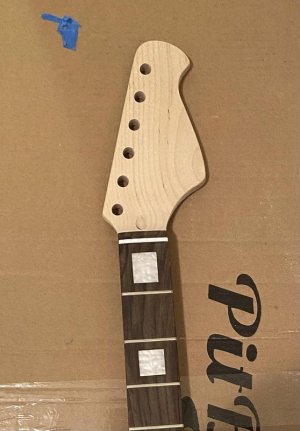
JZ-6 Bass VI apartment build

tommycarlos

Member
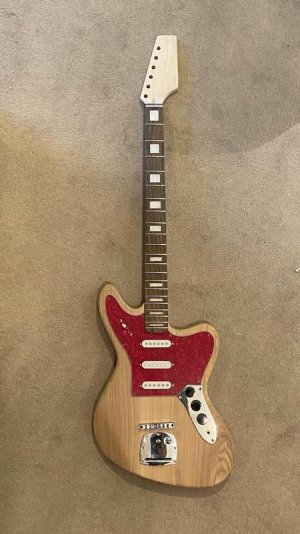
My new JZ-6 kit arrived today. It's all looking about how I expected, except the frets seem better than I feared.

I have done two Pit Bull kits and a build from a blank body and parts... but this one will have to be a bit different.

Previously, I lived in a suburban house with a yard and a shed... now I am in an inner city apartment, so spray painting
– and maybe even most power tools beyond a drill – are not going to be possible...

So. My plan for the body is more "kids craft" than "professional finish". Though it is tempting to just Tru-Oil it and leave it, the body actually looks pretty nice. We'll see.

But first, there's the problem of converting it from a 30" baritone to a Bass VI style.

I was expecting to have to enlarge the but slots, and change the tuners... but the tuners might actually be OK.

I am using Fender Bass VI Super 250 Bass Vi strings (.024 - .100), and they actually slim down towards the ends, so they might actually fit in the tuners. However, it seems like the windings near the ball end of the E are too wide for the hole in the tremolo. I chose .024 - .100 because I own a Squier Bass VI and the default strings that come with those always need to be swapped out so the E isn't too floppy... but I'd probably at least be able to get a .084 through the tremolo plate ;)

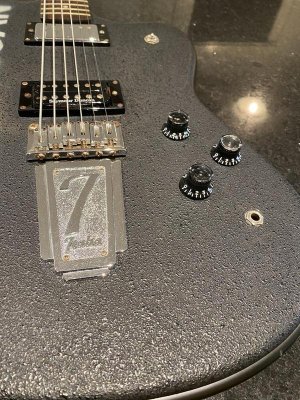
Before I have to put the kit in a cupboard and wait for a hardtail Bass VI plate from Faction Guitars, is it possible to just drill out the holes in the tremolo a tiny bit? It's sooo close.

All the other threads I can find here where folks talk about attempting this kinda never go past initial mocks, heh.
 
Heyo! I'm in the process of completing my first body build and have gone completely spray free and used hand tools for most parts. I used kids craft paint to add colour and contrast, and am now coating with wipe on poly. I've gone for a distressed look intentionally by rubbing back hard and watering the paint down to use as a "wash", but there's no reason you couldn't really block in the colour if you wanted to. With a bit of light sanding and multiple coats you could get something pretty nice I'd think.
 
Oh, in regards to widening the holes... I mean that's totally something I'd do. Especially if the only option is to replace it anyway. At worst you're out the price of another one. At best you save yourself some money.
 
I'd expect to drill out the trem holes. I expect it was what Fender did rather than get a new trem made just for the Bass VI. But if you can post a pic of the current trem holes, we could give an opinion.

I'd be tempted to swap to slot-headed tuners, as the strings will definitely fit those plus it's a more authentic look. The only issue is they normally require the correct hole spacing to get them to fit with their shared-screw mounting system, and the kit hole spacing is normally a few mm out overall. You can always measure and compare to the spacing diagrams shown on-line for the vintage tuner sets and see what you think. Plugging and redrilling the holes is an option, adding a bit of maple veneer on the front (the tuners cover the filled hole area on the back).

I've used a Dremel with a sanding drum inside the house. A bit messy, but I vacuumed up the sawdust and got away with it.
 
I'd expect to drill out the trem holes. I expect it was what Fender did rather than get a new trem made just for the Bass VI. But if you can post a pic of the current trem holes, we could give an opinion.

I wonder.. cause lots of folks replace the Squier one with a Mastery or USA Fender, and there is no Bass VI specific one AFAIK...

I might see if the strings fit though a standard Squier or Fender tremolo. Mind you, to use one of those I would need to make the route bigger. There's no easy path forward... though considering the price of the kit vs even a Squier (if you can even FIND one)... it should be worth it.

I'd be tempted to swap to slot-headed tuners, as the strings will definitely fit those plus it's a more authentic look. The only issue is they normally require the correct hole spacing to get them to fit with their shared-screw mounting system, and the kit hole spacing is normally a few mm out overall. You can always measure and compare to the spacing diagrams shown on-line for the vintage tuner sets and see what you think. Plugging and redrilling the holes is an option, adding a bit of maple veneer on the front (the tuners cover the filled hole area on the back).

Yeah, I was looking at just getting some vintage style tuners... I do like them better anyway.

I've used a Dremel with a sanding drum inside the house. A bit messy, but I vacuumed up the sawdust and got away with it.

Hah, awesome.

My biggest concern RE: power tools is cutting headstock paddle. I wonder how far I can get with scraping and filling before I give up and try and find a power point in the carpark? haha.
 
Tremolo update... with a Bass VI set more like what the Squiers come with (.024 - .084), the E fits through the tremolo just fine.

I might try going forward with these... see how it goes. Worst case, I can tune up to like F# or so. This is for a new project, so it's not like I am inflexible.
 
A fretsaw should cope with cutting the paddle to shape just fine. Then files and sandpaper or the aforementioned Dremel.
 
Ordered a coping saw.. hope that's enough... I know it's not quite as good at the fiddly corners, but my headstock design shouldn't need them.

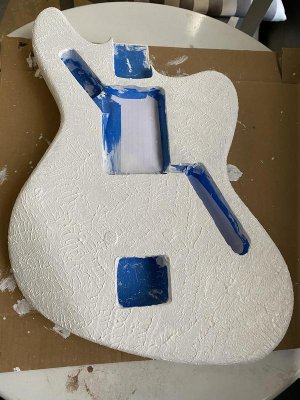
I have started painting with the Gesso undercoat.. brushstrokes were inevitable but that's fine, cause I plan on making the final coat kinda stucco looking, then sanding it down and adding more abstract colours...

Painting with acrylic paint is so much less stinky than spray paint, haha...

I also ordered some spray clear... that at least I could just do in the car park or out back if I am careful. It's still the easiest way to do the neck as well, so.

I also ordered the Faction Guitars Bass VI hardtail plate for later on (worst case I'll use it on my Squier), but it'll take a while to get here, so I'll keep going with the existing tremolo for now.
 
I thought I better actually add some pics...

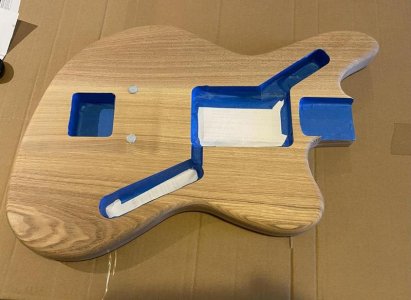
I call this series: "mock, mask, and mess" :D

EzTHIHk.jpg
kIy1iIf.jpg
rRYsXXF.jpg

I might be pushing the bounds of silliness with the textured base coat, but worst case that's what sandpaper was made for.
 
I think I noticed a smooth spot. ;)

You may need to smooth round where the scratchplate and control plate sit if you don't want big gaps showing under them.
 
I think I noticed a smooth spot. ;)

You may need to smooth round where the scratchplate and control plate sit if you don't want big gaps showing under them.

Good point..

I suppose I'll need to work out where they sit and make it a bit flatter there. Maybe I could screw them down while it's all still a bit "soft" before it fully cures.
 
I suppose I'll need to work out where they sit and make it a bit flatter there. Maybe I could screw them down while it's all still a bit "soft" before it fully cures.

Or you could put them in place first and mask them up , chasing the edges lightly with a blade to cut through the paint before removal.
 
I did a new coat on the top that is less "bumpy", but still textured... then once that dried, I tested the pickguard and control plate and they sit quite flat even without being screwed down, so I think it'll be fine.

I cut the headstock with a coping saw yesterday. Still pretty rough, but it was way easier than I thought. I had been avoiding kits with paddle headstocks for nothing (assuming I don't bork it during the sanding phase).
 
I suck at soldering, but there's not heaps to do on this kit, so I should be ok...

I think the only really hard part left is the nut. That is going to be challenging.
 
OK. Headstock shaped and sanded... the coping saw worked great! Not only that, but it took less time than going to my storeroom, finding my jig saw, and finding a place to use it ;)

Neck is ready to be masked up for its satin clear coat...

4PTDqyH.jpg
 
Back
Top