I bought the cheapest kit I could find on eBay - let's see if this was a good idea

ThatCluelessGerman

Active member
So, hi experienced guitar builder folks :D

Let me first say that I have already ordered a PitBull kit in April, but as it is on backorder, I expect it to turn up here in Mid June at the earliest. So I thought, why not get some other kit right now and practice a little, so I don't screw up on the "real" kit?

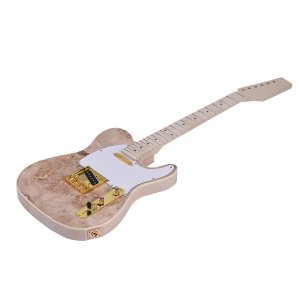
So I picked a burl top telecaster kit from "Muslady". I must admit that I never really lusted for a telecaster, but as I wanted to start quickly, the choice of readily available kits in my country is scarce. I eyed the Les Paul kits quite badly, but in these crazy times I just felt I can't drop 300€ on a pretty Les Paul kit with no building experience.

Also, I'm not a fan of fretboards with trapeze inlays (that reduces the choice of kit dramatically ;-) ), and I thought the gold hardware that came with the telecaster is something different. So, for 100€ incl. shipping, I took the risk and ordered the kit.

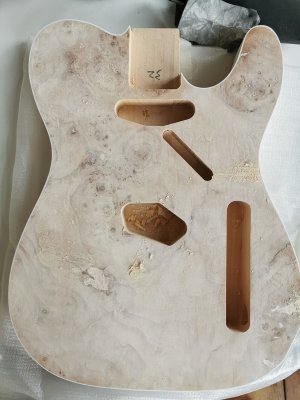
There is not too much info regarding the Muslady telecaster on the interwebz, but I found a YT video from a guy that built it and he criticized that the burl veneer had quite a few holes, which is also very visible in the product photo.

So my plan is to fill these missing bits with copper powder & clear epoxy. I'm not sure this will work out as intended, and also I need to wait until my kit arrives to judge if it even makes sense, but that is the plan.
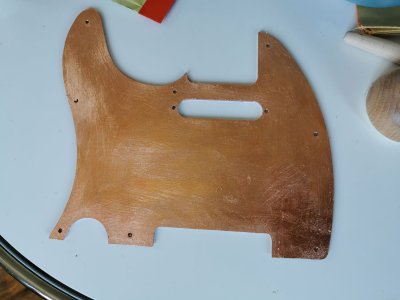
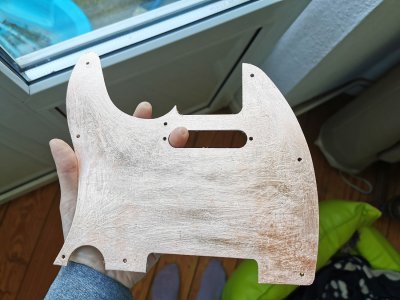
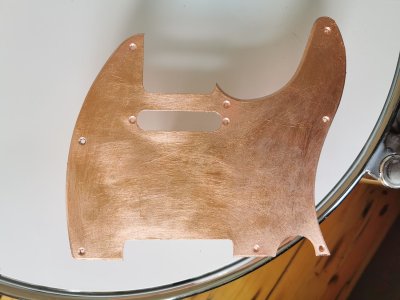
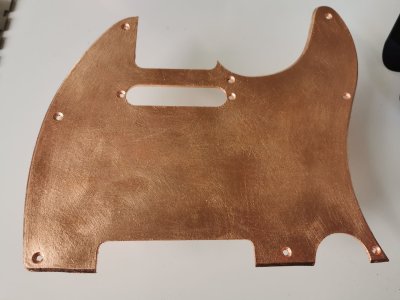
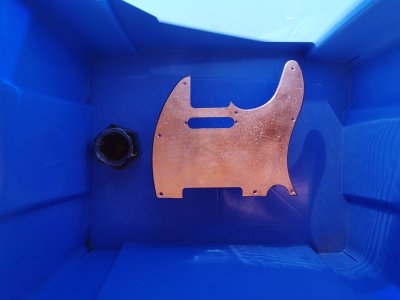
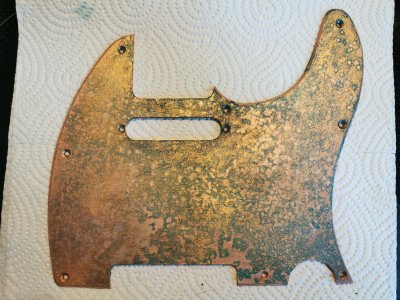
The guitar comes with a white pickguard which I hope to be able to copper leaf and then age with vinegar and salt.

I also got a bunch of wood stains and wood filler. I'm not really sure what I want to do with this guitar in regards to staining, I hoped to leave the top alone (just do the copper fills) and then grain fill the back and neck (?) and then just use tru oil as a finish.

Not sure if this all will work out, but I have already found loads of great information here so I'll stick around.

I'll update when the kit arrives. I ordered it tuesday evening, the tracking says it should be here tomorrow. Excited!

Kind regards,

the clueless & inexperienced German :cool:
 

Attachments

  • s-l1600 (21).jpg
    s-l1600 (21).jpg
    56 KB · Views: 352
Not sure if this all will work out, but I have already found loads of great information here so I'll stick around.

G'day ThatcluelessGerman. Sounds like a good plan.
I had the good fortune to find a couple of Pawn shop casualties to do the same.

cheers, CluelessMark.
 
Gutentag, Heir German!

I did a similar thing: ordered a custom kit and a cheaper in-stock kit to get some experience. That one is stuck in shipping delays und still ich haben es nicht so now I’m even considering another kit from USA to hold me over :/

I think the Burly wood with the holes and copper will look awesome! It seems to go along well with the Tele style body.

Keep us posted! Und Willkommen!
 
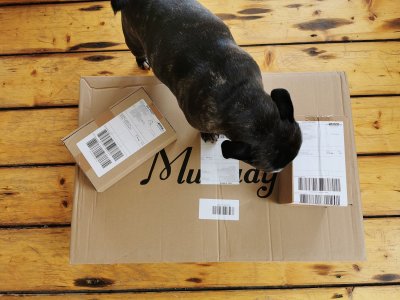
Much to my surprise, the parcel dude just dropped a few parcels, including the guitar! ;)

First, her royal highness had to inspect the goods.

IMG_20200508_112522.jpg

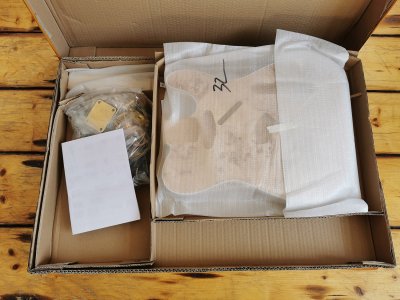
Passed the pug inspection, so unpacking.

IMG_20200508_112802.jpg

The box had little to no packaging. I was a bit shocked first but everything turned out completely fine!

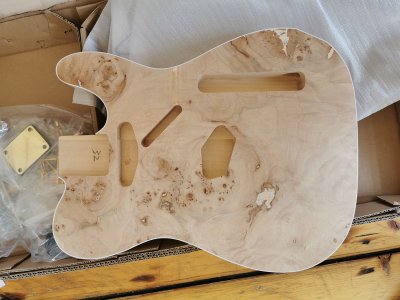
IMG_20200508_112830.jpg

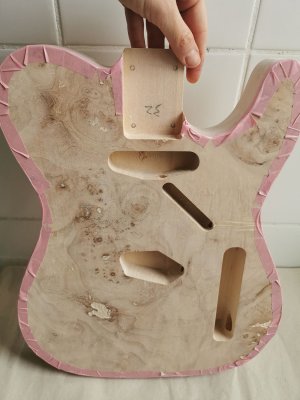
The body looks pretty nice actually. You can see the veneer is missing in a few spots, three of them are bigger. However, the veneer is really paper thin, so I am not sure what is the best way to fill the holes?
Would epoxy with copper powder be too runny, should I mix wood filler with the copper powder? Would that even look good? Otherwise, I have seen no glue spots, no dings and - omg, no holes! Drilling all the holes myself freaks me out a little right now.

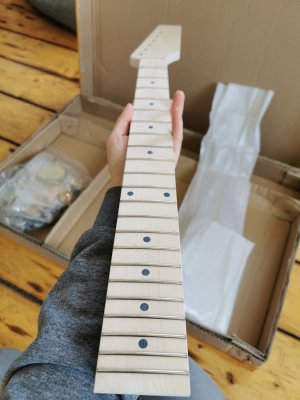
IMG_20200508_113118.jpg

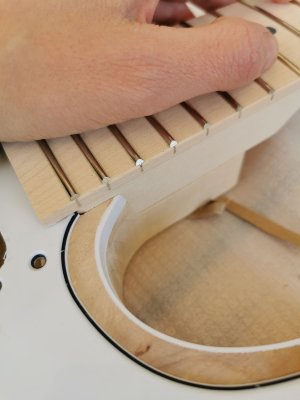
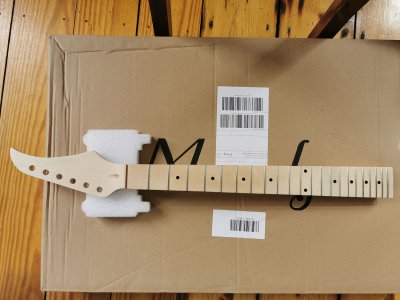
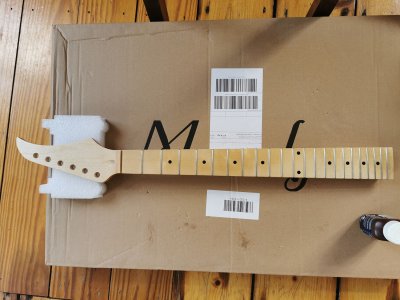
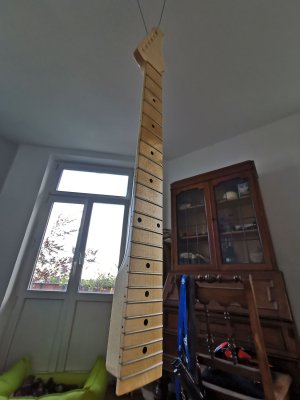
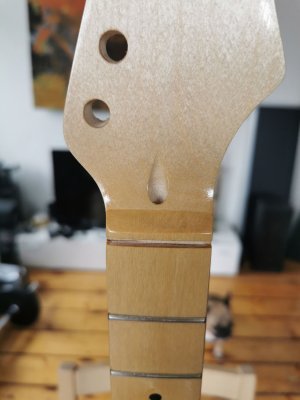
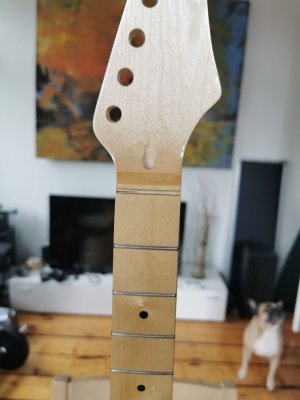
The neck looks quite good. It fits well into the hole, with a little wiggle room to the sides.
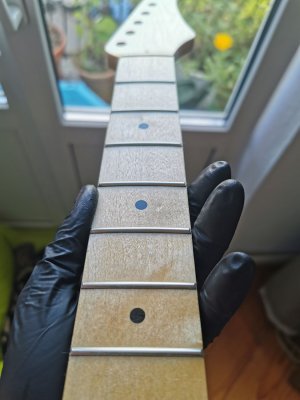
The frets are a bit rough, I don't know if they had already some work done or not. I will have to find out later ;-)

IMG_20200508_113152.jpg

This is how it sits with the pick guard. I think it's ok?

To be honest, with no experience so far, I think the build quality is surprisingly good. The wood looks really nice, I expected a lot of dings and scratches. But so far, I can't complain! But alas, I'm a person that buys IKEA furniture, so, I probably don't have a feel for quality wood yet :D
 
IMG_20200508_113548.jpg

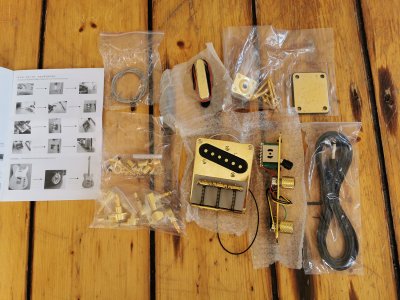
Here is the hardware. I don't know much about pickups and stuff. I think the gold looks funky and the switch and knobs work fine without any wiggle room. The back plate has some corrosion, which I like, because I wanted to go for a little vintage/rough look anyway on the hardware.

I also like that it comes with the nut unglued! I think I'll replace it anyway and so I don't have to scrape it out, yay!

IMG_20200508_114004.jpg

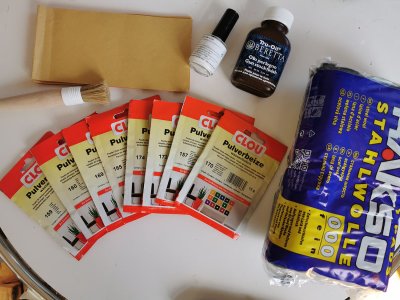
Here is the other stuff I have so far. A lot of dyes (because I don't know what colour I want on my other builds :D ), steel wool, true oil, copper leaf (daaamn is that stuff thin!) and such. I also have some sandpaper coming in the mail.
I'm a bit embarrassed because I ordered *everything* online, but currently, it's not easy to get all this in the shops due to the corona thing. Entry to the hardware store is strictly regulated and I don't want to queue forever just to find out they're out of stock for everything I want, so... I hope this will normalize soon.

Still waiting for the epoxy, copper powder and wood filler.

Now.... what is the best place to start?

My first questions are: How can I best check the body for glue stains? Wiping with a damp cloth or wiping with alcohol?
And, what is the best way on maple to make the grain on the back and sides "pop"? Should I fill with dark wood filler or should I stain dark and sand back?

IMG_20200508_124911.jpg

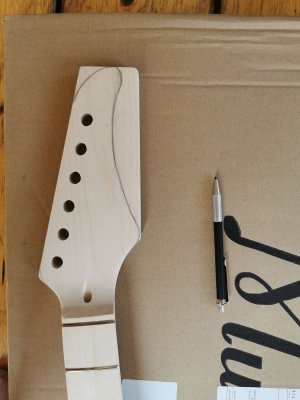
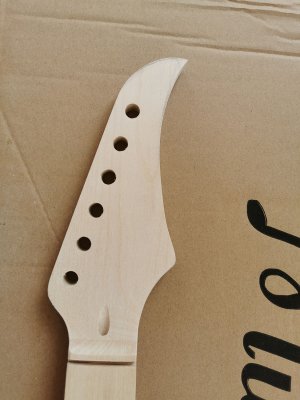
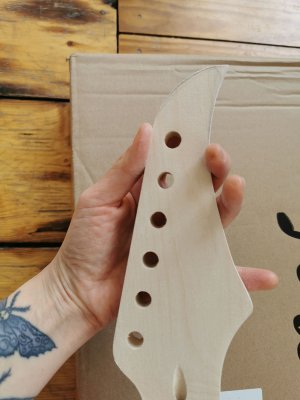
Edit: Just quickly sketched out my idea for the headstock. I know, it's not a typical telecaster shape, but to be honest: I don't like them. They just look weird to me. So this is a compromise between the shape I like better (like my Ibanez), but a bit rounder, like a telecaster.
 
Last edited:
So far, I decided to copper plate the backside of the pickguard for practice and it needs to be copper taped anyway, right?

I think it's looking pretty cool. I like the rougher / burnished look and I'm going to age the front side after leafing anyway.
I did two layers of leafing, not sure if it needs more or if that is ok.

IMG_20200508_172812.jpg

IMG_20200508_172840.jpg

Now about the front... The veneer has open grain in a few places and I'm not sure what the best way to go is here.
I want the front finish to be kind of smooth, so I think I need to fill in these places, right? Would it look nice to use a darker shade of filler or should I use light filler here? Also, should I apply the copper fills in the burl holes first or the wood filler in the grain?
 
OK, last step for today: I finally got the wood filler and started to fill in some of the super tiny grain holes and scratches. Sanded down with 400 grid and then re-applied where needed. The big holes are going to be filled with the copper, but I doubt it would look good with the pinholes, so...

I hope sanding it with 400 grid is okay. The paper thin veneer scares me.

IMG_20200508_203746.jpg

Now quickly need to tiny everything up before my other half returns from work....
 
I like the headstock design. I have never been a fan of the tele headstock either.

Sorry I can't answer any of your other questions. I have no experience with any of those things.

Sent from my moto g(7) using Tapatalk
 
If it were me, I'd be putting the guitar together.
Putting the neck on and setting the bridge position etc.
Getting a guitar into a good playing shape first and not having to worry about ruining my finish.
Having all the construction problems out of the way saves tears later.

cheers, Mark.
 
If it were me, I'd be putting the guitar together.
Putting the neck on and setting the bridge position etc.
Getting a guitar into a good playing shape first and not having to worry about ruining my finish.
Having all the construction problems out of the way saves tears later.

cheers, Mark.

+ 1 for the above, get a rough set up with the kit strings (they can be sacrificed for decent strings later) Let the instrument settle then when you are happy just unscrew everything and put on your finish with confidence in the build once finished
 
Try to avoid sanding the veneer, I would be worried that resin filler may need a lot of sanding that is likely to go through the surrounding veneer.
 
I think you guys are right. However, I feel a bit scared handling and building the raw wood. I think I will shape the headstock first and then give the neck 2 coats of oil before going on, just because I feel like any little dirt I have on my hands could stain the wood etc..

I need to do my book keeping stuff today anyway and my new sandpaper will arrive on monday, so all I can do today is copper plate the pickguard and then put it aside...
 
Roughly cut and sanded the headstock. Decided to keep the sharp top instead of a rounded one, I like this better. Let's see if I come to hate it later :D

I smoothed the shape with 80 grid sandpaper wrapped around a metal cup to get a nice curve.

IMG_20200510_111720.jpg

IMG_20200510_111740.jpg

I also ordered a graph tech nut, I hope it fits...

Also in the mail: A notched straightedge and a fret rocker, as well as a fret file. I put everything together "on the dry" yesterday and it looks as if everything fits right. But I'm scared of screwing it up by drilling the holes, so I think I need to measure like to more times :-)

I also plated the pick guard with the second layer of copper leaf. I like the burnished look and will add a third layer this evening or tomorrow.

IMG_20200510_122219_BURST001_COVER.jpg

The planned copper fills in the veneer still make me a headache. I've done some research and read that for shallow holes, thin cyanacrylat (aka superglue) is better than epoxy. I made some trials with scrap wood and while the fills look nice, I am not sure how I can knock them down to level without damaging the veneer. I think I need a super tiny sanding block. Need to look around what would be suited best.
 
Last edited:
To help with the sanding, you need a neutral colour water-based grain filler. You put it on around the area to be sanded, and build it up until it's the same height as the epoxy/CA. Then when you sand, you remove the grain filler and epoxy, and not the surface of the veneer.

When the epoxy/CA is flat (or as flat as you dare risk getting it), then use a wet cloth to remove the grain filler. This is why you need a water-based one, so that it will dissolve away again.

You are best first scraping away the highest points of the epoxy/CA with a burred blade. Same method as explained in this StewMac video.

 
Ah, this is brilliant! Thank you so much Simon!

That gives me confidence how to proceed, I was really puzzled what the best solution is.

I have some neutral colored water based wood filler right here, what luck! :-)

Meanwhile, I have smoothed out the headstock and sanded the neck. I went up to 1000 grid for both.

In a flush of idiocracy, I tried to sand the fingerboard lightly with 1000 grid. It's now really smooth, but also the color turned out really dull and mottled. No idea why. I tried cleaning it with a damp cloth and also an eraser, but still it's not as nice as it was before. Hmmpf!

IMG_20200511_135318.jpg

I decided to add the first coat of tru oil, so I don't have to worry so much when assembling it.

IMG_20200511_140737.jpg

Also, I added the third coat of copper leaf to the pickguard, so I might start to age that thing today or tomorrow.
 
Currently sanding down the back and sides and finally came across the famous dodgy chinese wood filler ;-)
On the bottom, there seems to be a (worm?) hole that was filled with wood filler. Not a big problem, but I was surprised.
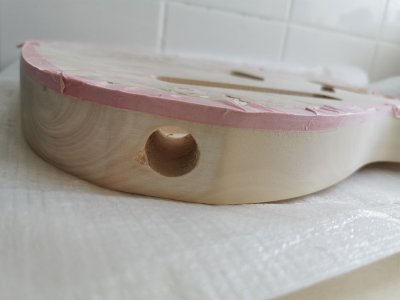
The hole for the output jack is a different story, looks like a chunk of wood broke away while drilling and was filled with epoxy and a thin layer of wood filler. Now, after sanding the wood filler away, there sits a big chunk of epoxy :mad:
I hope the rim of the socket will cover it.
 
Haha, folks, you'll never believe it :D

I just found out why this kit was so cheap ;-)

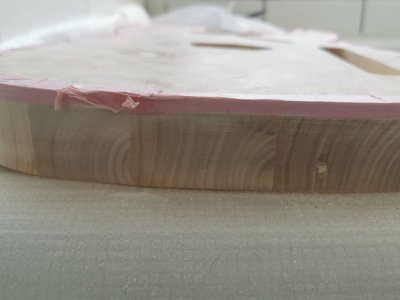
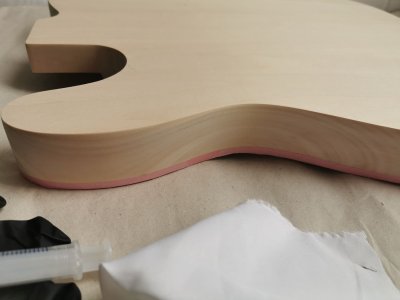
Turns out that not only the front is covered with a veneer, but the sides and the back are also. BUT! Not the bottom :D
I tried to sand down the bit with the wood filler, and wiped with a damp cloth afterwards. When I returned, the bottom was considerably darker than the rest of the body. I thought, maybe it's still a bit moist? But.. why does the grain not line up?! :D

I don't know why the bottom is not covered with veneer, but to hide this fact, they painted the bottom with a whiteish stain that let a little grain shine through to let it look more realistic. Damn realistic to be honest! The problem is that my slightly damp rag was enough to wipe the paint away :eek:

Now I'm not quite sure what to do with the sides, I actually wanted to stain and then sand back to accentuate the grain.

Will take pics later. I bet you'll laugh :D

Edit: Now, thinking about it, that would also explain why the sides were so perfectly baby butt smooth and the bottom looked like a rough saw cut... :rolleyes:

So here are the pics...

This is how the bottom now looks with the "fixed" ding and without the white stain:

IMG_20200511_185033.jpg


Here you can see the epoxy on the jack AND also the start of the veneer:

IMG_20200511_185041.jpg

Damn, they hid it REALLY well or I was blind when unpacking... Meh... I think I'll sleep over this.

At least the neck looks really good with the tru oil. I'm impressed by this stuff.

IMG_20200511_184950.jpg

IMG_20200511_183814.jpg

And the pickguard is also coming along...

IMG_20200511_160056.jpg
 
Last edited:
Today in pictures:

IMG_20200512_132931.jpg

IMG_20200512_132940.jpg

IMG_20200512_201927.jpg

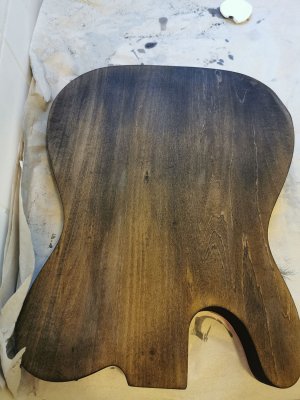
The staining looks so easy on YouTube but turns out to be a disaster... There are so many spots on the sides where the stain won't soak in. I don't think these are glue stains, but it drives me insane. I have sanded down the sides twice, now I don't care anymore. If they turn out ugly, I will use an opaque black color. At least the back is looking ok. Haven't touched the front yet. Maybe tomorrow.


Also, added a few more thin coats of tru oil. However, it has reached a state where it becomes difficult to keep it lint free. I have lightly sanded it with steel wool (0000) and also wet sanded with 2000 grid once, but the thicker the coat gets, the more I stumble over dog hairs in the finish -.-
So I will probably leave the neck like that. It's not super high gloss, but it's shiny.

IMG_20200512_165013.jpg

IMG_20200512_165025.jpg
 
And the aging of the copper.... I used salt and vinegar so far. However, this process is very very slow, between the pictures are about 4 hours or more. I heard a few drops of ammonium are good for this, but I don't have any of it here. Have added a few drops of Windex but it looks like these were doing more cleaning than aging. Meh. Will do another round tomorrow.

Added the salt and vinegar:

IMG_20200512_085532.jpg

4-5 hours later:

IMG_20200512_165043.jpg
 
Back
Top