Results 1 to 10 of 233

Thread: Astracaster First Build FS-1

Hybrid View

Previous Post Previous Post   Next Post Next Post
  1. #1
    Mentor nitroburner1000's Avatar
    Join Date
    Jun 2016
    Location
    Mount Gambier Australia
    Posts
    1,171
    Wow, youve been through the ropes mate. But most of the kits need adjustments, thats just the way things are these days, and fixing them adds to your guitar skills.
    So to your question about 2 kits and 2 separarte build diaries, yes that is a must, to avoid confusion. With your glue problems use water, although it can fur up the vaneer, or better still alcohol or thinners to see where the glue marks are first. TAKE YOUR TIME on every aspect of the build, there is no rush, and if you make a mistake and believe me you will, there is always someone here thats been there before and can help you.
    Take one step at a time and dont try and do everything at once.
    With the staining you can thin out the stain and build up subsequent coats, water based stains are better to work with as they dont dry as fast and you can correct your light or dark patches.
    DONT use a furry rag or cloth, use something that wont catch on the grain. you can apply the stain with a brush or rag then gently wipe off with a clean cloth to get the effect you want. You can build up as many coats as you want until you get the desired effect..
    It will dry lighter but go darked when applying the finishing coats to seal it.
    You can use rattle cans, a brush or spraygun, depends on what you are happiest with. ALWAYS TEST THE CLEAR ON A PIECE OF PREPARED STAINED WOOD FIRST IN CASE YOU GET A REACTION. Then build up mist or thin coats instead of 2 or 3 heavy coats.
    I use rattle cans with a handle and apply at least 30-50 coats. I know, over the top but thats just me. If you leave coats for longer than a day or so, finely sand between coats or it may laminate.
    Most of the guys on here can add to this but this is just painting 101. All the best with your build..
    Fender electric Fat Strat mim. (Bought)
    Maton Electric Acoustic EM325C
    Pitbull Guitars ST-1 ( finished) http://www.buildyourownguitar.com.au...ead.php?t=5970
    Pitbull Guitars SG-2 ( Finished) http://www.buildyourownguitar.com.au...ead.php?t=6124

    Pitbull Guitars JM-1 (Finished. 2018 June GOTM))http://www.buildyourownguitar.com.au...ead.php?t=7150
    Pitbull Guitars TL-1 (In production) [url]https://www.buildyourownguitar.com.au/forum/showthread.php?t=8676

  2. #2
    Quote Originally Posted by nitroburner1000 View Post
    Wow, youve been through the ropes mate. But most of the kits need adjustments, thats just the way things are these days, and fixing them adds to your guitar skills.
    So to your question about 2 kits and 2 separarte build diaries, yes that is a must, to avoid confusion. With your glue problems use water, although it can fur up the vaneer, or better still alcohol or thinners to see where the glue marks are first. TAKE YOUR TIME on every aspect of the build, there is no rush, and if you make a mistake and believe me you will, there is always someone here thats been there before and can help you.
    Take one step at a time and dont try and do everything at once.
    With the staining you can thin out the stain and build up subsequent coats, water based stains are better to work with as they dont dry as fast and you can correct your light or dark patches.
    DONT use a furry rag or cloth, use something that wont catch on the grain. you can apply the stain with a brush or rag then gently wipe off with a clean cloth to get the effect you want. You can build up as many coats as you want until you get the desired effect..
    It will dry lighter but go darked when applying the finishing coats to seal it.
    You can use rattle cans, a brush or spraygun, depends on what you are happiest with. ALWAYS TEST THE CLEAR ON A PIECE OF PREPARED STAINED WOOD FIRST IN CASE YOU GET A REACTION. Then build up mist or thin coats instead of 2 or 3 heavy coats.
    I use rattle cans with a handle and apply at least 30-50 coats. I know, over the top but thats just me. If you leave coats for longer than a day or so, finely sand between coats or it may laminate.
    Most of the guys on here can add to this but this is just painting 101. All the best with your build..
    Quote Originally Posted by fender3x View Post
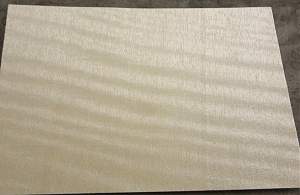
    Rolls would work, but are probably overkill. In my case I bought a small sheet of the cheapest light colored veneer I could find on eBay, which happened to be anigre wood. I still have most of it. I've used it to fill gaps, make wedge shaped and flat shims...and most recently to fill the the fret slots after turning a fretted bass into a fretless.


    Click image for larger version. 

Name:	s-l1600.jpg 
Views:	397 
Size:	159.1 KB 
ID:	44355

    I got a piece that was about 1x2 feet that is turning out to be a lifetime supply ;-)

    Cut it to size (slightly large) with scissors, glue in, and sand off any excess.

    Thank Simon for the idea...he turned me on to it.

    You can get something that matches your guitar wood too. Or you can get sampler packs with a variety of woods. I use it in places that don't show so it doesn't matter much, but anigre turns out to look a lot like maple, and takes glue well, so it might work for you, and it's quite cheap (which always appeals to me).
    https://youtu.be/k-8P-P4JtzQ

    One of my friend who owns a timber business gave me this catalogue of mini veneer sheets which he doesn't use anymore. It containers small paper thin veneer sheets of various woods totally 144 in number. Some are dyed and some are natural. These veneer sheets are 0.68mm thick and are 13 cm x 10 cm size. Do u think I can use this and fill up the gap. The wood I used previously from spoon was 1.64 mm. So i may need 3 of these strips to be glued.

    How to go about it? Can you brief me a step by step guide or can you refer me to a video please? How do u make a wedge out of them?

    Thank you
    Drashkum


    Sent from my NE2211 using Tapatalk

  3. #3
    Quote Originally Posted by Drashkum View Post
    https://youtu.be/k-8P-P4JtzQ

    One of my friend who owns a timber business gave me this catalogue of mini veneer sheets which he doesn't use anymore. It containers small paper thin veneer sheets of various woods totally 144 in number. Some are dyed and some are natural. These veneer sheets are 0.68mm thick and are 13 cm x 10 cm size. Do u think I can use this and fill up the gap. The wood I used previously from spoon was 1.64 mm. So i may need 3 of these strips to be glued.

    How to go about it? Can you brief me a step by step guide or can you refer me to a video please? How do u make a wedge out of them?

    Thank you
    Drashkum


    Sent from my NE2211 using Tapatalk
    That would work fine. Measure the total length of the wedge you wish to make and cut one piece to that length. Then cut another 2/3 of that size and the final 1/3 of that size. Then you basically arrange them and glue together so it looks like steps. Lay them all together so they line up and one end and you will get a gradual wedge shape.

    Sent from my Pixel 6a using Tapatalk

  4. #4
    Moderator fender3x's Avatar
    Join Date
    Jan 2016
    Location
    Miami, FL, USA
    Posts
    2,809
    Quote Originally Posted by Bakersdozen View Post
    That would work fine. Measure the total length of the wedge you wish to make and cut one piece to that length. Then cut another 2/3 of that size and the final 1/3 of that size. Then you basically arrange them and glue together so it looks like steps. Lay them all together so they line up and one end and you will get a gradual wedge shape.
    1+ That's the approach I would use. Don't use the veneer pieces that have been stained or finished. Use only the bare wood veneers. Any bare wood veneer should be fine. You should have pretty much a lifetime supply for guitar repairs with the amount you got from your friend.

    In the pic you have your spoon pushed pretty far into the slot, and it is flat rather than wedge shaped. So the first question is how far into the slot is "full length."

    1) The way I would do this is by putting the spoon in wherever you need it to be to get the bridge right.
    2) take a thin strip of veneer (maybe 4-5 mm). and see how much closer to the bridge you can insert it in front of the spoon. The place where the veneer is tight or an mm or two closer to the bridge is "full length." Mark the spot a piece of blue tape.
    3) If you can slip the strip of veneer into the slot at the heel end of the spoon, you may need 4 rather than 3 strips of veneer to make your wedge.
    4) I would probably use 4 strips rather than 3 in any case, since you want it snug and you can sand a little if it's too snug...and sanding would even out the steps a little. Just like BD suggested, but quarters rather than thirds.
    5) Paint the side of the pocket and the strip with Titebond, and put the first strip up to the full length mark. Clamp it in place. Use a small piece of wood wrapped in wax paper between the clamp and the veneer so that there is even pressure on the veneer.
    6) Wait 8 hours.
    7) Same procedure for the next three pieces of veneer, with 8 hours between each.
    8) Put the neck in and see if any adjustment (sanding or adding veneer) is necessary.

    You can use the same procedure, if you want to, at the base of the neck/pickup cavity to add an mm or two of string length, though as long as you can intonate the high E to the proper length you may not need to do this.

Tags for this Thread

Posting Permissions

  • You may not post new threads
  • You may not post replies
  • You may not post attachments
  • You may not edit your posts
  •