Wazkelly Build diary for DIY closing down sale Ash J Bass

wazkelly

Well-known member
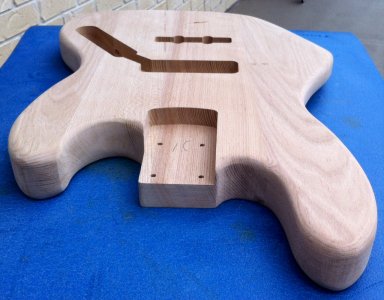
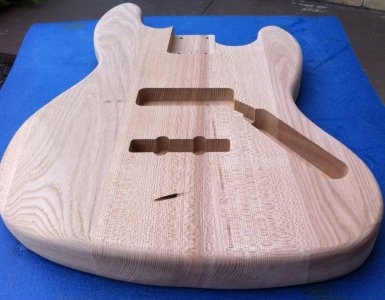
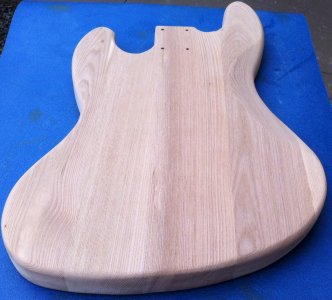
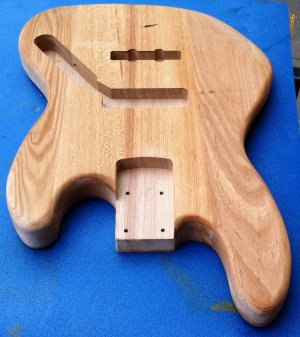
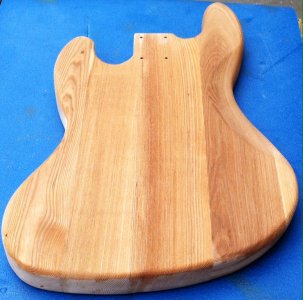
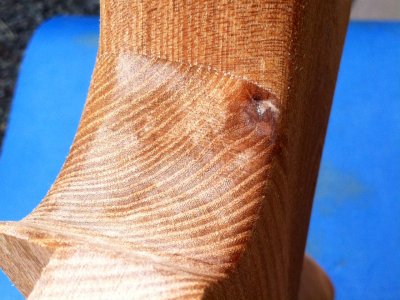
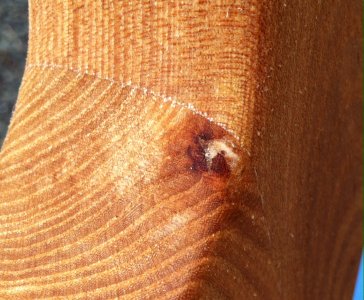
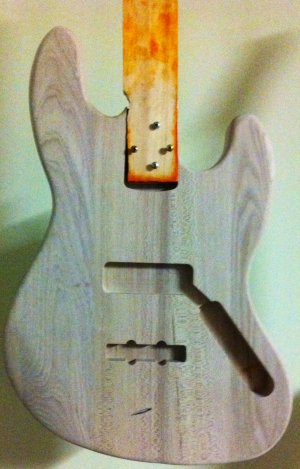
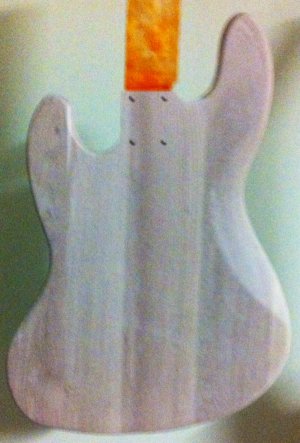
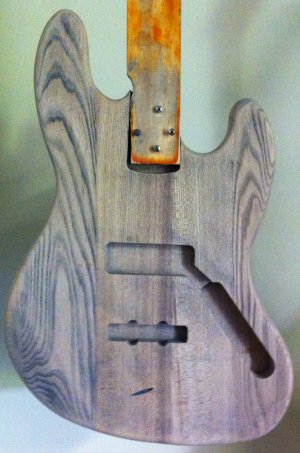
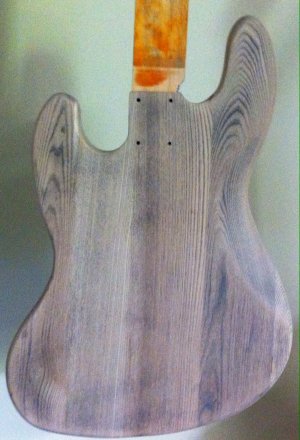
Yep, officially a sucker for punishment as this will be my 4th build when I haven't even finished 1st or 2nd and just starting a 3rd as well. GAS has surely gotta hold of me. Had to help clear some of the DIY closing down stock and was always eyeing off doing an Ash J Bass at some stage. Have longed for a Candy Apple Red with white pick guard and Maple Fret Board for ages however as this has so much awesome grain there is no way that will be hidden by a solid colour. Trying to figure out which way to go to get that toffee apple translucent red over the slightly pinkish darker Ash might be the challenge and any suggestions would be appreciated. At this stage I have looked at many different ideas from Color Tone Cherry Red and maybe mixing that with some Color Tone Mahogany? Maybe Feast & Watson Cedar mixed with their Mahogany and watered down with Metho? Looked into leather dyes and stumbled across Jacquard fabric dyes that could work too. Saw Keda dyes on Ebay and not too sure if I want to go down that path. Having used DT for 1st & 2nd builds believe Karajini Red might be the closet to Cherry Red but not convinced that is the product I want to use on this occasion. Also bought some humble food colouring at the supermarket last night and still tempted to find the darkest ink pad ink to play around with too. Looking forward to any feedback as this will be a slow burner whilst looking to find the exact colour to show off all this grainy goodness. Did buy some ebony timber mate from the BGSFOS and apologise profusely hoping that Woks has a pint waiting for me when I have been extradited to the Naughty Warehouse. Some dry and wet photos below where there is only one blemish around curve of top horn down to neck pocket. Most of these kits have at least one of these issues to deal with and a shame their QC standards a so low.
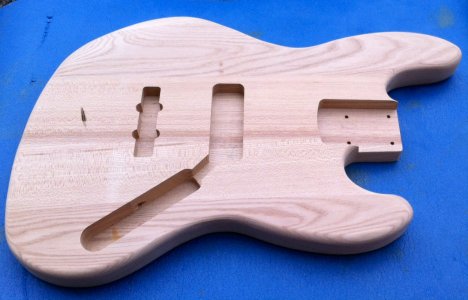
photo 4.jpgphoto 5.jpgphoto 6.jpgphoto 7.jpg
 
Wet photos to show off the grain....and that blemish/glue spot/filler near the neck pocket on top horn.
photo 8 front wet.jpgphoto 3 wet back.JPGphoto 1 Wet neck spot.JPGphoto 2 wet neck spot close up.JPG
 
nice looking kit Waz, in 15 minutes you just went up to level 2 in the GAS lounge. The service, food and drinks get better in the higher levels haha
 
Good stuff Waz your moving quicker than me but i tend to procrastinate.

GAS is a terrible thing, i have projects all around me and i am trying to get some finished, but the pile keeps mounting.

A telecaster bass is next, then i might do one of those Airline style guitars with the resin body and the tele 12 string with the Z coils i need to cut a pic guard for etc etc etc.

I am doing a candy apple red with the 12 string when i figure out how i actually want to approach it.
 
Just a shout to all the grain filler experts......when is it best to apply the grain filler?

Bought some ebony timbermate and looking at the raw body makes me wonder if you apply grain filler before doing any sanding, after a bit of sanding (up to which Grit Level) and whether you need to reapply it more than once?

Would really appreciate any feedback on this.

Thanks, Waz.
 
hey Waz, I usually sand to about 240 grit and then apply the grain filler, wouldn't hurt to even go to 320.
The ash grain is quite coarse so it may need 2 applications of timbermate.
Then I hand sand from the same grit to about 360 or 400 is heaps
 
Heres an extract of my Baritone build, it may help.

I have to fill and seal the body first so i have some Timbermate wood filler in natural and also some Birchwood Casey Sealer and filler, i may go the timbermate 1st to fill the grain then follow up with the BC sealer and filler, once that done i will start to tru oil the body

Prep for sealing plugged all the holes with bamboo skewers then cut them short

also gave it a sanding till smooth with 220

Then a single coat of tru oil sealer and filler

Have done a coat of Timbermate wood filler, its quite hot here and its going off quik. I made the Timbermate filler up to a slurry with water and covered the body with it using a plastic scraper and then i take it all of rather quickly, then leave 2 hours to dry, i will then sand it back and repeat steps one and two Tru oil filler sealer then timber mate filler i will then sand back until its smooth.

A day after the coat of Timbermate neautral filler i spend a bit of time sanding everything back with 220 grit, time consuming and gives you Popeye arms. After the sanding i ran over the body with the brush head of a vacuum cleaner then wiped the whole guitar with naptha. A second sealer coat was then applied, i went a bit thicker and made sure i got everthing.

Next is another coat of timbermate filler.

I have final filled the body again this afternoon and just now sanded it all back, its ready for another thick sealing coat as soon as i vacuum off the body and wipe it down with naptha. I look like a negative of a Welsh coal miner i am covered in filler dust.

I used neutral body filler on the first coat but it left the grain looking a little bit pinky so i added a slurp of Feast and Watsons maple stain to my liking, the colour of the paste will tell you what your getting. This filled the grain nicely and left it more natural.

A thick final seal needs to sit for 24hrs then we start with the coats of tru oil.

bod.jpg
 
Hi Tonyw, thanks for the advice. Hoping to get a toffee apple translucent red finish over the ebony timber mate grain fill so that the grain looks like it is floating in the red stain. Not sure if your method would take ink or stain once a sealer has been used.
 
As mentioned before this is a slow burner and being build # 4 will also be the last one started.

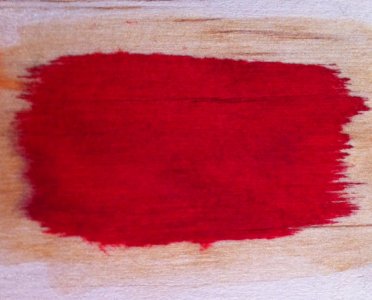
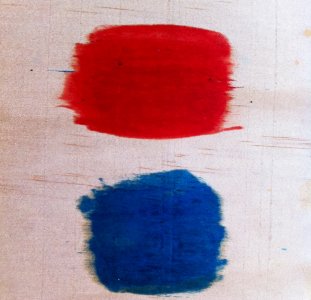
Back at work plus crap weather therefore not much time to do anything other than research how I want to finish this one. Chasing a translucent Red with TO as top coats. Leaning towards Red Fountain Pen Ink and also playing around with Red Food Colouring but not sure how colourfast that might be? Next couple of shots show the food colouring on pine ply under 1 coat of TO and another beside a blue sample where I added a few drops to some Tru Oil to see how that went as a tinted top coat. The blue is an ink jet ink and mixed in really good whilst the Food Colouring separated pretty much in the same way as when water hits oil and took a lot more mixing to almost blend it together. Don't think I would be using it that way as the coat that had dried a few days ago and then TO'd came out much better. Narrowed the field down to a couple of fountain pen inks, one in OZ & the other in Germany (both made in Deutschland), pretty much the same price however twice the quantity if happy to wait for some from Europe? Figger that one out with a dropping AUD vs Euro???
photo 1 - Red under TO.JPG
Red Food Dye under one coat of TO
photo 2 - Red & Blue in TO.JPG
Red Food Colouring mixed in with some TO
 
Last edited:
Waz, I reckon the red food colouring has a better staining effect, but that's from looking at the edges of the stain, looking at how much further it has leached into the timber.
 
Thanks Swanny & Nickosaurus, thought as much in relation to food colouring and yes it did leach into the wood much quicker which was a bit of a concern if trying to maintain an even finish. Ordered the following ink form this website today and hope it works out OK.
http://justwrite.com.au/Fountain-Pe...Fountain-Pen-Ink-Uluru-Red-60ml-Plastic-Pouch
They have other colours too and being Aussies was the clincher for me. Their green is one of the better ones I have seen if you are into that colour.
 
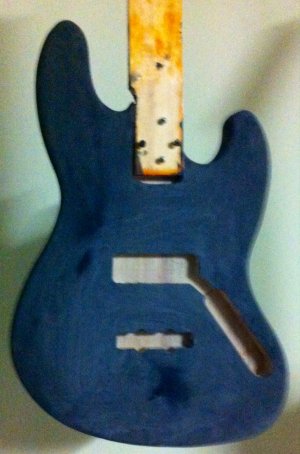
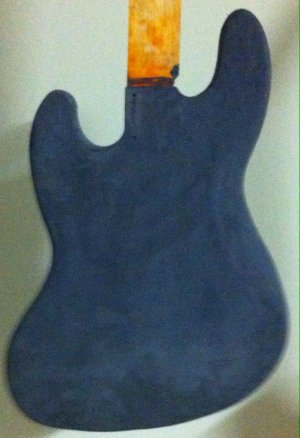
Got stuck into the sanding last weekend and also doing a bit more work on this build after work each night this week. Here are some of the progress shots.
photo 2.JPGphoto 1.JPG
Applied ebony timber mate last night. Man is that stuff messy and also has a weird stink!
photo 1.JPGphoto 5.JPG
 
Sanded the crap out of it this morning to reveal some popped grain.
photo 2.JPGphoto 3.JPG
Also shaped the headstock and added some colour to the body before lunch. Going natural on the neck as it has a maple fret board and TO'd it all over. Going out soon and you will have to wait a little bit longer to find out what colour was applied. With all the TO I am using on these 2 builds Woks may need to order another keg for the lengthy sentence I am about to receive in the naughty warehouse.
 
Some house of colour candy red clear over that...mmmmmmmm:cool: maybe a dash of blue pearl just to make it shimmer.;)
 
Back
Top