My technique for applying wipe on finishes (poly, tru oil) sucks... hoping for advice

ThatCluelessGerman

Active member
Hey folks,

me AGAIN with another question... Hoping for your precious advice!

As I don't have a way to apply a spray on finish, I settled for wipe on finishes, like tru oil or wipe on varnish.

My issue with it is that I must be doing something wrong regarding the thickness of the finish. Everywhere I'm reading, people are done with a few coats of poly varnish, like 3 - 5.

I'm not exaggerating but I think I applied like 50 or more coats of wipe on poly and I STILL managed to burn through the finish while polishing. Twice! HOW? I mean, I might just be dumb. Fair assumption. Or I'm just doing it wrong, in this case, there could be light on the end of the tunnel :-)

I mixed my own wipe on varnish with polyurethan and turps, with varying thicknesses. I wiped it on thinly, then let it dry, and applied wet on tack (means, when the surface is ALMOST dry but still a tiny bit tacky, I applied the next coat).

Then, in between every few coats, I'd sand it lightly. First, I used various grades of "sanding fleeces" (probably most comparable to artificial steel wool or scotch brite pads), and when it reached some state of evenness, I sanded with 1000 grid, 2000 grid, 3000 grid. After this, I used Meguiar's cutting component and Meguiar's polish.

It went very well, except for the fact that I burn through on one spot. Even after all these coats... I have no idea how thick my finish is, but it yellowed my guitar significantly, so I actually thought the coat must be quite substantial.

Any advice, tips, hints, on what I am doing wrong?

I'm hesitant to slap on thick coats with a brush or something, because of dust and dog hair. No matter how much I clean before, it's impossible to keep it clean here. So I thought many thinner coats are better here (which is true in regards of dirt), but there must be a way in between to get a beautiful finish without wiping on a million coats and then still burn through while finishing....

Thanks!
 
You're probably just sanding off most of the layer you've just applied. If you've got loads of dust and dog hairs, then realistically there isn't any way I know of to stop them getting on the finish. Arranging to do only one side at a time and hold it so that it dries facing downwards will help a bit. but small particles floating in the air will still get on.

I've mentioned considering Solarez UV curing lacquer before. My Solarez lacquer has now arrived and it certainly cures very fast in bright sunlight. Due to sand-through (yes I do it as well) I haven't got up to a polishing stage yet, so I can't tell you just how shiny it gets. This will minimise the amount of time that dust can settle on the finish when wet, as you can wipe it on, expose to UV and within a couple of minutes you're all dry. It feels rather rubbery on the surface until its been sanded, but it is cured. Not quite odour-free a stated, when wet it smells slightly of glass-fibre resin. And although its supposed to settle flat if you wait, it doesn't do that for me on my painted finish, but ends up rather rippled, resulting in more sanding.

Otherwise, can you build a dust-free area in a room somewhere? Wooden frame big enough to work inside, fine weave fabric covering, a fan blowing air in through a filter to keep the inside positively pressurised to compared to the room? The air will escape out through the fabric and stop dust coming in.
 
One thing I've noticed doing boats is that the same areas always get oversanded. Might be less true with a flatter surface like a guitar, but perhaps not. So it may be that in the danger area a large percentage of what's on there is getting removed with your intermediate coats, so the actual coating is plenty thick enough in most laces, but perilously thin in the one spot. The only cure I've found is to be aware of where you are going to get problems, and be hyper careful about not taking too much off there. With intermediate coat sanding I've got in the habit of not sanding too much, and (apart from runs and other major stuff) only taking the tops off the wipe marks and dust motes, rather than the whole thing flat.
 
Simon, a small tub of Solarez "I can't believe it's not lacquer" is already in the mail and should arrive this week. It's coming from abroad so it always takes a while. I'm curious and maybe it's the solution I'm looking for - let's see. So far, my experiences with UV curing substances is only so so (tack issues after curing etc.), so I will try it on a test surface first.

Now that I am thinking through my process, my issues could also be exaggerated from the rags I'm using to apply the finish. I'm using cotton (old, washed out shirts and stuff), but I think no matter how often I wash them before using (and throw them away after using), they tend to accumulate a big amount of the dust and crud. I notice most of the crud sits where I took the cloth off (end of the wipe). So while some hair or dust may fall onto the guitar while drying, I fear most of it gets in the finish while applying it. Maybe it falls off from my hair or my clothing, maybe it's already floating in the air. I now have a dedicated wall hanger for unfinished guitars, so maybe this also helps as it's in a corner of the room where the dogs don't get to.

Any advice on what is better to apply finish? I tried a lot of things from microfiber, shop towels, paper towels etc, but it was never really perfect in terms of crud. I used the same tshirt cloth for my tru oil guitar and it worked just fine here - the poly seems to be a different kind of dust magnet.

Jim, you have a good point. There seems to be a magic spot that I'm always sanding through. I tried to rotate the guitar when applying varnish, so I don't start from the same point every time, maybe I should also do this when sanding.
 
I used lint-free cloths when I had a go at applying TruOil and that seemed OK. Disposable foam brushes might be worth a go, but my feeling is that with cheap ones, the foam can break up after a while. I haven't tried looking for more expensive ones, but you could probably clean them up with turps or keep them in a jar of turps between uses.

I've tried foam brushes and foam make-up pads with the Solarez. I don't think one is particuarly better than the other. You don't need much of the Solarez at all to coat a guitar once, so don't be tempted to get big foam brushes or pads and soak up a lot of the lacquer with them as you'll waste a lot. But keep it and the brush or pad out of any UV light and it will stay fresh, so it doesn't need clearing up. I had about 1cm of Solarez in the bottom of a small glass jar (an old spice jar) and that cured very quickly (and rock solid) in the sun. It also got very hot when curing that amount, so be careful if you do the same or it could crack the glass.
 
Can you define "lint free cloths"? Is it old cotton clothing or cloth that you can buy specifically for cleaning?

I tried the foam brushed but they cause streaks (at least for me), so sanding is difficult because in the streaks, there are very high and very low spots. They gave me quite some trouble so I thought wiping on may be the best solution.

Good idea with the makeup pads. Gonna pick some of them up next time I'm shopping.

Have you already put the Solarez on a guitar? If yes, how do the necks feel? Do they stay hard and cold while playing? Or does the head from the hand give the feeling of a soft lacquer? I'm trying to avoid the later as hell.
 
They are cloths that don't (or aren't supposed to) shed fibres. I just type 'lint free cloths' into Amazon and get lots of suggestions. It just has to be the right type of rag/cloth material.

I haven't polished up the Solarez yet, so don't know. They describe it as being between nitro and poly for hardness. I'm fine with nitro lacquer, so am hoping it's OK.
 
OK, thank you, that sounds good! I'm also good with the hardness/feel of the poly, but my experiments with acrylic lacquer were not good (sticky feeling).
 
I use old bed sheets or work shirts rather than T shirts for Tru oil. My not-very-well-founded feeling is that T shirt cloth might be a bit more prone to shed. T shirt cloth for polishing.
 
Hey TCG, sorry to hear about your ongoing troubles.
Finishing is always the hardest part of any build regardless of material or method IMO, and you're not alone with the trials and tribulations.
I have had pretty good luck with wipe on finishes though. I won't say they've all been trouble-free but yielded good results.
One thing I have never done is only 3-5 coats. That just doesn't seem anywhere near enough. I think I have read of people doing that few, but I haven't and wouldn't expect to not have problems.

Whether using my own homebrew wipe-on poly or Tru-Oil, the minmum I've ever done is 24 coats. I think 30± is the most I've done. Yes, it's time consuming (especially for someone like me that lacks the virtue of patience) but it's probably less time than it takes to fix sand-throughs and certainly less frustrating.

I tend to do most of my finishes (wiping or spraying) in the warmer months, but with t-oil or my poly, I can typically get at least 4 coats on per day. Depending on how quickly it tacks, I may actually be applying 2 coats in one session; then leave to set for 1.5 hours; repeat... do that 12-15 times...

The only other tip I can offer is in regard to your applicator cloth. I use white 100% cotton tee-shirt material, which unfortunately seems to be getting harder to source these days (at least for me). A lot of the "bag-o-rags" you get from the hardware stores contain some real rubbish materials like denim which is absolutely crap for anything finish-wise - but I digress...

What I do with my rag material is cut it into a 125mm± (5") square, then fold two edges into the middle, then the other two edges into the middle and keep doing that until I have a squarish/rectangular pad that has NO CUT EDGES exposed. This keeps the loose cut fibres from getting into your finish.
The other thing is don't use an applicator rag past it's use-by. You can get a couple of sessions out of one piece if you seall it in an airtight container, but I wouldn't re-use it the next day. Cut a fresh one and start again.

Don't know if I've offereed anything you didn't already know, but I hope it helps.

Cheers,
Mick
 
Everyone who has answered is more experienced than I am at doing this. So far, finding the "idiot proof" finish has eluded this idiot...So please take this FWIW, and if there is any controversy take the other advice!

One thing you mentioned is that you get lint spots where you take the rag off. I have started to use a little shellac (an idea I got from McCreed). Most of what I have read says (a) don't stop until you get to an edge and (b) don't let the cloth get tacky. Maybe the same is true with other wipe-on finishes?

As mentioned by others wipe on finishes are generally VERY thin. Also if applied to bare (or dye stained) wood, a lot of the first coats gets soaked into the wood which might partially explain why you see a color change, but the finish may still be super thin. The change in color can make you think the finish is thicker than it really is since some of the color is below the surface of the wood.

I am wondering about something you said about the way you are applying coats. I think you said that you apply when the underlying coat is still a little tacky and you sand every few coats. With minwax, as well (as with the acrylic I use) the directions are to let it dry for 2-3 hours, then sand lightly with 220. by that time it should not be tacky. I have never applied a 2nd clear coat over a tacky finish, although I have heard of doing it with paint.

Others may correct this, but I don't sand flat between coats. I just lightly "scuff sand"... I just make the surface slightly rough enough so that the next coat of finish sticks to it. I try not to flat sand until I have a lot of finish built up. If you flat sand between coats you may be sanding away too much finish, and will most likely need more coats.

What JimC said about "spots" resonated with me. Especially on my ES bass. The place I sanded through was on a "bump." Inadvertently, I was putting more pressure on the top of the bump than on the valleys and sanded right through. For the finish I have been using the mfg liked sanding pads like the Scotchbrites you mentioned. I have found that it is really easy to put more pressure on a high place or a curve than a low place. So any place I have a high spot, I now try to sand without putting much pressure on the pad. lightest of all on a run or drip. It takes a LOT longer, but I haven't yet had an accident with my current build.

All thought to put in the FWIW column ;-)
 
Thanks everybody for your help!

I switched to a different poly (Minwax fast drying poly instead of Rustin's) and it's really drying very fast, so I can add more coats in the same amount of time.

I also tried a cotton pad to apply it, but it wasn't a good idea - much too much crud. Will try to find something better.

But, how would I now proceed best. I have MANY dust particles and stuff in the finish. So far, I'd now take a softer sanding pad/fleece and gently rub it off. But it would leave many fine scratches. Polishing them out is not working well, so I would need to add another coat of poly. And then introduce more dust and fuzzies. It's like an endless circle. How do I get out? If I try to sand out the scratches with finer and finer sandpaper (2000, 3000) like I did before, I'm afraid I'll break through the poly when polishing again.
 
But, how would I now proceed best. I have MANY dust particles and stuff in the finish. So far, I'd now take a softer sanding pad/fleece and gently rub it off. But it would leave many fine scratches. Polishing them out is not working well, so I would need to add another coat of poly. And then introduce more dust and fuzzies. It's like an endless circle. How do I get out? If I try to sand out the scratches with finer and finer sandpaper (2000, 3000) like I did before, I'm afraid I'll break through the poly when polishing again.

Depending on the size, type and colour of the debris, you may have to just live with it to some degree. Maybe sand back a couple of coats to remove as much of the particles as you can and re-apply with your new poly and good lint-free material.
Just bed-in the stuff that's in the previous layers. A lot of it may not be that noticeable if it's buried deep enough. Especially with the dark walnut base coat.

That's all I got short of sanding back and a complete re-do.:(
 
Ha, no way I'm gonna sand this mofo back. It's giving me gray hair since unpacking ;)

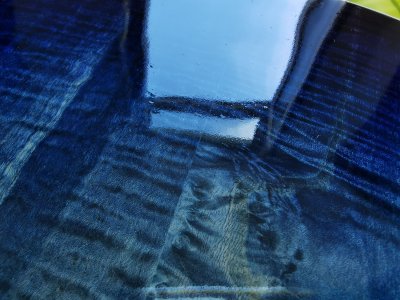
Here is a close up of the dust problem. The thing is, when I apply the poly, it looks all great and smooth, but when it's dry, all the dust appears. It looks like it got already applied with the poly, because it's not sitting on top. This time, I took a lab grade cotton paper towel. It's guaranteed to be lint free, unless you really rub it to pieces of course. But still....

I should probably just let go of the idea of getting a glass like mirror smooth surface. Because it's pretty obvious it's way above my skill level.

IMG_20200805_133115.jpg
 
I think that's pretty normal. When it's wet it looks perfectly smooth. When it dries it literally gets smaller as the solvent evaporates, and it shows more flaws. If it were me, I'd apply enough clear coat to be able to sand it pretty flat.

The only other thing I can think of is to try to create a space where particles have a harder time falling on your finish. I used to put the drying piece under the stove hood and let the fan run on high. Mostly this was to get rid of VOCs but it also takes care of a lot of stuff in the air that might have landed on the piece. I have been tempted to build a little hood for my garage now that my wife and kids are home all the time ;-)

You could do something similar with a box and a small fan...
 
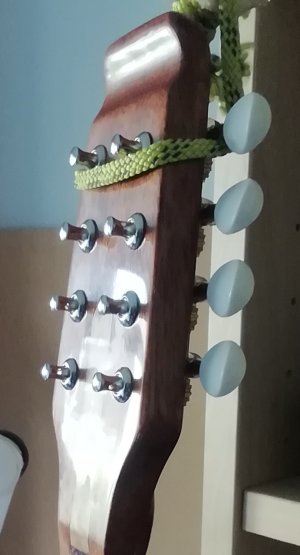
You're nearly there. There was a lot more dust on this headstock before it got its last sand and burnish, and I think it's decent enough. It's just a question of getting a good feel for the sand through problem, and once you get that down you'll be needing to change that rapidly becoming inappropriate screen name...
cropped7186474644597568116.jpg
 
Last edited:
A lot of it may not be that noticeable if it's buried deep enough. Especially with the dark walnut base coat.

I just quoted myself there...

I got your projects mixed up! I thought we were talking about the brown hollow body. You've got too many guitars going for me to keep up!

Anyway, my thoughts are the same regarding the fix.
I also agree with Jim C, that once you level & polish, you may be surprised just how much the particles aren't visible without very close inspection. If I judged all my finishes on sighting from 3 inches away, they'd all fail!

As for the rangehood/box fan idea, that concept is flawed unless you're starting in an already perfectly dust-free environment.
The rangehood or fan that's meant to be extracting is more likely just pulling dust in the direction of your project.
 
As for the rangehood/box fan idea, that concept is flawed unless you're starting in an already perfectly dust-free environment.
The rangehood or fan that's meant to be extracting is more likely just pulling dust in the direction of your project.

And another crackpot idea bites the dust.


Sent from my ONEPLUS A3000 using Tapatalk
 
Ha, you are right, I have too many guitars going :D
Number 1+2 are finished, number 3 and 4 get finished ;-)

But here comes the good news:
I *think* I found a routine that is now working for me. I did integrate a lot of your advice!

* First, I clean the surface with a soft cloth.
* Step two: Put on a fresh rubber glove and rub the surface with it. This works great for pulling off all sorts of tiny hairs and dust.
* Step three: I use lint free, lab grade cotton paper towels. Fold all the corners inside, and then fold it in the middle, so it has all soft edges and two usable sides (important, and a great tip from you guys).
* Step three: Dip it in the poly and apply in circular motions, while applying some light pressure. This step seems to pull out even more of the crud from the last layer, so here comes the next important step:
* Flip the folded cotton towel and now use the unused side to pull down the poly from one edge to the next (I do top to bottom) without lifting or stopping. This ensures the crud is trapped on the other side and I use the fresh side to even out the poly.

Of course, it is still impossible to have a completely dust free surface in my environment. I don't have a dedicated work space (currently using the kitchen table) cause we live in a pretty small flat with two hairy pugs. No cellar, no basement, no garden. So I'm trying to make the best of it.

Anyway, thank you very much for all your great advice and maybe my workflow above does help out somebody else who maybe found this thread on google :)
 
Back
Top