"Blue Heeler" Bondi Blue GR-SF1: Pt1 Aspirations, Procrastinations, and Consequences

Honkenstein

Member
"Blue Heeler" Bondi Blue GR-SF1: Pt1 Aspirations, Procrastinations, and Consequences

Hi, All.

First, my apologies in advance to anyone bored by my loquaciousness. Can't help but be wordy. For those of you who endure it, I hope you find the dialogue at least mildly amusing and informative. That's the nice thing about knowing other people's stuff-ups after all! :p

Aspirations

My initial purchase of this Gretsch-style was motivated by a desire to have a Bigsby-style tremolo arm and trapeze. I wanted it to have chrome hardware and pyrographic decoration; Namely, the famous 'Great Wave off Kanagawa', and finished in blue and tan Dingotone products.

It went wrong from the start, but was all my fault. :D "What went wrong?", you concernedly ask. "How were you so foolish?", you gently enquire.

Procrastinations


  1. I was so cock-sure that I'd start the project immediately that I declined to wait for the chrome hardware to come back in stock (maybe 6 weeks later) and deviated from my original inspiration by substituting with gold hardware. Never mind. It'd still look good enough with gold I told myself ... though I intensely dislike the maintenance of gold surfaces.
    • NOTE: PBG's Adam (PitbullGuitars) very kindly let me have the more expensive gold hardware at no extra cost! Many thanks to you, Adam. *Many* thanks!
  2. I lost my 'mojo' and didn't start the project until Jan 2020, a full 2 years later! "Gosh, that's a long time!", you may justifiably say.
  3. During those 2 years, I kept contemplating the pyrographic design. I'm insufficiently skilled at artsy stuff so drew up a paper 'community notice board' request for a capable artist's labour in exchange for some money or the pyrographic tools that I'd buy for the job. Never put the ad up, though I did buy a nice soldering iron to do the pyrography ... but it would take me so-oooooo long because they're simply not hot enough and aren't designed to run at their highest temps for very long. Pyrography step abandoned.
    • NOTE_1: I was intending to get this professional burner which, at the time, I thought was AUD $399 but is currently AUD $299 for the Razertip SS-D10. I might've jumped at $299 back then and may yet (too late for this project!) do so for future projects or to lend to artsy family members; See the SS-D10 on this page, https://suewalters.com/RazertipBurners.html
    • NOTE_2: Use your favourite search engine to source images related to a "guitar pyrography" query. Some fantastic stuff there. Do you personally know an artist who could visually transform your next kit to the "next level"? Wish I did. There are heaps of geet-tars with famous faces such as Roy Orbison et al upon them. The sound-hole's location typically impinges upon the subject's visage with "a ruddy great hole". Therefore, 'good taste' probably dictates that you don't put a "JFK" image on the top. It was in fact in 'bad taste' that I actually mentioned this obvious issue.

Consequences

So I commenced sanding the neck and body this month (Jan 2020) after having resigned myself to zero decoration -- no, not decorated with "zeroes"! -- and deciding upon the "Bondi Blue" stain kit from Dingotone. Real progress at last. I used 360 grit wet'n'dry, but also 1200 grit to smooth it somewhat prior to staining. Let me (kindly) know if using 1200 at this stage was, in general opinions, a twit's approach.

Unfortunately, the neck setting glue had probably expired from being left for 2 years instead of 30 days. It'd never been opened until Jan 2020, but had the consistency of the primary school non-toxic, almond-like smelling, *great-tasting* "Clag" brand glue. Yes, of course I've tasted it, and deliberately at that! I was a kid too, you know. :o Adam (PBG) advised it was best to get some fresher glue. To enlighten even the younger folk to Clag (though they probably ate it extensively in their own childhood days) see https://images.officeworks.com.au/...clag...150g.jpg

NOTE: Despite my insistence on literally paying for my own lazy-inspired misadventure, Adam very kindly provided me with a new pot of glue. Once again, Adam, dear sir, I am grateful to you.

In the next thrillingly boring (oxymoronic) instalment: Pt2 Real Action, More Disappointments
 
Last edited:
"Blue Heeler" Bondi Blue GR-SF1: Pt2 Real Action, More Disappointments

Real Action

Today, Tuesday 28/01/2020 I took the next step and applied the first and second coats of "Bondi Blue" stain from my kit bits!

More Disappointments

"Huzzah!", you all cry ... and then perhaps some of you -- as I do now -- cry again, only this time yours are mock tears, for the blue stain isn't as *intense* as hoped for. Tears are mock-style because it (hopefully) only happened to me and not to you. That's the nature of sympathy sometimes.

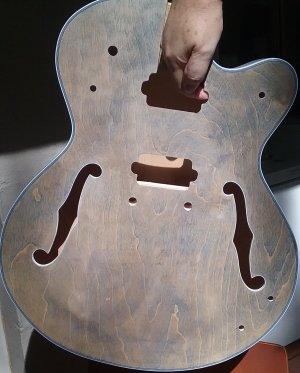
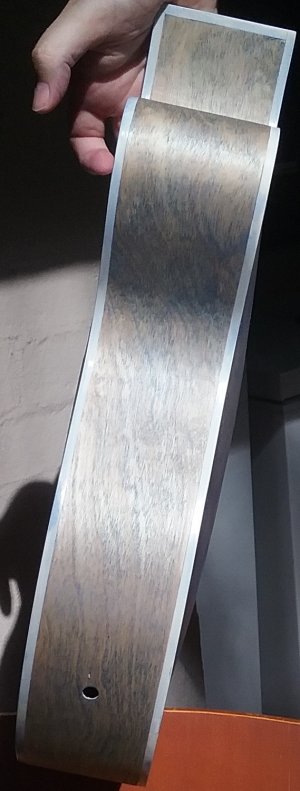
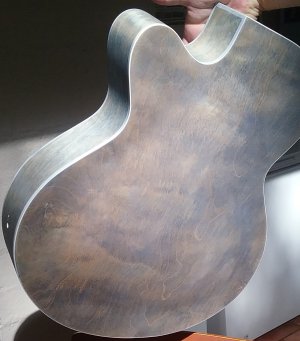
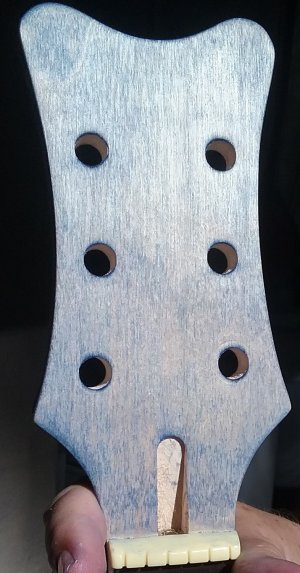
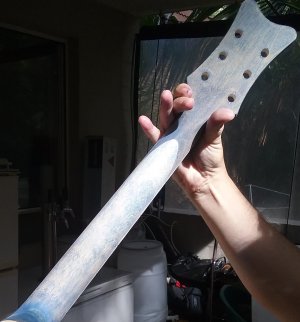
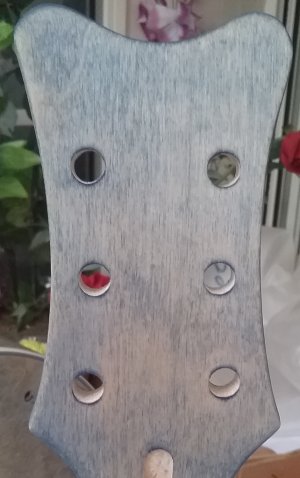
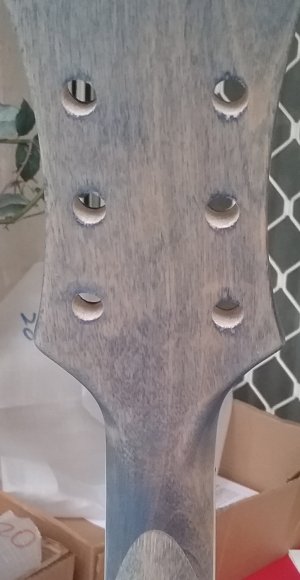
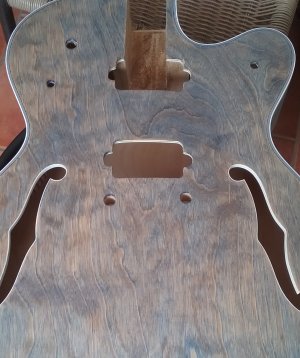
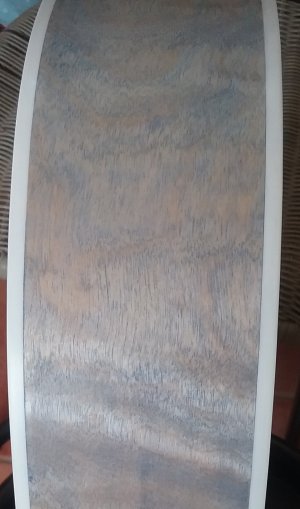
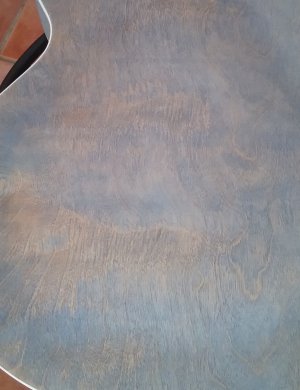
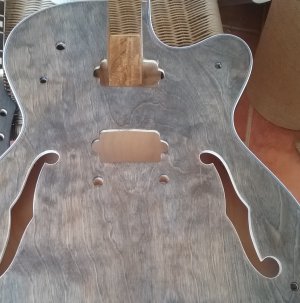
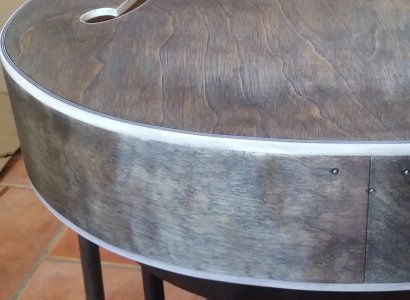
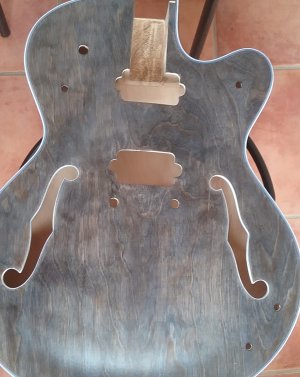
Photos #1 - #5 are of the first coat. They're in some 3pm Queensland sunshine, sans bushfire smoke tint, to hopefully make it easier to see coloured versus un-coloured grain contrasts. It literally took 1/3rd of the stain bottle to get this far.

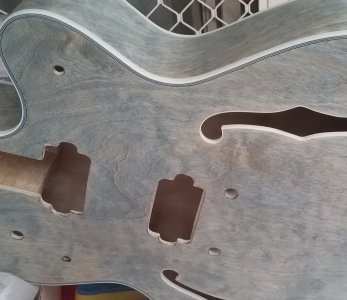
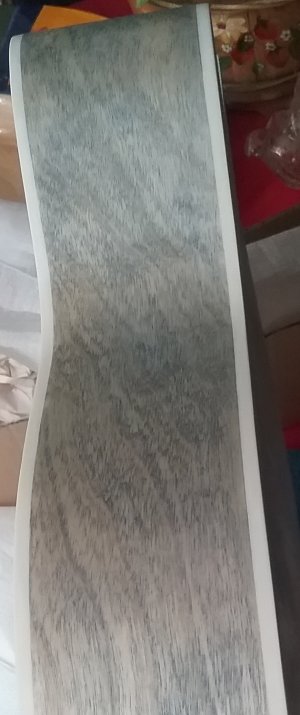
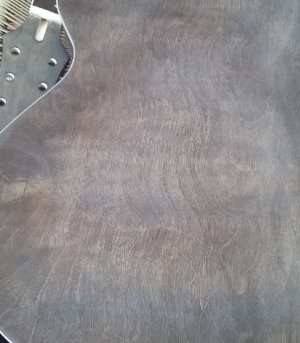
Photos #6 - #9 are of the second stain coat. Basically, this was performed within 30 minutes of the first coat. Despite the absence of direct sunlight to highlight the blue tint, you can see that the colour is not intense. I'm 2/3rds the way through my liquid stain at this stage.

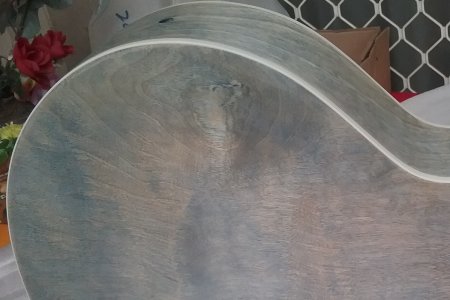
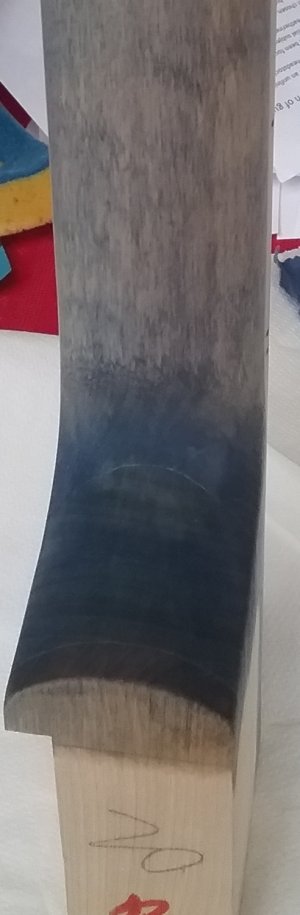
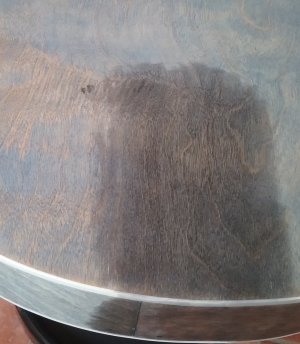
Photos #10 and #11 show vastly inconsistent stain absorption around the heel and neck/headstock join. I'm not concerned. I think it'll add to the character and individuality of the guitar in the end.

Don't read this next statement as a criticism of Dingotone nor PitbullGuitars' (paraphrased) claim that "there's enough stain in each bottle to complete any of the PBG kits". Frankly, the acoustic kit's surface area is larger than the more popular(?) electrics, and natural blue colouration sources seem more rare in this world. I'm sure we have very intense chemical ones though! Unfortunately, we can't take scrapings of a celeste-coloured sky and boil them down into a more concentrated form. There's heaps of sky to spare, after all. Still, it might be a worthwhile consideration to indicate on the website that the blue stain will not be as intense per volume in comparison with more readily sourced reds and yellows.

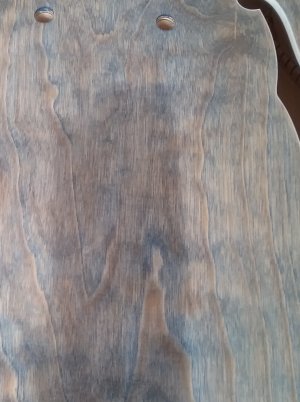
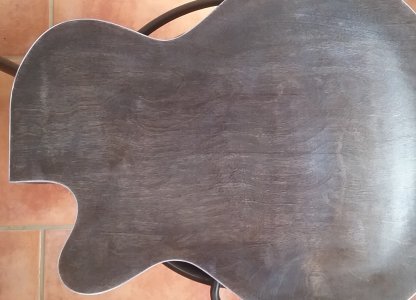
The very grey images (#7 - #11) are not directly sunlit and seem reminiscent of lime-washed timber furniture, aged cedar roof shingles, and sun-struck split hardwood fence railings from an outback cattle station. Ah, what inspiration!

I here decide to apply no further stain to the sides nor back. It's all for the front. "I wanted some tonal contrast between the sides and front anyway!", so I tell myself. Honestly, no petulant tone should be implied when reading the "I wanted" mental dialogue.

I mentioned inspiration. That grey-ish blue-ishness with tan-ish ... -ishness put me in mind of Straya's quintessential blue cattle dog! ... and hence I had an appropriate name for my build; "Blue Heeler"

So let's see if I can get 2 or 3 more stain coats for the top out of the last 3rd of the bottle. I'll be waiting between coats in the hope of better stain penetration and resultant contrast.

[time elapses]

It's been 3 hours since the first coat, so I'm going to apply the third on this balmy 28 Celsius Brisbane evening ...

Here endeth the first part of the story, but not the first self-taught, self-suffered lesson.

Coming up; Pt3 Stainings, Forget, Regret, The Wrong Dog, Dismay
 
Last edited:
"Blue Heeler" Bondi Blue GR-SF1: Pt3 Stainings, Forget, Regret, The Wrong Dog, Dismay

Stainings

Staining regimen on 26/01/2019
1) 3:30pm (natural dry)
2) 4:00pm (short rest from first coat, cold fan-forced dry afterward)
3) 6:30pm (cold and warm fan-forced dry afterward)
4) 8:30pm (cold fan-forced dry afterward)
5) 11:00pm (1200 grit quick sanding just prior)

You can really feel the wax(es) with each subsequent coat. However, the 5th coat is barely darker than the 2nd which, in turn, is barely richer than the 1st.

With the light sanding before the 5th coat, I intended -- more like hoped, actually -- that it would golden up the parts that didn't absorb stain well without affecting the parts that did a reasonable job of sucking up stain. I don't think it did much either way, good nor bad.

So I'm letting the stain settle in for a few days now. I propose to use the stain intensifier this Friday or Saturday. At this point I'd like to note that the colouring is still reminiscent of a blue heeler, or even a pair of faded blue denim jeans with tan stitching. 8)

Forget

Wed 29/01/2020 2pm

Whoops! Forgot to leave it a few days (ya' twit). Instructions forgotten. However, the stain layer felt nice and dry from gorgeous Brizvegas weather -- "beautiful one day, perfect the next!" ... drought the day after, ravaging and raging bush fires subsequent to that -- and I was motivated to apply the first intensifying coat. One word. Regret!

Regret

"We share your grief!", in sympathy you declare. So allow me to elaborate upon my regret;

I'd happily come to terms with the unexpected "faded denim blue" hue ... my "blue heeler" stain outcome. Wifey loved the idea too. A big plus! But the intensifying coat is, in my opinion -- in conjunction with the Bondi Blue stain -- simply a 'bedarkening' of the stained area. The grain is still visible, but even more muted, and the already too subtle blue is effectively greyed out. Some tan colour remains. The intensifying coat seems to love sticking to the binding more than the stain did. :(

The Wrong Dog

So now my Blue Heeler (a fine and purposeful beastie) has been transformed into a Silky Terrier! The wrong dog! Oh, woe ... all that wavy grey fur, similar to myself. Upon reflection, however, it's a more apt dog breed to describe my guitars. "Why, pray tell?" thou incant.


  • I don't work them like a cattle dog gets worked
  • I usually just put it on my lap and "pat" it a while ... infrequently
  • I brush/strum its "stringy" fur and sing it some songs (some original, some covers, some drivel, and all poorly executed)

Dismay

This harkens to internet matters, my voicing expressions of dismay. It's really more a wish-list of changes I'd like to eventually see on the websites. Administrators, please advise if you'd like me to move this part to a different thread, or similar. Thanks.

What I'd really need/like to see on the PBG and/or DingoTone websites is not only photos representing each bottled product in the kit -- there are a few stain kits lacking photos -- but also some constant, controlled environment images depicting, at least, items ii., vi. and viii. from the list below;


  • i. the raw guitar top timber/veneer
  • ii. a single layer of stain
  • iii. multiple layers of stain
  • iv. first intensifying coat (wet and/or dry)
  • v. multiple intensifying coats (wet and/or dry)
  • vi. first finishing coat (wet and/or dry)
  • vii. multiple finishing coats (wet and/or dry)
  • viii. *** a special example of Bondi Blue finishings without the intensifying layer(s) ***

Perhaps the website could bundle these images together in a matrix on a single page. For example, colours across (or down) and layers down (or across).
NOTE: Kudos and thanks to Adam and DB for the two instructional videos about stain kit application. Yet, both videos (imo) failed to record the timber grain highlights and colour due to too sharp angles and reflection. Sorry to point it out, but the videos themselves I felt were "grain-killers", like high-gloss finishes decried in one of the vids.

I believe making new videos that truly showcase the staining kit's potential by using good lighting and higher resolution (Full HD minimum) to display the wood grain would be a great asset. The same lighting and resolution could be used for the still matrix images for consistency, comparability, and predictability, making expectations more realistic. Showing potential, but also limitations. The Bondi Blue image depicted a result that wasn't feasible on my guitar body's timber and probably shows stain without the intensifying layer. A little misleading. I feel I shouldn't need to trawl through BYOG build logs to be made aware of the improbable colour outcome.

Following dismay comes rays, not of hope, but of a different acceptance: Pt4 Positives, Differently, Irony
 
Last edited:
"Blue Heeler" Bondi Blue GR-SF1: Pt4 Positives, Differently, Irony

Positives

29/01/2020 3:40pm

There are positives to the "bedarkening" though that deserve mention and retrieve my sodden form from the funk. :( The dark grey actually looks *rather good*, and in particular, on the back and sides because there's no feature grain to flaunt. Going a few layers darker will make the gold hardware "pop" more. Also, the headstock looks better in juxtaposition with the body already because the neck was more blue than the body. Looked incongruous.

Differently

However, I'd even (retrospectively) consider not staining the neck at all if using the Bondi Blue. Just keep it natural with a finishing coat or coats. Perhaps this is something for other Bondi Blue experimenters to note.

Irony

Another "full circle build irony": I got the Bondi Blue because they were out of the "Black Stump" stain kit! Now it looks more like what I thought I saw online at BYOG as Black Stump but may simply have been Bondi Blue with the intensifying coat. (sigh) Such a roundabout route taken to get to where I was going ... :eek: A little mock-worthy, really.

Next intended update subjects a few days away: Pt5 More Intense, Too Intense?
 
Last edited:
Hi Grant, that almost took 2 cuppas and a full packet of Tim Tams to read through all of that!

I understand where you are at as my 1st & 2nd builds were done using DT and I also live in this glorious part of South East Qld with lots of the humidity that we have been experiencing lately. Therein lies one of the biggest problems to deal with when using DT - Humidity. The finish is quite soft and needs many days, sometimes a few weeks between stain or intensifier coats for it to work properly. Something you may find out more about when you get around to doing the final polish or wet sanding stages.

But if we back things up a fair bit, the initial problem was probably through oversanding the kit. From all the threads I have read on Bondi Blue they all share a common theme of lack of colour absorption and the best way to solve that is minimal sanding to allow the stain some chance of penetrating into the open wood fibres. 240 Grit should be the place to stop, in fact 180 sanded "as smooth as" is possibly almost too well done. Think medium rare steak rather than well done.

Sounds like you have used up most of the base stain and just have intensifier left? On mine I found the intensifier added a bit more 'zing' with each coat applied and did in fact add more depth to the base stain colour plus it tends to take on a different hue as the applied coat cures, something that usually takes a minimum of 7 days in perfect low humidity, stable moderate dry temperature conditions. If you really want the "Bondi Blue' look, and can be bothered, that would require a full strip and sand back with 80, 120 & 180 grit plus a fresh bottle of stain to give it the best chance of soaking up some of that precious colour.

Lack of photos makes it hard for us to provide comments or guidance on what to do next or whether the consensus is to leave as is or keep going on your plotted path.

Hope this helps in some way.

Cheers, Waz
 
"Blue Heeler" Bondi Blue GR-SF1: Photos #1 - #5

First coat outcome
20200128_152310_#1_1st_coat_top.jpg20200128_152314_#2_1st_coat_side.jpg20200128_152318_#3_1st_coat_back.jpg20200128_153116_#4_1st_coat_head.jpg20200128_153126_#5_1st_coat_neck.jpg
 
Last edited:
Hi Grant, that almost took 2 cuppas and a full packet of Tim Tams to read through all of that!

I understand where you are at as my 1st & 2nd builds were done using DT and I also live in this glorious part of South East Qld with lots of the humidity that we have been experiencing lately. Therein lies one of the biggest problems to deal with when using DT - Humidity.
...
If you really want the "Bondi Blue' look, and can be bothered, that would require a full strip and sand back with 80, 120 & 180 grit plus a fresh bottle of stain to give it the best chance of soaking up some of that precious colour.

Lack of photos makes it hard for us to provide comments or guidance on what to do next or whether the consensus is to leave as is or keep going on your plotted path.

Hope this helps in some way.

Cheers, Waz

Thanks so much, Waz, for your speedy and informative reply! :D Greatly appreciated. I would've tucked into a Tim Tam pack myself if they were in the house ... 8(

Working on bunging photos in right now. Yes, a long read, and with no photos either until now. Hard going.

I'd considered potential error in too fine a paper grade, but decided to "go for it". Difficult enough to get me motivated. I'd also reasoned to myself that the 400-ish grit would facilitate an enhanced inability for the less porous wood to absorb and thus (hopefully) produce the contrast that I did eventually see on the top prior to the intensifying coat.

Noting your avatar; my guitar body looks a bit "gunmetal grey" currently, and will possibly continue to improve in its resemblance with more intensifying coats.

I'm probably going to storm ahead with this build -- although taking more time between coats herein -- because it still actually looks good, I think, and will get better. A better reason is specifically to *avoid* buying more products and sanding away ... over and over.

Your advice shall be heeded! By mine own self, if wise, and by others who learn from others' experiences! :D

Best regards
Grant
 
"Blue Heeler" Bondi Blue GR-SF1: Photos #11 - #15

Second stain coat of the heel
20200128_154951_#11_2nd_coat_heel.jpg
Prior to intensification after an overnight dry of 5 coats of the stain
20200129_135357_#12_pre_intnsfy_top.jpg20200129_135417_#13_pre_intnsfy_side.jpg20200129_135437_#14_pre_intnsfy_back.jpg
Intensification test area
20200129_140406_#15_test_intnsfy_back_n_side.jpg
 
Last edited:
"Blue Heeler" Bondi Blue GR-SF1: Photos #16 - #19

Intensification test area cont'd
20200129_140423_#16_test_intnsfy_top.jpg
Intensifier first coat. Goodbye, Blue Heeler. :( Hello, Silky Terrier. :{
20200129_142710_#17_1st_coat_intnsfy_top.jpg20200129_142725_#18_1st_coat_intnsfy_side.jpg20200129_142752_#19_1st_coat_intnsfy_back.jpg
 
Last edited:
"Blue Heeler" Bondi Blue GR-SF1: Pt5 More Intense, Too Intense?

More Intense

Haha! Fooled myself again. Applied the second intensification (aka "bedarkening") coat the next afternoon instead of Fri/Sat. "Why would you do that, you impatient person?", you are compelled in your wisdom and experience to ask. Well, it's because ...

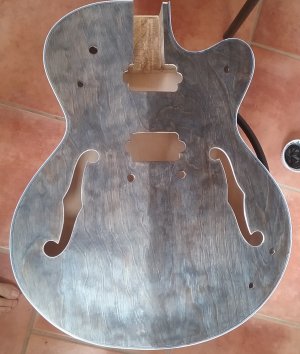
I had smeared such a thin layer for the first coat in order to (unsuccessfully) not destroy the Bondi Blue hue that it felt sufficiently dry/cured by midday the next day to add a second -- and I heartily propose a *final* -- intensifying coat. Needless to say, the Bondi Blue has vanished ... almost utterly. It's now certainly a *charcoal* guitar with a mysterious and barely discernable blue undertone.

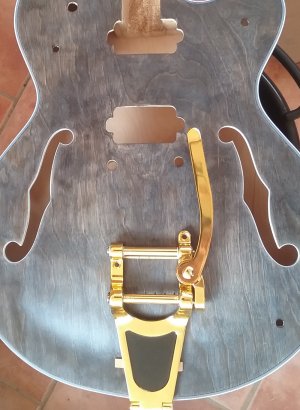
Photos #20 - #24 show the 2nd intensifying coat's test and completed stages, but also a preview of some gold hardware sitting on top. I expect the finishing coats will improve the contrast with some timber gloss and depth. Have to wait and see.

Too Intense?

I don't think so. As the photos show, in indirect daylight the body's still rather grey instead of black. Indoors it will surely appear darker, and in intimate lighting of a gig maybe darker still. No, I don't do gigs. I have neither the skill nor the inclination to make a living "the hard way"! :D

I didn't put a second intensifier layer on the sides! It was deliberate too, in case you wondered. I'm hoping for some tonal contrast between top and sides and finisher coats to enhance this further. We'll eventually see if it turns out that way.

Subsequent to this is: Pt6 A Long Wait, First Finishings
 
Last edited:
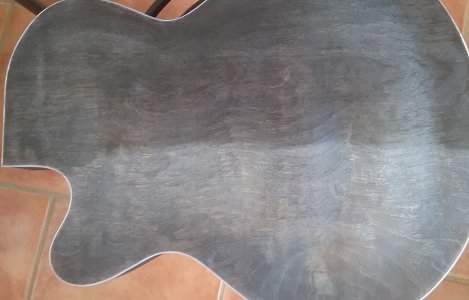
Hi there, watching with interest. got me with your Blue Heeler hook ;)

Take a look at my Blu Heeler JBA-4

https://www.buildyourownguitar.com....?t=8006&page=3&p=157963&viewfull=1#post157963


good luck with the build.
Regards
Guvna

(exasperated gasp) Why doesn't *mine* look like that? :confused: Oh, yeah. DT blue. :D
Hi, Guvna

Thanks for sharing your build. Yes, I was hoping/expecting a blue such as yours. Now I know I'd need to use a different product. I don't really regret the way mine's turned out though. Black-ish was always high on my list of colours. I also feel that my first kit *should* be fraught with unknowns and whoopsies. Being a little lazy by nature, and preferring matte and natural finishes, I'll probably use DT for my next build as well. Even consider not staining it, though that'd be a hard temptation to pass up if the next is Strat or Tele based.

Your teal 'tar looks very nice, and I, like several others would like to further express my appreciation of the headstock decal. "Noice!"

Best regards
Grant
 
"Blue Heeler" Bondi Blue GR-SF1: Photos #20 - #24

Test areas with 2nd intensifying coat
20200130_111420_#20_2nd_coat_test_intnsfy_back.jpg20200130_112920_#22_2nd_coat_intnsfy_test_top.jpg

Completed 2nd intensifying coats
20200130_111804_#21_2nd_coat_intnsfy_back.jpg20200130_113557_#23_2nd_coat_intnsfy_top.jpg

Preview of gold hardware prior to clear finishing coats
20200130_115725_#24_2nd_coat_intnsfy_plus_gold_hw.jpg

Photos #25 - #29 here
 
Last edited:
The gold hardware will be your saviour on this build as that looks pretty good to me.

Not much blue colour left behind but what it has done makes it look like some aussie bush timber. I would encourage you to keep going with at least 1 more intensifier coat to build a bit more depth and shine.

Cheers, Waz

Sent from my SM-A520F using Tapatalk
 
Builds rarely turn out the we initially plan and somtimes the end result can be a pleasant surprise.....glass half full approach.....

Sent from my SM-A520F using Tapatalk
 
The gold hardware will be your saviour on this build as that looks pretty good to me.

Not much blue colour left behind but what it has done makes it look like some aussie bush timber. I would encourage you to keep going with at least 1 more intensifier coat to build a bit more depth and shine.

Cheers, Waz

Sent from my SM-A520F using Tapatalk

Thanks again, Waz. Talked me into it. Depth and shine are appealing. May as well use up the rest of the "squid ink in a bottle" too! :D I'll probably only coat the top but will likely get 2+ more coats with what's left. I'm not sure I'm prepared to go that dark though.

Still, I have to wait days between coats at this stage so there'll be plenty of time to reconsider.

Ta, mate. 8)
Grant

PS - Oh, my! Your TL-1AR GOTM entry and ES-1 Runner-up GOTM are beautiful! Some 40 TO coats on the TL. How much time did that take? (no need to tell) I used to have a Kalamazoo-made 1971(?) ES-355TD-SV. It was too beautiful and I was unworthy. My workmate and I "juggled" it between us. Basically, I bought it off him with the promise to sell it back to him when flush again. The first thing I really heard him play on it was a virtuosic rendition of Hendrix's Little Wing down at Brisbane's "Blue Note Bar" in the late 90's, still in his Blue groove prior to detouring into Jazz. I'd love to hear Ewan sing and play again. Died a couple of years back.
 
Last edited:
My old guitar

Thanks again, Waz.
...
PS - Oh, my! Your TL-1AR GOTM entry and ES-1 Runner-up GOTM are beautiful! Some 40 TO coats on the TL. How much time did that take? (no need to tell) I used to have a Kalamazoo-made 1971(?) ES-355TD-SV. It was too beautiful and I was unworthy. My workmate and I "juggled" it between us. Basically, I bought it off him with the promise to sell it back to him when flush again. The first thing I really heard him play on it was a virtuosic rendition of Hendrix's Little Wing down at Brisbane's "Blue Note Bar" in the late 90's, still in his Blues groove prior to detouring into Jazz and Gypsy Swing/Jazz. I'd love to hear Ewan sing and play again. Died a couple of years back.

Here's a link to what may actually be my old guitar. Everything looks right. However, at the time it didn't have the tremolo arm, and the stereo was disabled (but a set of instructions left in the body cavity to instruct how to convert it back to stereo. https://www.ebay.com.au/itm/124064205425

Another workmate borrowed it and marvelled at its unmuddied tones at higher gain. I see the price has gone up from the AUD $1700 I paid for it ...

The case's exterior condition looks right, but the interior lining looks less dark than mine. To own that guitar again ... (sigh)

... and that dark line running from the bridge pickup to the binding looks familiar! Tried to sell it on consignment at "Joe's Guitars and Retro" (or something like that) on the Sunshine Coast around about year 2000 for $3000, minus his 20% cut. Didn't sell. He gently chided me for not cleaning and shining the gold myself! :D
 
Last edited:
Back
Top