Page 1 of 2 1 2 LastLast
Results 1 to 10 of 12

Thread: It's here... SSCM-1F - wish me luck!

  1. #1

    It's here... SSCM-1F - wish me luck!

    First off, a huge thanks to Ben for going above an beyond to get me this kit before my Chrissy break. You rock Ben.

    As a disclaimer, I'm a drummer, but, I do play guitar, albeit like a thumbless thief trying to use a screwdriver and my face to break into a garden shed to retrieve my slippers...

    I love building stuff, and, as like everyone here, i love intrusments in my house for people to use, and considering the price of a Les Paul for someone who can't play much more than smoke on the water, I've opted to build one the way I could only dream of.

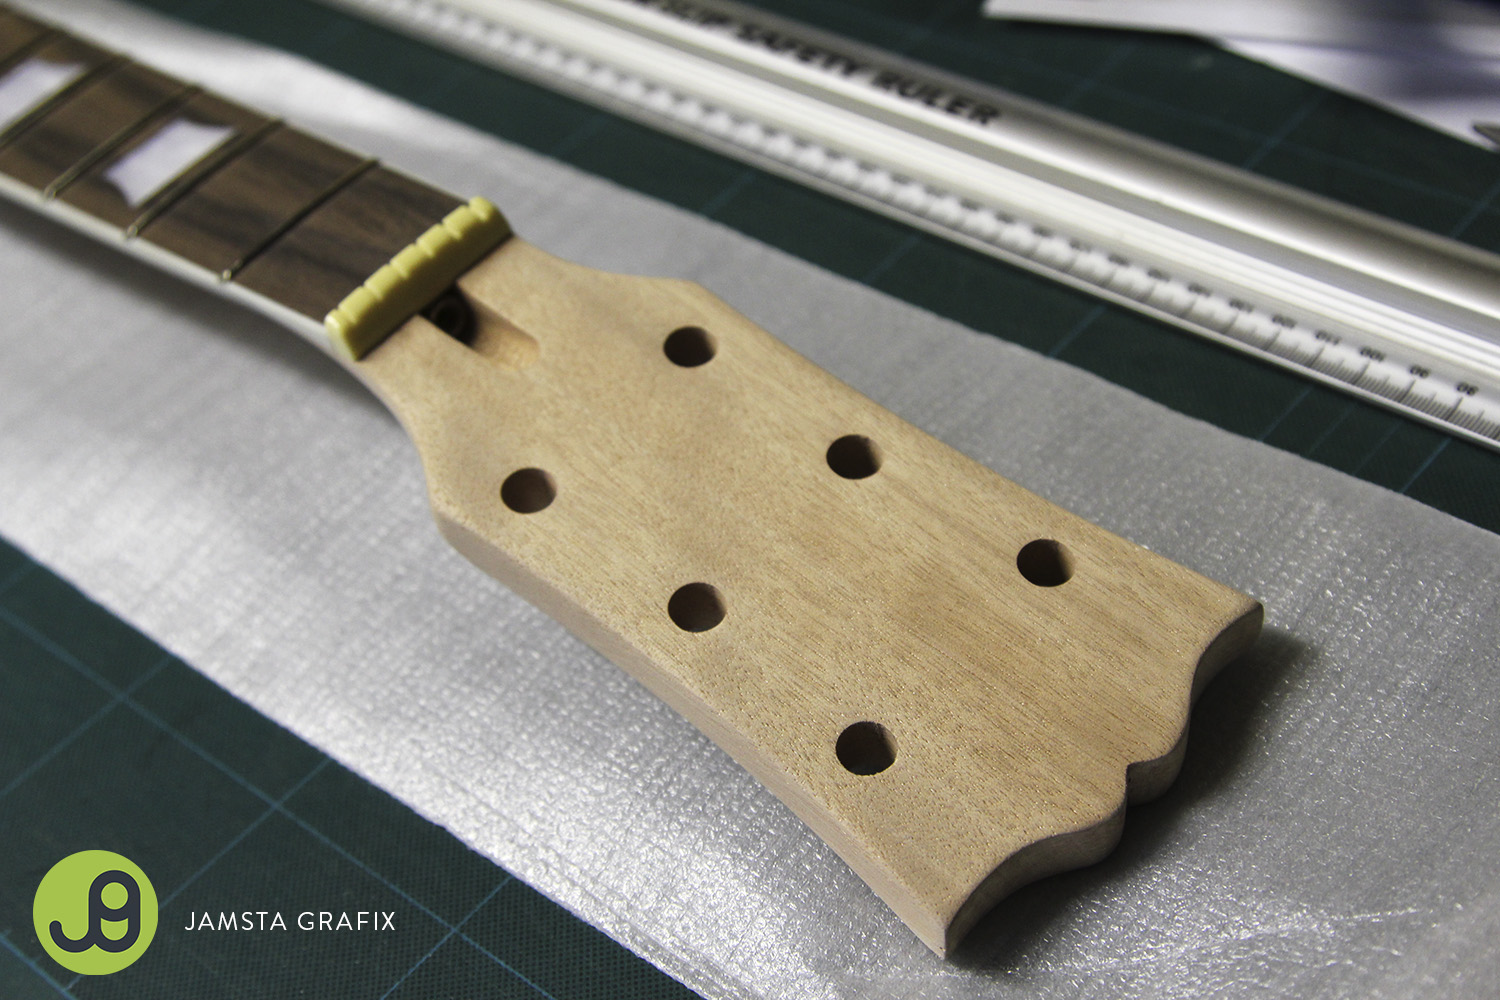
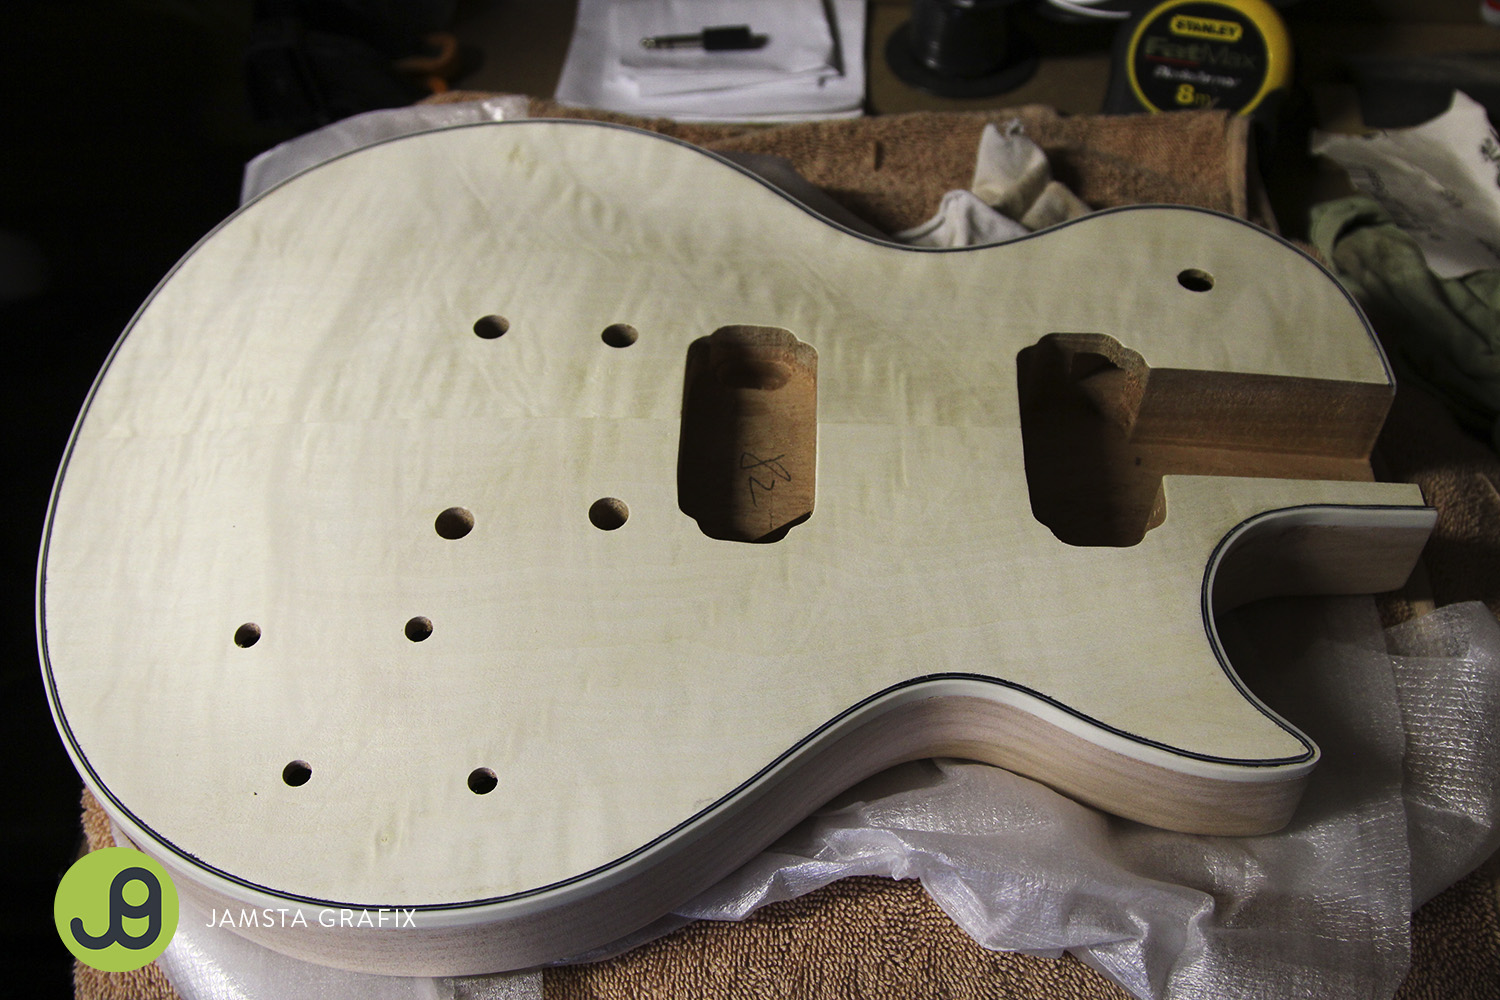
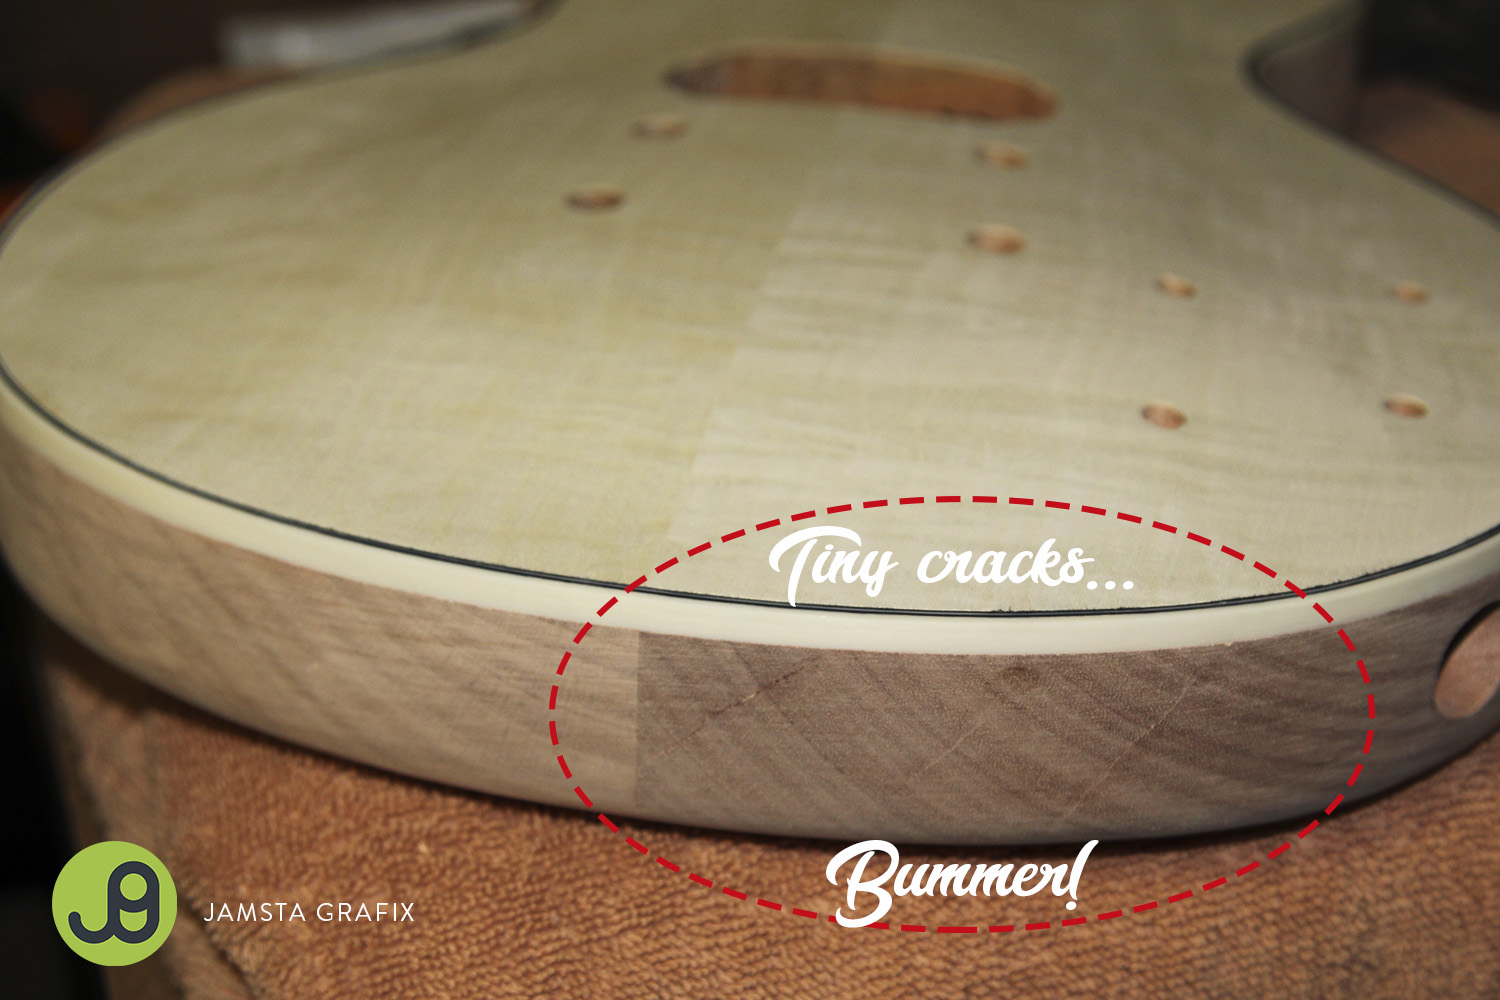
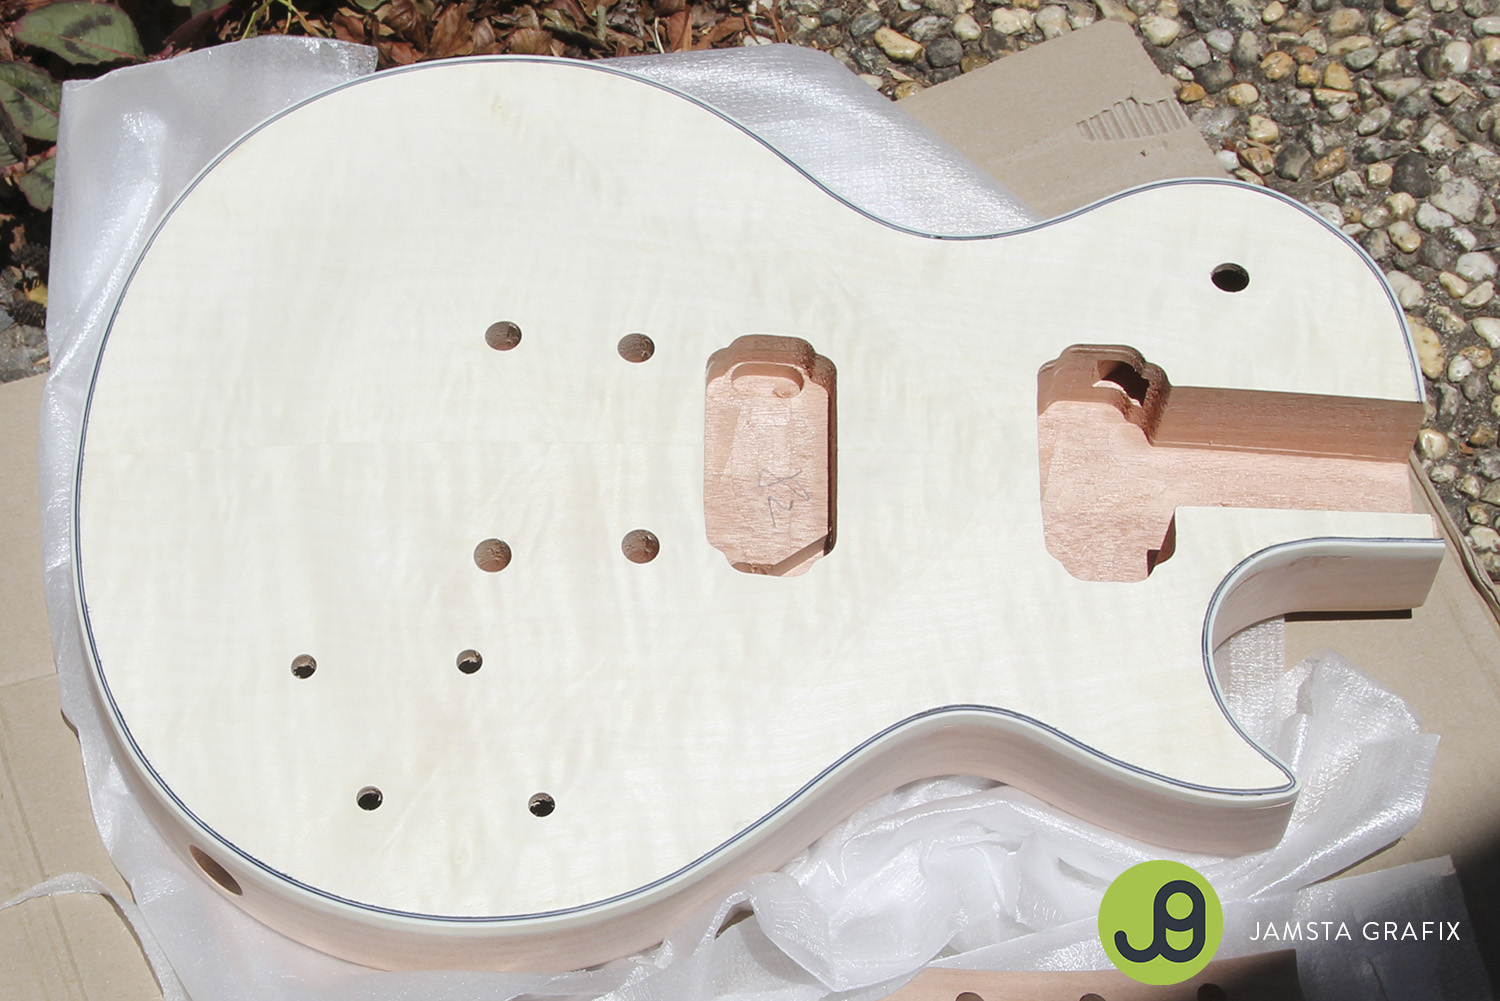
    The kit turned up 2 days before Chrissy and after opening the box, realised how damn cool this beast is going to be. After reading how some kits have a few little issues here and there, I thought that's okay, but to my surprise, this kit is near perfect.

    I'll post some pics asap, but right now, I'm off to the garden shed to retrieve my slippers, and start some sanding, wish me luck.

    Cheers
    Jamsta

  2. #2
    Mentor Trevor Davies's Avatar
    Join Date
    May 2020
    Location
    Perth
    Posts
    1,384
    Welcome Jamsta, and good luck.
    Last edited by Trevor Davies; 26-12-2020 at 03:18 PM.
    PitBull Builds: FVB-4, LP-1SS, FBM-1, AG-2, TB-4, SSCM-1, TLA-1, TL-1TB, STA-1HT, DSCM-1 Truckster, ST-1, STA-1, MBM-1.

    Scratch Builds: Pine Explorer, Axe Bass, Mr Scary, Scratchy Tele's.

    The little voices in my head keep telling me "build more guitars"

  3. #3
    Mentor robin's Avatar
    Join Date
    Feb 2013
    Location
    Brisbane
    Posts
    1,513
    Welcome aboard Jamsta, take your time and enjoy the build.

  4. #4
    Member jonwhitear's Avatar
    Join Date
    May 2020
    Location
    Sydney, Australia
    Posts
    260
    Welcome, Jamsta. I didn't realise PBG had started doing an LP style kit again. I know what I'll be building next, and watching your build with interest!

    If you're off to do some sanding, do be careful with that veneer - it's probably very thin!

    Have you got a plan for how you're going to finish it? If you're thinking about a stain, it's wort mentioning that the veneered bodies seem to often have glue spots, especially around joins. You'll need to del with those before applying a stain.
    Last edited by jonwhitear; 28-12-2020 at 10:59 AM.

  5. #5
    Overlord of Music Sonic Mountain's Avatar
    Join Date
    Jul 2017
    Location
    Toowoomba, Qld.
    Posts
    3,261
    Oh that is good news that those body shapes are back. I guess we should avoid using the letter designation from 'G' so it doesn't turn up in searches....
    Build 1 - Shoegazer MK1 JMA-1
    Build 2 - The Relliecaster TL-1
    Build 3 - The Black Cherry SG AG-1
    Build 4 - The Sonicaster TL-1ish
    Build 5 - The Steampunker Bass YB-4
    Build 6 - The Howling Gowing ST-1

    "What I lack in talent I make up for with enthusiasm"

  6. #6
    Thanks for the welcome and best wishes everyone, it's much appreciated.

    I'm pretty excited to get this kit underway, and there's only been sanding, more sanding, a little head-stock shaping, and more sanding going so far.

    Thanks jonwhitear for your suggestions. I am very careful with the veneer, as I don't want to ruin what could potentially be an awesome guitar. I have noticed some small cracks that are on the edge of the bum of the body, hopefully that won't look too bad???

    I'm pretty sure I know how I want the guitar to look, but getting it right is the trick. I am aiming for water based stain, upgrading the pick ups to Seymour Duncans, plus I have a bone nut - which brings me to a question. Do I replace the nut now, or after I build the guitar and get it all aligned and working?

    Again, thanks for the well wishes and tips thus far, it is very much appreciated.

    A few pics below...


  7. #7
    Hey Jamsta, if possible could you take a pretty straight on photo of the body? I’m keen to buy one of these but the photos on the website make the bottom of the body look way wider than the proportions of another certain manufacturers single cut. Just want to see if there photos are taken on an angle of if the proportions are quite different for certain reasons.

    Cheers

  8. #8
    Quote Originally Posted by theabomb View Post
    Hey Jamsta, if possible could you take a pretty straight on photo of the body? I’m keen to buy one of these but the photos on the website make the bottom of the body look way wider than the proportions of another certain manufacturers single cut. Just want to see if there photos are taken on an angle of if the proportions are quite different for certain reasons.

    Cheers

    Hey theabomb, I have this shot which is close to what you're after I hope.

    The proportions are pretty good in my opinion.


  9. #9
    Overlord of Music McCreed's Avatar
    Join Date
    Oct 2018
    Location
    AUS
    Posts
    3,552
    plus I have a bone nut - which brings me to a question. Do I replace the nut now, or after I build the guitar and get it all aligned and working?
    It can be done anytime, as luthiers/repairers replace nuts on finished instruments all the time. However there are advantages to doing it during the build process. Presuming the factory nut is centred and seated properly, it's fine for setting the neck and getting the string alignment right.

    Replacing the nut before you apply any finish means you won't need to touch up the finish afterward. NOTE: it can be done without any damage to the finish, but there is always a risk you may thus requiring a touch up repair to the finish.

    Also the replacement nut nut may require a bit of adjustment to its width and length to make it fit, or you may get lucky and it will drop right in. FWIW, best to fit to the nut to the slot than fit the slot to the nut. String slot depth is a discussion for another time.

    Whether you choose to set the neck and then apply the finish to the whole guitar, or finish the neck and body separately then set the neck, is a personal choice. It can be done either way.
    Making the world a better place; one guitar at a time...

  10. #10
    Thanks jamsta, is it just me or does the binding and veneer near the binding look pretty bad? Hope it all cleans up nicely for your build!

Page 1 of 2 1 2 LastLast

Posting Permissions

  • You may not post new threads
  • You may not post replies
  • You may not post attachments
  • You may not edit your posts
  •