


Hi everyone this is my first build DTL-1SB. My order arrived in Sydney from Perth within 4 business days from ordering at Christmas which is fantastic timing for the break!
The body seems in good condition including the neck sliding in with very little pressure.
My prefered Finish:
Front: Gloss clear, remove pickguard and replace with a silver neck pickup ring and switch cover to reveal most of the spalt
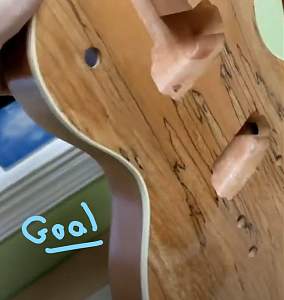
Back: Stain dark with satin finish = see goal image on this post
Upgrades: Pitbull swapped the black hardward out for silver. I have started with locking tuners and bone nut - I will look at better pickups latter.
Issues and questions that I would love to hear suggestions on tackling them please:
1. Small chip where the nut meets the top edge of the headstock - am I best to just round it off and not fill?
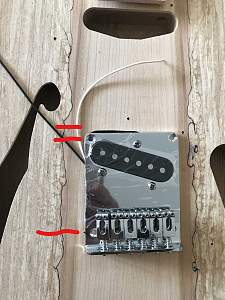
2. The pickguard holes drilled in the splat bear no relation to the pickguard holes. Plus I want to ditch the pickguard so what is the best solution - matchstick glued into the holes before lightly sanding the spalt?
3. If I screwed the bridge on using the predrilled holes you would see the end of the pickup cavity. What is the best approach to this - I assume the best approach is measure nut to 12 fret then double that to identify the bridge location and go from there?
4. Front finish - I am not sure I need to pre stain and sand back etc rather as I would really like a light colour finish overall once it's preped hit it with wipe on poly. How much will the colour change/spalt pop when I clear coat it?
5. Rear finish - I am looking to stain to give it some contrast to the front with satin poly finish on that.
Thanks in advance


 Reply With Quote