


Looks like I'm going to need to take a significant amount of wood off to fit in my pickup upgrade in the bridge route. I don't have access to a router, I do have access to a dremel...? Is this the best I can do with what I have? I have access to chisels but I've never used them before.
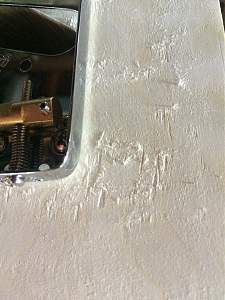
NOTE: I used double sided tape to draw on my measurements, I should have used masking tape, didn't realise how strong the adhesive is and I've done some damage to the veneer!!!! Does anyone know how I can proceed from here?


 Reply With Quote

 Once I've routed the pickup out I'll get some timbermate, coat the cap/veneer and begin sanding. Its all good, its just a learning experience for me, I'll see how it turns out and worst case I'll paint it a solid colour. I'm really after mainly, a playable instrument.


