
Great advice from Waz. One other thing I have found is a drop of dishwashing detergent in the water helps to keep your sandpaper unclogged longer. Good Luck.
cheers,
Gav.


Great advice from Waz. One other thing I have found is a drop of dishwashing detergent in the water helps to keep your sandpaper unclogged longer. Good Luck.
cheers,
Gav.
--
Build #01: BC-1
Build #02: ST-1
Build #03: JR-1DC
Build #04: ES-2V
Build #05: ESB-4 (GOTM July 2014)
Build #06: RC-1
Build #07: MK-2
Build #08: TLA-1
Build #09: JR-1DC
Build #0A: LPA-1
Build #0B: STA-1 (GOTM April 2015)
Build #0C: MKA-2
Build #0D: LP-1M
Build #0E: JB-1
Build #0F: FS-1
Find me:
https://www.facebook.com/firescreek.guitars/
http://www.guitarkitbuilder.blogspot.com.au/

Wasn't so sunny yesterday where some parts recorded well over 100mm. Was out & about in Mooloolaba until late yesterday and must have left the area not long before the mini tornado ripped a roof off a block of units within 400m from where we were. It felt like a cyclone in the middle of winter. All sunshine again today but cooling off as it is winter after all.Originally Posted by Alkay

Hi wazkelly,
Well the weather is still been a bit ordinary here but it is everywhere anyway haha.
I have now got 9 coats of tru-oil on(thought I would do an extra one on top of your advice because I have been heavy handed when sanding).
Do I wet and dry with 1200 and then apply more tru-oil and then move up to the next grit of 1500 once that is dry and so on with oil in between each grit. Sorry I'm just a bit confused about that. Above you said 6 to 8 coats of oil and sand back with 0000 steel wool or wet and dry. You also mentioned that sanding back may be done 2 or 3 times.
Or
Do you mean that I should sand back with 1200 wet and dry, apply a few more coats of oil repeating this process 2 or 3 times and then just work through to 1200 the last time and then 1500, 2000 and then the micro mesh of 4000, 6000, 8000, then 12000 before I add the car polish.
Also I watched a video where they said to soak the wet and dry overnight. Do you do this or doesn't it matter?
I just wanted to double check your advice before I go further. Don't mean to sound vague, I'm just not understanding the process step by step as I have never done this before. My last guitar neck with tru-oil was very very average but I will fix it when I know how.
Cheers,
Alkay.
Thanks Gavin,
I've got a bit of a way to go with this wet and dry but I'll take your advice with the dishwashing detergent. Thank you.
I checked out your blog site and wow you have some really awesome builds.
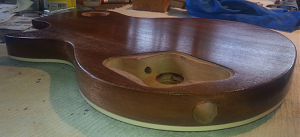
Ok so here's an update. These pictures are with 9 coats of Tru-oil with no sanding at all.

looking good Alkay, how many more naughty oil coats you planning ? Should have enough coats to let it cure and wet sand it I'd say
Current Builds and status
scratch end grain pine tele - first clear coat on !
JBA-4 - assembled - final tweaks
Telemonster double scale tele - finish tobacco burst on body and sand neck
Completed builds
scratch oak.rose gum Jazzmaster - assembled needs setup
MK-2 Mosrite - assembled - play in
Ash tele with Baritone neck - neck pup wiring tweaks and play in
Here's a picture before I tried the wet and dry 1200.
-------------------------------------------------------------
....and now for the mistake. I thought I followed everyone's advice and also checked some videos too for tips.
I wet and dry sanded a small section of the side of the body from the neck to near the pickup selecter cavity area.
Wet and dry was soaked overnight in water and dishwashing detergent.
The section I sanded has left streaks in the finish. I used cork sanding block and made 4 smooth even passes in the same direction.
This was looking like a beautiful finish before I attacked it. I appreciate any help.
Cheers,
Alkay.
I hope you can see the damage in the picture.

.....haha probably hundreds after the above mistake I just posted. It's really disappointing. It was looking really nice.
Hi Alkay bit hard to see in the bottom photo. What grit paper did you use to wet sand ? EDIT just read you used 1200 grit
how long since the last coat of tru oil when you wet sanded ?
my guess is the tru oil maybe hadn't fully cured
Last edited by wokkaboy; 28-06-2016 at 11:03 AM.
Current Builds and status
scratch end grain pine tele - first clear coat on !
JBA-4 - assembled - final tweaks
Telemonster double scale tele - finish tobacco burst on body and sand neck
Completed builds
scratch oak.rose gum Jazzmaster - assembled needs setup
MK-2 Mosrite - assembled - play in
Ash tele with Baritone neck - neck pup wiring tweaks and play in
Heres a better picture so you can see the damage of the 1200 wet and dry sanding.
9th coat of Tru-oil went on 25/06/16. It has been drying in the lounge room near the fire place which is on mostly 24/7.
How long should have I waited?
Cheers,
Alkay.
Last edited by Alkay; 28-06-2016 at 11:12 AM.

 Reply With Quote
