tommycarlos
Member
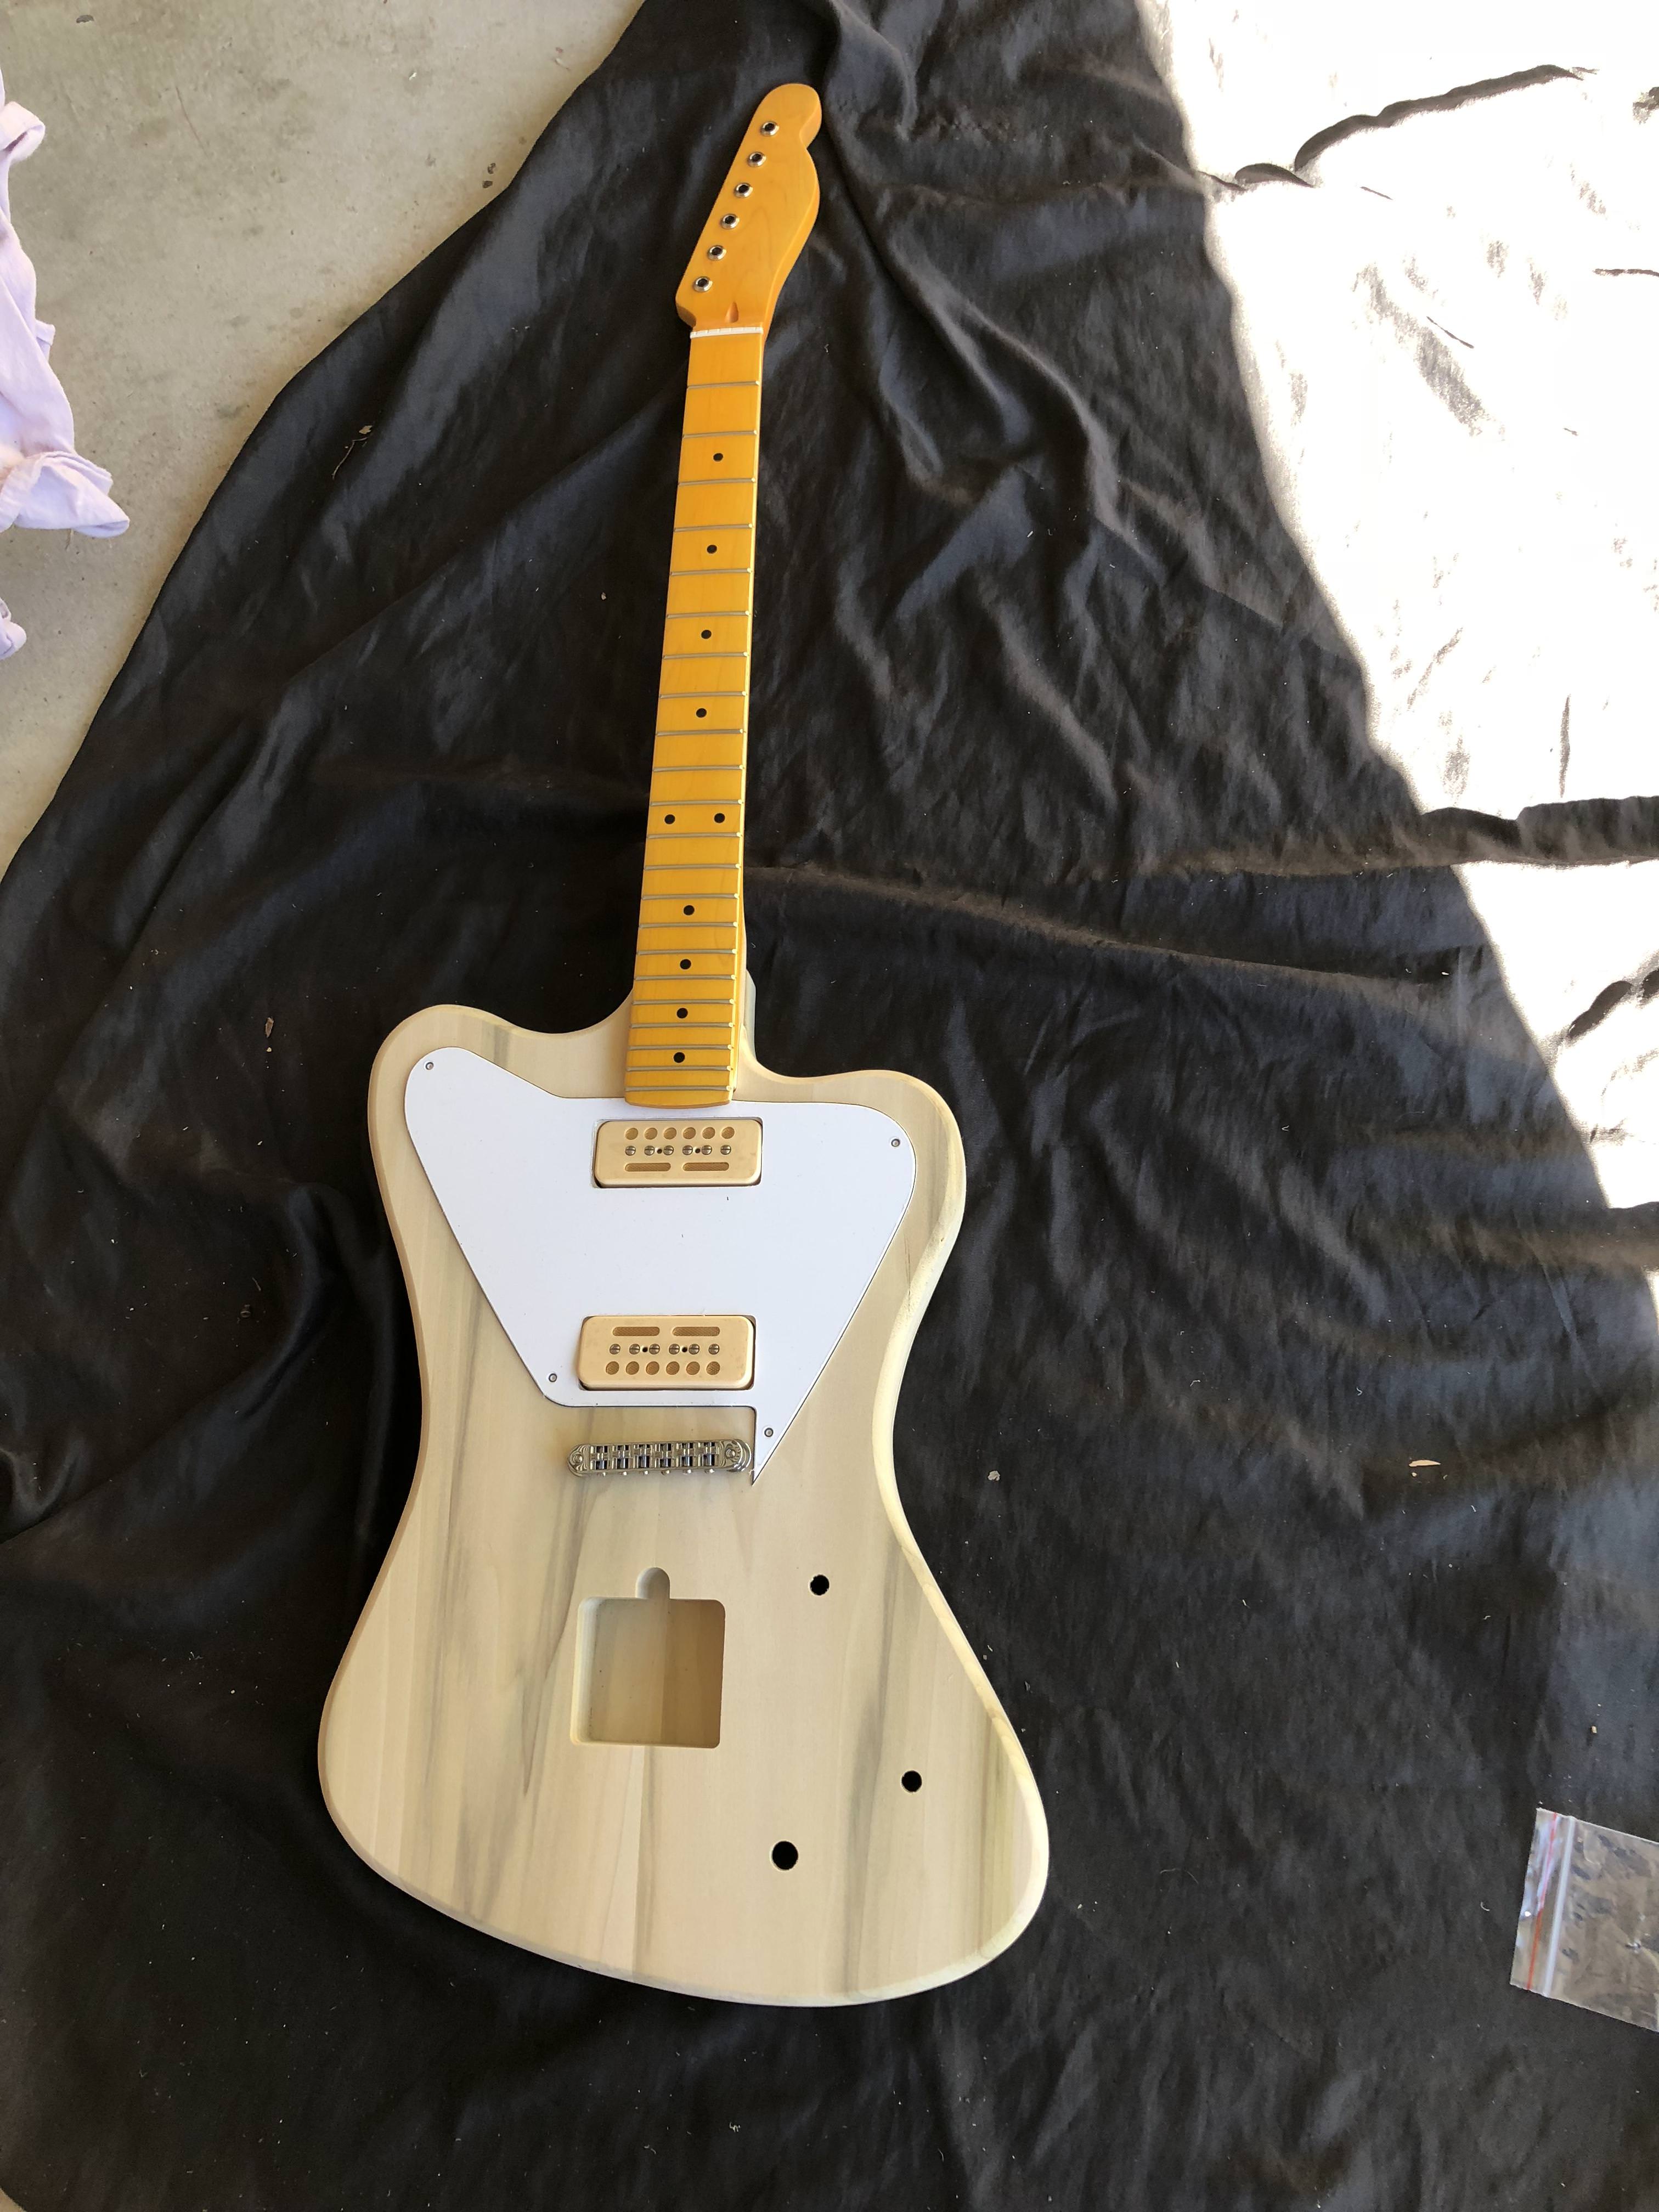
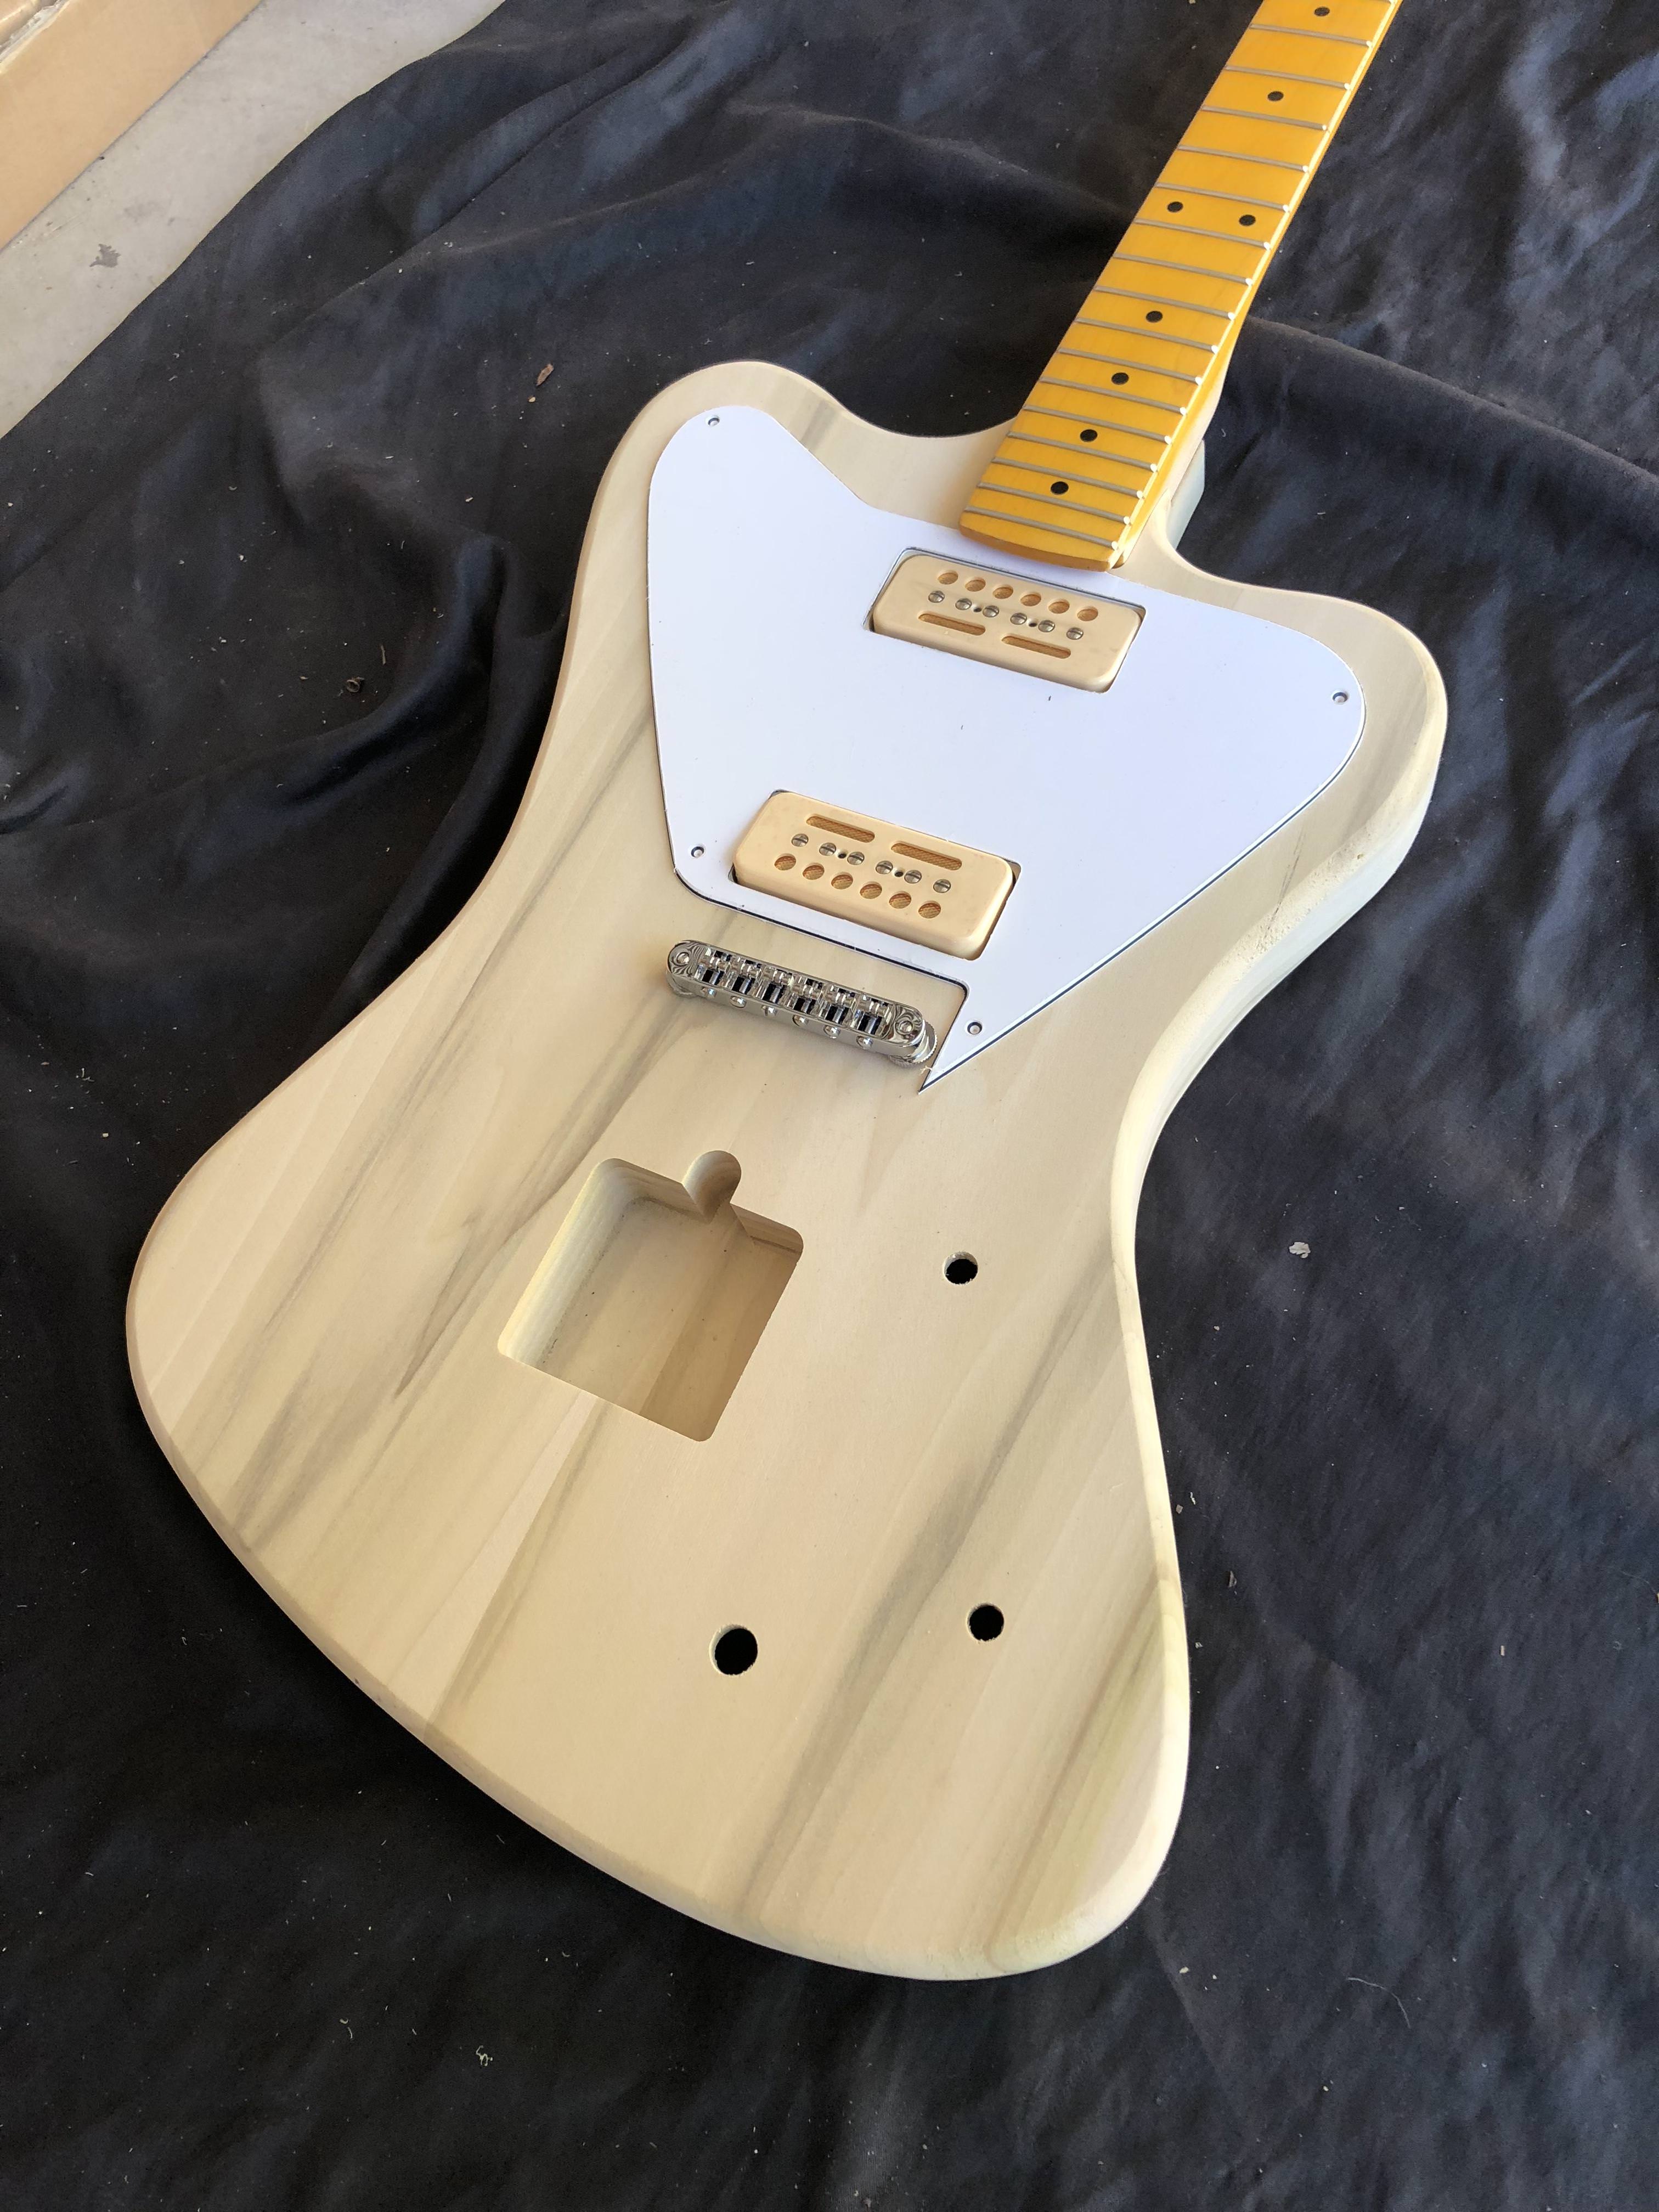
My dream guitar for the longest time has been some variation on a Non-Reverse Firebird (NRFB). However, when I was playing Gibsons, they didn't have a model available for a decent amount of money... and now that they do, I am pretty in love with Fender style offsets (especially that vibrato and single coil pickups, etc).
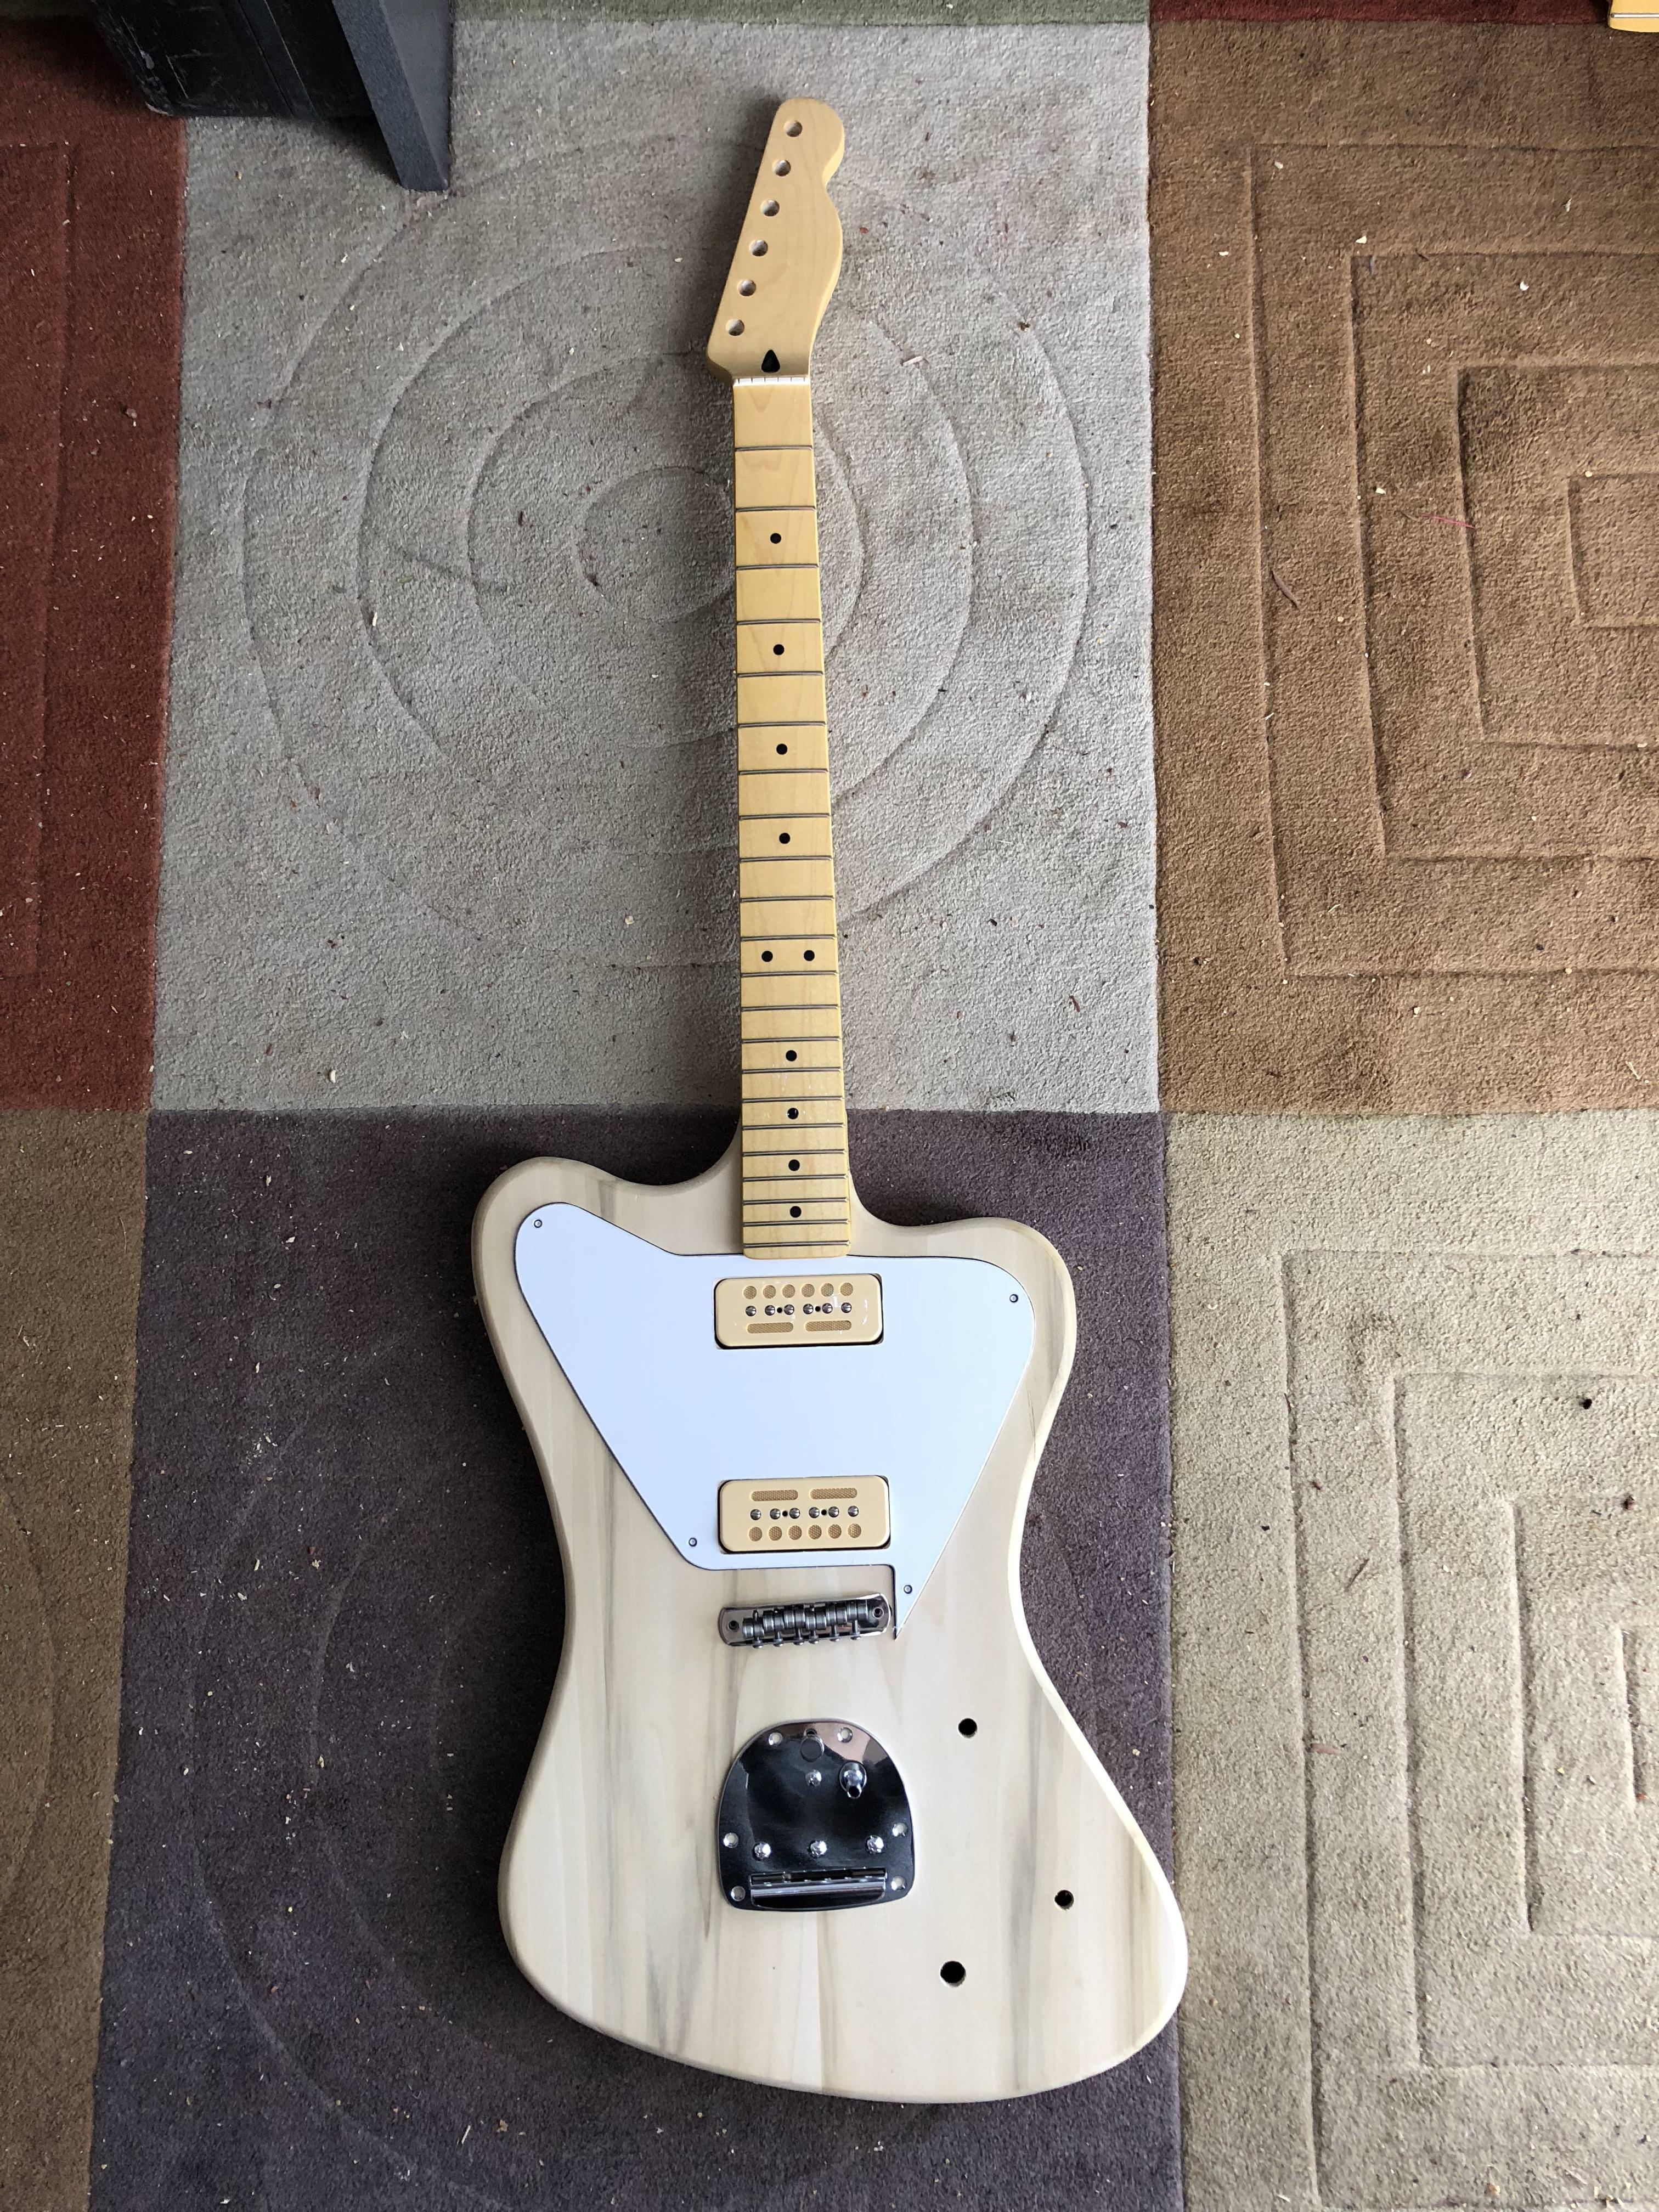
Therefore.. I have had this dream of getting someone to make me a NRFB, but with a bolt on neck, single coil pickups, and a Jazzmaster vibrato. However, that also looked like it could only be done by pawning one of my (actual flesh and blood) children, and I am far too fond of them to do that.
Along comes Pitbull guitar kits, and I start to think that as long as I could find someone to make an NRFB body routed for a JM vibrato... I could build this from parts myself!
Once I talked to Rosser Guitars in North Carolina, it all started coming together. Since I pulled the trigger on getting the body made, I have been sourcing the other parts from all over the place. I _think_ the last parts (a Mighty Mite Tele neck and a good aftermarket JM vibrato) will be here early next week! (until then I have some lower quality parts I can use for mocking up and measuring etc).
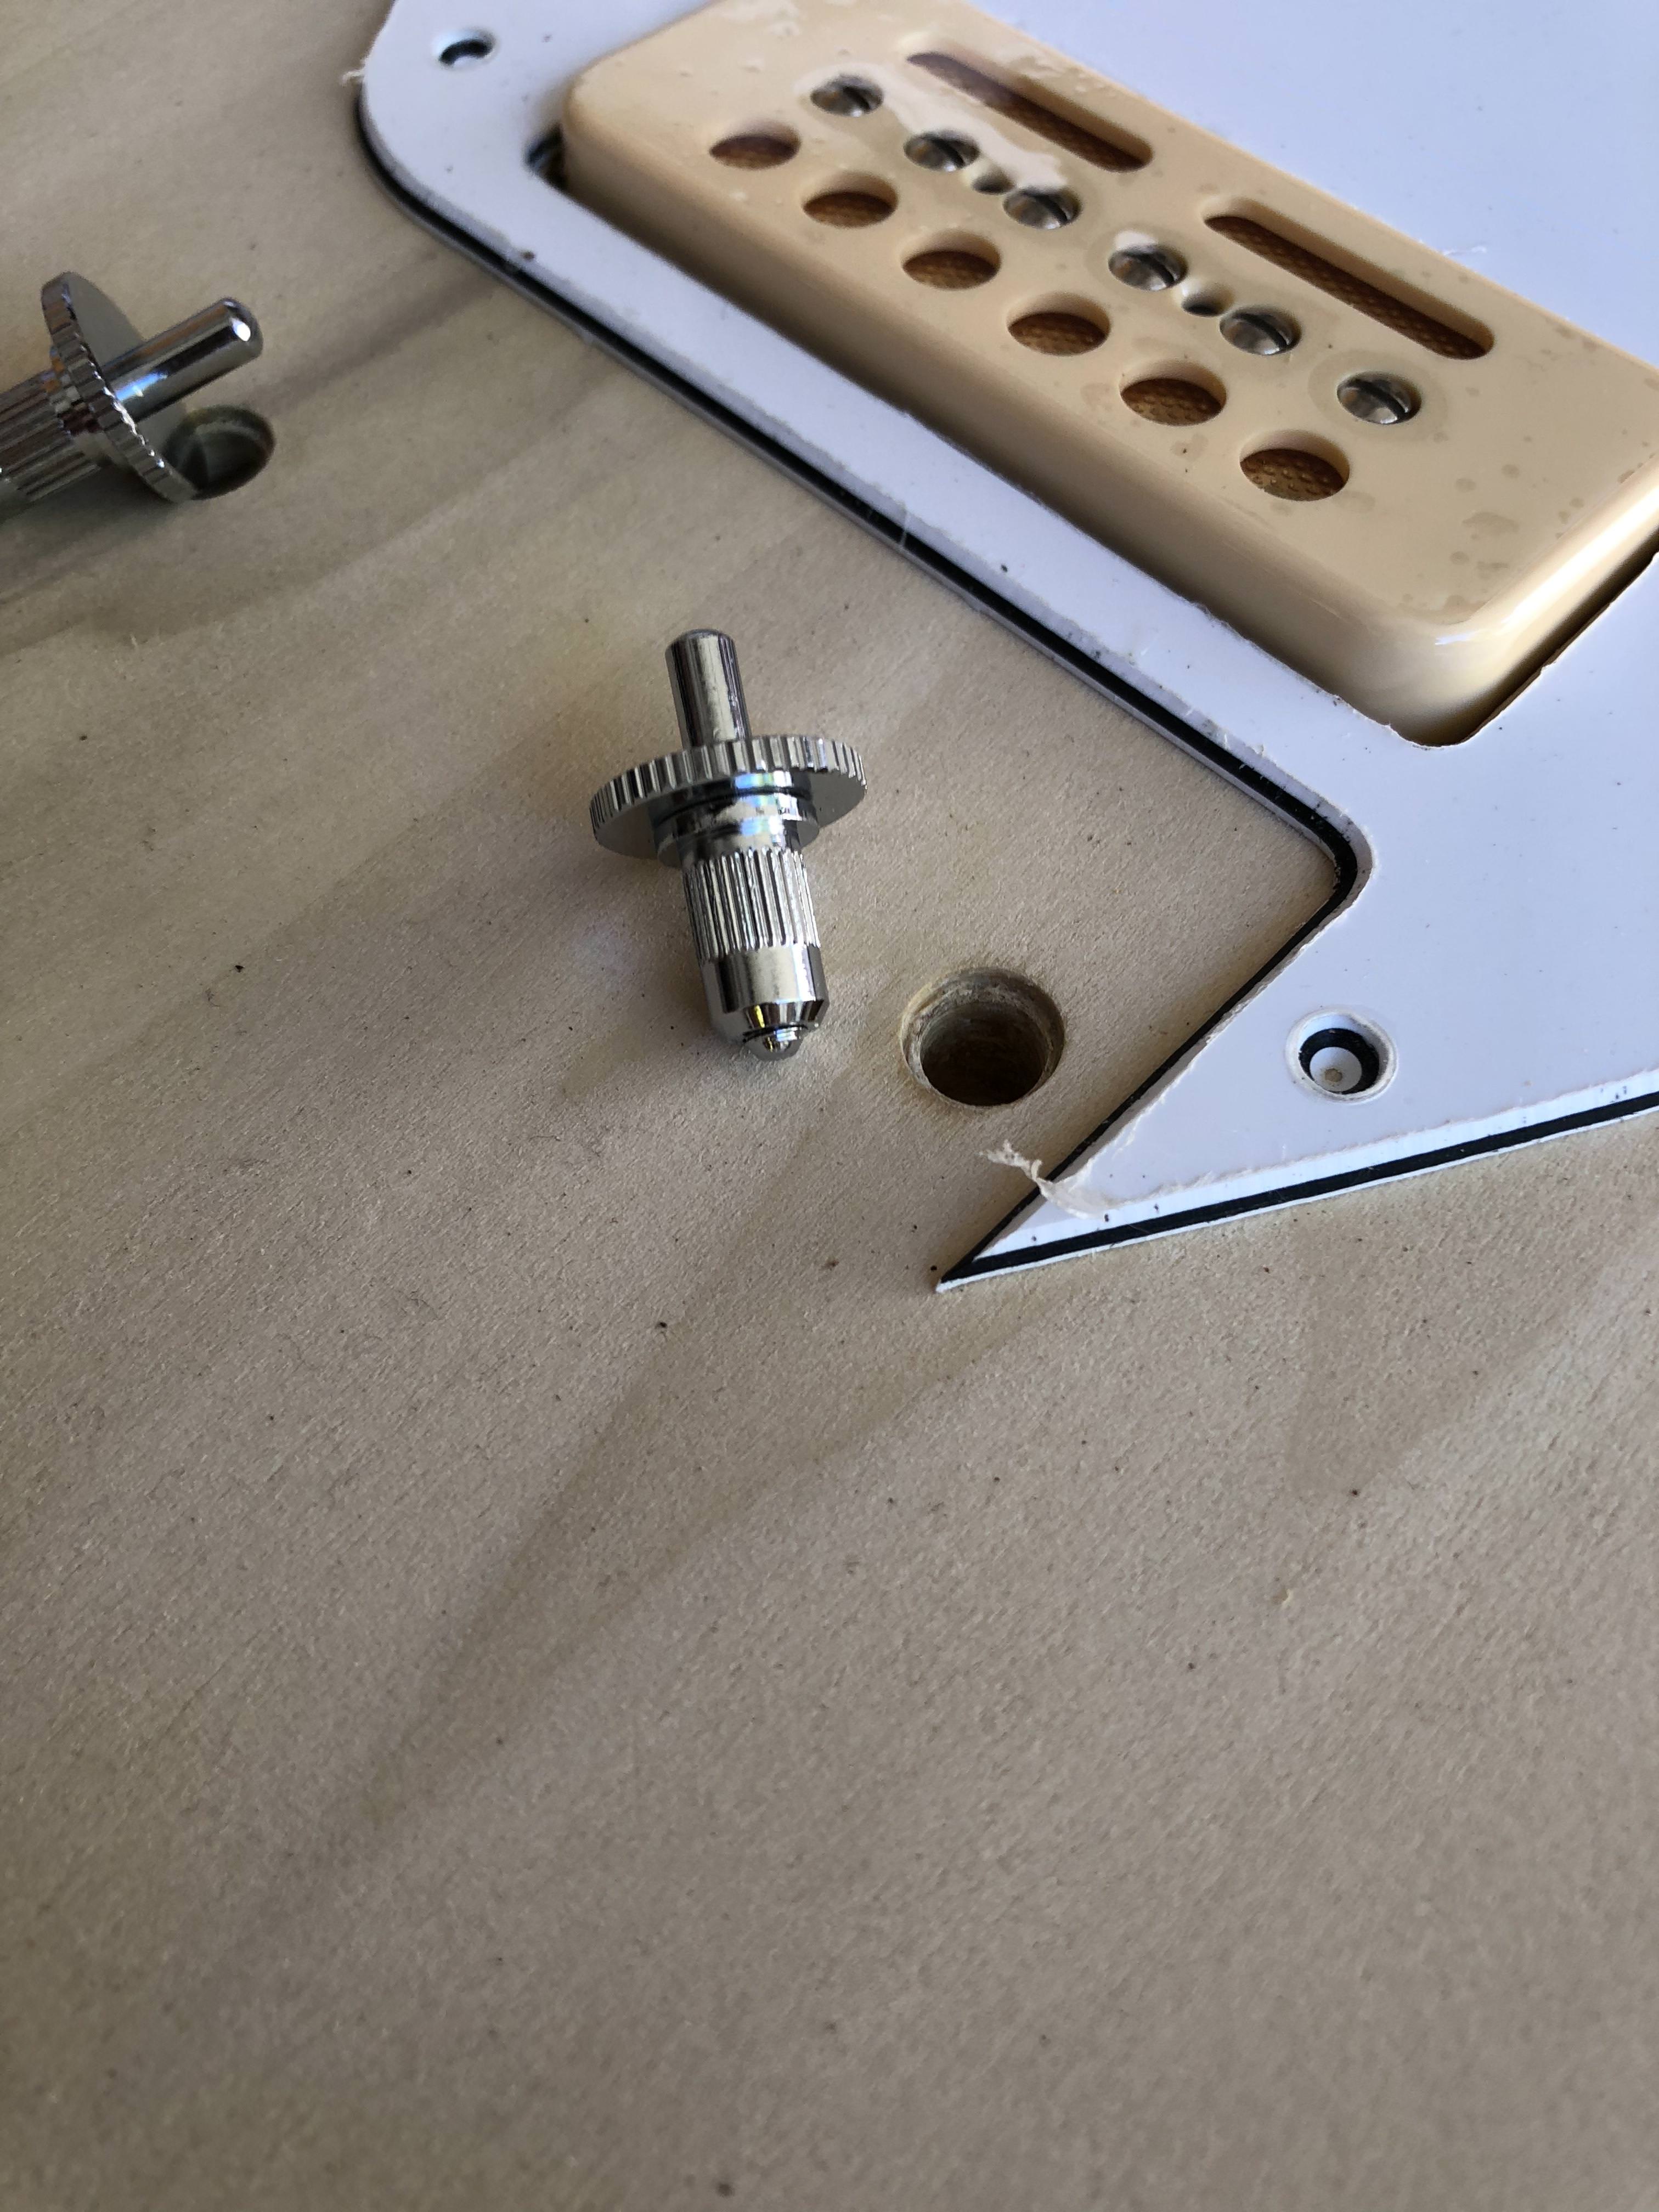
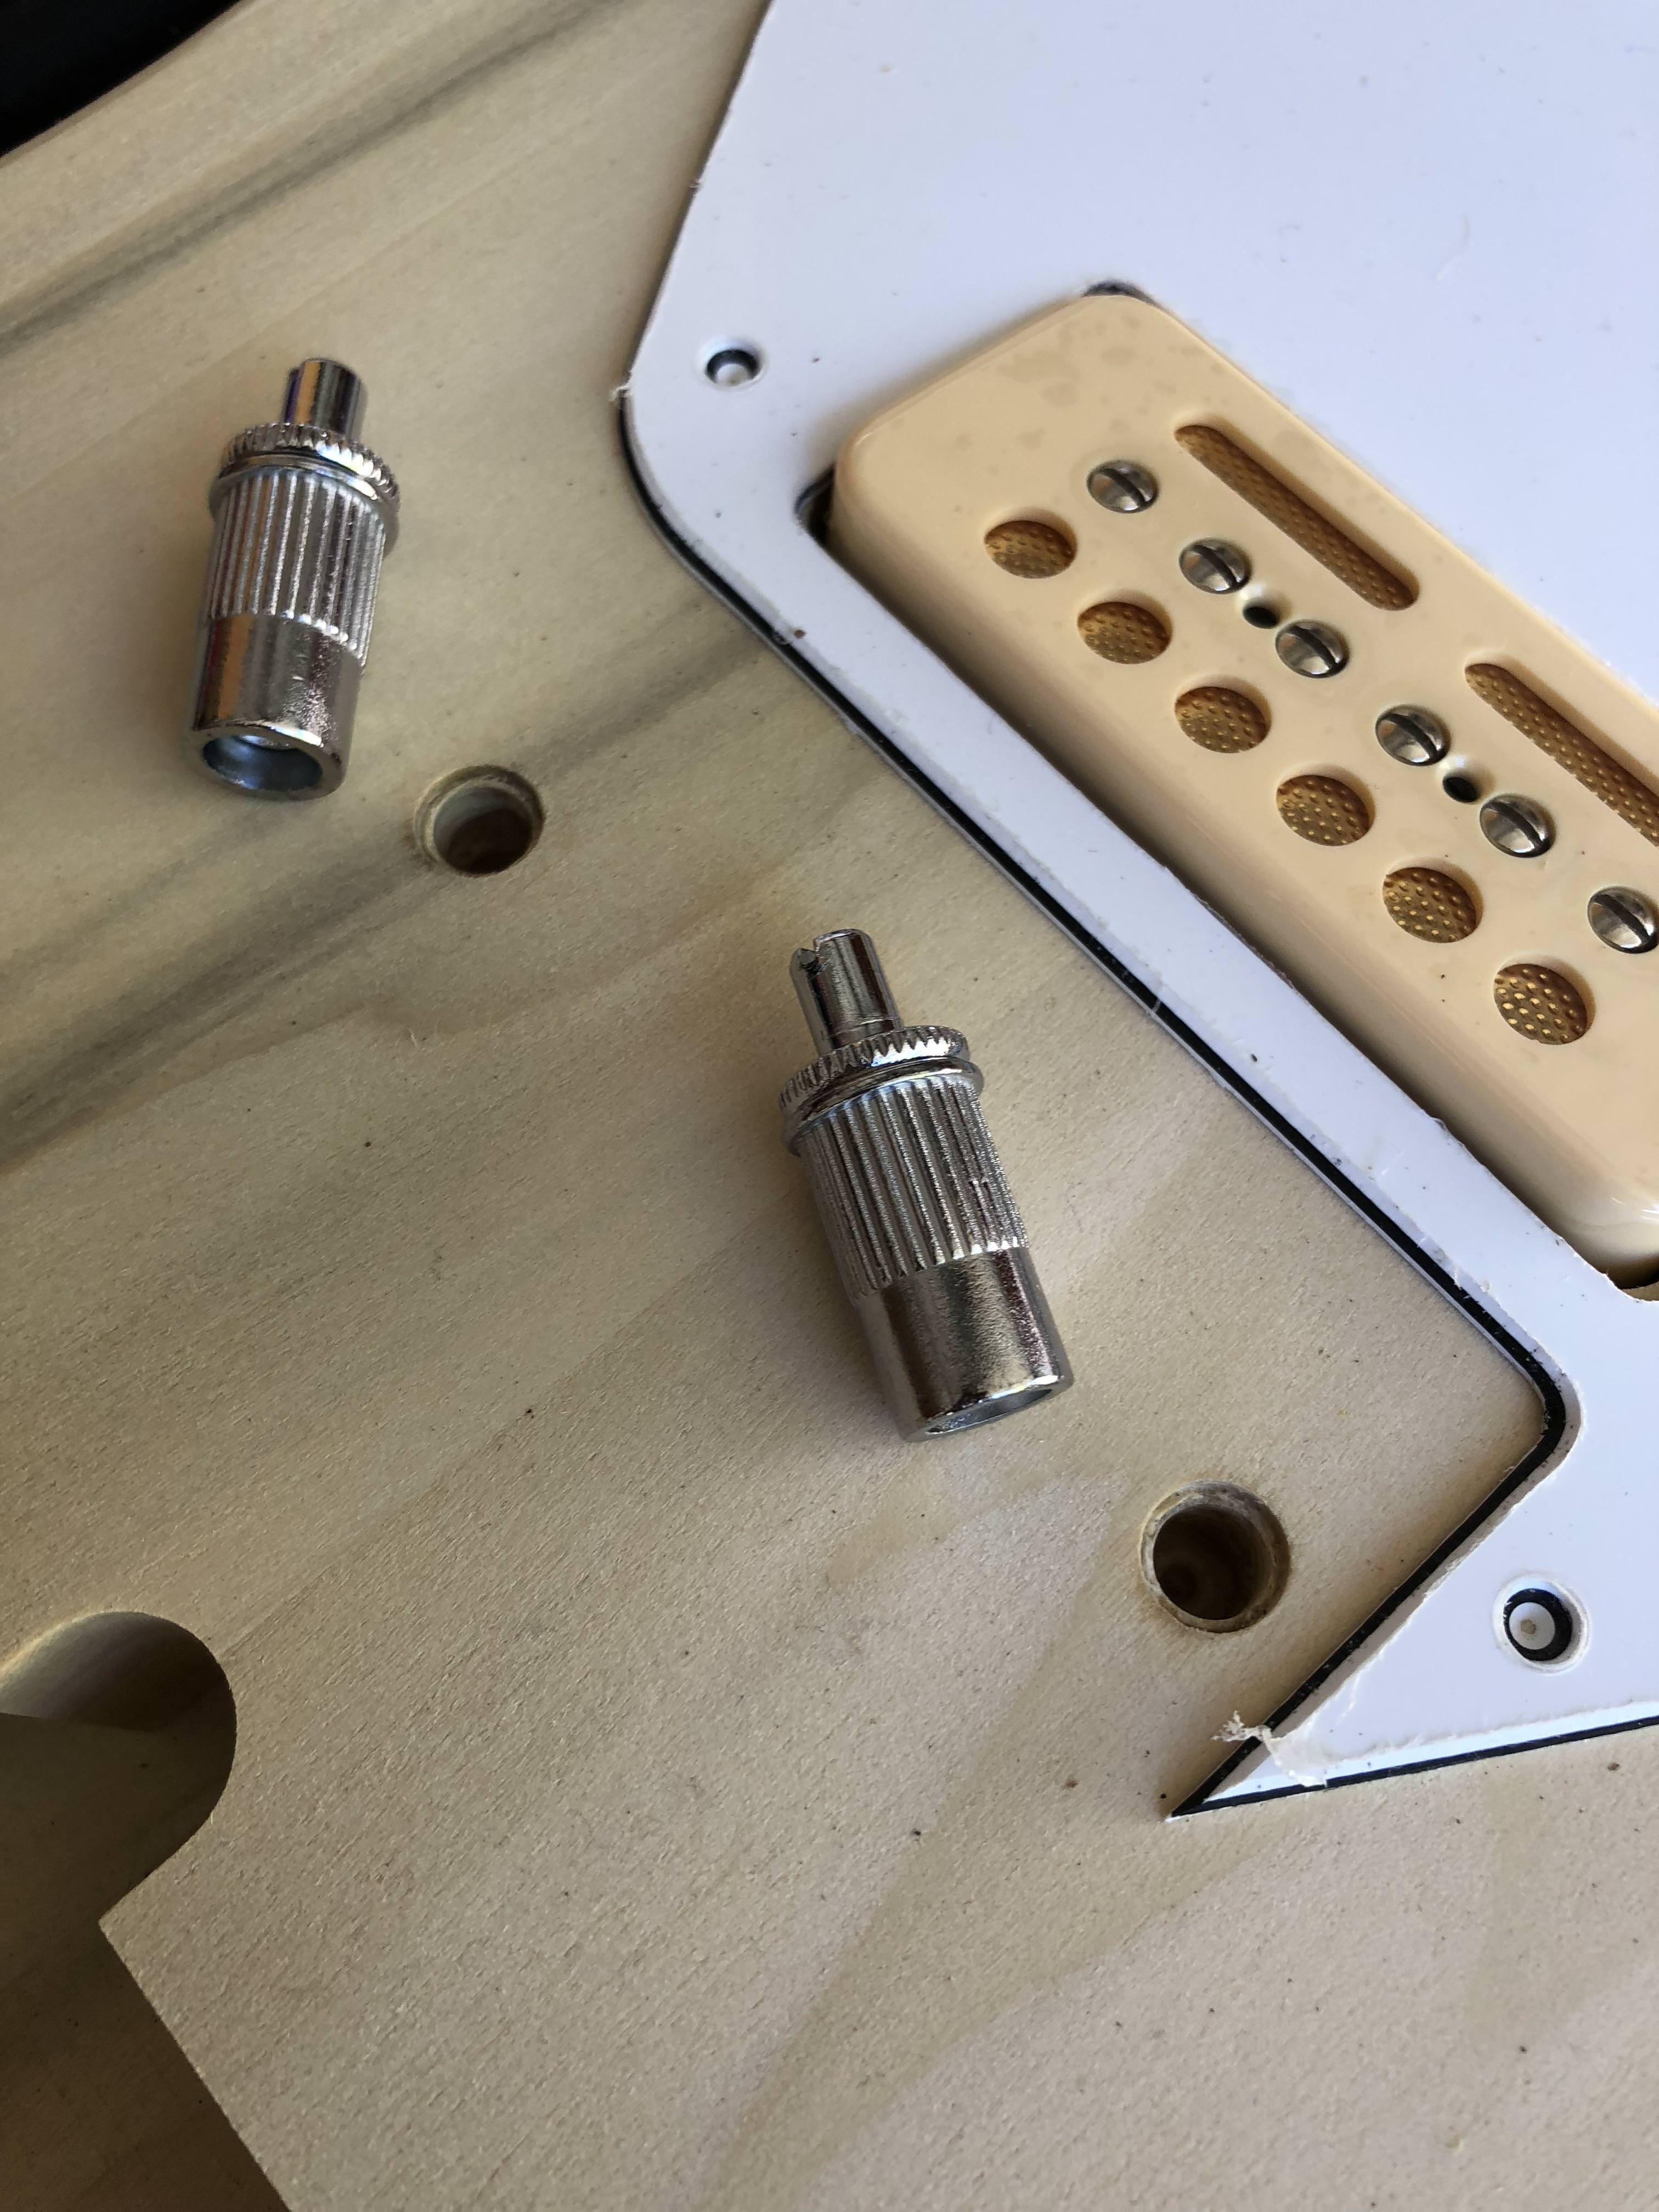
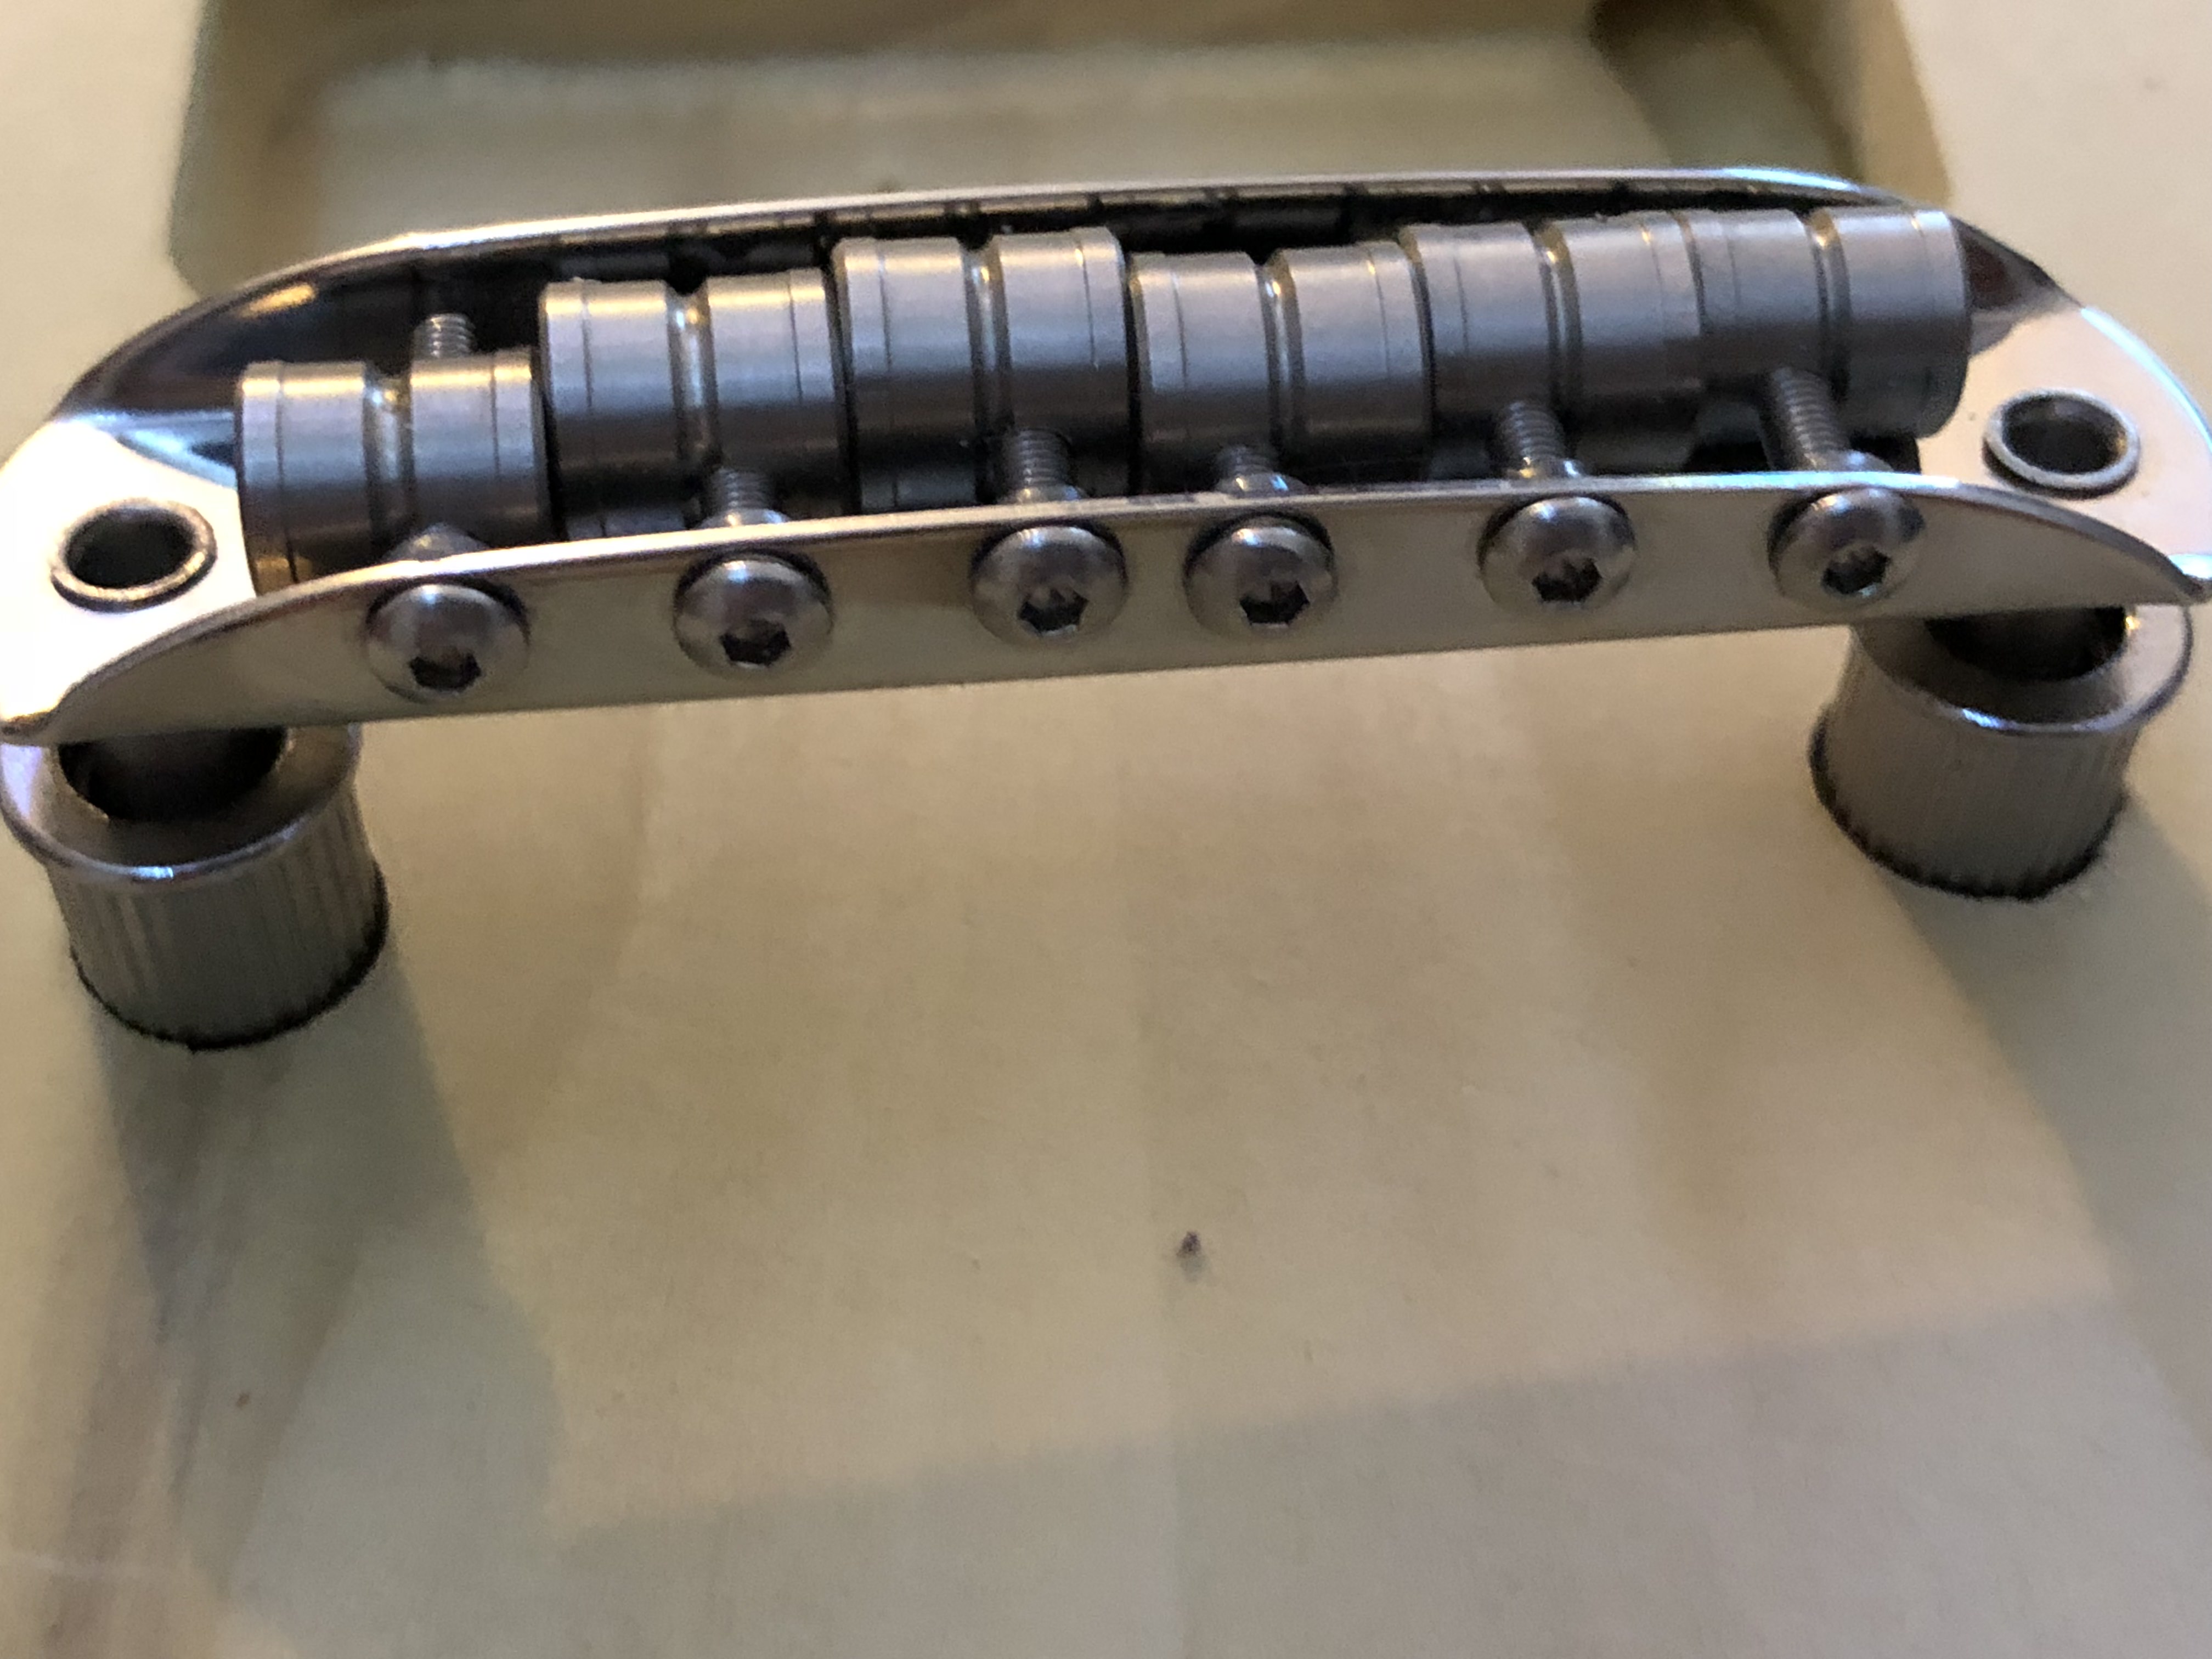
There is one sour note, however. The body arrived yesterday and I discovered something I didn't know before. I was under the impression that there were two types of TOM bridge: the older ABR-1 style with the small posts and the wheel for adjustment, and the newer style like you see on many guitars like the Pitbull JZ-1 kit, my Squier J. Mascis Jazzmaster, etc. I thought this newer style with the larger posts and the flat-head screw adjustment was the one called a Nashville.
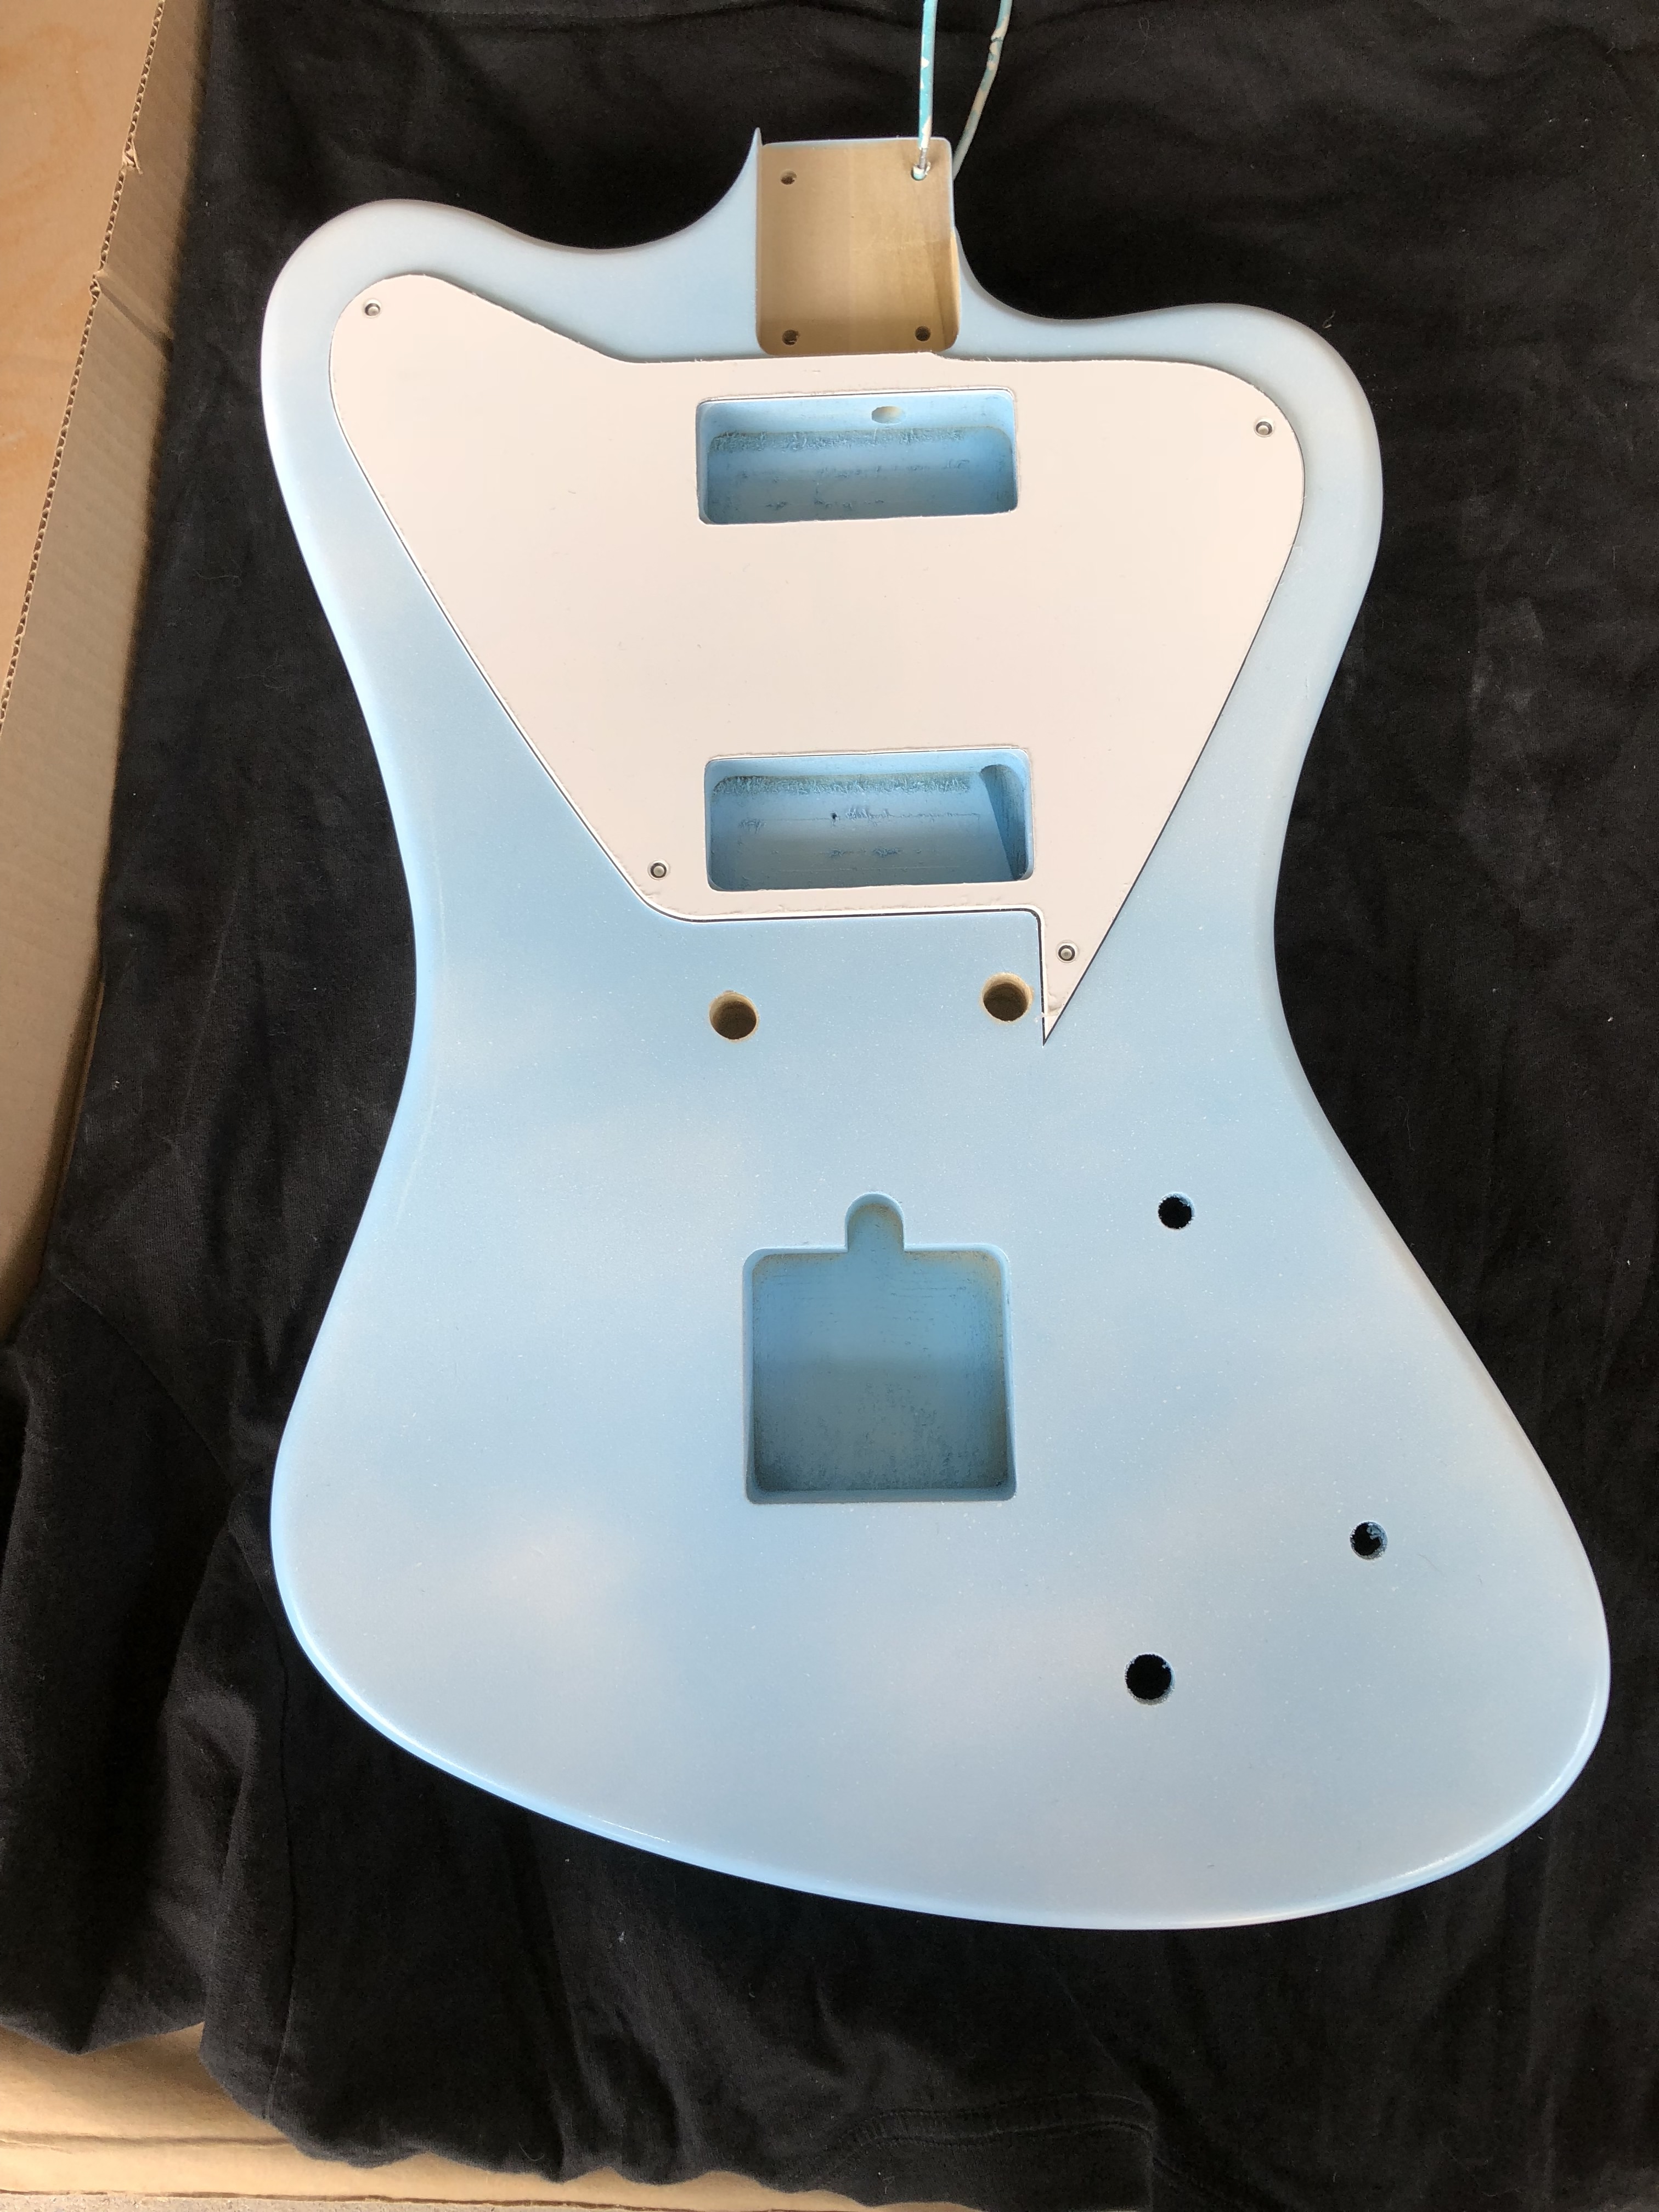
Nope. There are three variations, really. The Nashville is a small post and wheel type, but it sits in thimbles like the newer one instead of going directly into the body like the actual old ABR-1. Sadly, I specifically asked Rosser Guitars for a Nashville bridge route, and that's what I got. D'oh!
I had been wanting to use either a roller bridge TOM or (even better) my StayTrem AOM replacement that is currently on my Squier J. Mascis JM. I was going to decide depending on the radius of the neck I settled on... and since the Mighty Mite is 9.5", I was really hoping to use the StayTrem. It is a drop-in replacement for the newer style TOM with the larger posts and thimbles... but clearly won't fit on the NRFB body that arrived yesterday.
So, before I can do anything else, I need to work out just how difficult it will be to modify the body to take the bridge I *actually* want instead of the one I mistakenly thought it was
Pictures of everything to follow ...stay tuned.
Therefore.. I have had this dream of getting someone to make me a NRFB, but with a bolt on neck, single coil pickups, and a Jazzmaster vibrato. However, that also looked like it could only be done by pawning one of my (actual flesh and blood) children, and I am far too fond of them to do that.
Along comes Pitbull guitar kits, and I start to think that as long as I could find someone to make an NRFB body routed for a JM vibrato... I could build this from parts myself!
Once I talked to Rosser Guitars in North Carolina, it all started coming together. Since I pulled the trigger on getting the body made, I have been sourcing the other parts from all over the place. I _think_ the last parts (a Mighty Mite Tele neck and a good aftermarket JM vibrato) will be here early next week! (until then I have some lower quality parts I can use for mocking up and measuring etc).
There is one sour note, however. The body arrived yesterday and I discovered something I didn't know before. I was under the impression that there were two types of TOM bridge: the older ABR-1 style with the small posts and the wheel for adjustment, and the newer style like you see on many guitars like the Pitbull JZ-1 kit, my Squier J. Mascis Jazzmaster, etc. I thought this newer style with the larger posts and the flat-head screw adjustment was the one called a Nashville.
Nope. There are three variations, really. The Nashville is a small post and wheel type, but it sits in thimbles like the newer one instead of going directly into the body like the actual old ABR-1. Sadly, I specifically asked Rosser Guitars for a Nashville bridge route, and that's what I got. D'oh!
I had been wanting to use either a roller bridge TOM or (even better) my StayTrem AOM replacement that is currently on my Squier J. Mascis JM. I was going to decide depending on the radius of the neck I settled on... and since the Mighty Mite is 9.5", I was really hoping to use the StayTrem. It is a drop-in replacement for the newer style TOM with the larger posts and thimbles... but clearly won't fit on the NRFB body that arrived yesterday.
So, before I can do anything else, I need to work out just how difficult it will be to modify the body to take the bridge I *actually* want instead of the one I mistakenly thought it was
Pictures of everything to follow ...stay tuned.