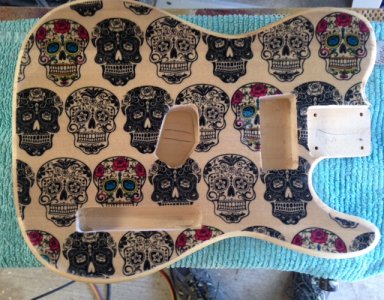
TL-1 Build....well 1/2 of one???


Firstly a big thankyou to Adam for finding me a TL-1 body only, I wanted to do some experimenting with fabric so this was perfect.
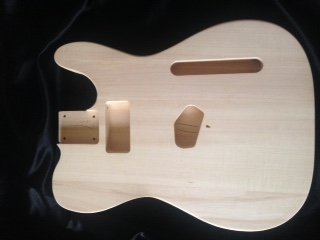
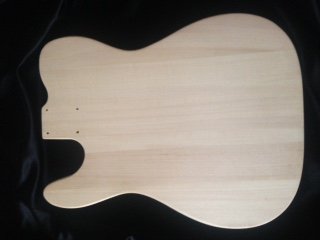
The body arrived this morning and the sanding guy or girl at the factory did an awesome job, might have been the first one of the day, cause this body is pretty schmick.
Clean routs no tearouts and nicely sanded even on the cutout yay!
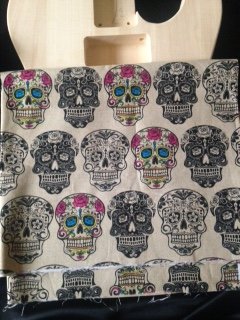
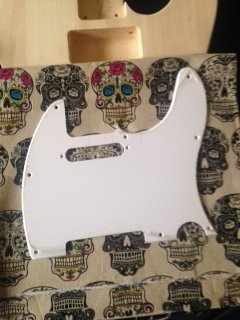
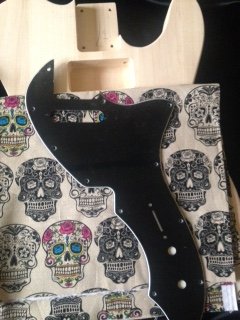
See the attached photos for more details including the fabric which is a 100% cotton quilting fabric in an awesome sugar skulls print. I will probably spray the back and sides black. The white pickguard came with the body (thanks Adam) which I will use as a template for cutting the black pickguard. I want to leave as much body showing as possible.
Neck and hardware, will depend on how much of a success or failure this turns out to be:rolleyes:
 

Attachments

  • IMG_0797.JPG
    IMG_0797.JPG
    22.9 KB · Views: 242
  • IMG_0798.JPG
    IMG_0798.JPG
    20.2 KB · Views: 235
  • IMG_0799.JPG
    IMG_0799.JPG
    66 KB · Views: 247
  • IMG_0801.JPG
    IMG_0801.JPG
    53.4 KB · Views: 240
  • IMG_0802.JPG
    IMG_0802.JPG
    57.1 KB · Views: 255
I'm watching with interest Euroa! Can you give us some detail about your process? I'd really love to do something like this myself.

cheers,
Gav.
 
I'm watching with interest Euroa! Can you give us some detail about your process? I'd really love to do something like this myself.

cheers,
Gav.

Hi Gav

I've never done fabric before (paper yes but not fabric), but I think I will use a fibreglass resin to apply the fabric and then rout the edge with a round over bit once it has hardened to clean it up then apply a burst to hide the edge. Seen a couple of guys do it on youtube with mixed results. One famous guitar youtuber WEG (initials) did it with a vacuum press, but if you look closely you can see bubbles and he doesn't show the finished guitar!
So I might film it and see what happens!
 
Very cool. There is another build on here somewhere (i'll try to find it) where they used one of those "like glass" resins to set the fabric. The results seemed to come out very nicely. I was wondering if you could do this and hide the edge with binding. That's what I thinking of trying anyway. Might be a good experiment for a cheap pine scratch body methinks...

cheers,
Gav.
 
Also look up Solarez, like a surfboard resin that some use for guitars - a thick clear glassy resin that sets under UV light
Some YouTube vids on it.
Hard to find but I think Perry Ormsby in WA sells it
Or just a billion coats of nitro....
Cool project
 
Looks like a really cool concept. I've got a guitar that has a semi-transparent screen-printed fabric over the top of the quilt, and it's a really interesting effect. Very keen to see how this goes, and to hear about your methods.
 
The process of sticking fabric to a guitar body

I'm watching with interest Euroa! Can you give us some detail about your process? I'd really love to do something like this myself.

cheers,
Gav.

Hi Gav this ones for you, the process so far:

1 Sand body to 240 grit to leave a key for the resin
2 Tape edges and neck pocket to help with any drips
3 Cut out fabric with a 5mm overhang (I used quilting cotton as it has a little more weight to it)
4 Place tissue into cavities so fabric doesn't collapse into them
5 Iron fabric to remove any creases
6 Place fabric on guitar and mix fiberglass resin according to instructions
7 Using a wide short bristle brush apply resin, smooth out with a wide spatula or scraper. Make sure you have a good . coverage and that there are no air bubbles. I applied a little resin to one side and then the other side first to help . . stick it down
8 Leave to tack off for 4hrs
9 Using a sharp blade trim edges and cut out cavities
10 Allow to dry for 24 hrs then apply another coat of resin to make sure all the fabric is coated and help stick down the . edges around the cavities etc.

I'm now up to the stage of routing the edges, so far its gone really smoothly with no air bubbles... be warned the resin stinks don't do it in the kitchen like I did, the Mrs wasn't too happy!:o

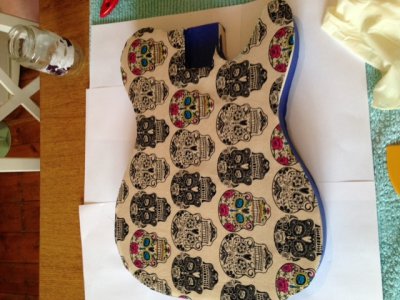
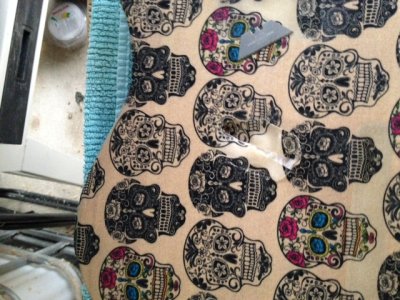
Photos #1 Fabric laid out #2 Resin applied and cutting cavities out #3 Ready for routing edges sanding and topcoat (picture quality not the best but it is actually as dark as the first two photos)
 

Attachments

  • IMG_0858.JPG
    IMG_0858.JPG
    146.2 KB · Views: 226
  • IMG_0863.JPG
    IMG_0863.JPG
    174.8 KB · Views: 199
  • IMG_0871.JPG
    IMG_0871.JPG
    146.3 KB · Views: 207
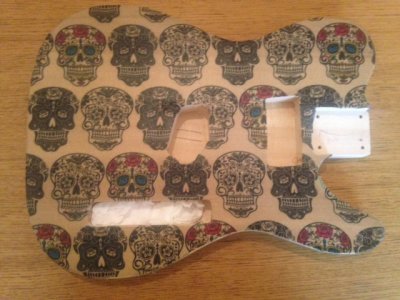
Here's a photo after edge routing and sanding top to 600, wet down for photo.
Next black tint to sides back and front bevel.
 

Attachments

  • FullSizeRender (39).jpg
    FullSizeRender (39).jpg
    188.2 KB · Views: 181
cool effect Euroa, this will be a very cool tele, keep it way from the tele napper if he is a fan of skull pattern axes ! haha
 
cool effect Euroa, this will be a very cool tele, keep it way from the tele napper if he is a fan of skull pattern axes ! haha

Haha, thanks Wokkaboy... I'm waiting on a pre finished neck to come in which is maple with black dots, and the hardware is black and chrome so should look cool, I was going to go all black but it looked a bit too dark. Back and bevel and sides are now stained black, starting to come together pretty quickly.
 
so will you have skull fret markers ? sure you can get stick on ones. Presume it will also have skull volume/tone knobs ?

will the headstock have the skull pattern on as well ?

I think the biggest threat for a tele nap would be Dedman ! he loves skulls !
 
Back
Top