The EX-4 Explorer Bass: An expedition into the world of kit guitars

Howzit,

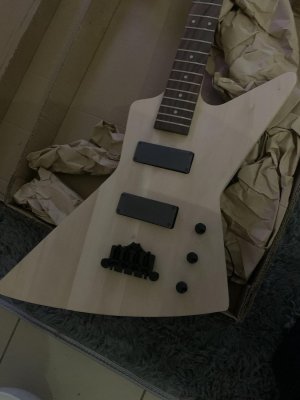
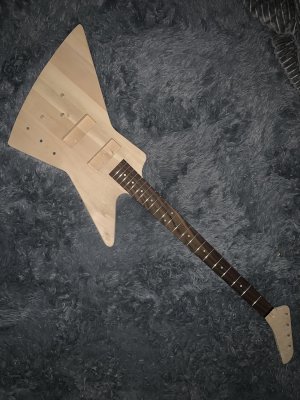
My EX-4 kit arrived today and I couldn't be happier.

I did a mock build, checked scale length, string spacing etc and all is good :D

I'll be waiting until the weekend to get started but figured it was time to start the diary.
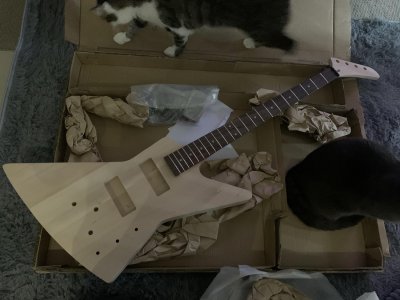
 

Attachments

  • zemSeQ3.jpg
    zemSeQ3.jpg
    423.7 KB · Views: 262
  • A9YTgIt.jpg
    A9YTgIt.jpg
    360.3 KB · Views: 254
Glad the kit all fits nicely.

The bridge is the weakest part of the kit. It's a not-so-great copy of a pretty poor original bridge design. The post inserts are quite shallow and they do have a tendency to pull out. Also, the black coating isn't conductive, so you need to scrape it away where the bridge parts touch each other in order to ground the bridge and strings.

Best of luck with your build!
 
…The bridge is the weakest part of the kit. It's a not-so-great copy of a pretty poor original bridge design…

This, and my own experience with a bridge not fitting makes me wonder why PBG doesn’t at least offer the option of ordering a blank, undrilled body, so the builder could add the parts they prefer.

Regardless, it looks like a fun build. Keep us updated.
 
Hey Simon thanks for your input.
I own a Gibson Thunderbird so I’m pretty familiar with the 3 point bridge (which I really don’t mind), so I’ll see how this one goes. Worst case scenario I’ll replace the bridge if it causes too much drama.
 
G
The bridge is the weakest part of the kit. It's a not-so-great copy of a pretty poor original bridge design. The post inserts are quite shallow and they do have a tendency to pull out. Also, the black coating isn't conductive, so you need to scrape it away where the bridge parts touch each other in order to ground the bridge and strings.

The post holes on mine were actually fairly deep and tight enough that I needed to help them in with a rubber mallet. You can lower the action a bit by counter sinking the heads of the posts.
 
Hey rabbit, my post holes seem plenty deep enough so hopefully I’ll be fine.
I think I’m one of the very rare people that actually like the 3 point bridge, yeah they can be a pain but after playing a thunderbird for the last 10 years set up is a breeze for me.

Fingers crossed it’ll be fine.

I’ll start sanding and staining this weekend, then it will be a month or so hanging in cupboard to dry the oil based stain I am making before putting any clear coats on.
 
Last edited:
So I didn't do anything Saturday, but I've sanded the body now (120/180/240). It looks and feels good.

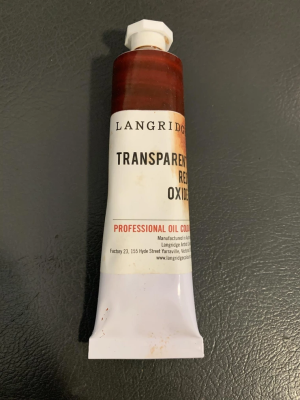
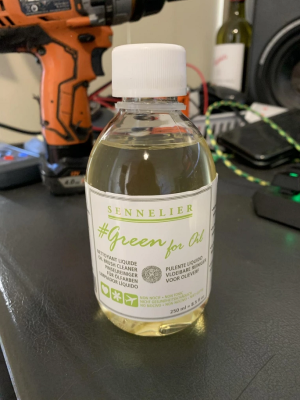
I finally bought my oil paint and medium today. I went with Langridge "Transparent Red Oxide" and "Green for Oil" by Sennelier.

The medium is odourless and environmentally friendly, which helps as the body and neck will be hanging in a cupboard for a month or two drying.
 

Attachments

  • 6Fq6uBY_d.png
    6Fq6uBY_d.png
    883.4 KB · Views: 248
  • gSZwP6F_d.png
    gSZwP6F_d.png
    942.8 KB · Views: 238
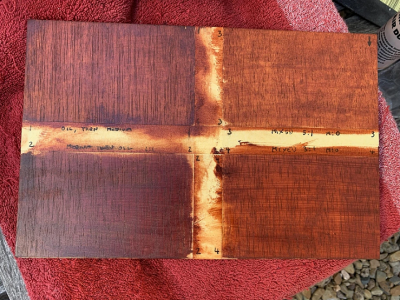
I did this tester piece.

1:Oil down first, then Medium was added
2:Medium down first, the Oil was added
3:Mixed approximately 5:1 ratio Medium:Oil
4:Mixed approximately 3:1 ratio Medium:Oil

This picture is after 30 minutes, but I will leave it for at least 24 hours before I do some more testing on the other side of the scrap wood.
 

Attachments

  • hIuGhNc_d.png
    hIuGhNc_d.png
    959.6 KB · Views: 231
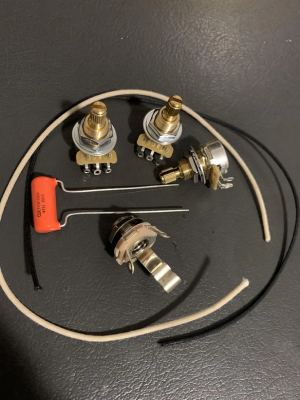
My electronics arrived today;

1x Switchcraft 1/4" mono jack
1x Sprague .047mfd Orange Drop capacitor
3x 500k CTS Audio Taper Mini Pots
1 foot of black cloth wire
1 foot of white cloth wire

Not required for a few more months yet, but I'm glad to have them though as despite ordering "mini pots" it is now clear that I'll have to drill larger holes because the pre-drilled holes are 8mm and the CTS pots are 3/8".

8mm seems like a strange size to me as I've only ever had 3/8" pots in every guitar I've ever worked on, but I am quite thankful to discover this before painting/finishing.
 

Attachments

  • 9AYWsk6_d.png
    9AYWsk6_d.png
    883.5 KB · Views: 161
8mm is a fairly standard Asian mini-pot size. less metal, less overall cost I expect. When you are making the pots as cheaply as you possibly can, then all small savings make a difference when scaled up to a run of 100k pots or more. 'Mini' only refers to the pot diameter.

You'd probably need new knobs as well. The kit pots and knobs will have 18-spline shaft fittings. Whilst you can get CTS pots with 18-spline shafts if you look around, the standard CTS pot is 24-spline, and 18-spline knobs don't ft on 24-spline shafts.

Making the holes larger is easy. I normally use a reamer rather than a drill.
 
I actually got some speed knobs the other day but yeah they are metric ones, I’ve since worked out the 18/24 spline thing.
I’m hoping the shaft length is long enough now because the length is the same but the thread ends shorter than the stock pot, I’ll know for sure once I acquire an 3/8” drill bit or reamer.

I’ll track down a good deal on some imperial knobs soon, thankfully it’ll be a couple months before I can install them anyway.

This is how we learn.
 
Last edited:
I actually got some speed knobs the other day but yeah they are metric ones, I’ve since worked out the 18/24 spline thing.
I’m hoping the shaft length is long enough now because the length is the same but the thread ends shorter than the stock pot, I’ll know for sure once I acquire an 3/8” drill bit or reamer.

I’ll track down a good deal on some imperial knobs soon, thankfully it’ll be a couple months before I can install them anyway.

This is how we learn.

I used a step drill to enlarge my pot holes. I got full sized pots with long shafts because the picture looked the same proportions as the kit supplied minis. Didn't realise they were full sized pots hehe.
 
And you've also got a spare set of knobs for another guitar. Alpha pots are good, as good as CTS IMO, and they normally come with 18=spline shafts (though some suppliers will offer a 24-spline version).
 
Painting: week one


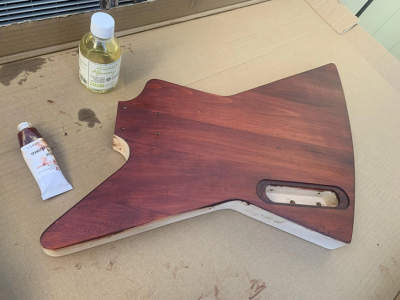
I started my painting/staining today.

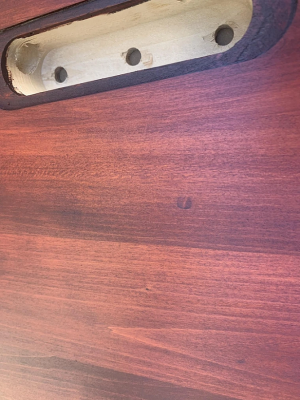
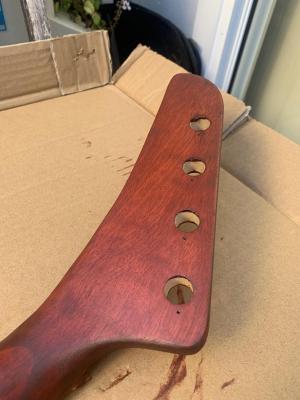
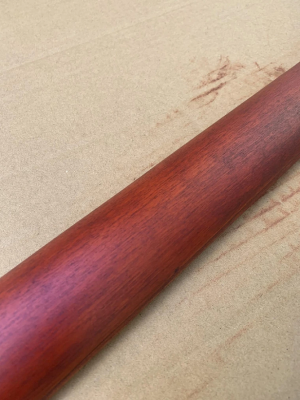
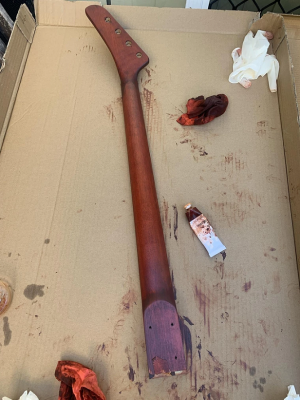
I basically applied the oil paint directly to the wood, then rubbed it in with a cloth. After the surface was covered I added a small amount of the medium to the cloth and wiped it in until I got a fairly even coat.

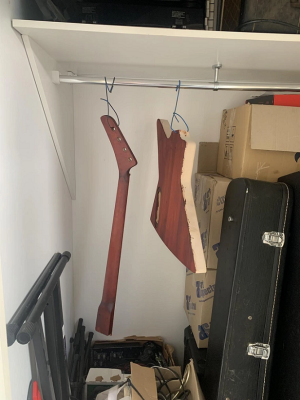
Now it will hang to dry for a week or two until touch dry and then I'll do the front and sides of the body.
 

Attachments

  • iZGk6CB_d.png
    iZGk6CB_d.png
    762 KB · Views: 170
  • nJqxJG9_d.png
    nJqxJG9_d.png
    968.8 KB · Views: 155
Looking pretty good so far. Always good to see something different in progress.

Sent from my Pixel 4 using Tapatalk
 
Back
Top