ozgordys First Build - DJT1 to Meteora (style)

ozgordy

New member
Long time lurker - first time builder.

Decided to bite the bullet and instead of buying an old guitar and tarting it up I would try to do a kit.

I did try many years ago with a previous vendors kit but was incredibly disappointed in the quality and it just didn't fit well together so it was junked.

The kit has arrived and I'm impressed both with the quality of the American ash body and the routing of the body.

I'm going to try and do a similar set of adjustments from a previous build done by Richy17, his #3 build the blasteroid which is fender meteora style guitar.

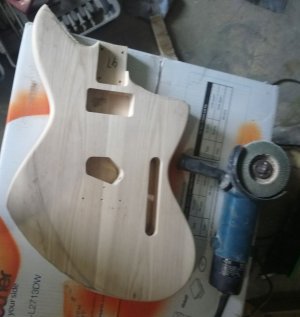
so here is the body with my new outline. off to the garage to gut with the jigsaw and sand my life away.
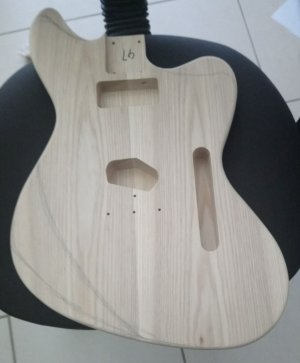
marked up body.JPG
 
Last edited:
ok more pics.. cutting with a jigsaw is a bitch as the wood is quite hard.

still it worked.

body after the jigsaw has worked its magic

body after jigsawing.JPG

id hoped to be able to rough it out with the bench grinder but the wheel was for steel and just burnt the wood.. oh well hand sanding it is.. :mad:

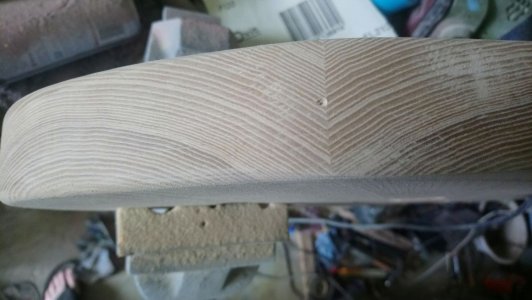
nice grain but it shows marks left but the bandsaw so there's more sanding needed here.


sanding in the bottom cut.JPG

that better .. only an hour to sand out the marks etc

finished bottom.JPG

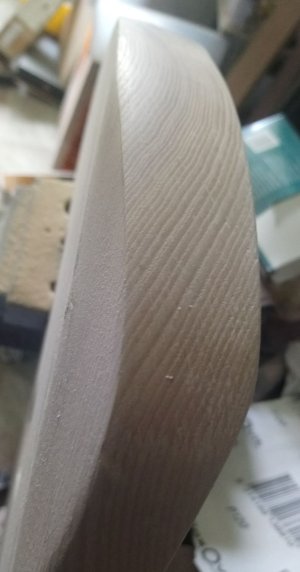
well I sanded in the body relief and I'm not sure. I may try it a bit larger.

body relief.JPG

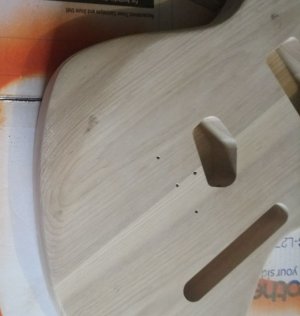
Finished at last... I think.. i'll look again in the morning before I stain or paint ??

I have to decide what colour..im thinking black with silver highlights on the grain. (ceruse I think they call it)..

with a black/white pickguard custom shape, black tele humbucker bridge, black tuners knobs etc.. shame I bought a maple neck kit before I decided on this colour scheme. may have to order a new neck. ;)
 
ok.. next day next stage..

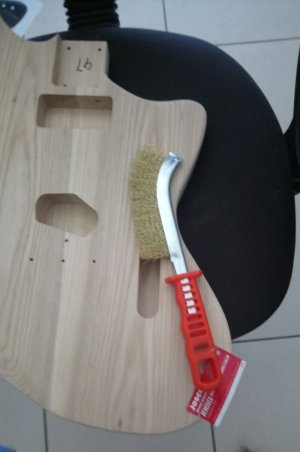
wire bush the body. go with the grain to enhance.

wire brush.JPG

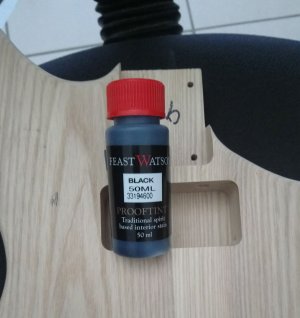
next stain the body.
stain.JPG
lets try this stain i have heard good reports.

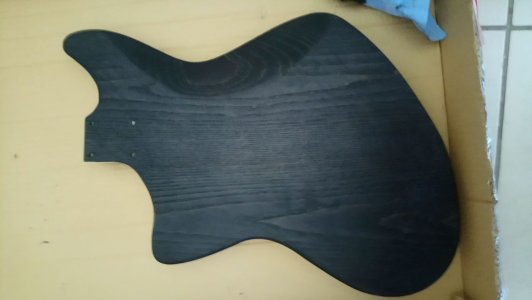
ok do the back first in case I don't like the outcome.

back stained.JPG

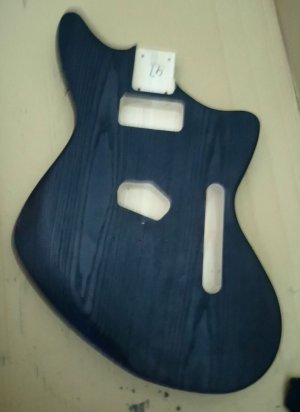
that turned out really good. ill do the whole guitar this way.

front stained.JPG

more updates later. have to let this dry and probably another coat or two to get a good dark black stain.
 
Hi Ozgordy, I found the FW stains good to work with too. They go on quite dark. Looking forward to the silver highlights.
 
Interesting build. I like the Meteora concept. I look forward to seeing how it finishes up.

From what I've read, traditional cerused finish uses clear furniture wax as the "top coat" (floabw) are you going that route or something harder like poly or lacquer?
 
Interesting build. I like the Meteora concept. I look forward to seeing how it finishes up.

From what I've read, traditional cerused finish uses clear furniture wax as the "top coat" (floabw) are you going that route or something harder like poly or lacquer?

probably poly but I will wait till I get the silver on first. I'm planning to use the rub and buff which is a mix of waxes and powder to get the grain highlights and I will need to wipe off the excess with teak oil. so it will depend on its condition after the application and removal process. Ill let the stain dry for a day or two and give the back a go.
 
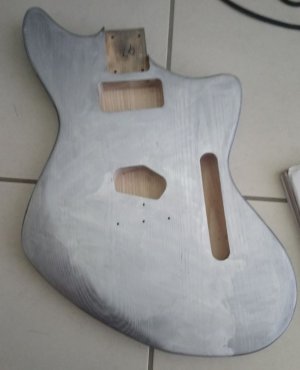
ok front of guitar after rubbing in the rub and buff silverleaf into the body.

front with silver.JPG

to get this coverage just use your finger, put a drop on the guitar body or finger and rub in well to the body.

The only downside is getting silver finger prints everyone that you have to clean off.

next stage leave i to dry. minimum 2-3 hours. I left mine overnight.

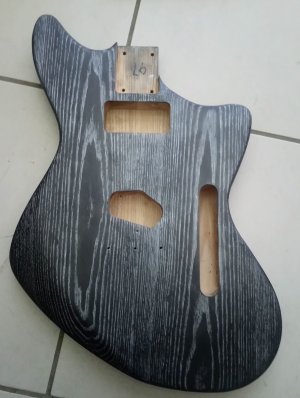
Then its time to rub it off. I followed a process I saw online and rubbed off using boiled linseed oil.

here's what it came out like.

front finished.JPG

looks ok but here are the downsides i faced.

1. it took a huge number of rags to clean the silver off. At least 40 small rags (cut up a sheet) to clean the body.
2. the smell of linseed oil.
3. I don't think the guitar body is as black as it was. perhaps there has been some bleed between the silver and the black stain. Perhaps its just that there is a lot of grain that has taken on the highlights.

I think next time I will give the body a light coat of paint as the undercoat. (black and gold or black and orange. how about red body with black highlights. I think a tele body next) Hang on I haven't finished this one yet..

ok quick question.

I thinking black pickguard and bridge etc but I'm undecided on if I should stain the neck black to match the body and just have an oil finish. Its a maple neck so I don't think that will work so I will have to procure another one from Pitbull unless I can find a nice used one locally.

I have decided to use a spare fender player bridge pick up (thanks son) and put it will a Tonerider alnico 2 neck humbucker.

I think that would make a nice pairing.

next pickguard design and cutting out.
 
Looks pretty good in the pic. The black should take on a denser look with top coats. Personally I'd keep the maple neck natural as a contrast to the body.
 
Oh man. I can see this guitar in my future.........
Beautiful.


Sent from my iPhone using Tapatalk
 
Very cool. Natural maple neck and black pickguard will look sweet I reckon.

Sent from my Pixel 4 using Tapatalk
 
ok now I'm confused..

sprayed a quick coat of lacquer on the front to protect it whilst I'm working on it and the silver has disappeared?. Any idea what has happened. is it just the lacquer reflecting the light randomly and it will comes back on finish sanding?

I could put more silver on as the ridges are still there but will it disappear again on the next coat of lacquer.
 
probably poly but I will wait till I get the silver on first. I'm planning to use the rub and buff which is a mix of waxes and powder to get the grain highlights and I will need to wipe off the excess with teak oil. so it will depend on its condition after the application and removal process. Ill let the stain dry for a day or two and give the back a go.

Referring to our previous exchange about the finish, if you used wax in the ceruse process, the thinner in the lacquer may have been too "hot" for the wax and dissolved it.

This is purely speculative on my part as I have no experience with a cerused finish. Perhaps shellac would have been a better choice for a sealer. (again, just guessing)

I know when I use bee's wax for hole plugging prior to wet sanding, I use naptha (aka shellite in AUS) to clean off any smeared wax on the surface and it comes right off.
 
Referring to our previous exchange about the finish, if you used wax in the ceruse process, the thinner in the lacquer may have been too "hot" for the wax and dissolved it.

This is purely speculative on my part as I have no experience with a cerused finish. Perhaps shellac would have been a better choice for a sealer. (again, just guessing)

I know when I use bee's wax for hole plugging prior to wet sanding, I use naptha (aka shellite in AUS) to clean off any smeared wax on the surface and it comes right off.

McCreed,

thanks that's probably what's happening. I forgot all about the tin of lacquer having solvents in. Yes it would have impacted the wax. it will need a non reactive coat of something to protect the silver. ok time to strip the front and do it again. :(
 
thanks that's probably what's happening. I forgot all about the tin of lacquer having solvents in. Yes it would have impacted the wax. it will need a non reactive coat of something to protect the silver. ok time to strip the front and do it again.

Again, I'm not speaking from experience here as to how it will work with the ceruse, but if you make your own shellac (from flakes) you would dissolve it in methylated spirits, and maybe metho would be gentler on the silver/wax. It certainly is far less hot than lacquer thinners.

Mixing shellac for a sealer, you make what's called a "1 pound cut". This equates to a 1:1 ratio which is based in the old imperial language of 1 lb. of shellac flake to 1 gallon of *methylated spirits. (*denatured alcohol in the US terms)

You can mix smaller batches but use the same ratio. I usually go 250g flake to 250ml metho. It's not an exact conversion but close enough, and 250 mils of shellac goes a long way. It lasts me a quite a while.

If you have the ability to spray it, it may be better than having to apply by hand. I was going suggest Zinsser Bulls Eye spray shellac (rattle can), but looking at the MSDS, it appears to have some acetone in it as part of the thinners. Acetone and wax would definitely not be a good combo.

I'm probably not being much help to you here really :o
 
You could try just rubbing in fine aluminium/aluminum powder (not the aluminium oxide variant which is grey, not silver) and sealing that in with a shellac spray.
 
Back
Top