
You are using an out of date browser. It may not display this or other websites correctly.
You should upgrade or use an alternative browser.
You should upgrade or use an alternative browser.
NON-PBG Build 2 - LP Build Diary for DIY Guitars GLP-40BBK
- Thread starter Alkay
- Start date
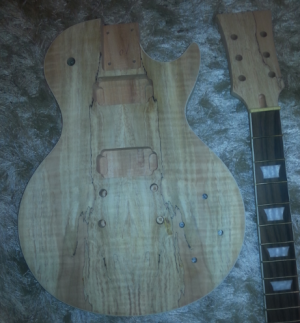
Hi Alkay, kit looks great, is this the same kit you were querying the scale length and sanding or another build ?
hard to keep up with all the build diaries !
Hey mate,
No this is a new build which I haven't started yet.
I don't think I'll try to pop the grain on this one. On my current build I put too much timbermate with black ink on and ruined the spalted look.
http://www.buildyourownguitar.com.au/forum/showthread.php?t=5662&page=7&highlight=alkay
Cheers,
Alkay.

wazkelly
Well-known member
Hi Alkay, forget the dark grain popping on this one.
One thing I successfully experimented with on my blue non PBG tele was through applying a good soaking 1st stain coat and then 24 hours later wiped as much off as possible before applying a 2nd coat. This helped to double up in certain areas to provide a darker highlighting effect of the same colour on the flamed maple top, a bit like grain popping from within the same colour tones of the stain.
Also only lightly sanded the top with 180 or 240 from memory just to knock down any rough bits as it looked far too easy to sand through if not careful and if you paid extra for the top you want to make the most of it.
Wishing you better luck with this one.
One thing I successfully experimented with on my blue non PBG tele was through applying a good soaking 1st stain coat and then 24 hours later wiped as much off as possible before applying a 2nd coat. This helped to double up in certain areas to provide a darker highlighting effect of the same colour on the flamed maple top, a bit like grain popping from within the same colour tones of the stain.
Also only lightly sanded the top with 180 or 240 from memory just to knock down any rough bits as it looked far too easy to sand through if not careful and if you paid extra for the top you want to make the most of it.
Wishing you better luck with this one.
Hi Alkay, forget the dark grain popping on this one.
One thing I successfully experimented with on my blue non PBG tele was through applying a good soaking 1st stain coat and then 24 hours later wiped as much off as possible before applying a 2nd coat. This helped to double up in certain areas to provide a darker highlighting effect of the same colour on the flamed maple top, a bit like grain popping from within the same colour tones of the stain.
Also only lightly sanded the top with 180 or 240 from memory just to knock down any rough bits as it looked far too easy to sand through if not careful and if you paid extra for the top you want to make the most of it.
Wishing you better luck with this one.
Hi wazkelly,
I'm so glad to hear that. That's really helpful for me, thank you WazKelly. My sanding is getting better now after some great advice I got on my other current build(the ruined spalted one with too much black ink in the timbermate).
Thanks to wokkaboy for the link and gavin1393 for making the videos. They were so helpful.
*For future reference I would really appreciate a pic of how timbermate and black ink should look after its applied before taking the cap off. If that's the right word. Eg. Trying to get the grain to stand out. I hope that makes sense haha.
I'm not sure what colours to go for but I'm going to do some tests on the pine I have to try and get an idea. I have some left over ink here to try. After reading through these forums I have seen it's good to try different colours on a test piece of wood to get an idea. There are so many good builds on here. I want to get to that stage.
Cheers,
Alkay.

dingobass
Moderator
Spalts can be a challenge to pop mainly due to the extreme porosity of the timber.
In my experience, there is already enough going on with spalts and popping can be be detrimental.
Usually you will find a lot more figure will come out when you apply the finish.
IMHO, the best course of action is to make a slurry (consistancy of thickened cream) of timbermate and use a rubber squeegee to force it into the pores before sanding..
Let it dry overnight. Timbermate does need some time to harden, it may feel and look dry but it still needs some time to cure.
Then give it a light sand with 320 grit to flatten out the surface.
Check it to see if there are any spots you missed and apply a second coat of timbermate if needs be.
Then sand the top carefully with 320, remember spalts dont require a lot of sanding.....
In my experience, there is already enough going on with spalts and popping can be be detrimental.
Usually you will find a lot more figure will come out when you apply the finish.
IMHO, the best course of action is to make a slurry (consistancy of thickened cream) of timbermate and use a rubber squeegee to force it into the pores before sanding..
Let it dry overnight. Timbermate does need some time to harden, it may feel and look dry but it still needs some time to cure.
Then give it a light sand with 320 grit to flatten out the surface.
Check it to see if there are any spots you missed and apply a second coat of timbermate if needs be.
Then sand the top carefully with 320, remember spalts dont require a lot of sanding.....
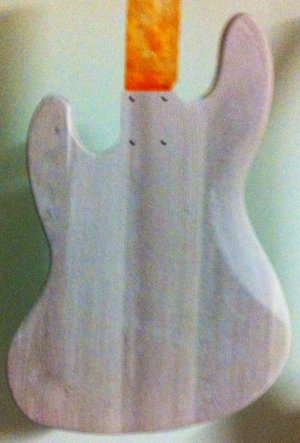
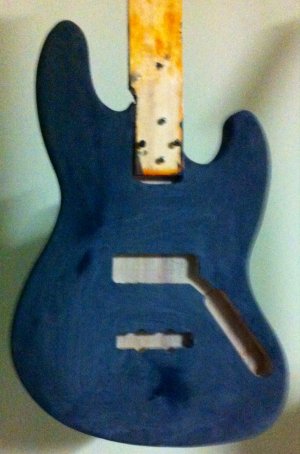
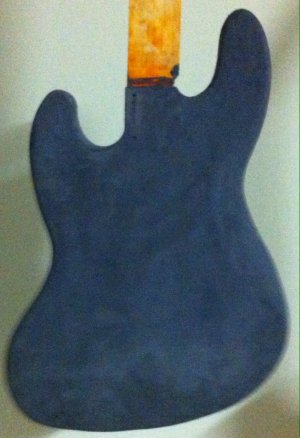
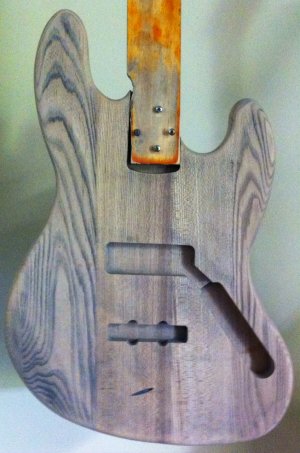
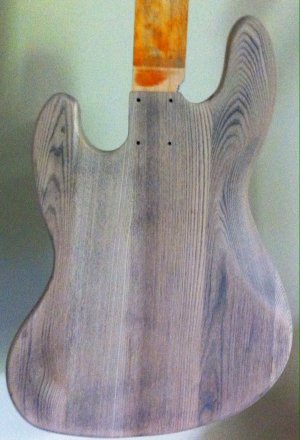
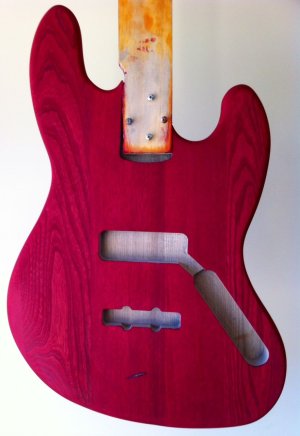
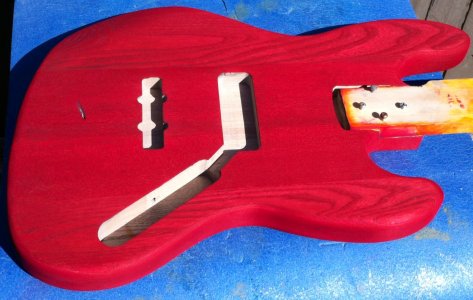
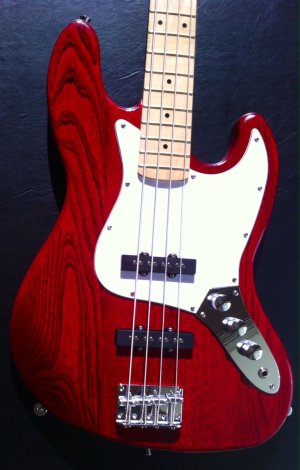
Thats great advice DB and wazkelly,
Thank you so much, that looks sweet as. A really nice finish that's shiny is what I'm aiming for too like the photo's above.
I still don't know what colour yet but I will do DB's advice and give an update soon. I think I'm better at sanding now. I'm really impressed with the other build I'm doing and I'll update that soon with some photos.
Cheers,
Alkay.
Thank you so much, that looks sweet as. A really nice finish that's shiny is what I'm aiming for too like the photo's above.
I still don't know what colour yet but I will do DB's advice and give an update soon. I think I'm better at sanding now. I'm really impressed with the other build I'm doing and I'll update that soon with some photos.
Cheers,
Alkay.
Hi again,
So I started with the timbermate and made a slurry as suggested.
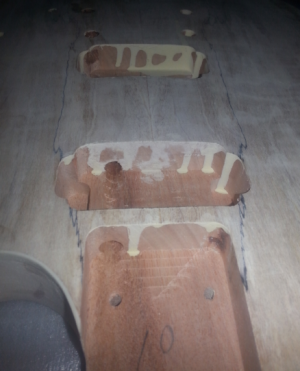
I may have made a slight mistake. The timbermate slurry has slightly gone into the pickup cavities and it's about 1mm thick on a couple of edges. Yes I used a squeegee, applied to much I think. What should I do?
It's been drying for a few days.
Cheers,
Alkay.
So I started with the timbermate and made a slurry as suggested.
I may have made a slight mistake. The timbermate slurry has slightly gone into the pickup cavities and it's about 1mm thick on a couple of edges. Yes I used a squeegee, applied to much I think. What should I do?
It's been drying for a few days.
Cheers,
Alkay.
wazkelly
Well-known member
Hi Buddy, sanding will get rid of it quite easily but be very careful on that precious spalt cap as you can sand through without noticing before it is too late.
In the PUP cavities, do the PUP's still have enough clearance? If so, nothing to worry about, in fact you may even prefer the dark background down in those holes. If not, maybe scrape out from above with a very sharp chisel or Stanley knife blade. The aim is not to touch any wood, just scrape off the Timber Mate as it will be almost like a plastic film on top of everything. Once you get back to the timber switch to light sanding, probably 240 or 320.
In the PUP cavities, do the PUP's still have enough clearance? If so, nothing to worry about, in fact you may even prefer the dark background down in those holes. If not, maybe scrape out from above with a very sharp chisel or Stanley knife blade. The aim is not to touch any wood, just scrape off the Timber Mate as it will be almost like a plastic film on top of everything. Once you get back to the timber switch to light sanding, probably 240 or 320.

wokkaboy
Well-known member
Hi Alkay, don't worry too much about timbermate in the pup cavities, you should be able to remove most of it with a narrow paint scraper, chisel or large flat screwdriver. I usually leave a bit of TM residue and just line the cavities with copper shielding. Next build maybe mask tape off the cavities as it does tend to go everywhere !
As Waz says be careful not to do any damage to the veneer
As Waz says be careful not to do any damage to the veneer
Hi Alkay, don't worry too much about timbermate in the pup cavities, you should be able to remove most of it with a narrow paint scraper, chisel or large flat screwdriver. I usually leave a bit of TM residue and just line the cavities with copper shielding. Next build maybe mask tape off the cavities as it does tend to go everywhere !
As Waz says be careful not to do any damage to the veneer
Ok thanks waz and woks,
I was thinking stanley knife or chisel but I thought I would check here first.
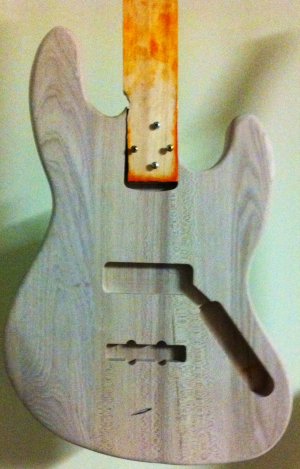
Anyway, here is a pic of the mess:
Cheers,
Alkay
Hi Alkay, don't worry too much about timbermate in the pup cavities, you should be able to remove most of it with a narrow paint scraper, chisel or large flat screwdriver. I usually leave a bit of TM residue and just line the cavities with copper shielding. Next build maybe mask tape off the cavities as it does tend to go everywhere !
As Waz says be careful not to do any damage to the veneer
...and mask the cavities yes. I thought I could get away with it. Anyway, thank you. Lesson learned.
Doesn't look too bad. Even 0000 steel wool would take that off if you think you need to.
Cool, I was thinking I need to use the conductive shielding paint I bought in the PUP cavities so that mess will not make it um....conduct to well hey haha.
I'll remove it all very carefully.
wokkaboy
Well-known member
Hi Alkay the timbermate doesn't look too bad in the cavities. Definitely clean up the neck pocket so the neck heel fits flush.
Rest in the pickup cavities will come out with a chisel carefully or even sandpaper, but don't worry if there's a bit of residue in them.
I just use a vacuum cleaner to suck out the particles as it's messy stuff
Rest in the pickup cavities will come out with a chisel carefully or even sandpaper, but don't worry if there's a bit of residue in them.
I just use a vacuum cleaner to suck out the particles as it's messy stuff
Last edited:
Hi Alkay the timbermate doesn't look too bad in the cavities. Definitely clean up the neck pocket so the neck heel fits flush.
Rest in the pickup cavities will come out with a chisel carefully or even sandpaper, but don't worry if there's a bit of residue in them.
I just use a vacuum cleaner to suck out the particles as it's messy stuff
Ok thanks wokkaboy,
I'll do that, I have access to an air compressor I can use so that should do the trick. Might be a few days before I get to that. The weather isn't so great here. My other build is coming along nice and I'm about to do another coat of tru oil.
Cheers,
Alkay.
Ok it's been awhile on this build because of the problems with the other one but this is where I am at:
- 1 coat of timbermate over the whole body. I can't see any obvious blemishes over the body. Maybe it was 2 coats, a few beers were involved back then so I'm not absolutely sure haha. I'm on 320 at this stage.
I have seen a video on raising the grain after sanding which uses denatured alcohol(metho) to achieve this and then hit it with 320 again. Then move up to 400 and repeat with the metho with each grit as you go up. Apparently it raises the fine fibres so they can be carefully brushed off to give a smooth finish.
I'm thinking about trying this but here are some photos first.
Front:
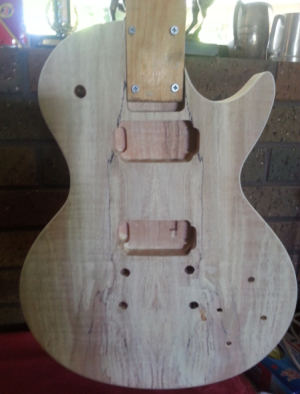
See the white dots that don't look so great beside the control cavity, any thoughts on fixing this:
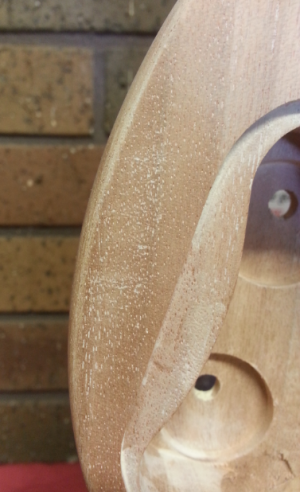
Cheers,
Alkay.
- 1 coat of timbermate over the whole body. I can't see any obvious blemishes over the body. Maybe it was 2 coats, a few beers were involved back then so I'm not absolutely sure haha. I'm on 320 at this stage.
I have seen a video on raising the grain after sanding which uses denatured alcohol(metho) to achieve this and then hit it with 320 again. Then move up to 400 and repeat with the metho with each grit as you go up. Apparently it raises the fine fibres so they can be carefully brushed off to give a smooth finish.
I'm thinking about trying this but here are some photos first.
Front:
See the white dots that don't look so great beside the control cavity, any thoughts on fixing this:
Cheers,
Alkay.
wazkelly
Well-known member
Hi mate, timber looks like Mahogany and the white dots are showing up the grain pores which may not have been sanded off.
May need to go back to 180 or 240 to sand those off as higher grades will just polish everything all around and do nothing towards removing the slight grain indented bits if that makes sense.
Alternatively, depending on what you plan to use as a finish, sometimes additional top coats will act as a grain filler but it does mean more wet sanding further down the track if you are chasing a smooth as glass finish.
May need to go back to 180 or 240 to sand those off as higher grades will just polish everything all around and do nothing towards removing the slight grain indented bits if that makes sense.
Alternatively, depending on what you plan to use as a finish, sometimes additional top coats will act as a grain filler but it does mean more wet sanding further down the track if you are chasing a smooth as glass finish.
Similar threads
- Replies
- 25
- Views
- 72K


- Replies
- 38
- Views
- 59K