My First Builds - IB-6S Bass and LPA-7 Guitar

P2ych0178

New member
I'm starting into my first two builds today and I'm really looking forward to the process!! (and the final result)

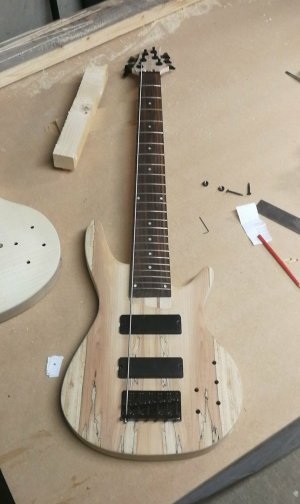
I'm building two guitars, starting with the IB-6S bass kit from Pitbull Guitars.

I've thus far measured out my neck and mounted the bridge (34 inch gauge).

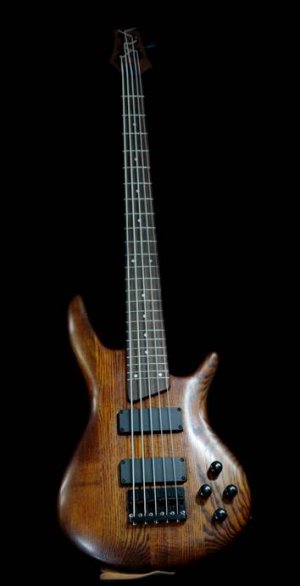
I'll be finishing the bass in a Columbian Gold satin stain from wudtone.com
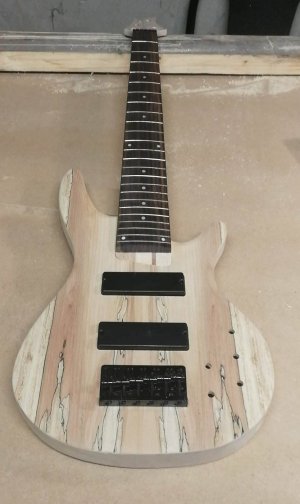
22473590_10212726383249006_1611524900_o.jpg

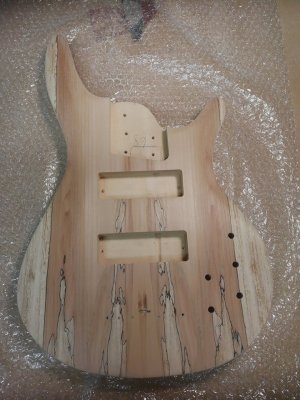
Next up is the LPA-7 kit. So far, I've routed out the channels for the pickups as I'll be putting in Entwistle Dark Star 7's (which have a 88mm gap between pickup screws instead of the 78 as default on this kit). I'm replacing all the hardware with blacket plastic and metal. Any advice on where to find a suitable black 7 string nut would be greatly appreciated though =) Will be finishing this guitar in the Onyx gloss with silver highlights, stain, also from wudtone.com. I'll leave the white binding and I'm hoping that the darker would on the body and the lighter wood on the veneer/neck will create a sort of dual-tone, whilst still only using the one colour of stain.
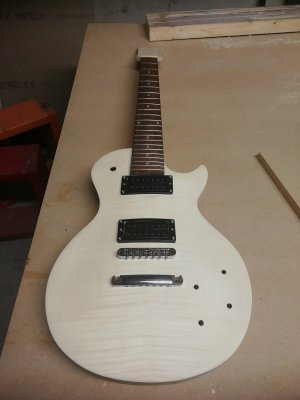
22494816_10212726727097602_1738894403_o.jpg

Really looking forward to getting through this build and keeping up the build diary! Any advise would be greatly appreciated, as I'm learning as I go along!
 
Hi P2 and welcome to the forum.

2 kits! going hard mate. good on you.

Well the firstest firsty piece of advice I would give you is

....do not sand through the veneers.....

they are mighty thin and easy to sand through.

and If you do, its not the end of the world (you will cry, I will cry) but it will be a great paint job.
 
Thanks Andy40,

I'm after doing a bit of a test-assembly to make sure that things are lining up right. The neck when screwed in is sitting slightly lower (maybe a mill?) than the veneer. I was going to try sand until they met but, I'm guessing that might be a bad idea?? :D

Also, just to check my logic is right. I've only put one string on, just to check everything seems to be sitting right. I'm getting buzz on the first 5 frets and I'm noticing that the neck is ever-so-slightly curved back at that point (truss rod too tight). I'm guessing that that might correct itself once there's 5 more strings on, and neck is under full tension??

22532351_10212727341032950_1278493898_o.jpg

And cheers Fretworn =)
 
Thanks Andy40,

I'm after doing a bit of a test-assembly to make sure that things are lining up right. The neck when screwed in is sitting slightly lower (maybe a mill?) than the veneer. I was going to try sand until they met but, I'm guessing that might be a bad idea?? :D

Also, just to check my logic is right. I've only put one string on, just to check everything seems to be sitting right. I'm getting buzz on the first 5 frets and I'm noticing that the neck is ever-so-slightly curved back at that point (truss rod too tight). I'm guessing that that might correct itself once there's 5 more strings on, and neck is under full tension??

View attachment 22744

And cheers Fretworn =)

As a general rule, I do all modifications before laying any finishes and final sanding. So setting it up like this is a good way to check to see if you are going to run into problems, so if a modification is required you don't have to risk destroying a finish.

I would set up both high and low strings to check the real estate on the edge of the fret board and ensure the neck is straight.

I usually do not worry about neck bow, saddle heights/nut height until setting up the guitar. Its just a usual process you will go through
 
For a black 7-string nut I'd look on eBay. e.g. http://www.ebay.co.uk/itm/GRAPHTECH...133203&hash=item3f84f5d03d:g:L9kAAOSwsXFZM-Ra

But measure the width of the neck first (and also the existing nut height) to avoid selecting something too small or too big. Graphtech do a lot of nuts so it's worth looking at their website, selecting the one that's the best fit for your neck and then Googling for the part number. Someone will have it in stock somewhere. http://www.graphtech.com/products/product-categories/nuts

As you want black, then I'd definitely recommend something like their Tusq nuts over a standard plastic one. Well worth a few Euros extra.
 
Nice grain on both kits. Almost a shame to hide them under dark colours.

With the height difference where neck is slightly lower....DO NOT SAND THE VENEERS....they are thinner than paper and it wouldn't take much to sand right through as many forum members have discovered the hard way. Best to wait until final setup to see how things are as once you put some coats of finish on the neck heel that may just solve height issues perhaps. If not a shim under the neck may be required but you may also discover the issue could be cosmetic and that fretboard height is more important in relation to bridge saddle heights and thus achieving a decent low action. Changing one thing because it doesn't look right can often have ripple effects and best to check all those things out on the final assembly and setup stage. Likewise, neck bow, as a fiver does generate a lot of tension and best to make any truss rod adjustments under tension and at proper pitch.

2 on the go at once is lots of fun which is how most of mine were done. Ensures you always have a build to work on.

Good luck and will be keenly watching how things progress.

Cheers, Waz
 
Nice grain on both kits. Almost a shame to hide them under dark colours.

With the height difference where neck is slightly lower....DO NOT SAND THE VENEERS....they are thinner than paper and it wouldn't take much to sand right through as many forum members have discovered the hard way. Best to wait until final setup to see how things are as once you put some coats of finish on the neck heel that may just solve height issues perhaps. If not a shim under the neck may be required but you may also discover the issue could be cosmetic and that fretboard height is more important in relation to bridge saddle heights and thus achieving a decent low action. Changing one thing because it doesn't look right can often have ripple effects and best to check all those things out on the final assembly and setup stage. Likewise, neck bow, as a fiver does generate a lot of tension and best to make any truss rod adjustments under tension and at proper pitch.

2 on the go at once is lots of fun which is how most of mine were done. Ensures you always have a build to work on.

Good luck and will be keenly watching how things progress.

Cheers, Waz

Just after sanding the veneer on the body and I think it's looking pretty good (gradually worked my way up to 400 grit). There's one or two slight bumps in the veneer but I got a clear filler with the stain that should help me smooth out those VERY minor imperfections.

And yeah, it's not that the neck is high? More that it sits a little lower at the base. I put a 2cm*1cm piece of paper folded twice over at that corner and it lines up perfectly but that affects strings. Will just have to wait and see what works best when it's finished and fully strung =)

And on the dark stains - I very much appreciate what you're saying. I thought that having the gold and silver tints in the stains might help bring the grain back out in the wood. Adam sent me a pic of a similar bass finish in much the same way and I thought it looked pretty sweet. I'm considering whether to maybe stain the top of the LP a lighter colour. It's looking pretty epic in the almost-white it currently has! =D

Sanded veneer:-

22523718_10212733725112548_2104438148_n.jpg

Example of Columbian Gold stain:-

image001.jpg
 
And Thanks Simon for the advice on the nut!

I went looking and the closest nut they have is longer than mine. However, it says E-to-e spacing is exactly the same. Any chance that for a 7-string, that actually means B-e spacing? As I could then maybe chop the sides of the nut to make it fit. I'll see if I can find a way of messaging them to find out =)
 
Funny how most of these Bass shapes end up some brown colour?

That spalted top looks awesome and would really come to life with just a clear or light colour on top. Something that goes no darker than a shade of honey, yet that may be a fraction too dark, would really accentuate the grain and different timber tones on top. Over here Feast Watson have a golden teak stain that would look good.

https://www.google.com.au/search?q=...D9rvHWAhUGT7wKHSfqBvAQsAQIPA&biw=1920&bih=974

Edit: Here are some examples found on this forum....

http://www.buildyourownguitar.com.au/forum/showthread.php?t=2559
 
Last edited:
Funny how most of these Bass shapes end up some brown colour?

That spalted top looks awesome and would really come to life with just a clear or light colour on top. Something that goes no darker than a shade of honey, yet that may be a fraction too dark, would really accentuate the grain and different timber tones on top. Over here Feast Watson have a golden teak stain that would look good.

https://www.google.com.au/search?q=...D9rvHWAhUGT7wKHSfqBvAQsAQIPA&biw=1920&bih=974

Edit: Here are some examples found on this forum....

http://www.buildyourownguitar.com.au/forum/showthread.php?t=2559

that is a beautiful colour. Sadly, can't get them sent to Ireland for some reason. If it's looking too dark after 1-2 coats, I might put a clear or honey stain in the mix (same brand) to lighten it up =)
 
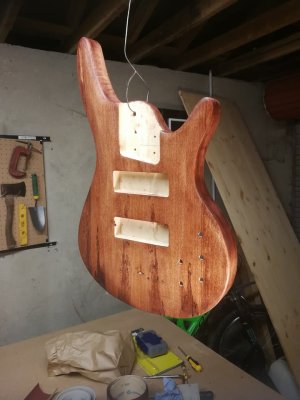
First coat of stain down. Many more to go! Might only go a few coats of stain deep, before putting my satin finish (4 coats might be enough?) so as to keep the grain alive? Will know when each coat is cured, what looks nice

22497573_10212739884826537_768780604_n.jpg
 
Last edited:
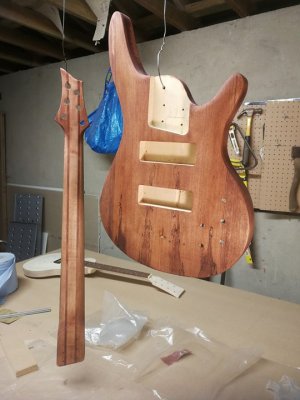
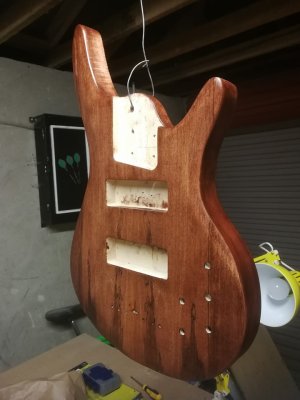
Had an issue where some of the stain went black on first coat (think it was dust from the sandpaper mixing with the stain... should have run a hoover over before first coat) Had to strip some of it down and start again. A coat or two later, the body's starting to take on somewhat of a texture. The stripping and re-staining has added a more stressed and aged look to the wood but, I don't mind that, it gives it a little bit of character. The body won't be going any darker than this really. The most of the remaining coats are being mixed with a gold flake so, if anything, should brighten up a bit (it's nice to keep the appearance of the veneer visible).

Oh well, I've made some mistakes, had to fix some mistakes... I've learnt a lot from this build for the future.

22552479_10212769308482110_6963199095180169269_n.jpg
 
yeah, it's not too dark, so you can still see the spalting. I found it funny how the light went dark and the dark parts stayed light (inverted) when i stained. I quite like the darker stripes coming up from the bottom
 
All coats of stain now applied. Just have to leave it to cure for a bit before applying my satin finish. I think I brought it back from the brink in a few spots but, I know what NOT to do next time around... =P

22773558_10212799536157783_517385164_n.jpg
 
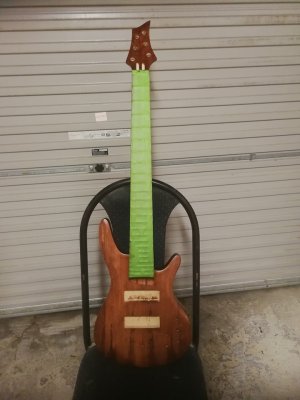
Did a quick test to see how tight the neck was before doing the satin clear coat. Nothing a little 0000 steel wool won't take care of...

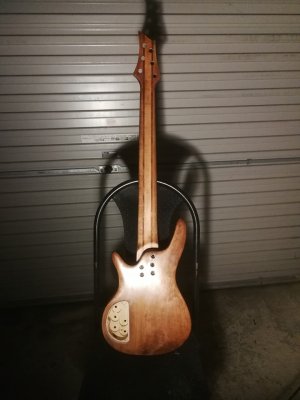
I think the look is starting to come together =)

22782399_10212805447105553_2020507074_n.jpg

22811424_10212805660430886_368054287_n.jpg
 
Back
Top