April Guitar of the Month (for Guitars and Basses finished in March 2018)

Brendan

Well-known member
April Guitar of the Month (for Guitars and Basses finished in March 2018)

Enter your finished guitar or bass here to be judged for the Pit Bull Guitars April 2018 Guitar of the Month.

Please remember:

For Guitars or Basses finished on (or before) the end of March 2018

One guitar/bass per member per month
It must be a Pit Bull Guitars kit (mods and upgrades acceptable)
Guitar or Bass must be finished and playable

We need at least 4 photos:
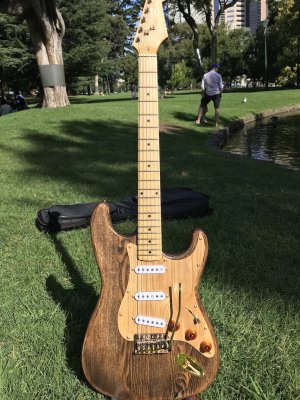
· full guitar shot from the front;
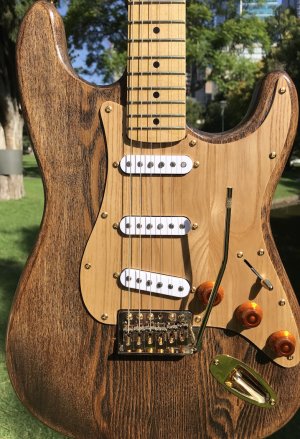
· close up of the body finish;
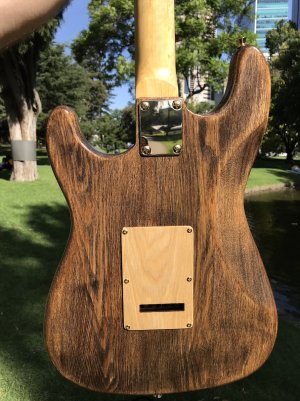
· shot of the back of the guitar; and
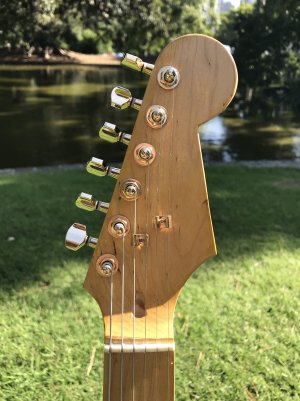
· close up of the headstock (please, no brand name logos)


Please post your photos in this thread. If you are having issues posting photos on the forum, please email them to brendan (at) pitbullguitars (dot) com

Please note: This competition is open to amateur guitar builders only. If you are making and selling guitars for profit, you are ineligible. Also while there are some stunning guitars around - you never know what the judges are looking for, so we encourage anyone who's built a Pitbull during the month to enter!

Competition for April closes at the end of March 2018 (Perth Western Australian time).

The sorts of things we judge on include:
· How well have the body and neck been prepared
· Is the choice of finish for the style of guitar appropriate
· How well has the finish been applied
· How well has all the hardware, pickups, etc, been installed
· Does it have the "Wow Factor"
· Which guitar would you make a beeline for in a guitar shop. That is, which one would you most like to take home.


BTW - remember that the winner is invited to be a guest judge the following month!
 
Hey guys, first time posting - hope you'll enjoy!
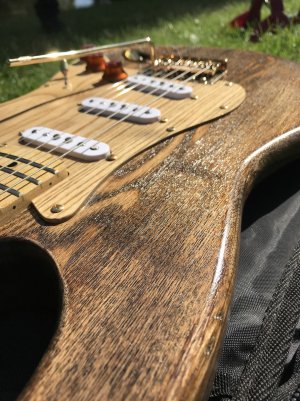
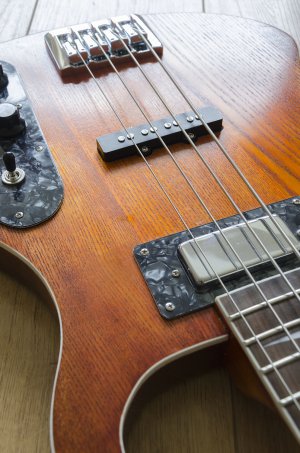
Here is my 3rd Pitbull build, after my Les Paul Junior and my SG3 (a nice lesson in routing). With a working name of "Morning Wood", "Treebeard", "Sherwood Forest", "Woody" or "Victor Wooden".

It all started with the STA-1M Ash Stratocaster - the grain looks great, and I have a hard time justifying a rosewood or ebony fingerboard on a Strat. Immature and reductive, I know. But maple fingerboards just seem right.

Body
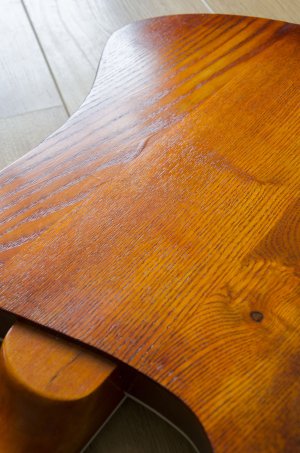
- Phase 1: 220/320 sand down the body and applied Feast Watson Black Prooftint stain. Then sanded the entire thing off. I read somewhere that this improves the contrast of the grain. I can't cite it and I have brought shame to my name. Sorry.
- Phase 2: Coat of Feast Watson Sanding Sealer, and then a 320 sand. Done twice for optimum smoothness.
- Phase 3: Cabott's Walnut Water-Based Interior Stain
- Phase 4: Two coats of Tru Oil and then smoothed it out with 00 steel wool. Repeated this process for a total of 4 times - so 8 coats of Tru Oil.
- Phase 5: Two coats of Howard's Feed-N-Wax. Smells great and makes for a great finisher on a body

Neck
I straightened the neck and levelled out the frets by using the tips from Guns and Guitars' amazing video Make pro guitar luthier tools out of stuff you have - it was the most boring part of the build, but it DEFINITELY made a difference on the finished product.

I pretty much copied Ben Eller's method for re-finishing necks; while adding a Feast Watson Golden Teak Prooftint stain.
Two coats of Tru Oil, smoothed out with 0000 steel wool, done twice for a total of 4 coats. And then two coats of Birchwood Casey Gun Stock Wax. I love the feel of the grain of the neck and the satin smoothness of the Tru Oil. Can't recommend this stuff enough!

Hardware
- Amber knobs
- Ash pickguard and backplate
- Gold pickup selector switch
All from eBay. Everything else was stock - including the missing screw for the bridge, which Adam quickly sent over for free after I contacted him.

Pickups
Guitar Fetish Premium II Strat set w/ Kwikplug harness - 250k pots and a .047uf tone cap
This was so incredibly simple to install. Sweet Strat tone, without the wiring headache.

Anyway, hope you guys enjoy the photos!
Front Close.jpegFront Full.jpegBack.jpegHeadstock.jpegGrain.jpeg
 
Last edited:
Rc-12

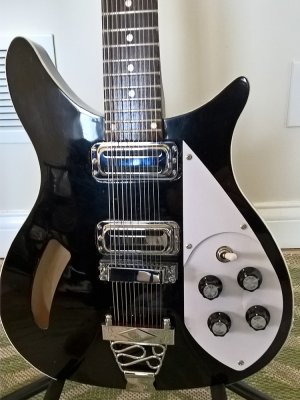
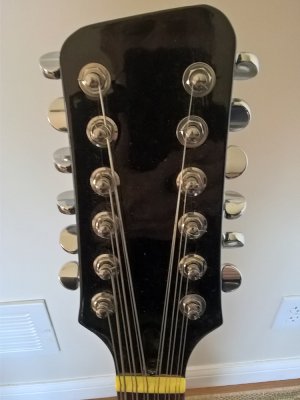
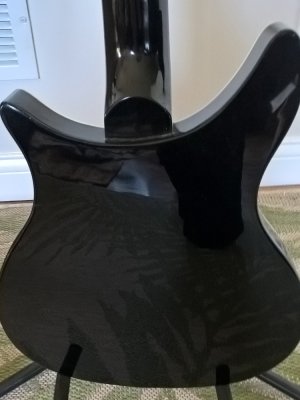
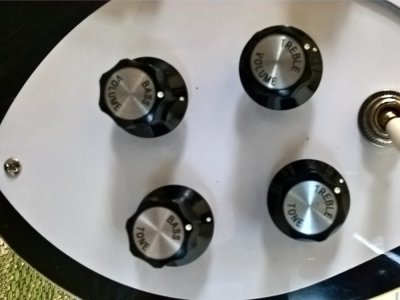
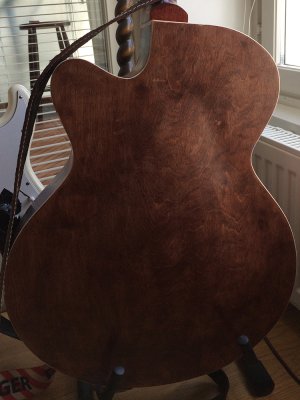
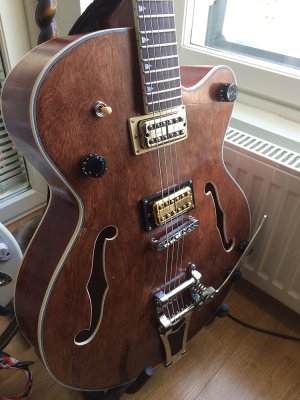
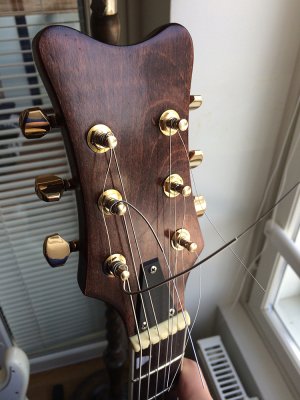
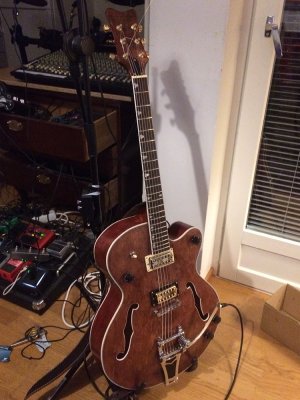
Maybe not the 'wow' factor.....but plenty ($$) on the 'whoa' factor. What you see -- and recognize -- is only the half of it. But I know that we, the amateurs, still anguish over detail and the pursuit of perfection. But when it comes to winding your own pickups, it won't be cheap....and it may not be pretty. I paid $79.00 USD for a 'dead' Rickenbacker toaster pickup. I figured it could be repaired? WRONG. Try rewinding it with.44 awg copper wire. Talk about focus. The Thomas wonder was $215.00. But all that aside, it (the pickup) finished @ 6.2 ohms. It RINGS !!! Grover tuners, Rickenbacker bridge and cover, Allparts trapeze tailpiece, heavy duty 3 way switch, Les Paul type jack and jack plate, and to top it off, Pyramid Gold flatwounds. Now, there are some clear coat lacquer flaws ( it's winter up here!!), but quite honestly, the sound is equal to it's appearance. And as I mentioned to Adam Boyle, " all's well that ends well".

nine-01.jpg nine-02.jpg nine-03.jpg nine-04.jpg
 
Last edited by a moderator:
GR-1SF Build from Martti in Finland

"The name of the guitar is Mal after the late great(est rhythm guitar player ever) Malcolm Young. The colour on the surface was done with stain, brown to top & bottom and red to the sides. Finished with shell lack, also brown and Pickups were upgraded to tv-jones bridge classic and bridge plus (neck is the plus) and tune knobs upgraded to Wilkinson knobs.

Martti-01-1.jpg Martti-03-1.jpg Martti-04-1.jpg martti-11-1.jpg
 
A very cool look with the timber scratch plate and covers, how does it sound.

Cheers mate!
GFS market the pickup as sounding like Mark Knopfler, and I tried to see what all the fuss was about. When I was setting the guitar up, the closest amp was my Gallien Krueger 400rb - a bass amp. Figuring I'd just plug it in and have a go, it blew me away! I had a jam over Sultans of Swing (because how much more of a casual fan can you be?) and it fit in perfectly in 4th position. Plugged into my Thunderverb and I couldn't fault it, though I'm more of a fan of an HB in the bridge. GFS pickups are proving to be an up-and-coming favourite of mine, mainly due to their ease of installation, as well as the price...and I guess it helps that they sound great ;)
 
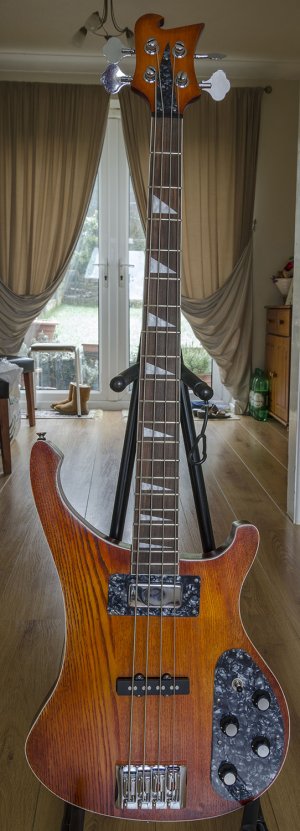
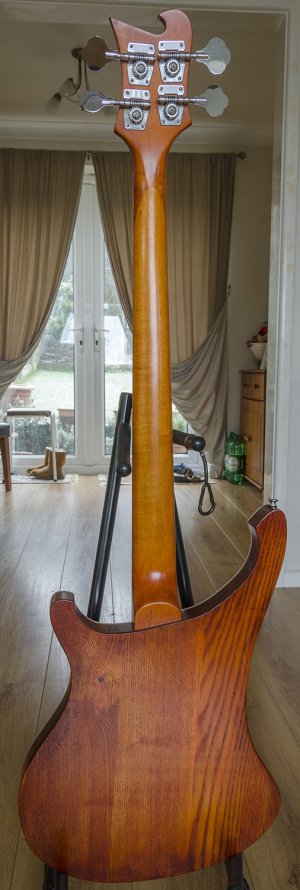
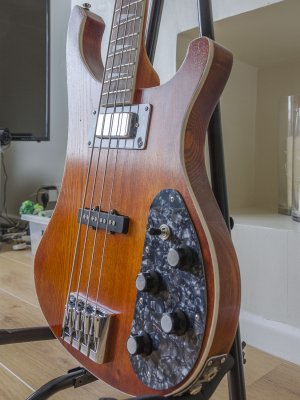
RCA4 Bass

I will throw my RCA-4 bass into the mix.

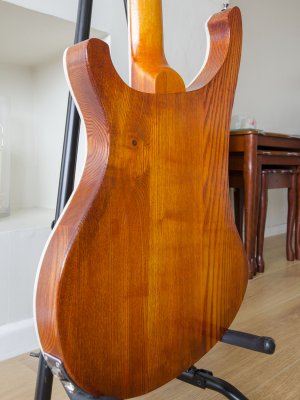
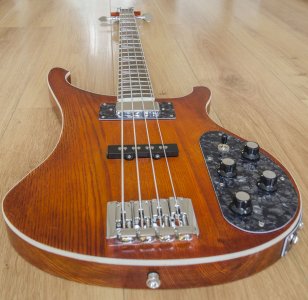
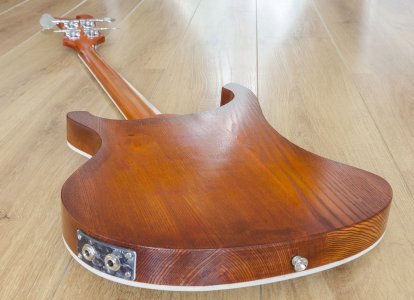
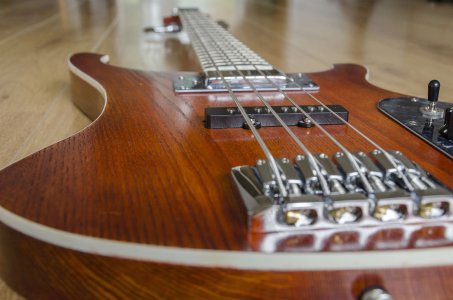
Finish - Sanded down to 240grit and stained using Wudtone Burning Sky and Hot Auburn
Neck - Frets levelled and dressed using similar methods to those mentioned by Ahabs_beard :)
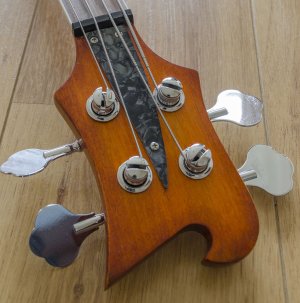
Hardware - Tuners as supplied with the kit. Bridge a 'no-name' item from ebay that I liked the look of. Control cavity cover, neck pup surround and truss rod cover I made myself.
Electronics - Pickups as supplied with the kit. Wired for stereo with new pots, caps, switch and jack sockets.
For those who don't know (and I didn't properly understand when I set out on the build) the bass has two jack sockets. One mono which works as normal and one stereo which separates the outputs from the two pickups then using a splitter cable each pickup can be run to separate inputs (eg two different amps).

Build diary is here http://www.buildyourownguitar.com.au/forum/showthread.php?t=8183

_DSC2392sml.jpg _DSC2391sml.jpg

_DSC2407sml.jpg _DSC2406sml.jpg

_DSC2408sml.jpg
 
I will throw my RCA-4 bass into the mix.

Finish - Sanded down to 240grit and stained using Wudtone Burning Sky and Hot Auburn
Neck - Frets levelled and dressed using similar methods to those mentioned by Ahabs_beard :)
Hardware - Tuners as supplied with the kit. Bridge a 'no-name' item from ebay that I liked the look of. Control cavity cover, neck pup surround and truss rod cover I made myself.
Electronics - Pickups as supplied with the kit. Wired for stereo with new pots, caps, switch and jack sockets.
For those who don't know (and I didn't properly understand when I set out on the build) the bass has two jack sockets. One mono which works as normal and one stereo which separates the outputs from the two pickups then using a splitter cable each pickup can be run to separate inputs (eg two different amps).

Build diary is here http://www.buildyourownguitar.com.au/forum/showthread.php?t=8183

View attachment 25348 View attachment 25349

View attachment 25350 View attachment 25351

View attachment 25352

Holy crap! And I thought competition would be easier this month - looks like I'm wrong!
I've always been really apprehensive about buying kits with binding, in case I get the stain over them...
How exactly do you go about making sure that the white binding stays (or gets) clean?
 
Holy crap! And I thought competition would be easier this month - looks like I'm wrong!
I've always been really apprehensive about buying kits with binding, in case I get the stain over them...
How exactly do you go about making sure that the white binding stays (or gets) clean?

When I saw your guitar I thought - no point entering this month ;) Same could be said every month though.
I wouldn't think it possible to do something unique with a Strat but you have managed it!

I think some people manage to successfully mask the binding but the majority just stain over it then scrape the binding clean afterwards with a blade which gives a nice clean edge.
It is not that difficult but mighty tedious and certainly in my case gives continued entertainment in spotting bits that have been missed :rolleyes:
 
Holy crap! And I thought competition would be easier this month - looks like I'm wrong!
I've always been really apprehensive about buying kits with binding, in case I get the stain over them...
How exactly do you go about making sure that the white binding stays (or gets) clean?

If you polish the binding smooth first then it can be quite stain resistant making it easier to clean up after.
 
I think some people manage to successfully mask the binding but the majority just stain over it then scrape the binding clean afterwards with a blade which gives a nice clean edge.
It is not that difficult but mighty tedious and certainly in my case gives continued entertainment in spotting bits that have been missed :rolleyes:

When you say 'mask', you mean just covering it with masking tape when staining, and hoping for the best, right?
Stewmac have a good video; is this what you meant by scraping? I'm a noob, but I'm gonna try to hound all you guys for as much information as I can get! haha

If you polish the binding smooth first then it can be quite stain resistant making it easier to clean up after.

What exactly do you mean by polishing? Like, steel wool, sanding sealer etc? What products do you recommend? Cheers!
 
When you say 'mask', you mean just covering it with masking tape when staining, and hoping for the best, right?
Stewmac have a good video; is this what you meant by scraping? I'm a noob, but I'm gonna try to hound all you guys for as much information as I can get! haha


What exactly do you mean by polishing? Like, steel wool, sanding sealer etc? What products do you recommend? Cheers!

I'm new here myself so maybe not the best to be giving 'advice' :)
Masking - yes, covering the binding with masking type. My view was that I don't have a good enough eye or steady hand to get it just right (especially on the really narrow binding on the guitars top) so would be likely to get stain on the binding and have to scrape anyway or, even worse, get tape over the wood and miss bits with the stain.
The Stewmac vid is it. He makes it look easy! I like the tool he uses - I did all mine with what he calls a utility blade (Stanley knife blade in the UK)
I don't know about the polishing, would be interested to hear if Fretworn replies on that.
 
It's difficult to mask binding well, especially when staining, as some liquid always seems to creep under the binding. Standard masking tape tends to allow seepage under the edge, so use something like Frog decorator's tape that's smoother and seals better. Some bindings develop small stress cracks in the surface (from being bent - especially on the sharper curves) that you can't see with the naked eye, but stain can find their way into the cracks and look very obvious with a dark stain. Of course if you just try staining a pat of the guitar at the time, it's easier to wipe the stain off the binding as you go along.

It is quite easy to scrape the binding, it's just quite time consuming.

However it's a lot easier to mask the binding when spraying than spraying and then scraping the paint off. You can scrape it easily if the paint is only a couple of layers and it's still fresh, dry enough to handle but nowhere near cured. The longer you leave it the harder it gets, and the harder it gets to scrape it off. Even so, you'll have to do it quite a few times to do it as easily in the StewMac (or Gibson) videos.

Even so, it it's only 0.5mm or 1mm wide binding showing on an edge, then I would always scrape that edge rather than try to mask it.

If you are just masking the binding, then I'd suggest using 3M 3mm or 6mm wide 'fine line' masking tape as it's a stretchy plastic and it is actually pretty easy to follow the binding with it (look online, or auto stores normally carry it or similar products). Just beware when using it (or even standard masking tape) on concave curves, that it needs to be use din short lengths. Any attempt to stretch the tape here results in the tape being under tension and being pulled away from the guitar. Even small changes in temperature can cause differential movement between te tape and the guitar body and pull the tape away. So use short sections of tape on concave curves.

As Gary says, it is quite difficult to put masking on binding with pinpoint accuracy. You are better off leaving a small part of the binding exposed (and scraping that if necessary) than covering up some of the wood near the binding and leaving a gap in the stain (or paint). Almost all binding stain or paint marks can be removed by scraping. You'll be amazed at how much scraping you can get away with on the binding.

Polishing the binding is done by getting it as smooth as possible so maybe start with P400 paper and work up to P1500 or P2000, then buff with a cloth (or switch to Micro-Mesh and work all the way up to 12000 grit). I'd avoid putting any wax on it as it would be hard not to get it on the wood and so prevent it staining. Whilst you could use steel wool, I'm always wary of the steel fibres it leaves behind that can stick in the wood and affect the later finish, so you then might want to mask the body off first round the edges! However I've never tried polishing the binding before staining, so I'd let others who've done it tell you what they've done.
 
Back
Top