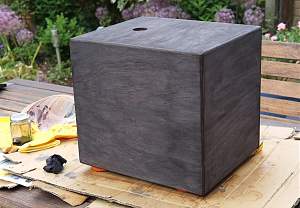
I've mentioned it before a couple of times, but I haven't posted anything directly about it, but my home-made (mainly someone else's home) 1x10" bass cab is now assembled.
I'd had a 2x10" Bill Fitzmaurice design cab for bass for a long while, but it was such a big heavy ugly thing that it stayed in the garage and never got used. Eventually I decided to break it up and I gave the two 10" Eminence speakers to my mate Jim (officially a Aussie but has been in England since he was 8 or so, so for over 50 years), who made some small PA cabs with them. In return he offered to make me a new bass cab (well, to construct it as I had to provide all the materials). So towards the start of the year, he designed and built the cab after I'd decided on a Celestion BN10-300X speaker for it.
It was made out of Meranti-faced ply, so I started off finishing it using a dark-brown tinted varnish, followed by clear varnish over the top (both water-based from the same manufacturer). I built up several layers of each, to give me enough depth to sand flat and polish after leaving it for several weeks to cure.
Except that when I stuck the random orbital sander on it, the varnish just peeled off in big floppy strips, it hadn't stuck to the wood at all. I was a little bit miffed.
So I had to strip it all off and start again; which was easy except for the bottom of the cab where it had stuck very firmly. Heat guns and paint stripper didn't seem to affect it, so it was out with the heavy duty belt sander fr all the awkward patches. Which meant that I went through a lot of the outer ply layer.
I despaired of getting it looking nice, so was wanting to just paint it one colour, but Jim though that he could re-veneer it ad took it away. Except that due to its size and wanting to use 2mm thick 'construction' veneer, he found it would be prohibitively costly to do, so we gave up on that. I then decided that I'd just do the same thing as before but with stain and different varnish and show all the battle scars as a feature.
So started out with a black stain:

Then sanded that back (like on a figured veneer) and then used a dark-brown stain:
I then applied yacht varnish over several weeks, giving each coat time to dry. Despite being as careful as possible, as it got varnished with the front facing down I still ended up with some runs around the front edges, so will be leaving it for quite a while before addressing those to give them time to really harden. But after five coats of varnish, I didn't see any reason not to finish putting it all together.
So yesterday I sprayed the front face black and glued in the two plastic ports.
Then today I started off by fitting the rear Speakon socket panel, fitted the corners and feet and top handle and spray-glued on the final bits of acoustic wadding to the inside:
I then soldered on the speaker leads and fitted the speaker. One slight issue was that one of the T-nuts for the speaker bolts (luckily the very first one I tried doing up) wasn't attached to the wood properly as the four triangular ears that are supposed to stick in the wood had folded over flat, so were hardly gripping the wood. When I went to tighten the bolt, the T-nit came off and just spun around. As the speaker was mainly filling the hole for it, it was a lot of hard work to get it held securely so I could remove the bolt and replace the T-nut.
We've got a bit of a heat-wave (all relative) on over here at the moment so it was over 31°C in the shade in our garden, and I was working in the sun, so was all rather hot! Nevertheless, I got the speaker fitted:
Then all I had to do was attach the speaker grille (made some time ago from perforated steel sheet with the edges bent over and sprayed black) and it was all done:
Continued...


 Reply With Quote


