Page 1 of 6 1 2 3 ... LastLast
Results 1 to 10 of 53

Thread: JM-1 First Build

  1. #1

    JM-1 First Build

    Finally got my hands on my first kit guitar (bit of a wild goose chase with Aust Post that nearly ended my guitar building ambitions prematurely). Here are some out of the box shots:

    Click image for larger version. 

Name:	WP_20151220_11_34_08_Pro.jpg 
Views:	233 
Size:	63.9 KB 
ID:	7152

    Click image for larger version. 

Name:	WP_20151220_11_35_19_Pro.jpg 
Views:	242 
Size:	78.0 KB 
ID:	7153

    Click image for larger version. 

Name:	WP_20151220_11_29_52_Pro.jpg 
Views:	232 
Size:	85.8 KB 
ID:	7154

    I have to admit, the pre-shaped headstock was a strong selling point.

    Click image for larger version. 

Name:	WP_20151220_11_28_55_Pro.jpg 
Views:	245 
Size:	70.7 KB 
ID:	7155

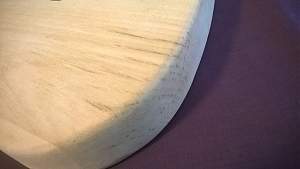
    I'm quite impressed overall. There are some dark scrape looking marks on the body - I'm assuming these will come out with sanding, or are these a feature?

    Click image for larger version. 

Name:	WP_20151220_11_37_26_Pro.jpg 
Views:	246 
Size:	77.3 KB 
ID:	7156

  2. #2

    Mock Build

    Click image for larger version. 

Name:	WP_20151220_11_25_45_Pro.jpg 
Views:	254 
Size:	85.0 KB 
ID:	7157

    This was the start of my mock build. I did fit the tuners (Grover upgrade) and strings but I guess I forgot to take a photo. The locking machine heads made it super easy to string up (and take apart). I think these will be a standard purchase for future kits.

    I positioned the neck and bridge, measured nut to 12th fret and 12th fret to the bridge saddle of the high e - everything seemed to line up.

    As this is my first build I was planning to keep things as simple as possible: just stock, sand and stain. However, the day I got my kit I found Zeromick's JM-1 mashup build diary and was both impressed and inspired. Zeromick's build is pretty much what I wish I could do. I like the look of the JM-1 but I'm not a fan of tremolo bridges and I don't much care for the pickup configuration in the pearloid red pickguard.

    So with that in mind I figure I'll try some mild modifications.
    • Rolling the fretboard edges
    • Further rounding of the edges on the body
    • Already ordered a Babicz 2 point trem. Figured if I have to have a trem, I'd try this out.
    • Somehow, a P90 is going in that neck position.


    I haven't decided on a finish yet. I bought DT Coolangatta Gold for the body with Mission Beach on the neck, then entertained the idea of doing a burst so bought an assortment of Dingotone (Black Stump, Bondi Blue, Outback Sunset) to experiment with…. and a second kit, an LP-1S, which will probably be my stock, sand and stain build (diary to follow shortly).

  3. #3

    The Beginning

    Whittled away the fretboard corners with a Stanley Knife (crude but effective) and pulled the plastic nut.
    Click image for larger version. 

Name:	WP_20151222_13_46_38_Pro.jpg 
Views:	236 
Size:	76.1 KB 
ID:	7159

    Taped up the neck in preparation for some fret levelling.
    Click image for larger version. 

Name:	WP_20151222_14_18_51_Pro.jpg 
Views:	240 
Size:	78.0 KB 
ID:	7160

    I didn't take any photos during the levelling process, but I basically just followed the guide on the forum. I went and splurged on some tools, as I'd really like to be able to set up a guitar properly - notched straight edge, fret rocker, fret levelling beam and a triangular crowning file from Stewmac.

    I'm part way through crowning the frets. I'm enjoying the filing - there may be something wrong with me.

  4. #4

    This is my file, this is my gun

    Started rounding the edges on the back with a bastard file. I just like saying bastard file.
    Click image for larger version. 

Name:	WP_20151223_15_10_10_Pro.jpg 
Views:	227 
Size:	78.3 KB 
ID:	7161

    This could so end in tears.
    Click image for larger version. 

Name:	WP_20151223_15_42_44_Pro.jpg 
Views:	237 
Size:	74.6 KB 
ID:	7162

    I've done some more, but I need to take photos; because really, who wants to read this stuff?

  5. #5
    Overlord of Music dave.king1's Avatar
    Join Date
    Aug 2014
    Location
    Woonona by the sea
    Posts
    2,760
    I've taken a couple of cheap option for fret work, a Stanley knife blade has a decent straight edge for a fret rocker and an aluminium spirit level has a nice machined surface for a levelling bar, both cheap and readily available at your local hardware store my local also had a nice little kit of assorted very fine files and 0000 steel wool

  6. #6
    A Stanley knife blade as a fret rocker, that's an awesome idea Dave. Thanks for the tips.

  7. #7
    Member Bungee's Avatar
    Join Date
    Dec 2015
    Location
    Sydney
    Posts
    80
    Get to get some cheap hacks. I keep watching YouTube how to videos and getting gear envy. I was watching a guy build a strat from scratch, he had just about every bit of gear imaginable, I thought he was sponsored by stewmac!


    Sent from my iPhone using Tapatalk

  8. #8
    GAStronomist wokkaboy's Avatar
    Join Date
    Dec 2012
    Location
    Perth WA
    Posts
    13,555
    looking good Blueshound, I like the mods of the rounded edges on the body and fingerboard.
    You should be able to cut the pickguard to fit a P90 neck pup.
    Keep up the good work !
    Current Builds and status
    scratch end grain pine tele - first clear coat on !
    JBA-4 - assembled - final tweaks
    Telemonster double scale tele - finish tobacco burst on body and sand neck

    Completed builds
    scratch oak.rose gum Jazzmaster - assembled needs setup
    MK-2 Mosrite - assembled - play in
    Ash tele with Baritone neck - neck pup wiring tweaks and play in

  9. #9
    @Bungee
    I know what you mean by gear envy. Gear envy and space envy. I had to make space just to open my first kit. Now I'm wondering where I could put a third.

  10. #10

    Shaping

    Filing was good fun. I got carried away in parts and went past my pencil guidelines, but it's quite a comfortable shape now.

    Click image for larger version. 

Name:	WP_20151227_16_23_26_Pro.jpg 
Views:	234 
Size:	78.3 KB 
ID:	7270Click image for larger version. 

Name:	WP_20151227_16_23_43_Pro.jpg 
Views:	232 
Size:	80.1 KB 
ID:	7271

    Click image for larger version. 

Name:	WP_20151227_16_23_56_Pro.jpg 
Views:	238 
Size:	70.5 KB 
ID:	7272Click image for larger version. 

Name:	WP_20151227_16_24_18_Pro.jpg 
Views:	225 
Size:	78.0 KB 
ID:	7273

    Click image for larger version. 

Name:	WP_20151227_16_23_06_Pro.jpg 
Views:	244 
Size:	74.7 KB 
ID:	7274

Page 1 of 6 1 2 3 ... LastLast

Posting Permissions

  • You may not post new threads
  • You may not post replies
  • You may not post attachments
  • You may not edit your posts
  •