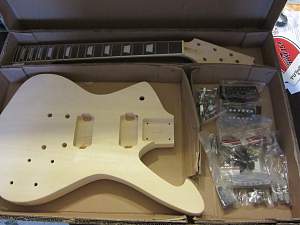
Starting my IC-1 Build

Starting my IC-1 Build

Last edited by Lord Gord; 16-10-2015 at 10:47 PM.
Welcome to our forum Gord....
Gavmeister
Welcome to the forum Lord Gord. I don't see many of these kits being built so look forward to your build diary!
Current Projects
#Planning 5 String Bass
Welcome Lordy. I've built an Iceman so can answer any questions you have. Plus it's one of the moderators Dingobass' s favorite guitar ever haha
Current Builds and status
scratch end grain pine tele - first clear coat on !
JBA-4 - assembled - final tweaks
Telemonster double scale tele - finish tobacco burst on body and sand neck
Completed builds
scratch oak.rose gum Jazzmaster - assembled needs setup
MK-2 Mosrite - assembled - play in
Ash tele with Baritone neck - neck pup wiring tweaks and play in
ok
So I sanded, sanded, sanded and sanded some more. Started with 120 grit, that 220 and 320 on the raw body and neck before I started staining.
I'm hoping to make kind of a sunburst pattern using ebony to darken the grain. Red oak as the base coat of guitar and neck and a Darker Black Cherry colour for the middle of the top of the body.
And........I got the dreaded glue spots.....
So, I spot sanded where these spots were. Hoping to blend them in in the second coat of ebony. A couple of them blended in. Some just went smooth but retained the mark. I'm not too upset. If I build another kit, I will sand heaver at the beginning and ensure that there are no marks that will show up later.
Sanded the second coat of ebony. I applied the first coat of Red oak. When wet, it really had the colour I was hoping for, but when I wiped the excess off, it went to a dark brown, becoming red type of hue. I let the first coat dry for a day. Minwax recommends not sanding between coats as it is "non grain raising". I decided not to sand before applying the second coat.
I also decided to apply it as thick as I could without leaving puddles or runs as this got me the colour I wanted. 2 hours after I applied the stain, I went to wipe off excess and there wasn't much that was wet. Wiped down neck and body. It is tacky but not wet. Will let it totally dry for a few days to ensure it's dry, but I am happy with the colour.
It doesn't show up in the pictures very well. It looks brown, but it has a pinkish red hue to it. Kinda like a sunburn you know is going to hurt the next day
Nice progress Lordy. Looking great so far!
Current Builds and status
scratch end grain pine tele - first clear coat on !
JBA-4 - assembled - final tweaks
Telemonster double scale tele - finish tobacco burst on body and sand neck
Completed builds
scratch oak.rose gum Jazzmaster - assembled needs setup
MK-2 Mosrite - assembled - play in
Ash tele with Baritone neck - neck pup wiring tweaks and play in
Alrighty....
Let the thick coat of Red Oak dry for a few days. I got the colour I wanted, but the stain dried very gummy. I re-applied the stain and let it activate for 10 min at a time. Did this a lot. Eventually got the surface of the guitar un gummy. Took a long time and lesson learned. Take your time!!!
Sanded the face of the body with 220 grit sandpaper. Was careful not to hit the edges very much. Wanted to scuff off the middle for my planned sunburst pattern. First off, went to 6 different hardware store. None of them had Black Cherry. The only colour close to my choice was Cabernet from Varathane. So I bought the cabernet and began staining. When wet, it had the colour I wanted, but when I wiped it off it was very weak and thin.
I started putting it on thick and wiping it down every 20 minutes. I lost count at how long and how many coats it took. Tried to do the sunburst pattern but with the trouble I had with the colour penetrating, I wound up with a bunch of patch that lumped together, So I started alternating and layering my stains and wound up getting and awesome stain job!!!!!
Front
Back
Headstock
I am happy with all of these surfaces. However, the sides of the guitar, are a different story....