Page 1 of 3 1 2 3 LastLast
Results 1 to 10 of 22

Thread: Restoring a basketcase

  1. #1

    Restoring a basketcase

    I was doing my usual trawling for 2nd hand pick ups and came across a semi destroyed bass guitar that had a pick up I wanted, so I bought the lot and decided to restore/rebuild it.

    The previous owner had taken it apart to refinish it and lost interest (I found out why, later)
    It came as a box of bits, and with only a few missing pieces of hardware I had lying around was able to get it to playable condition.

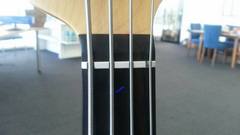
    And it mostly looked like this:
    Click image for larger version. 

Name:	Music Sub s.jpg 
Views:	208 
Size:	21.8 KB 
ID:	5247

    Looks ok, eh?
    It sure played ok.

    Sadly it also looked like this:

    Click image for larger version. 

Name:	20150805_144253.jpg 
Views:	206 
Size:	221.3 KB 
ID:	5248

    and this

    Name:  nut.jpg
Views: 293
Size:  5.4 KB

  2. #2
    So.. I haven't owned a fretless bass guitar for years, and decided it might make a good project.

    At this point I hadnt made up my mind on what to do with the body.

  3. #3
    GAStronomist wokkaboy's Avatar
    Join Date
    Dec 2012
    Location
    Perth WA
    Posts
    13,555
    nice one Beef, so are those pics how you got it or is the front photo after you restored it ?
    fretless bass's are awesome
    Current Builds and status
    scratch end grain pine tele - first clear coat on !
    JBA-4 - assembled - final tweaks
    Telemonster double scale tele - finish tobacco burst on body and sand neck

    Completed builds
    scratch oak.rose gum Jazzmaster - assembled needs setup
    MK-2 Mosrite - assembled - play in
    Ash tele with Baritone neck - neck pup wiring tweaks and play in

  4. #4
    My word, you are on the ball. I just posted this!
    No, thats the $100 wonder bass as I got it.
    The Lace pick up was the clincher.

    So I set about the basically pointless activity of removing the incredibly thick paint and sander sealer.
    And even after about 15 coates of stripper, and a liberal dose of heat gun, it still looked like this.
    Click image for larger version. 

Name:	20150813_201840.jpg 
Views:	205 
Size:	200.4 KB 
ID:	5250

    The sander sealer looked like congealed honey, and while the very thin enamel(ish) gloss came off pretty easily by comparison, I was wonderign if the other gak would ever come off.

    Then I realised I had access to one of these.
    Click image for larger version. 

Name:	12023023_10153219902474372_1859683790_n.jpg 
Views:	214 
Size:	83.8 KB 
ID:	5251

  5. #5
    GAStronomist wokkaboy's Avatar
    Join Date
    Dec 2012
    Location
    Perth WA
    Posts
    13,555
    wow what an absolute mess Beef getting the paint off.
    Yeah those flap wheel sanders are awesome. Great for sanding the cutaways and hard to get rounded surfaces
    Current Builds and status
    scratch end grain pine tele - first clear coat on !
    JBA-4 - assembled - final tweaks
    Telemonster double scale tele - finish tobacco burst on body and sand neck

    Completed builds
    scratch oak.rose gum Jazzmaster - assembled needs setup
    MK-2 Mosrite - assembled - play in
    Ash tele with Baritone neck - neck pup wiring tweaks and play in

  6. #6
    Next day I had it looking pretty much like this:
    Click image for larger version. 

Name:	20150816_092240.jpg 
Views:	222 
Size:	245.7 KB 
ID:	5252
    Click image for larger version. 

Name:	20150816_092246.jpg 
Views:	191 
Size:	232.9 KB 
ID:	5253

    You can see the heat gun damage to the back, where it has gone orange.

    My original idea was to go and copy Pino's bass in dark burst.
    But in my practice room was this plank ...

    Click image for larger version. 

Name:	20150830_210520.jpg 
Views:	213 
Size:	153.9 KB 
ID:	5254

    Stupid ideas began to form in my mind.

    Meanwhile, I needed to do some ironing.

    Click image for larger version. 

Name:	20150805_132807.jpg 
Views:	198 
Size:	181.9 KB 
ID:	5255
    Click image for larger version. 

Name:	20150805_133250.jpg 
Views:	204 
Size:	216.6 KB 
ID:	5256

    And they all came out as neatly as a meth-head's teeth. (Probably neater)

  7. #7
    GAStronomist wokkaboy's Avatar
    Join Date
    Dec 2012
    Location
    Perth WA
    Posts
    13,555
    come up pretty good Beef considering how thick the paint and sealer was.
    Whats the idea of heating up frets before you remove them, does that make them easier to remove ?
    That's a new idea !
    What colour are you staining/painting it and will you fill the pickguard screw holes and leave the pickguard off ?
    Current Builds and status
    scratch end grain pine tele - first clear coat on !
    JBA-4 - assembled - final tweaks
    Telemonster double scale tele - finish tobacco burst on body and sand neck

    Completed builds
    scratch oak.rose gum Jazzmaster - assembled needs setup
    MK-2 Mosrite - assembled - play in
    Ash tele with Baritone neck - neck pup wiring tweaks and play in

  8. #8
    My most played instrument doesnt have fret lines or markers, so I wasnt keen on the whole lined fretboard idea, so I tried to match things up.
    Click image for larger version. 

Name:	20150805_135148.jpg 
Views:	193 
Size:	226.7 KB 
ID:	5257

    Filling the fret slots with mahogany vaneer and glue from the nice timber yard out Windsor, NSW way.

    Click image for larger version. 

Name:	20150805_135153.jpg 
Views:	190 
Size:	198.5 KB 
ID:	5258

    Cutting them off with thing Id never heard of called a Japanese saw.
    Sanding them down and staining the board a few shades darker.

    Click image for larger version. 

Name:	20150816_164325.jpg 
Views:	196 
Size:	157.5 KB 
ID:	5259
    Click image for larger version. 

Name:	20150816_164321.jpg 
Views:	200 
Size:	156.1 KB 
ID:	5260

  9. #9
    After a bit of a sand and tidy up, I realised all the neck side position dots are in the wrong place, so I whipped them out, got some dark wood filler, and also addressed some minor nicks in the neck, and restained the whole neck a few more times.

    Click image for larger version. 

Name:	20150817_212531.jpg 
Views:	197 
Size:	159.5 KB 
ID:	5261

    Click image for larger version. 

Name:	20150817_212537.jpg 
Views:	206 
Size:	164.9 KB 
ID:	5262

    I also took the time to remove the original logo from the headstock.
    Interestingly the timber had 'aged' around the big black logo, but leaving the unstained neck out on sunny days resolved this in about 20 hours of direct sunlight.

    Click image for larger version. 

Name:	20150831_210103.jpg 
Views:	197 
Size:	139.3 KB 
ID:	5263


    The frets come out easier if you heat them up, just softens up the glue. Some people use a soldering iron.
    Last edited by Swinging Beef; 14-09-2015 at 01:24 PM.

  10. #10
    GAStronomist wokkaboy's Avatar
    Join Date
    Dec 2012
    Location
    Perth WA
    Posts
    13,555
    wow looks excellent Beef. What did you use to stain the fingerboard ? looks ebony colour - well done
    Current Builds and status
    scratch end grain pine tele - first clear coat on !
    JBA-4 - assembled - final tweaks
    Telemonster double scale tele - finish tobacco burst on body and sand neck

    Completed builds
    scratch oak.rose gum Jazzmaster - assembled needs setup
    MK-2 Mosrite - assembled - play in
    Ash tele with Baritone neck - neck pup wiring tweaks and play in

Page 1 of 3 1 2 3 LastLast

Posting Permissions

  • You may not post new threads
  • You may not post replies
  • You may not post attachments
  • You may not edit your posts
  •