Page 1 of 9 1 2 3 ... LastLast
Results 1 to 10 of 81

Thread: robs JR-1DC (Lyn #7)

  1. #1
    Mentor robin's Avatar
    Join Date
    Feb 2013
    Location
    Brisbane
    Posts
    1,513
    HI Folks, it’s been quite a while since I last posted. I’m sorry to say that I haven’t even been keeping up with the Forums, so apologies for my absence. Unfortunately I seem to have fallen in a bit of a heap over the last few months and haven't been able to get myself going.

    To get out of my "funk" I decided the best therapy would be to start my next kit. The LP Junior DC. I've had the kit for quite a few months now, but I have had neither the motivation nor the enthusiasm to even start it.

    Anybody who has followed my previous builds knows that, for me, the guitars are all about playability. So I wasn't too sure that the original compensated wrap-around bridge would be good enough for accurate intonation, so I ordered an individual saddle wrap-around bridge. Unfortunately the new bridge is quite a few mm's higher than the original so I have had to rebate the post holes.

    As it only has one pick-up I thought I would get a good replacement for it. I have never owned a guitar with a P90 (until PBG I hadn't even heard of them), so after a lot of Googling I decided on a Lollar "Dog ear" P90. When it arrived I found that the "ears" were even less flexible that the stock Pup which made mounting it on the slightly contoured Arch Top of the kit rather problematic.

    To cut a long story short, I had one of those “it seemed like a good idea at the time” moments. D’oh!

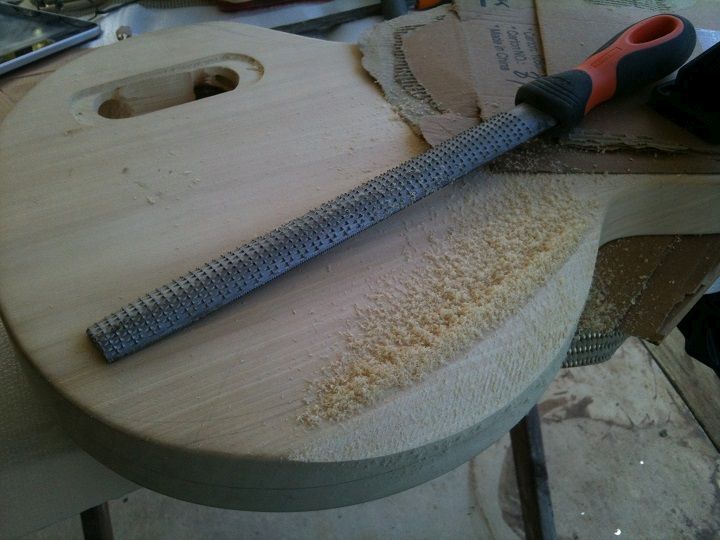
    So I decided to cut the top of the guitar to fit the P90, but I had to go much deeper than I had planned so then the pickguard wouldn't fit properly. So I cut the body for that, and then I realized that the P90 will be too low (by several mm's) so I will have to make a shim for it. It wouldn’t be me if it didn’t have tummy and forearm cuts. Plus for this one I’ve also included a “leg” cut to make it more comfy while sitting and playing. All in all my rasping, filing and chisel skills are coming along a treat.

    At that stage I had realised that it had all got out of hand and I knew it I was well on my way to making a guitar that will probably hold pride of place in the "Ugly Guitar Thread". Lol.

    I was pretty disappointed with how it was turning out so I wasn’t going to do a Build Diary but I thought it will give me the incentive to see this through to the bitter end.

    But I reserve the right to terminate this Thread if it gets too bad.

    So I have reluctantly added a few photos of my rather haphazard progress. I am just making it up as I go along folks, so I have no idea how it will eventually turn out. Hopefully over the next month or so I will have something that will not be too Frankenstein-ish.

    My main regret is that it is no longer a Les Paul Jr. But like all our guitars, it will be unique. Ugly, but unique.

    At least it’s good to be back

    Cheers
    rob


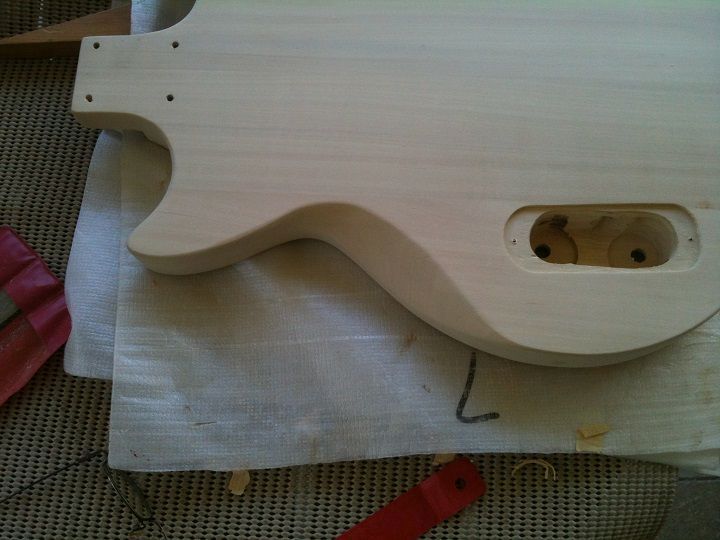
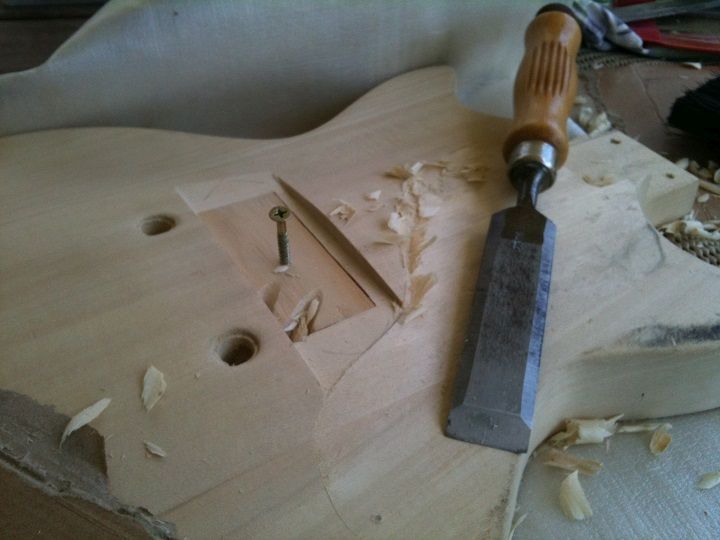
    Pic #1. I wanted to try and reproduce the sound of the Jr so I didn’t like the idea of the Humbucker cavity under the P90 so filled it in with a block of wood. Here I have started to cut the body to take the standard pickguard.

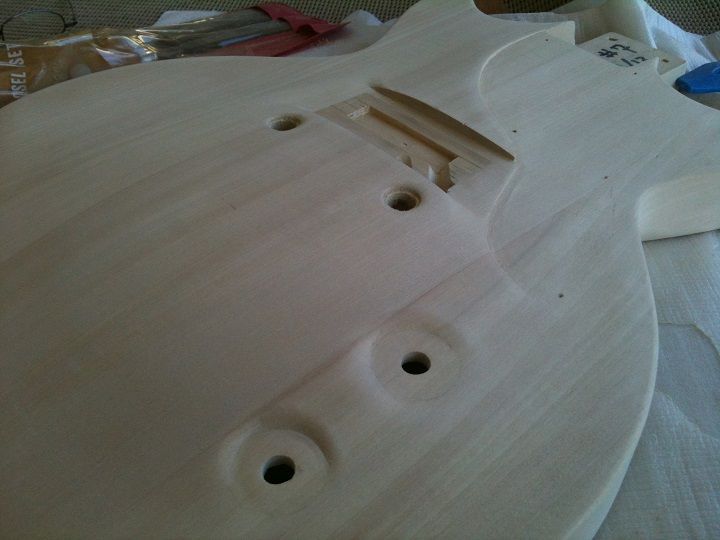
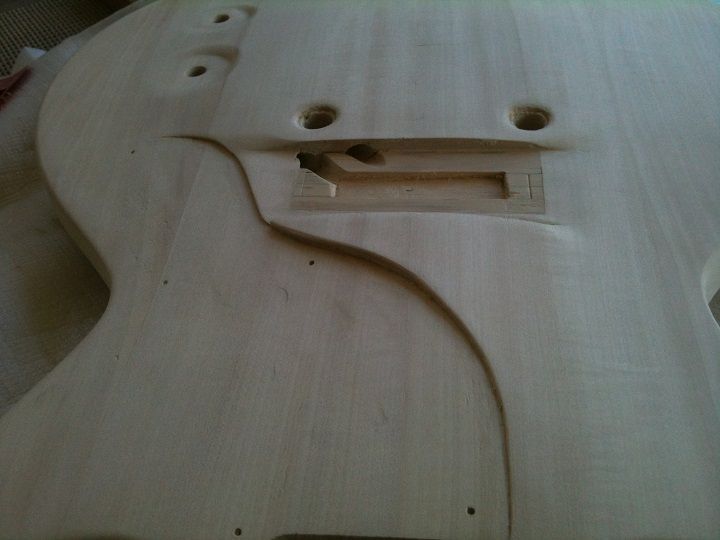
    Pic #2. Pickguard shape cut out, and the Pup cavity finished

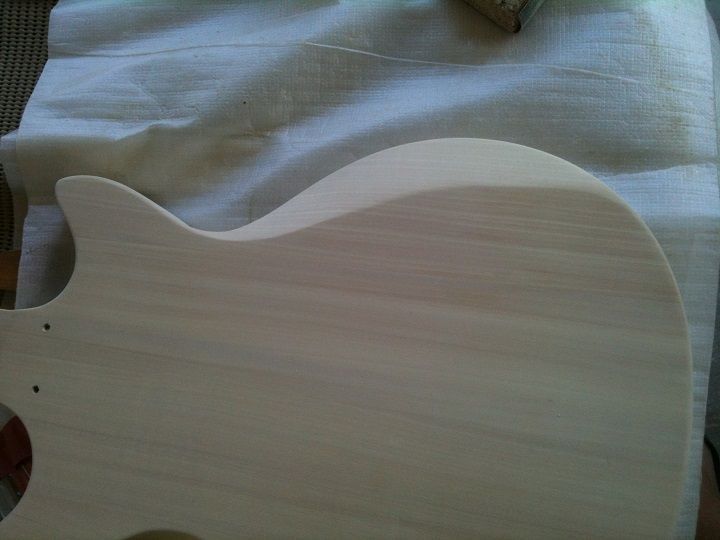
    Pic #3. Finished mutilating the top.


  2. #2
    Mentor robin's Avatar
    Join Date
    Feb 2013
    Location
    Brisbane
    Posts
    1,513
    Pic #4. Now to start on the cuts. As per usual for me everything is done by hand. All the cuts were done with a rasp
    Pic #5. Tummy cut
    Pic #6. “Leg” cut.


  3. #3
    GAStronomist wokkaboy's Avatar
    Join Date
    Dec 2012
    Location
    Perth WA
    Posts
    13,555
    nice mods Robin, I'll read later when I have time, good to have you back on the forum mate !
    Current Builds and status
    scratch end grain pine tele - first clear coat on !
    JBA-4 - assembled - final tweaks
    Telemonster double scale tele - finish tobacco burst on body and sand neck

    Completed builds
    scratch oak.rose gum Jazzmaster - assembled needs setup
    MK-2 Mosrite - assembled - play in
    Ash tele with Baritone neck - neck pup wiring tweaks and play in

  4. #4
    Mentor
    Join Date
    Aug 2013
    Location
    Mackay
    Posts
    1,276
    Hey, that's looking very cool, Robin. I truly hope you keep going through with this and post often. I love the way the mods are shaping up and I like the idea of it being done by hand. To me that's the artistry. And I don't think it looks ugly at all! Cheers.

  5. #5
    Looks fantastic so far Robin. Don't see why you're so negative about it, looks to me like you've taken a basic kit and made it a whole lot better. Keep it up!
    Cheers,

    Adam


    adamboyle(at)pitbullguitars.com

  6. #6
    Member
    Join Date
    Mar 2013
    Location
    Canberra
    Posts
    162
    Hey Robin

    I really like what you did with the carve for the pickguard...never really thought of recessing the pickguard before, but It's a really nifty idea and I'm sure it will look cool (particularly on a arched top guitar).

    Cheers

    Darren

  7. #7
    Moderator Brendan's Avatar
    Join Date
    Apr 2013
    Location
    Perth, WA
    Posts
    3,444
    Robin - welcome back - missed you! Personally I think it's looking great - can't see what the problem is! I reckon like your others - this will be a cracker!

  8. #8
    Welcome back Rob.
    This is looking great, love the craftsmanship.
    Interested to know how you did the recesses for the control knobs?
    Been looking up the exact thing on the web yesterday...something I may want to try in the future.
    Keep up the good work.

    Cheers
    Andy

  9. #9
    Overlord of Music gavinturner's Avatar
    Join Date
    May 2013
    Location
    HOLGATE NSW
    Posts
    3,057
    Great to have you back Robin! I've missed reading about your awesome builds. This one sounds like no exception. In my opinion you are on track to create something really cool here!!

    cheers,
    Gav.
    --
    Build #01: BC-1
    Build #02: ST-1
    Build #03: JR-1DC
    Build #04: ES-2V
    Build #05: ESB-4 (GOTM July 2014)
    Build #06: RC-1
    Build #07: MK-2
    Build #08: TLA-1
    Build #09: JR-1DC
    Build #0A: LPA-1
    Build #0B: STA-1 (GOTM April 2015)
    Build #0C: MKA-2
    Build #0D: LP-1M
    Build #0E: JB-1
    Build #0F: FS-1

    Find me:
    https://www.facebook.com/firescreek.guitars/
    http://www.guitarkitbuilder.blogspot.com.au/

  10. #10
    Mentor robin's Avatar
    Join Date
    Feb 2013
    Location
    Brisbane
    Posts
    1,513
    Hey Guys, thanks a bunch for the support and encouragement, it really does mean a lot to me. This community really is the best.

    I was actually going to start this Thread a few weeks ago when the guitar was a bit rough and I wasn't sure where I was going with it. I apologize for the negative tone of the OP, I should have re-read it before posting.

    @ Warren, Brendan, Andy and Gav, thanks Guys, it's good to be back.

    @ Andy, To recess the Control knobs I just used a chisel. The Basswood is so easy to work with that I didn't even need a mallet. Just eased the chisel in, made a rough circle and finished it off with sandpaper.

    Cheers Guys and thanks again
    rob

Page 1 of 9 1 2 3 ... LastLast

Posting Permissions

  • You may not post new threads
  • You may not post replies
  • You may not post attachments
  • You may not edit your posts
  •