


Luthiers glues.
When it comes to gluing your guitar there are a few things worth knowing, such as what glue to use and why this is important.
First I want to talk about the most common glues used in lutherie.
1. P.V.A is one of the most commonly found glues, every hardware store and most super markets stock some form of P.V.A. There are some issues with this glue, which I will discuss later.
2. Aliphatic Resin glue, can be purchased from specialty wood craft stores.
3. Hide glue, a traditional glue used by luthiers. Hide glue is available from lutherie suppliers and some specialty wood craft stores. Hide glue can be purchased in ready to use liquid or granulated form.
4. Cyano acrylic or super glue. Again readily available from hardware and super markets. Again there are issues with these glues that will be covered later.
P.V.A is a general purpose glue used for adhering timber to timber joins in carpentry and some cabinet making. While it is sufficiently strong enough for these applications it does have a few short comings when used for Lutherie.
P.V.A glues generally do not form a bond that is stronger than the timber being joined. P.V.A glues are also prone to thermo plastic creep, i.e. they expand and contract with differing temperature and humidity conditions.
Another problem with P.V.A glues is that over time they can become brittle and have been known to 'let go' when it is most inconvenient for them to do so.
Generally, I tend to avoid using P.V.A glue in my custom builds on joints that are under stress, such as necks and fret boards. I will use P.V.A for adhering top woods and peg head veneers as the slight flexibility of P.V.A is useful in these situations.
Aliphatic Resin Glues are again a general purpose adhesive that is being used more frequently in the cabinet making industry and are gaining wide spread use in Lutherie.
Aliphatic Resin glue forms a stronger than wood bond that is slightly flexible. This is highly desirable when fixing necks to bodies as a strong joint assists with sustain.
Aliphatic Resins also resist thermo plastic creep.
I have been using Franklin Titebond glue with great results, Franklin Titebond is available from most specialist wood crafting and Luthiers suppliers.
Hide Glue is the traditional glue used by Luthiers and Cabinet Makers. As the name suggests, it is an animal based glue made from cow or rabbit skins.
Hide glue is water soluble and is available as a liquid or granular product.
Hide glue also requires the purchase of equipment such as heated glue pots and brushes which makes it economically inviable for the hobbiest Luthier.
Mastering the use of hide glue takes some time as it is generally used as a hot glue, which requires the user to be highly organised as you have about 15 20 seconds to apply the glue and clamp before it starts to set.
The only time I would recommend the use of hide glue is for the repair of vintage instruments.
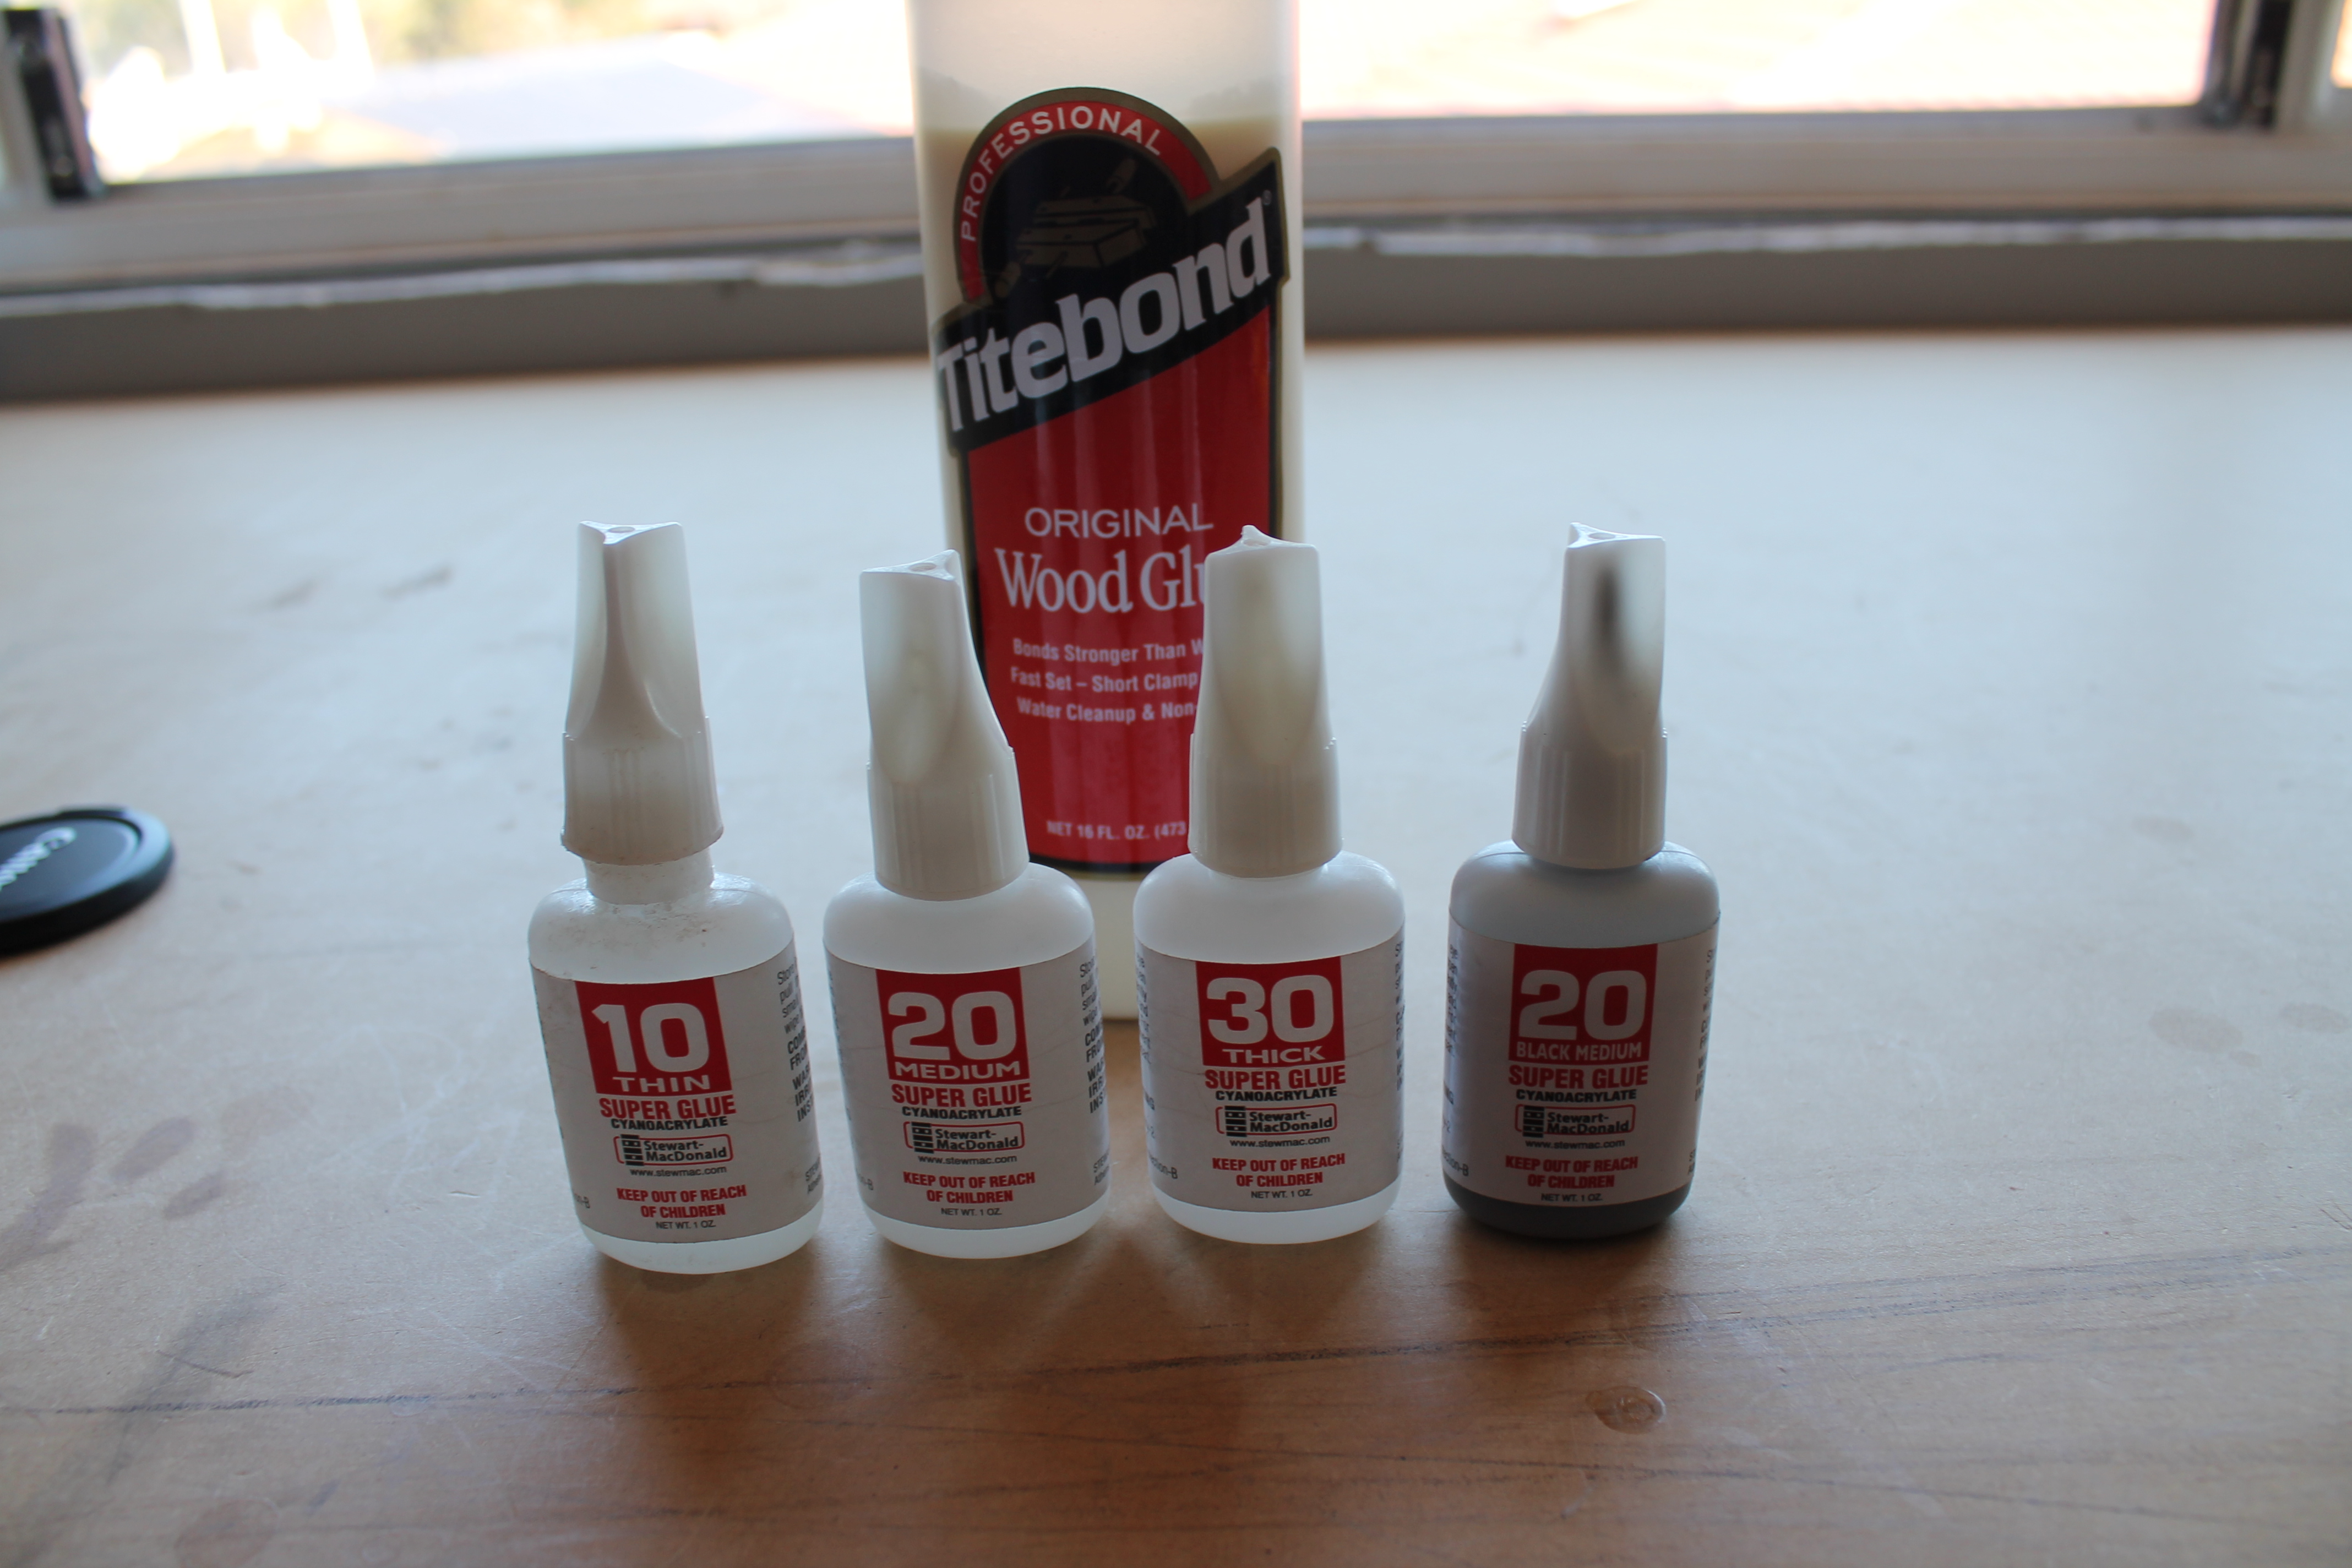
Cyano Acrylic or Super glue is used for attaching binding, inlays, fretwork and also can be used as a drop fill for chips in guitar finishes.
The super market form of super glue is unsuitable for Lutherie as it is usually not of the correct consistency or quality needed.
Stewmac.com in the U.S.A offer a range of super glues for Luthiers. They are Thin, Medium and Thick and also tinted varieties.
Thin super glue is used for jobs such as gluing frets, filling chips in fret boards and gaps between binding and bodies. It can also be used as a hard finish on fret boards.
For chip and gap filling, fill the chip or gap with fine sandings and place a few drops of glue. The wicking nature of this glue will enable an invisible filling that can be sanded back When re seating frets, clamp the fret down and add a few drops of glue along either side. This will hold the fret in place.
Medium glue can be used for fixing inlays, nuts and as drop fill in surface chips on a guitars finish.
Thick glue is used for attaching bindings, inlay work and as a drop fill in larger chips and scratches in a guitars finish.
To fix a chip or dent in the finish of a guitar you will need a razor blade, fine wet and dry (1500 2000 grit) and polishing paper or compound. If the chip has removed some of the underlying paint, you will need to match the colour before adding the glue.
Using a tooth pick, drop some glue into the chip and let this set. Keep adding glue until it forms a slight mound. With the razor blade, carefully scrape the mound level with the surface then polish until it has blended in. With care and patience you can make most chips and dents disappear.
If you have any questions regarding the use of any of the glues discussed in this article, I am more than happy to try and answer them.
Phil.


 Reply With Quote
 Gavmeister


![[url=https://www.facebook.com/kellysgutiars]](image.php?s=6552f8f605baf6d45471e50ac4f9a98a&u=1285&type=sigpic&dateline=1444110346)


 ).
).
