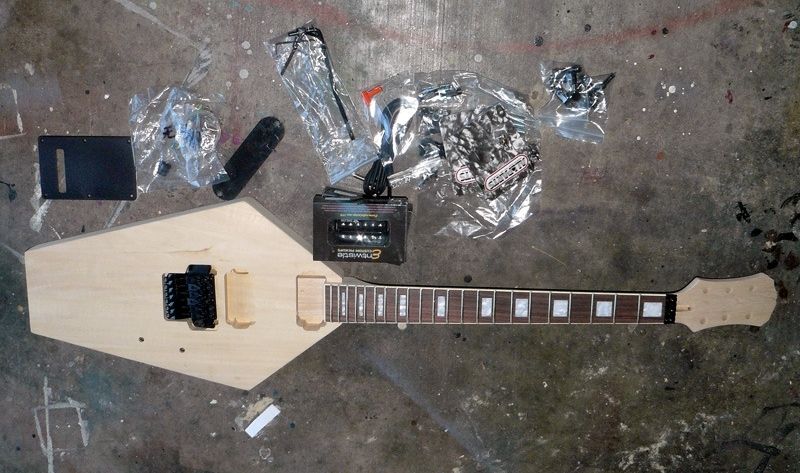
*fluffs eyebrows* some experimentation is called for
Build 19 PSH-1 Kustom
Build 18 HB-4S Kustom
Build 17 WL-1 Kustom
Build 16 TL-1TB Kustom
Build 15 PBG-2-
Build 14 FTD-1
Build 13 RD-1 Kustom
Build 12 DM-1S
Build 11 MKA-2 -
Build 10 Basic strat
Build 9 JM Kustom
Build 8 FV-1G
Build 7 ES-2V
Build 6- Community prototype
Build 5 LP-1LQ
Build 4 ES-5V
Build 3 JR-1
Build 2 GD-1
Build 1 TLA-1
I took Waz's idea and just washed over the fretboard, surprisingly a lot stuck to the inlays so I'll give a couple of days to dry and see how permanent it is. My tuners tuned up today but so did the painters, so scaffolding and tarps everywhere, won't be getting much done this week.
Build 19 PSH-1 Kustom
Build 18 HB-4S Kustom
Build 17 WL-1 Kustom
Build 16 TL-1TB Kustom
Build 15 PBG-2-
Build 14 FTD-1
Build 13 RD-1 Kustom
Build 12 DM-1S
Build 11 MKA-2 -
Build 10 Basic strat
Build 9 JM Kustom
Build 8 FV-1G
Build 7 ES-2V
Build 6- Community prototype
Build 5 LP-1LQ
Build 4 ES-5V
Build 3 JR-1
Build 2 GD-1
Build 1 TLA-1
Bit of car polish or maybe 0000 steel wool over the fret markers might remove a bit of the washed on colour.
I'll polish the frets but not the markers, they look nice and grimy but I can still see them. I did drill out the side markers as I painted the white binding, I'll fill the tiny holes with some glow powder and PVA glue . I put the ebay tuners on and they look great and indeed might be real Gibson ones. Once I can get the car out of the garage I think it will be fret leveling and neck glueing time ...my first set neck.
Build 19 PSH-1 Kustom
Build 18 HB-4S Kustom
Build 17 WL-1 Kustom
Build 16 TL-1TB Kustom
Build 15 PBG-2-
Build 14 FTD-1
Build 13 RD-1 Kustom
Build 12 DM-1S
Build 11 MKA-2 -
Build 10 Basic strat
Build 9 JM Kustom
Build 8 FV-1G
Build 7 ES-2V
Build 6- Community prototype
Build 5 LP-1LQ
Build 4 ES-5V
Build 3 JR-1
Build 2 GD-1
Build 1 TLA-1
Damn painters
Dude not to throw a spanner in the nuts or anything buthow does swapping your inlays for some plastic insects sound?! just sand them from underneath until they're level with the fretboard and glue them on. No filling just that spiders and crickets in their empty holes?? (sorry bro I just had to
)
I had thought of following VH2580's idea of clear inlays with images on the back of them and even did the first image but I really don't have the confidence to pull huge inlays out and it's not like I can just get another neck if I stuff it up on this kit, it's a unique to the
GD1. so grimy its gonna be.
This lovely was disappointed she didn't get to be on a guitar![]()
Build 19 PSH-1 Kustom
Build 18 HB-4S Kustom
Build 17 WL-1 Kustom
Build 16 TL-1TB Kustom
Build 15 PBG-2-
Build 14 FTD-1
Build 13 RD-1 Kustom
Build 12 DM-1S
Build 11 MKA-2 -
Build 10 Basic strat
Build 9 JM Kustom
Build 8 FV-1G
Build 7 ES-2V
Build 6- Community prototype
Build 5 LP-1LQ
Build 4 ES-5V
Build 3 JR-1
Build 2 GD-1
Build 1 TLA-1
This is an epic build, so in character with the style of the guitar, great job.
Another idea for the markers, I knew a guy who did scrimshaw on horn. He simply used a sharp awl to scratch in the design and then simply rubbed in black ink in the scratches. If you are not good at drawing then you could get like a tattoo artist to scratch in some howling faces, wolves , bats , skulls , whatever...
Stan's LP Build for my Sister: http://www.buildyourownguitar.com.au...ead.php?t=3146
Benson Pickup Strat mod: http://www.buildyourownguitar.com.au...ead.php?t=5229
Epiphone LP headstock fix: http://www.buildyourownguitar.com.au...ead.php?t=3410
Martin Backpacker Repair: http://www.buildyourownguitar.com.au...?t=5038&page=3
'57 Harmony Jazz guitar project: http://www.buildyourownguitar.com.au...ead.php?t=2972
another good idea Stan, but without computer assistance I can't draw to save myself, and money is always tight this time of year so, paying someone is right out.
Build 19 PSH-1 Kustom
Build 18 HB-4S Kustom
Build 17 WL-1 Kustom
Build 16 TL-1TB Kustom
Build 15 PBG-2-
Build 14 FTD-1
Build 13 RD-1 Kustom
Build 12 DM-1S
Build 11 MKA-2 -
Build 10 Basic strat
Build 9 JM Kustom
Build 8 FV-1G
Build 7 ES-2V
Build 6- Community prototype
Build 5 LP-1LQ
Build 4 ES-5V
Build 3 JR-1
Build 2 GD-1
Build 1 TLA-1
You could always use the computer to draw a template that you place over a fret marker and then scribe/scratch away until you get the image you want.
When looking into transfer decal paper another idea was to print in reverse on kitchen grade grease proof paper and gently rub that on a surface, let it dry, and then add final coats. In this instance that could maybe work as your outline for doing an etching? Bit like doing a tattoo in reverse.
Not sure if this is a workable solution for you Dedman?
Acoustics:
1995 Maton EM725C - Solid 'A' Spruce Top, QLD Walnut B&S, AP5 Pickup
2015 Ibanez AEL108MD-NT - Laminated Spruce top, Laminated Mahogany B&S, Fishman Sonicore Pickup
Electrics:
Pitbull LP-1S - http://www.buildyourownguitar.com.au...ead.php?t=5745
Carsen Superstrat Rebuild - http://www.buildyourownguitar.com.au...ead.php?t=6284
Builds in Progress:
Silent Guitar Semi-Scratch Build - http://www.buildyourownguitar.com.au...ead.php?t=6809