My latest build has arrived, and it's an SSCM-1E - mahogany body, ebony board. Everything looks OK going by a quick mock build.
I'm planning to spray a finish in a solid colour, though I haven't decided which yet. I also haven't decided if I'll use rattle cans or invest in a compressor and gun. I'm leaning towards gloss black - maybe even metallic - front, but don't know about the back.
I'll upgrade the tuners to Grovers, and will probably upgrade the pickups and electrics when I get to that point. I'll also fit an electro socket and replace the plastics with black, as the "cream" doesn't really do it for me.
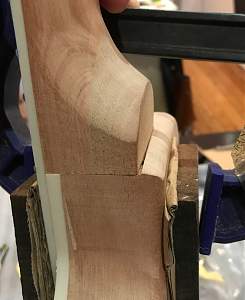
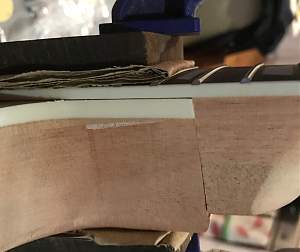
I would appreciate some advice on the neck. It's a snug fit, but I'm not sure that it's seating into the pocket properly, i.e. I'm not sure there's a lot of contact between the heel and the floor of the pocket. Here are a few photos. Even when clamped quite firmly, there's a gap between the neck and the pocket, and a slight gap between the board and the top of the body. How would you tackle it?


 Reply With Quote