Very handy addition there mate.Originally Posted by Simon Barden


Very handy addition there mate.

The last few days I've been working on headstocks. Cutting out the fibreboard to size to stick on the face and gluing it on. I have enough clamps to do one at a time, so it's taken a few days as I've been doing four necks in total, as I've now reclaimed my ES11 neck from JimC and also decided to refinish the ES-3 headstock in the same way.
I used a brad point drill to open the tuner holes up, working from the rear until the tip poked a central hole through the fibreboard, then turning the neck over and finishing from the top. Even with the brad point, there was still a tendency for the fibreboard to tear a bit round the edges, so the first neck had some CA repairs around the hole edges. I then used a smaller drill for the others and finished off the opening with a tapered reamer. Much smoother.
The truss rod cavity sides were enlarged with a Dremel then hand sanded.
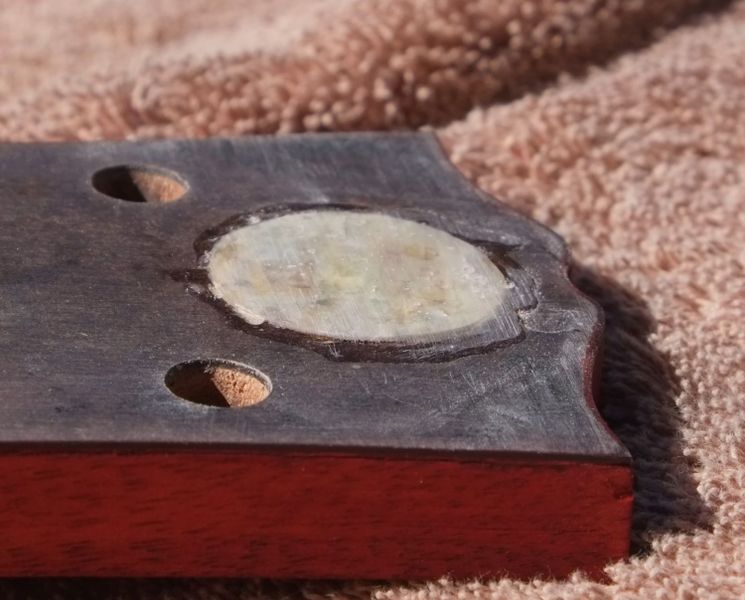
I'm still persevering with a slightly proud abalone inlay, a few coats of black paint over the top of the headstock, and then sanding back so the abalone is flush with the paint. A black decal then goes on the abalone, generating my SB logo with a black ring around the outside smoothing out and hiding the edges of the abalone circle. All then covered in clear lacquer.
I've learnt as I've gone along, so this time I laminated three layers of abalone sheet together so that I've definitely got enough not to sand through when the time comes.
I still needed to fill in the gap around the edge of the abalone disk with CA, but in order to do so, I had to put a lot on, resulting in the excess CA being level with the top of the disk.
As I needed the CA to be level with the surface of the headstock in order to build up the paint layers, this meant some careful filing away of the unwanted CA with a flat needle file.
I've still got the ES-3 headstock to get into shape as the fibreboard was glued on yesterday, but I should be gluing on the necks of the SGs today, and probably cleaning the binding on the ES-1 neck before giving it a coat of amber lacquer to darken the binding to match its body.
Been pretty hot (for the UK) the past few days, so gave been taking things relatively slowly. Also had a couple of days where everything went wrong, so didn't do much on those days.
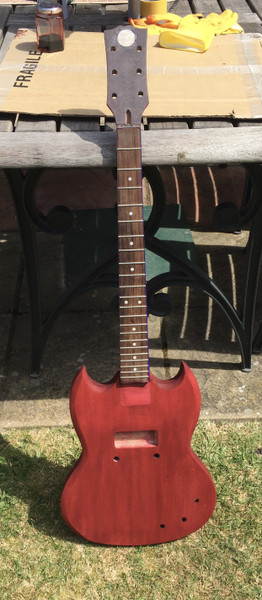
Here's the GSJ-1 with the neck glued on, the neck joint filled and patched up, and the body (finally) cleared of all scratches and re-stained where necessary (actually this photo did show a bit of a stain tide-line near the bottom so I did the top of the body again after this). I thought the heel tenon was going to sit proud of the body, but once I really clamped it down, it sank below it, so I filled in the pit and got it all level.
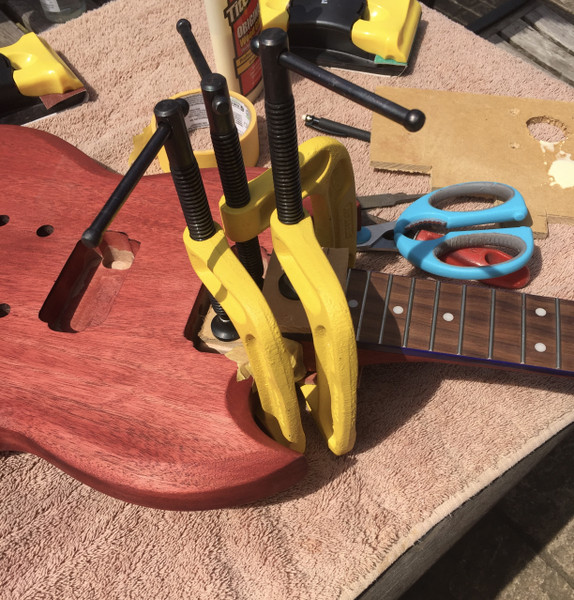
Here's the GSM-1 with the neck being glued on. A bit of joint filling and touching up, undoubtedly a few exta bits of re-staining to do as I'm bound to knock it or notice more scratches, and then it should be time to start spraying them in two days time. One coat of heritage cherry red lacquer on each and then clear coats.
Then it's time for three coats of black on the headstock face, then sanding that flat, level with the abalone inlay. then a clear coat layer, decal, more clear coat on the headstock, then put aside to dry/cure.
Forecast is currently for at least six more sunny days. Which is nice.

That's looking really good.
And I am glad I am not the only one looking at weather forecasts to work out if I have a big enough window to paint.
DC
Mantra: No more pedals, must finish BlueyCaster...
Disclaimer: I haven't done woodwork since high school, and wasn't really paying attention at the time ...
Looking good Simon. At least the weather is on your side for painting right now.
It's almost too hot. 28°C in the shade in the back garden at the moment. Hotter in the back garden than out front because it faces the sun, and the brick walls and patio paving heat up and make it warmer.
But that's better than too cold or too humid. But it is still only May, late spring here.
Looking great, loving the colour.

Funny about the vaguerities of weather. That's about an average day in February here. Usually we can at least count on sun. But not lately. we have just had the second named storm of Atlantic hurricane season pass by and the season doesn't even begin until Monday. So, at the moment, I am envious of your weather and the color on that SG.
Sent from my ONEPLUS A3000 using Tapatalk
The past couple of days I've been spending my time on the headstocks, spraying the face black and building up enough depth of paint so I can sand back the abalone level with the paint. But I sprayed some on when it was too warm, and the paint has bubble up - trapped gases under a set skin I presume. So I'm letting that dry harder before sanding back and spraying again.
I also had a look at the bridge that came with the GSJ-1 kit. It was OK, a copy of a BadAss wrapover bridge, but not that well executed. The chromium plating in the string mounting holes was blocking some of the holes and was leaving sharp edges on others that could cut into the strings. I had a go at clearing the holes with needle file, which improved things, but they were poorly positioned for access with sandpaper, so I decided to have a look around for something similar, better, but low-cost.
I found this on Amazon, and bought one. https://www.amazon.co.uk/gp/product/...?ie=UTF8&psc=1
The same seller was also selling the kit bridge for a very similar price.
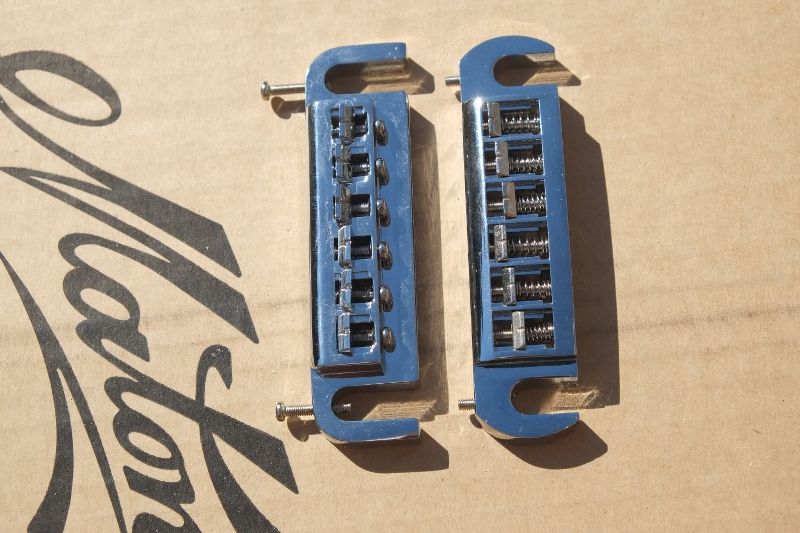
But I much prefer the new one. The post heads are that bit wider, there is double the amount of intonation adjustment travel available and the whole thing is that bit more compact. It's also lower overall, the top of the saddles only come up to where the top of the main bridge ends on the kit bridge. The kit saddles sit up a long way from the bridge itself, so that's less comfortable for palm muting. Some wrap-over bridges can be really too tall for the guitar they're fitted to, making it difficult to lower the bridge enough for a low action. This one is about as low as they come. The one kit bridge advantage is that it does had a far more rounded string path at the back of the bridge.
GSJ-1 kit bridge on the left, replacement on the right:
As I have glued the necks on the GSM-1 and GSJ-1 and also my ES-1, I needed to build my better spraying support. My mic stand experience with my EX-1 last year wasn't a good one. So I ordered the bits to make a proper upright stand I could hang guitar s safely from, and they've come over the past couple of days.
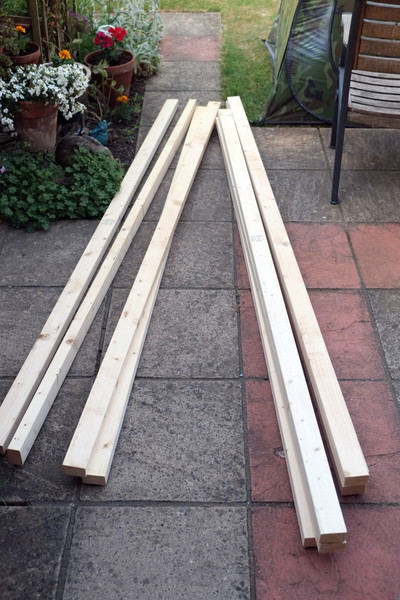
Wood (was supposed to arrive on Monday but turned up first thing today):
Far more than I needed but I had to get it online and delivered.
So I started cutting, and drilling and gluing. Another glorious hot sunny day here in the UK, far too hot for this sort of work really.
So is it surprising that when I came to attach the cross-piece to the second upright I found this?
So many pieces of wood lying around I'd picked up the wrong one. D'oh!
And it's amazing just how strong a bond Titebond can make in less than 5 minutes! Took some prizing apart.
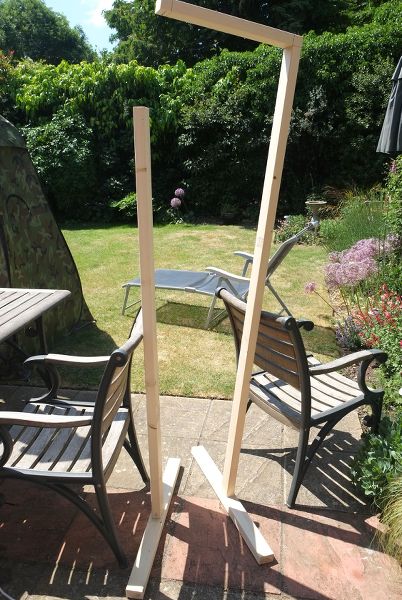
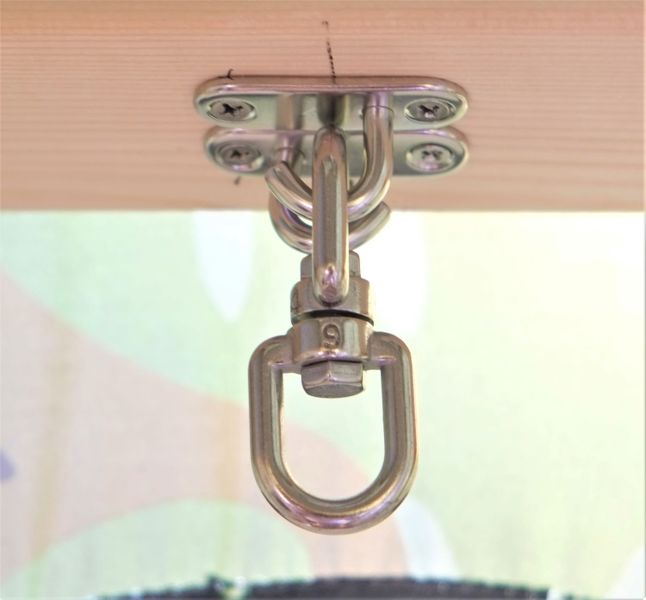
But eventually I pieced it all together. I'd just fitted the last of two corner supports to complete the frame when Amazon man turned up with the last missing piece - the primary hooks to hang the swivel from. Which was nice. because the swivel has two closed loops, I'd ordered open hooks rather than staple types to hang it from. But the hooks were shallower than I had expected, so I used two of them reversed, and made a mounting that the swivel couldn't escape from:
I use a couple of large S-hooks to suspend the guitars form, like so:
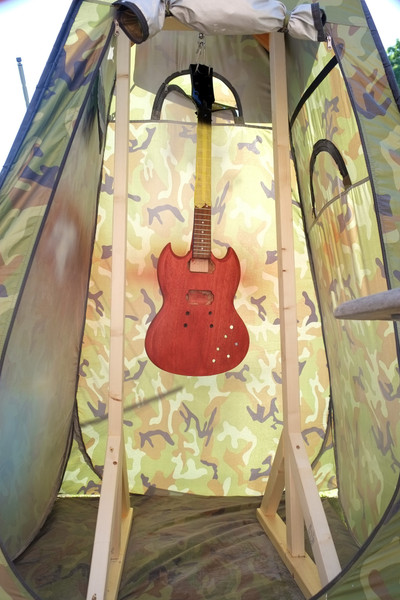
Then installed it in the spray tent.
Puts on black cap. "Pit Bull GSM-1, you shall be taken from this place to a place of spraying, where you shall be hung by the neck until red":
I'd have liked it to be a bit wider to reduce the risk of the guitar swinging and touching an upright, but I made it to just fit in the tent. To get something of a similar height but larger, I'd have to go for a much larger tent, family size, which would just be far too large and take a long time to put up/take down. So like everything in life, I have a workable compromise that's quick to assemble.
Last edited by Simon Barden; 31-05-2020 at 12:51 AM.
More headstock spraying today. Had some bubbling last time because it was really too hot to spray when I did it, so I first sanded those bubbles flat (the paint had had two days to dry fairly hard so no problems there), Started before 9am this morning and finished my round of three coats for for four headstocks faces by 11am, when it was hitting 25°C and was several deg. warmer in the spray tent.
Just checked and its now 28°C in the shade and was 40°C in the tent with the flap closed (post-spray mode to keep the dust/wind/insects out). Definitely too warm for good results. Early morning and early evening sprays only from now on all the time we have this glorious near-cloudless weather.
Last edited by Simon Barden; 31-05-2020 at 07:53 PM.
 Posting Permissions

 Reply With Quote