Nice. Very Suhr-esque.


Nice. Very Suhr-esque.
'As long as there's, you know, sex and drugs, I can do without the rock and roll.'

Thanks Pablo! Yes it's Suhr inspired!Originally Posted by pablopepper

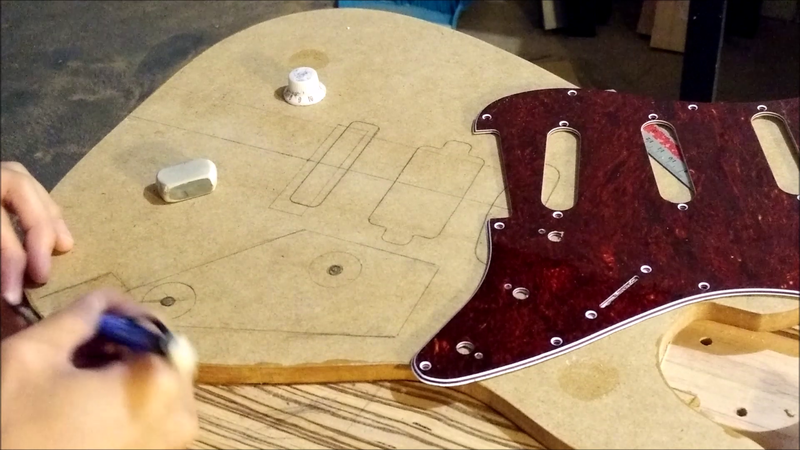
It was time to do the electronics control cavity. I started off by planning the layout on my template, adjusting the knob and switch positions according to my playing style. Then I drew a shape around the knobs and switch to form the back plate shape.
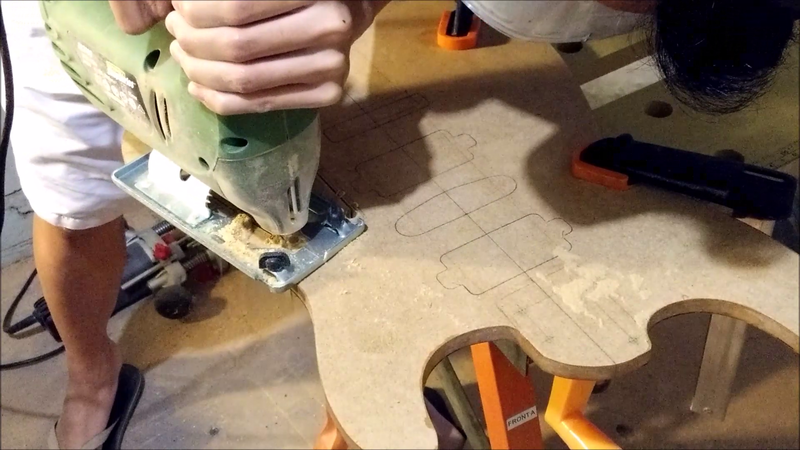
I cut out the shape with my jigsaw and then shaped it.
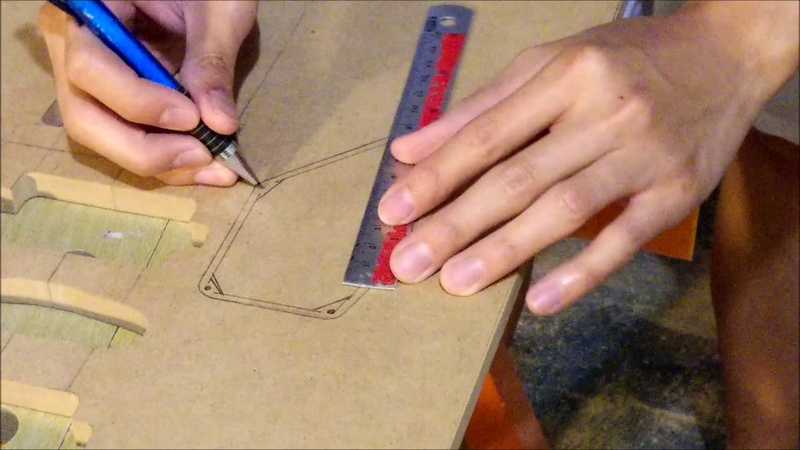
Once I was happy with the shape, I traced it out onto my pickup and neck template, and marked out the actual control cavity shape.
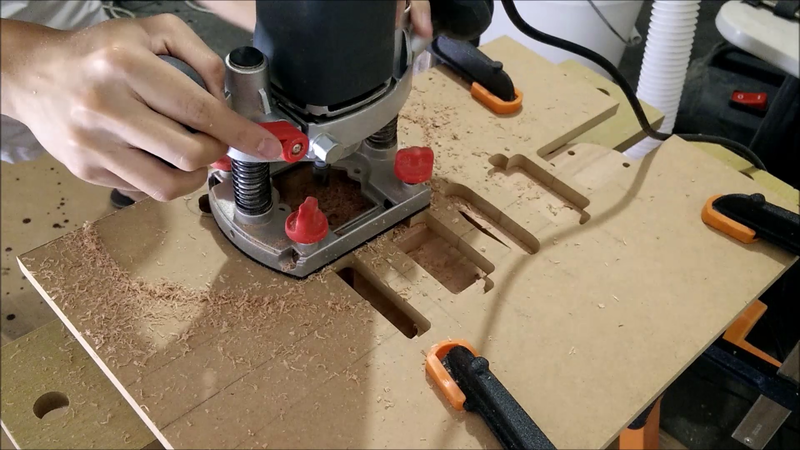
Then I drilled relief holes and routed out the cavity.
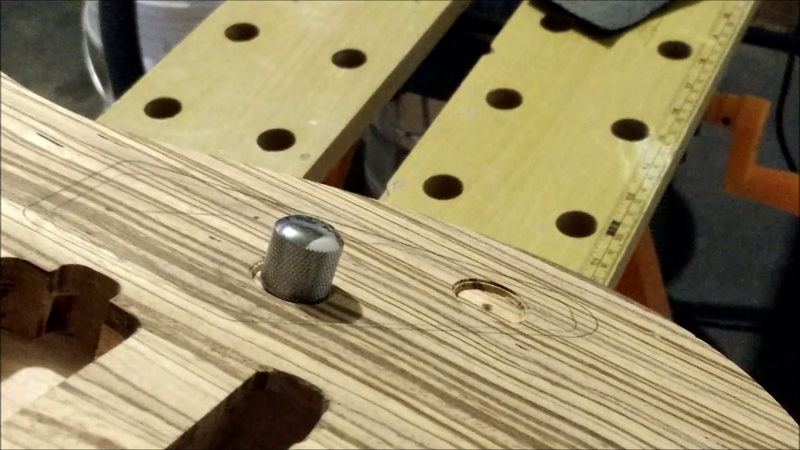
I then transferred the knobs and switch design to the top. I decided I wanted the knobs to be slightly recessed but not so dramatic like PRS.
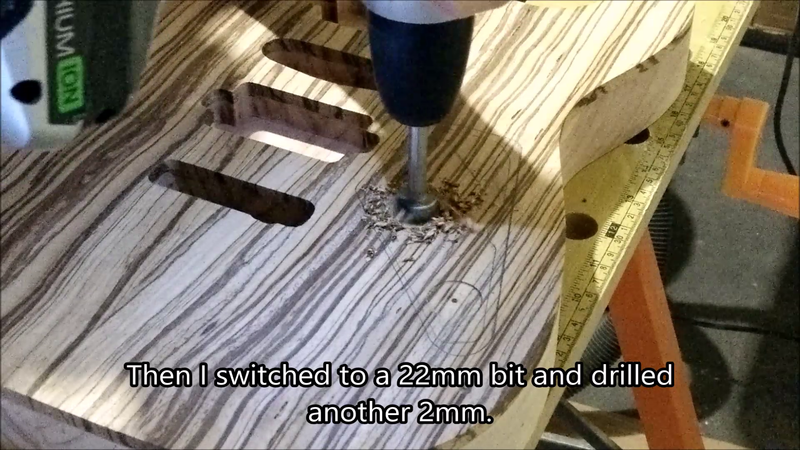
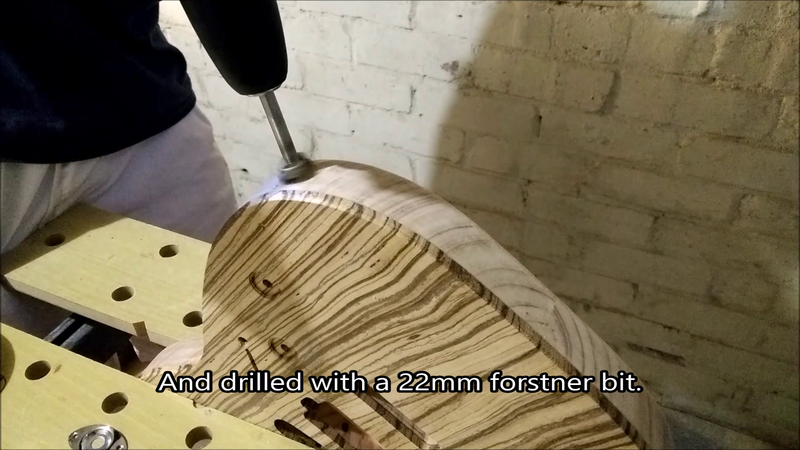
20mm not 22mm bit.
Love what your doing mate...
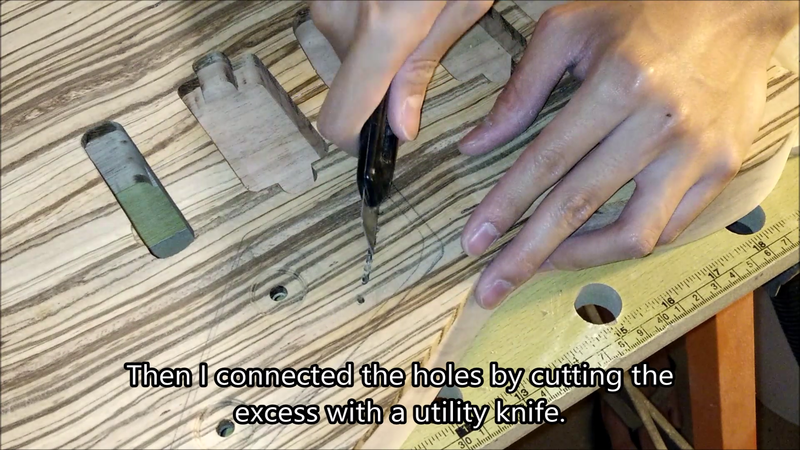
To make the switch slot, there are a few ways which I've seen. I could go with a 1/8" router bit and use a template, or a dremel, or drill holes and cut it out by hand. I realised a lot could go wrong with the router and the dremel. One slip and that's it! So I decided to try drill 3mm holes in a line and cut them out.
I cut the wood in between each holes with a utility blade.
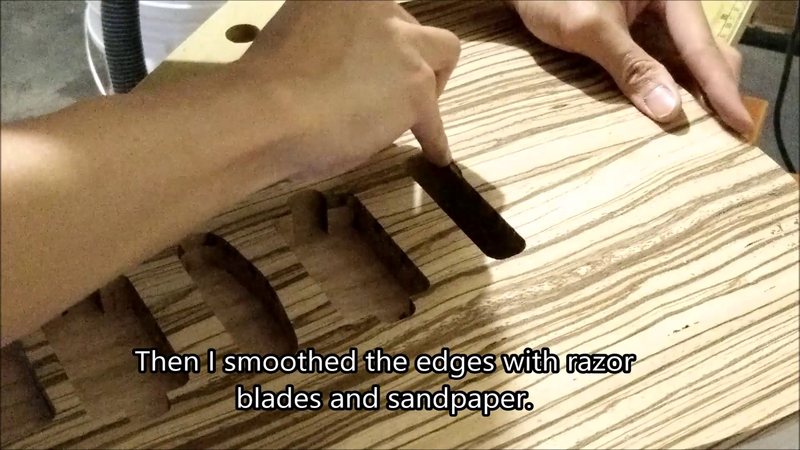
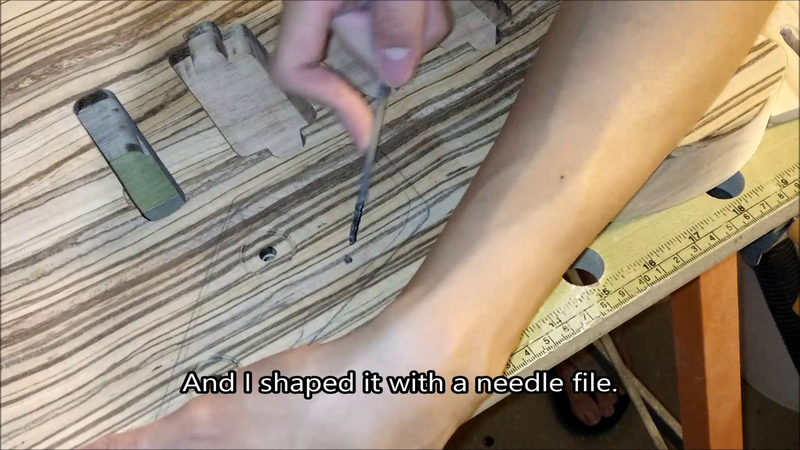
Then I finished shaping the slot straight with a needle file and some sand paper.
I reckon it's not perfectly straight so I'd have to work on it later, but the whole process took about 30mins. It may have been easier, faster and cleaner with a dremel so I might try that next time.
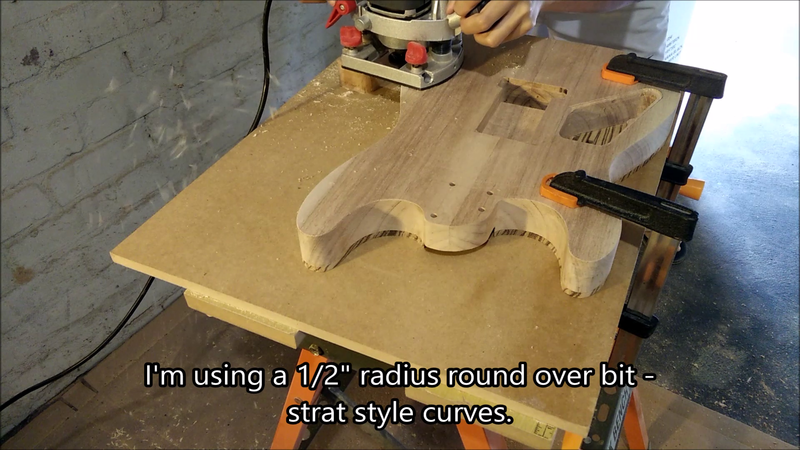
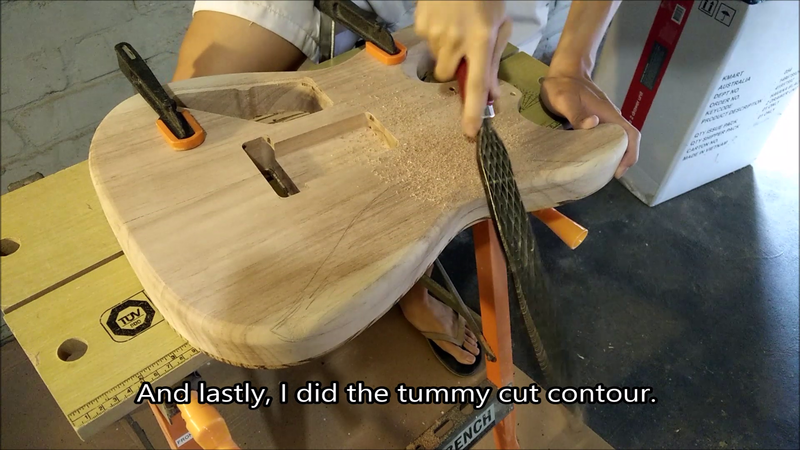
Once the top was taken care of, I paid attention to the curves. While this is a modern strat inspired guitar, I still want to retain the nice curves on it.
I used this 1/2" radius round over bit on the bottom. With such a large bit it's important to go slow.
This new bit gave me a super clean cut.
Then I switched to a 1/8" radius bit for the top. Since I don't intend to stain the top or put any binding, I figured out that was the perfect roundness.
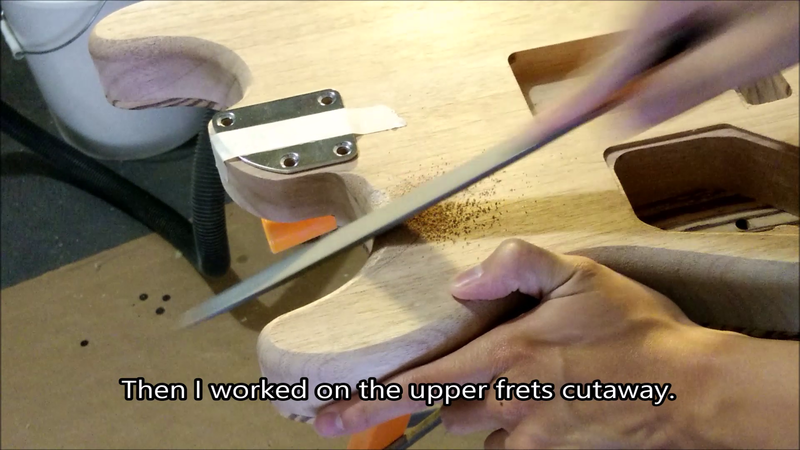
While thinking of the design, I wanted to add a cut away for the upper frets access on the lower horn. I've seen this done on some guitars like the Suhr modern and I liked it.
And I also did the tummy contour. I did this a few times on some guitar kits so it wasn't foreign to me (contours on a tele - gasp!). However, I took about an hour to shape it. The best part was customising the shape to my liking.
Once all the shaping has been done, I turned my attention to some unfinished business.
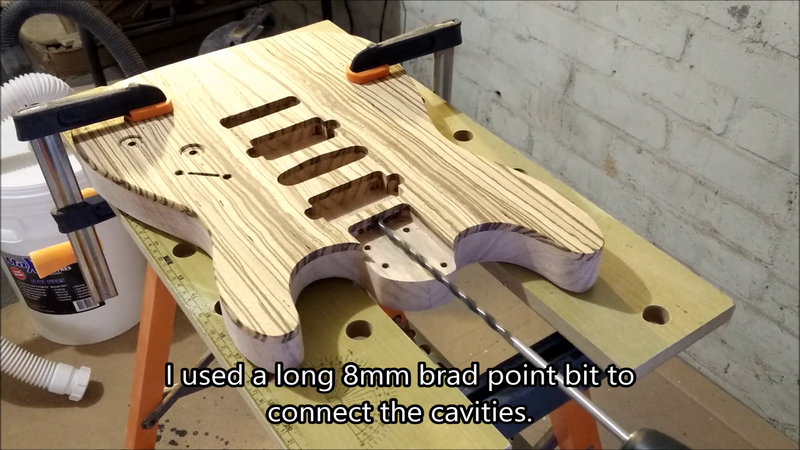
I had to connect the cavities to the master control centre.
I drilled from the neck pocket all the way to the bridge pickup with a long 8mm bit. I could also have routed channels on the body before gluing the top on but back then I hadn't decided on the layout of the cavities. Anyway all the holes will be covered up so that doesn't matter.
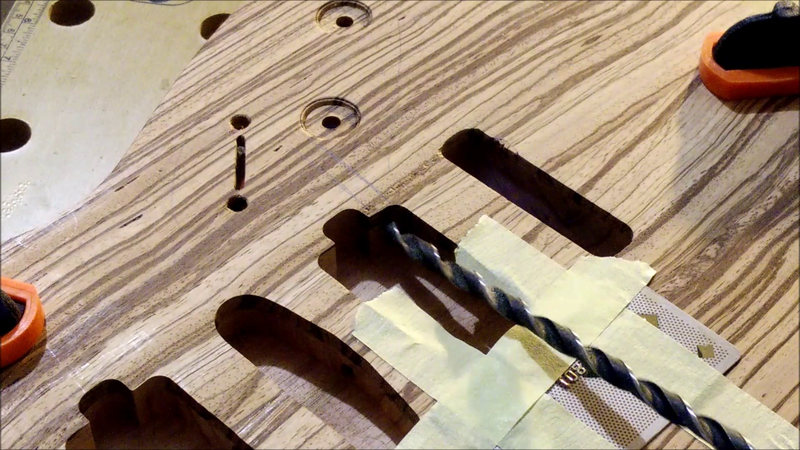
Drilling from the bridge into the control cavity.
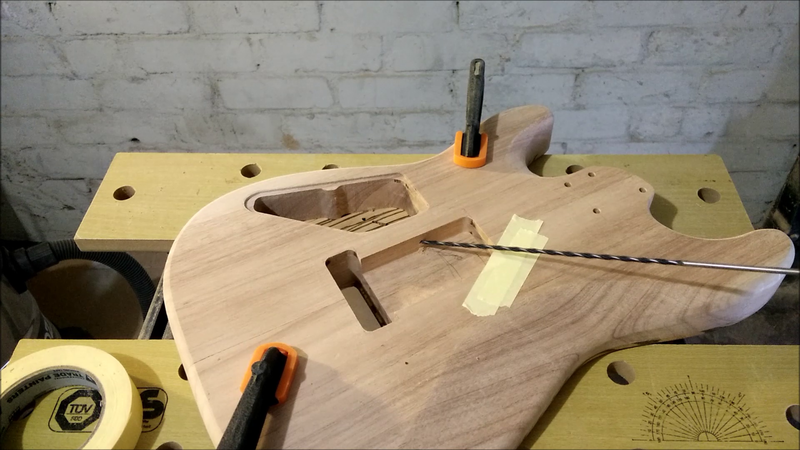
And the ground wire from the spring cavity into the control cavity.
It was so therapeutic seeing the bit emerge from a blind area into the cavity. Fortunately I didn't screw up drilling out of the body.
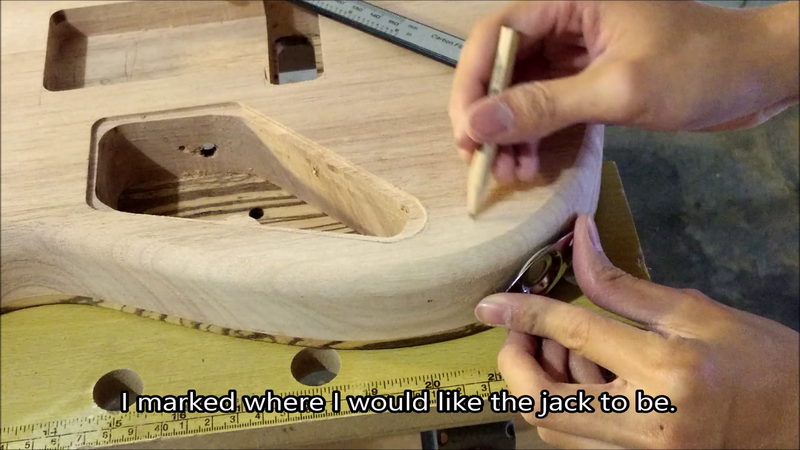
And the last thing that needed to be done was to drill the output jack hole. I planned where the jack would sit and I like it similar to the teles and les pauls where they are just to the side. This keeps the cable away from my thigh.
Then I drilled a large cavity with a 22mm bit until the jack could fit in nicely. This took a lot of time because of the end grain I think.
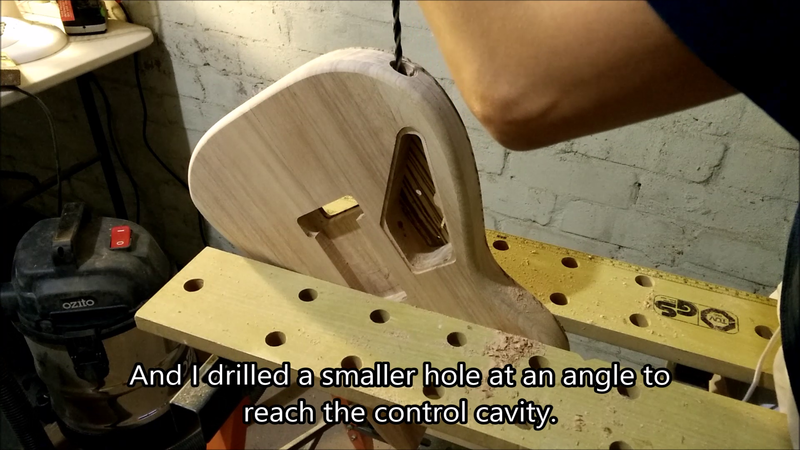
Because the 22mm bit was drilled at an angle towards the centre of the body, I had to switch to another bit to drill down to the control cavity.
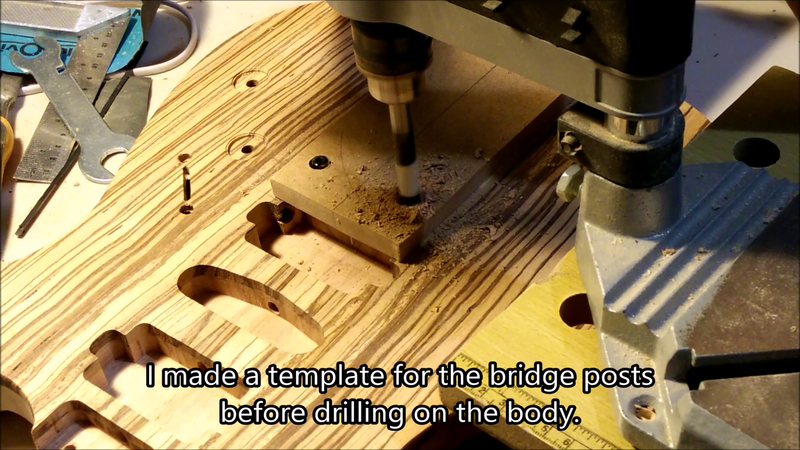
Well, the final thing was to drill the bridge post holes, so I could do a dry fit before I start preparing for finishing. I made a template to make sure the posts were perfectly spaced out, because the last thing you want to do was to drill it onto the top, realising after hours of hard work the bridge cannot fit.
Very nice work, love what your doing.
 Posting Permissions

 Reply With Quote