Page 4 of 20 FirstFirst ... 2 3 4 5 6 14 ... LastLast
Results 31 to 40 of 196

Thread: Simon's Super Strat Scratch Build.

  1. #31
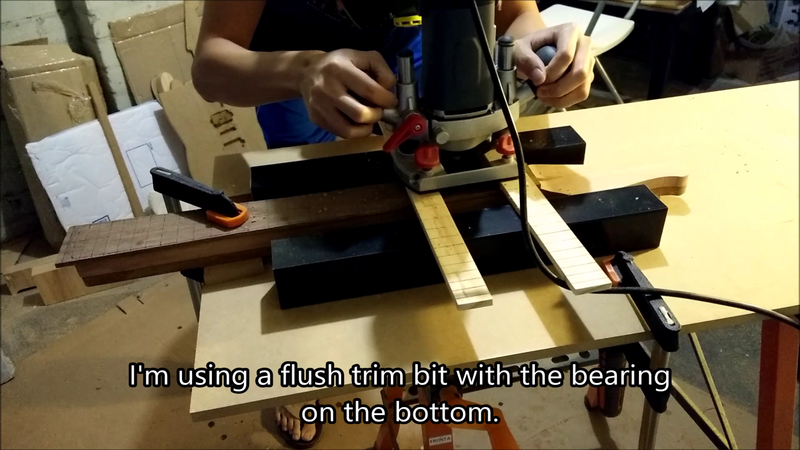
    Once the fretboard was placed on, it slid right into place because the nails helped align it.

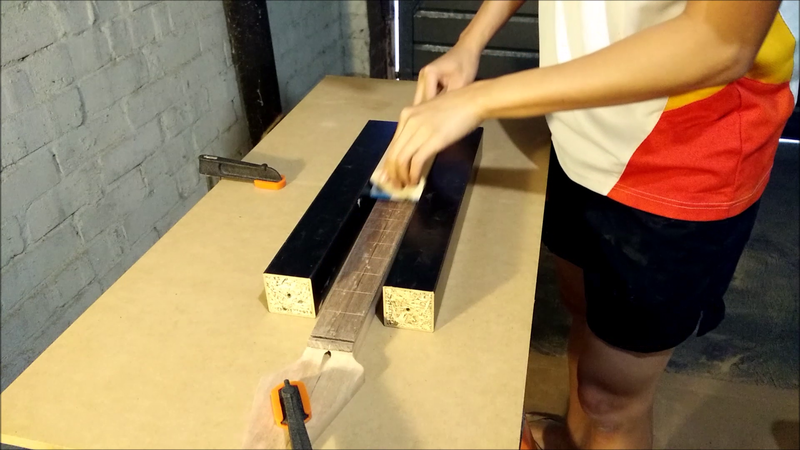
    Then I scrambled for every clamp I ever owned - only 7 in total. Clamps are expensive so I'll have to collect them slowly.


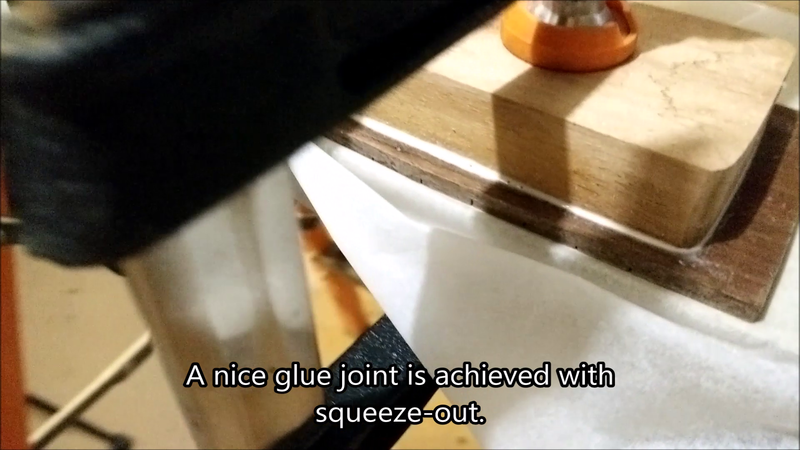
    I managed to get even glue squeeze out. This means my joint was well prepared and I was very pleased. It was extremely satisfying seeing the glue squeeze out as I clamped it down. I also wiped off the excess with wet paper towels to help more glue to be squeezed out.


    That's it for today. I'm leaving all the clamps on for 24 hours.

    So far so good!

  2. Liked by: DaveyCustom

  3. #32
    GAStronomist wazkelly's Avatar
    Join Date
    Aug 2015
    Location
    Caloundra West, Sunshine Coast Qld
    Posts
    6,631
    Quote Originally Posted by SIMpleONe89 View Post
    Oh no you spotted me wearing thongs! Was hoping no one saw that! But yes they are all unplugged and so far I've not had any accidents in the garage!
    Must be a Queenslander as they are standard issue safety boots up here haha.

  4. #33
    GAStronomist FrankenWashie's Avatar
    Join Date
    Jan 2016
    Location
    Glebe, NSW
    Posts
    5,666
    Quote Originally Posted by wazkelly View Post
    Must be a Queenslander as they are standard issue safety boots up here haha.
    Those are cultural artefacts Waz, the Traditional footwear of many island nations.

  5. Liked by: wazkelly

  6. #34
    Banned
    Join Date
    Dec 2015
    Posts
    1,171
    Goes with the glad wrap i saw around the eyes of a welder in India

  7. Liked by: wazkelly

  8. #35
    Overlord of Music
    Join Date
    Aug 2012
    Location
    Brisvegas
    Posts
    3,356
    'As long as there's, you know, sex and drugs, I can do without the rock and roll.'

  9. Liked by: DaveyCustom, wazkelly

  10. #36
    GAStronomist DrNomis_44's Avatar
    Join Date
    Dec 2014
    Location
    Darwin,NT Australia
    Posts
    5,509
    This is looking great so far, I'm definitely going to keep following this thread as I'm very interested in seeing how this build pans-out and also checking out the finished guitar, the woods you've used look really nice too, especially the one for the top of the body since it has a lovely grain pattern, keep up the good work on it mate.

  11. #37
    Thanks guys. At the moment I'm still contemplating on the fretboard inlays but hopefully I'll have more progress by the weekend.

  12. #38
    Overlord of Music gavinturner's Avatar
    Join Date
    May 2013
    Location
    HOLGATE NSW
    Posts
    3,057
    Great work simon and a great write up! I dont quite understand how the nails help align the fretboard but i'll do some digging on that one.

    Cheers,
    Gav.
    --
    Build #01: BC-1
    Build #02: ST-1
    Build #03: JR-1DC
    Build #04: ES-2V
    Build #05: ESB-4 (GOTM July 2014)
    Build #06: RC-1
    Build #07: MK-2
    Build #08: TLA-1
    Build #09: JR-1DC
    Build #0A: LPA-1
    Build #0B: STA-1 (GOTM April 2015)
    Build #0C: MKA-2
    Build #0D: LP-1M
    Build #0E: JB-1
    Build #0F: FS-1

    Find me:
    https://www.facebook.com/firescreek.guitars/
    http://www.guitarkitbuilder.blogspot.com.au/

  13. #39
    Quote Originally Posted by gavinturner View Post
    Great work simon and a great write up! I dont quite understand how the nails help align the fretboard but i'll do some digging on that one.

    Cheers,
    Gav.
    So basically the nails are fixed to the neck and if you align the fretboard with the centre line and press down hard, they should leave an indentation on the fretboard where the nails are. Then you take a drill bit and drill where the indentation is, you end up with a hole that is aligned with the nail on the fretboard. After you glue up the fretboard, the nails will fit into the holes in the fretboard, keeping it from sliding as the glue acts as a lubricant. The nails basically hole the fretboard into place.

    Sorry if I can't explain it well but I'll let David Fletcher do the explanation:
    https://www.youtube.com/watch?v=67axCaw9Bdc
    Watch from 11:08 onwards.

  14. #40
    Managed to work on the neck this weekend.

    After the glue dried, I trimmed the fretboard flush with a bottom bearing flush trim bit.

    I used a router sled to stabilise the router because I don't want to risk tearing into the neck.

    After that, I had to radius the fretboard. I used a 14" sanding block with 80 grit. Sanding is a boring and tedious process, but it's important. Someone once said guitar building is 95% sanding.


    I used a radius gauge to check my progress. I think it took me about 2 hours to radius the fretboard.

Page 4 of 20 FirstFirst ... 2 3 4 5 6 14 ... LastLast

Posting Permissions

  • You may not post new threads
  • You may not post replies
  • You may not post attachments
  • You may not edit your posts
  •