
nice conversion, the base kit is a pretty cool shape too


nice conversion, the base kit is a pretty cool shape too
Thanks Ben. Not sure the PBG guys (DB?) would be all that happy about what I've done to their design.

Neverwas - no probs with modding the design - the Mods are all drooling over what Max is doing to his guitars and jealous that we haven't the guts / ability to do the same... Overall though looking great!
Thanks Brendan. Max is in a league of his own.
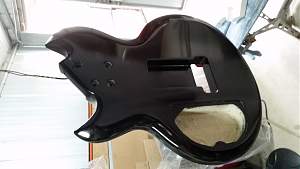
Back to plan A. The poly ended up with fine cracking/crazing after a few coats. I left a day between coats, so not sure if I put the coats on too thick or too close together. Either way, it was sanding time.
Re-applied ink and used up almost all of the naughty oil. Forgot- didn't think to- do the grain fill again so there are some deep pores showing up, mostly on the back. All up there is 14 coats on the front and 22 on the back, with some sanding along the way.

Neverwas the colour has come up really nicely.
Tony

oh wow, what a pain...
Stan's LP Build for my Sister: http://www.buildyourownguitar.com.au...ead.php?t=3146
Benson Pickup Strat mod: http://www.buildyourownguitar.com.au...ead.php?t=5229
Epiphone LP headstock fix: http://www.buildyourownguitar.com.au...ead.php?t=3410
Martin Backpacker Repair: http://www.buildyourownguitar.com.au...?t=5038&page=3
'57 Harmony Jazz guitar project: http://www.buildyourownguitar.com.au...ead.php?t=2972
Also tried to coil-split the stock pups and failed straight away. Managed to break the fine coil wire on the first coil I tried as I undid the tape. So, ordered a pair of Tonerider Rocksongs from Adam and proceeded to fry whats left of my brain by trying to do a Jimmy Page style wiring set-up.
Spaghetti farm
Grant
Thanks Tony. Stan, yeah a real pain in the rear. Oddly, both colours have taken on a brown tinge, even before all the coats of TO, so the red looks a bit brighter in the pic than in the flesh.
Made some progress recently, neck on, cavities shielded, pups wired and strings on.
Now I have a question about the locking nut on these kits. The high e string was hard down on the first fret so adjusted the small grub screw on top of the nut to get some clearance.
Attachment 4328
Attachment 4329
There is now a gap of about 20 thou between the bottom of the nut and the end of the fretboard (can't get a good pic of it).
This is only on the treble side, the bass side is fine.
Do I need to put a shim in between or can I leave it as is?
Also have a question about the wiring. I followed this diagram
Only thing I needed to change was add a ground wire between the tone pots as the adhesive on the shielding tape wasn't as conductive as it could be.
Everything appears to work fine, however when the pup selector is set to bridge only and the neck tone is 'up' there is no output.
Is this how it's supposed to work? Tried to check on their site for specifics (switch must be in this position, etc) and couldn't find this diagram listed, just my luck.
Any wisdom will be greatly appreciated.
Grant
 Posting Permissions

 Reply With Quote