There's something about being 'forewarned' and then marching straight into trouble...
Fitted the neck.
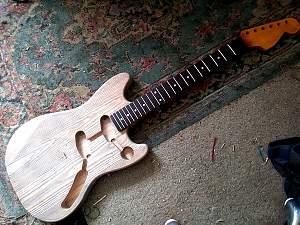
Measured up the scale and decided to use the pre-drilled screw holes.
But then (despite being warned by Oli's drama) decided to use the kit screws.
Drilled the holes again to make sure the screw would go in without issue.
First screw was going in quite easy when the top just came off like it was made of cheese.
Doh!!
Unlike Oli, I just drilled the remnants with the same size drill bit. Figuring the damned thing would dissolve...
Which it apparently has.
Anyway, in hindsight, these supplied screws don't even look like they're up to the task.
I used some other screws which are far more sturdy, and put just 4 of them in for a preliminary test.
I have another hard-tail strat style bridge which I'm using as it also has 'string through' holes.
Which will be the scene of further drama up the road no doubt.
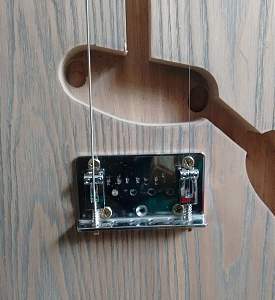
Can't test for intonation as the electrics aren't in yet but so far so good.
cheers, Mark.


Originally Posted by jugglindan


 Reply With Quote


