
Total of 8 coats of clear applied...despite 2.5 days of dry time the lacquer is still soft and can be marked with a finger nail....I'll let it dry for a week and (hopefully) I can then sand back the orange peel.
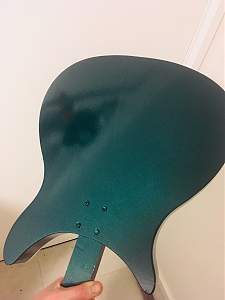


Total of 8 coats of clear applied...despite 2.5 days of dry time the lacquer is still soft and can be marked with a finger nail....I'll let it dry for a week and (hopefully) I can then sand back the orange peel.
Looking good. I'm not surprised that 2.5 days isn't long enough. I'd be waiting a couple of weeks at least before the wet sand and polish.Originally Posted by aido78

Sent from my SM-G960F using Tapatalk
Build #1 - TLA-1Q
Build #2 - Scratch Thinline Tele
Build #3 - Scratch Rickenbacker 330/12
Build #4 - Scratch All Aussie Timber Strat
Build #5 - 1st Violin/Fiddle
Pedal Build #1 - Aion Gale
Pedal Build #2 - Aion Aurora

Nice colour and looking good!
IME (so far) single pack lacquer needs at least 7 days before wet sanding, regardless of what the mfr may state in their MSDS.
I typically wait 2 weeks before I do it. For me, *that's* the hardest part of the build... WAITING!!!")
Making the world a better place; one guitar at a time...
Thanks for the feedback...I've developed patience over the last 2 month due to this cold spell in Melbourne..
It's now been 6 days and it still hasn't passed the finger nail test....I'll wait at least another week before proceeding further. Hopefully it will be OK....
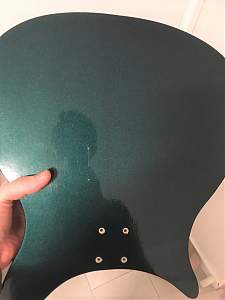
Wet Sanded with 1200 and 2000 grit. Then some buffing with a foam pad...
I think I'll leave it at that, lest I sand through the clear.
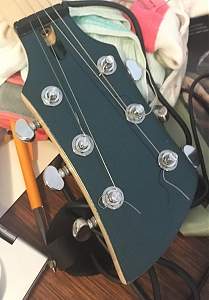
Tuners installed.

Looking the business mate. Nice job!
FrankenLab:
Turning tone wood into expensive sawdust since 2016!
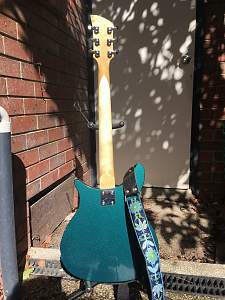
I installed the stock hardware and discovered the factory had drilling the bridge post holes 2-3mm closer than they should.
I was annoyed because I did do a mock build and didn't see it!
In the end I pinched a bridge post pin from another bridge and used that. It was an easy hack to get out of a bad situation. Easier than the alternatives...

Hi. I made some significant progress over the last week...So it's pretty much been completed.
Pickups - Railhammer Cleancut (a friend donated these to the cause)
Neck - 8 coats of tru-oil, 4 on the fretboard
Electronics - I installed just the 1 volume and 1 tone
Things I learnt or advice to newbies:
* Basswood is extremely soft - I think it's better to go for a harder wood (eg. alder)
* Spray painting in winter is best avoided
* The guitar plays well with the plastic factory nut. But I'll replace this in the future.
* Bridge Post holes - factory drilled them too close together - may dowel them and re-drill in the future.
Last edited by aido78; 12-08-2019 at 07:52 AM.
Real nice finish up to that aido, very clean, very polished. Well done!
FrankenLab:
Turning tone wood into expensive sawdust since 2016!
 Posting Permissions

 Reply With Quote