
Thanks for the tips and the feedback everyone, I will clear coat the bindingOriginally Posted by andrewdosborne


Thanks for the tips and the feedback everyone, I will clear coat the binding
Cheers
CubCall

That's looking sensational. Love the quilt and the stain really brings it out. I'd call the reverse burst a very happy mistake.

Have to agree. Quite often those 'Oops' moments at first seem wrong but after emotions have calmed down and logic takes over things tend to look quite good after all, if not better.
It is all part of the magic involved with building your own.
# 1 - EX-5 https://goo.gl/fQJMqh
# 2 - EX-1 https://goo.gl/KSY9W9
# 3 - Non PBG Tele https://goo.gl/W14G5g
# 4 - Non PBG J Bass https://goo.gl/FbBaFy
# 5 - TL-1AR GOTM Aug 2017 https://goo.gl/sUh14s
# 6 - MMB-4 Runner-up GOTM Oct 2018https://goo.gl/gvrPkp
# 7 - ES-1 Runner-up GOTM Aug 2018https://goo.gl/T9BEY8
I agree with both you guys, the accident turned into something good
Cheers
CubCall

beware Cubcall not all accidents or changes of plans work out, but well done on the reverse burst looks cool
Current Builds and status
scratch end grain pine tele - first clear coat on !
JBA-4 - assembled - final tweaks
Telemonster double scale tele - finish tobacco burst on body and sand neck
Completed builds
scratch oak.rose gum Jazzmaster - assembled needs setup
MK-2 Mosrite - assembled - play in
Ash tele with Baritone neck - neck pup wiring tweaks and play in
Hello everyone,
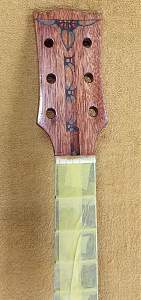
It has been a few weeks since I last posted an update. In that time, I have applied the clear coats and waited 20 days. I am now getting ready for finishing. Here are a few pictures with the final coat. I used some decals that my wife had made for her ceramics business to give it a personal touch. They came out great. Next step is wet and dry sanding, then cut and polishing.
Cheers
CubCall
wow that's come up a treat Cubcall. Are the decals hand painted or printed onto decal paper ? Looks hand painted
Current Builds and status
scratch end grain pine tele - first clear coat on !
JBA-4 - assembled - final tweaks
Telemonster double scale tele - finish tobacco burst on body and sand neck
Completed builds
scratch oak.rose gum Jazzmaster - assembled needs setup
MK-2 Mosrite - assembled - play in
Ash tele with Baritone neck - neck pup wiring tweaks and play in
If hand painted you may need a few more clear top coats before commencing the wet sand and/or micro mesh polishing.
# 1 - EX-5 https://goo.gl/fQJMqh
# 2 - EX-1 https://goo.gl/KSY9W9
# 3 - Non PBG Tele https://goo.gl/W14G5g
# 4 - Non PBG J Bass https://goo.gl/FbBaFy
# 5 - TL-1AR GOTM Aug 2017 https://goo.gl/sUh14s
# 6 - MMB-4 Runner-up GOTM Oct 2018https://goo.gl/gvrPkp
# 7 - ES-1 Runner-up GOTM Aug 2018https://goo.gl/T9BEY8

Very nice indeed! I'm waiting for my LP-1QM kit to arrive and hopefully this will have a nice veneer top like yours. Great job!!!
Nr 1: Red Widow LP-1MQ (Finished) ->Diary<-

Love the reverse burst. That veneer has come up amazingly well. Great job!
cheers,
Gav.
--
Build #01: BC-1
Build #02: ST-1
Build #03: JR-1DC
Build #04: ES-2V
Build #05: ESB-4 (GOTM July 2014)
Build #06: RC-1
Build #07: MK-2
Build #08: TLA-1
Build #09: JR-1DC
Build #0A: LPA-1
Build #0B: STA-1 (GOTM April 2015)
Build #0C: MKA-2
Build #0D: LP-1M
Build #0E: JB-1
Build #0F: FS-1
Find me:
https://www.facebook.com/firescreek.guitars/
http://www.guitarkitbuilder.blogspot.com.au/
 Posting Permissions


 Reply With Quote