


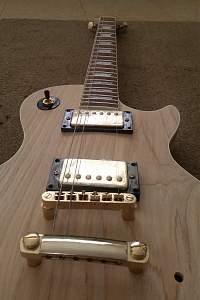
Even thought the bridge is sitting about a mile in the sky, I've ran 5, 6 and 1 to see the alignment of the neck, bridge, saddles etc. etc. Alignment wise, I think it's not too bad - thoughts?
Note: The neck isn't clamped, and the bridge doesn't have it's pegs mounted as of yet - Not sure how I'd check the neck angle without really mounting the bridge, so it's firm enough to at least hang on to a string that's tensioned "Straight". The more I look at it though, the less and less Im worrying - nothing particularly untoward seems to be going on there outside of a little bit of creative filler and colouring.
Ideas, suggestions welcome - Im getting heaps of good info from you all so far!


 Reply With Quote


