
If not too late, definitely mask around PUP cavities as the Conductive Shielding Paint can make a mess of the top if not too careful.


If not too late, definitely mask around PUP cavities as the Conductive Shielding Paint can make a mess of the top if not too careful.
Ok thanks wazkelly and wokkaboy,Originally Posted by wazkelly

I have started the TO on the body again. Just one coat.
Q. Apply Conductive Shielding Paint now or should I wait until the end after 8-10 coats, sand back and repeat as you said, then paint all of the cavities including PUP's, control switch and potentiometers for the LP style?
I think wait until the end but when I mask it I will strip off layers of TO when the masking tape is removed. I did work out how to make the masking tape less adhesive. Just wanted to double check before I go and do something I regret.
I read CA glue was a no no for finishing. Is it for quicker curing times?
Thanks for your help so far. I have got some nice headstock designs coming along now too.
Cheers,
Alkay.

If you are applying the conductive shielding paint wth a brush you could get away with not masking at all. Personally if you want to mask I would get some low tack painters tape. It will be very gentle on the TO. I use the light green stuff from BEAR. What were you thinking of finishing with the CA glue? It is used here on various builds all the time.
cheers,
Gav.
--
Build #01: BC-1
Build #02: ST-1
Build #03: JR-1DC
Build #04: ES-2V
Build #05: ESB-4 (GOTM July 2014)
Build #06: RC-1
Build #07: MK-2
Build #08: TLA-1
Build #09: JR-1DC
Build #0A: LPA-1
Build #0B: STA-1 (GOTM April 2015)
Build #0C: MKA-2
Build #0D: LP-1M
Build #0E: JB-1
Build #0F: FS-1
Find me:
https://www.facebook.com/firescreek.guitars/
http://www.guitarkitbuilder.blogspot.com.au/
Thanks for tip Gav but I think I will mask just to be safe.
With the glue I just remember reading somewhere on the net it wasn't a good idea.
The fretboard on lots of fretless necks are finished here with CA glue to give them strength and shine.
cheers,
Gav.
--
Build #01: BC-1
Build #02: ST-1
Build #03: JR-1DC
Build #04: ES-2V
Build #05: ESB-4 (GOTM July 2014)
Build #06: RC-1
Build #07: MK-2
Build #08: TLA-1
Build #09: JR-1DC
Build #0A: LPA-1
Build #0B: STA-1 (GOTM April 2015)
Build #0C: MKA-2
Build #0D: LP-1M
Build #0E: JB-1
Build #0F: FS-1
Find me:
https://www.facebook.com/firescreek.guitars/
http://www.guitarkitbuilder.blogspot.com.au/
Oh ok cool, I'll have a look into them. Something I might consider after a few more practice builds first haha.
Just thought I would give an update and show some of the headstock designs I have come up with.
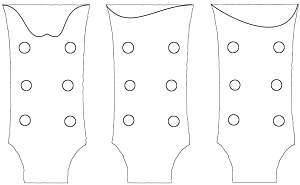
....and a few more.
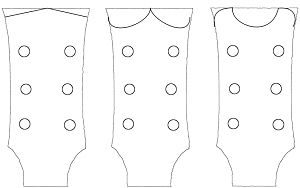
Headstock shapes look interesting and like one on the left immediately above or very top right in panel showing 8 images.
With CA glue I am using it to finish off a fretless neck and very fiddly indeed plus highly toxic fumes that makes your eyes water, well at least that is how it affected me. Have run out of TO and need to do a touch up spot on one of my axes where top was accidently scorched with a soldering iron. The CA comes up clear and in a small area might be OK but would never recommend over a large area such as a guitar body as it does not dry completely flat and smooth and requires extremely delicate wet sanding to start the polishing process.
Had left things for over a week and last night thought I had it done but on the final 12,000 micro mesh sandings I noticed it was starting to go through around 2nd fret....ARRRGGGHHHH. Another touch up, then another light sand tonight plus apply a bit more to just the whole area of that 2nd fret block hoping it will dry pretty smooth and flat overnight. Looks great all polished up but damn hard to get it all looking perfect and not slightly sand through. Unfortunately those areas will not take the final car polish as too close to the bare wood.
Ok thanks for your input wazkelly,
Ouch. That sounds like you have a bit of work to do. I'm sure you will get it sorted. I think I'll wait before I'm going to do the CA and do a few builds first.
12000 micro mesh says allot to me with this build. I'm taking your advice and putting about 10 coats of TO on, 1500 wet and dry sand back and repeat. She's already starting to look very shiny.
The soldering iron, well I won't ask. I just know when I do soldering that's when it turns bad for me. Practice first for me.
Cheers,
Alkay

 Reply With Quote