
yes Andy you did a great job of the string through and some good advice for Juddernaut


yes Andy you did a great job of the string through and some good advice for Juddernaut
Current Builds and status
scratch end grain pine tele - first clear coat on !
JBA-4 - assembled - final tweaks
Telemonster double scale tele - finish tobacco burst on body and sand neck
Completed builds
scratch oak.rose gum Jazzmaster - assembled needs setup
MK-2 Mosrite - assembled - play in
Ash tele with Baritone neck - neck pup wiring tweaks and play in

and given all thats gone on...i might just down tools and stop working on stuff now. Why tempt fate eh? Now where's that beer fridge?Originally Posted by wokkaboy


Update
I've decided the ding can stay. If i sand it back the edge is going to look wonky. If I fill it, I take the risk that the patch will look worse than the ding. It's important to me that I finish this guitar in DT. What the heck, its on the back, the build is only for me, the colour is dark enough to hide it and I'm not trying to win any awards with it.
Its been a week again and the humidity has been nice in Brisvegas, so it was time for another coat of DT.
The last stain coat had dried with patches of gloss, so I gave it quick light sand with 400.
And the final stain coat has cone on. Its still wet but you can tell that the stain has "matured".
I may give this one a bit longer as storms are predicted this week. but nevertheless it will be on with the intensifying coat!
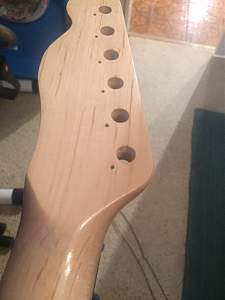
The neck got another thin dose of neck finish.
I think thats three neck coats in all. I know that's enough for DB, but I'll see how this one dries.
Build #1 - ST-1 - Completed
Build #2 - LP-1SS - Completed
Build #3 - TLA-1R - Completed
Build #4 - SGD-612 - Completed
Build #5 - ES-1G - Completed
Build #6 - STA-1HT | Completed
Build #7 - ST1JR - Completed
Current Build #8 - JBA-4
Build #9 - Semi-scratch build Tele x 2 - Completed
Current Build #10 - PRS-1H
Current Build #11 - AGJR-1 - Completed
Current Build #12 - ATL-1SB
Current Build #13 - GST-1
Current Build #14 - FBM-1

Looking good.
Shame about the oversized neck humbucker route they cut into all these kits considering most will have the traditional single coil PUP as that complicates things if you want to have a naked top with no scratch plate. Same on both my Tele & J Bass and would have preferred to go 'Naked' to show off all the grainy goodness just like yours has.
New Update
Neck was peppered with dust particles....damn particles...not sure if you can see them in the pic.
0000 Steel wool applied gently, wiped clean
new coat of DT final neck coat applied.....oops didn't take a pic, but she looks sweet.
The body wont be taking any more stain. gentle sand with 2000 grit to even out and first intensifying coat applied.
Looks good when wet. I think i accidentally applied too much. We'll see after a week.....or two....hmmmm
Build #1 - ST-1 - Completed
Build #2 - LP-1SS - Completed
Build #3 - TLA-1R - Completed
Build #4 - SGD-612 - Completed
Build #5 - ES-1G - Completed
Build #6 - STA-1HT | Completed
Build #7 - ST1JR - Completed
Current Build #8 - JBA-4
Build #9 - Semi-scratch build Tele x 2 - Completed
Current Build #10 - PRS-1H
Current Build #11 - AGJR-1 - Completed
Current Build #12 - ATL-1SB
Current Build #13 - GST-1
Current Build #14 - FBM-1

Oh man that's looking fantastic. Can't wait to see her all assembled. That rosewood is just awesome.
cheers,
Gav.
--
Build #01: BC-1
Build #02: ST-1
Build #03: JR-1DC
Build #04: ES-2V
Build #05: ESB-4 (GOTM July 2014)
Build #06: RC-1
Build #07: MK-2
Build #08: TLA-1
Build #09: JR-1DC
Build #0A: LPA-1
Build #0B: STA-1 (GOTM April 2015)
Build #0C: MKA-2
Build #0D: LP-1M
Build #0E: JB-1
Build #0F: FS-1
Find me:
https://www.facebook.com/firescreek.guitars/
http://www.guitarkitbuilder.blogspot.com.au/
Update
Body
Wet and dry sanded lightly with 600 grit, next Intensifier coat applied
Neck
0000 steel woolled the bumpies out of it
Applied another DT Neck coat
Build #1 - ST-1 - Completed
Build #2 - LP-1SS - Completed
Build #3 - TLA-1R - Completed
Build #4 - SGD-612 - Completed
Build #5 - ES-1G - Completed
Build #6 - STA-1HT | Completed
Build #7 - ST1JR - Completed
Current Build #8 - JBA-4
Build #9 - Semi-scratch build Tele x 2 - Completed
Current Build #10 - PRS-1H
Current Build #11 - AGJR-1 - Completed
Current Build #12 - ATL-1SB
Current Build #13 - GST-1
Current Build #14 - FBM-1

very slick Andy, nice
Stan's LP Build for my Sister: http://www.buildyourownguitar.com.au...ead.php?t=3146
Benson Pickup Strat mod: http://www.buildyourownguitar.com.au...ead.php?t=5229
Epiphone LP headstock fix: http://www.buildyourownguitar.com.au...ead.php?t=3410
Martin Backpacker Repair: http://www.buildyourownguitar.com.au...?t=5038&page=3
'57 Harmony Jazz guitar project: http://www.buildyourownguitar.com.au...ead.php?t=2972

Andy that's a stunning build. I bet your stoked. Look forward to seeing and hearing the finished guitar.
looking sweet Andy, nice fix mate !
Current Builds and status
scratch end grain pine tele - first clear coat on !
JBA-4 - assembled - final tweaks
Telemonster double scale tele - finish tobacco burst on body and sand neck
Completed builds
scratch oak.rose gum Jazzmaster - assembled needs setup
MK-2 Mosrite - assembled - play in
Ash tele with Baritone neck - neck pup wiring tweaks and play in
 Posting Permissions


 Reply With Quote