
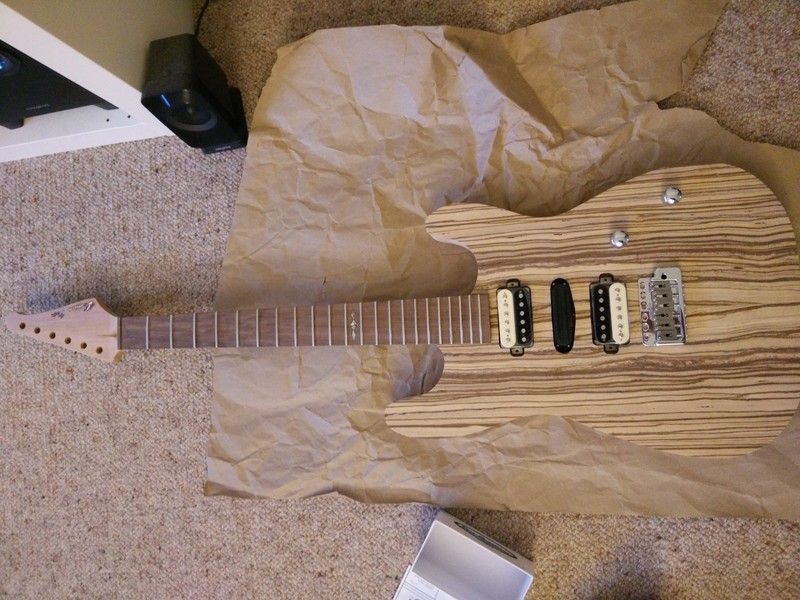
And this is what you will end up with.
I couldn't help but do a quick mock build. I already ordered black hardware, which will look stunning once the guitar is finished.


And this is what you will end up with.
I couldn't help but do a quick mock build. I already ordered black hardware, which will look stunning once the guitar is finished.

brilliant!
Build 19 PSH-1 Kustom
Build 18 HB-4S Kustom
Build 17 WL-1 Kustom
Build 16 TL-1TB Kustom
Build 15 PBG-2-
Build 14 FTD-1
Build 13 RD-1 Kustom
Build 12 DM-1S
Build 11 MKA-2 -
Build 10 Basic strat
Build 9 JM Kustom
Build 8 FV-1G
Build 7 ES-2V
Build 6- Community prototype
Build 5 LP-1LQ
Build 4 ES-5V
Build 3 JR-1
Build 2 GD-1
Build 1 TLA-1

Very nice!!
Sent from my SM-N920T using Tapatalk

Good work!
Sent from my GT-I9506 using Tapatalk
Current Projects
#Planning 5 String Bass

well done Simon this is shaping up to be an excellent scratchy. So you just got to route the control cavity on the back and is the output jack going on the bottom side ?
Didn't see any pics of your 3 plugger safety boots ! Just in case Worksafe are watching hahah
So you planning a 5 way switch, 1 volume and 1 tone ?
Current Builds and status
scratch end grain pine tele - first clear coat on !
JBA-4 - assembled - final tweaks
Telemonster double scale tele - finish tobacco burst on body and sand neck
Completed builds
scratch oak.rose gum Jazzmaster - assembled needs setup
MK-2 Mosrite - assembled - play in
Ash tele with Baritone neck - neck pup wiring tweaks and play in
Yup cavity will be behind. 5 way switch with a push pull for coil split and another for 7 way mod.
sounds interesting Simon the wiring plans you have. Have you got resident wiring guru Weirdy to help with a diagram ?
oh and you can still burn your feet with solder wearing 3 pluggers mate hahah
Current Builds and status
scratch end grain pine tele - first clear coat on !
JBA-4 - assembled - final tweaks
Telemonster double scale tele - finish tobacco burst on body and sand neck
Completed builds
scratch oak.rose gum Jazzmaster - assembled needs setup
MK-2 Mosrite - assembled - play in
Ash tele with Baritone neck - neck pup wiring tweaks and play in
Yup I have wiring diagrams and I did it on my tele. With this mod you can get the neck and bridge in parallel, the desired tele tone.Originally Posted by wokkaboy

Haha many things can go wrong in the garage but fortunately no accidents yet!

How did you hold down the mdf as routing guides? Double sided tape?
first build PRS-1TS in progress...
http://www.buildyourownguitar.com.au...ead.php?t=4937
second build PRS-1Q in progress...
http://www.buildyourownguitar.com.au...ead.php?t=4956
Yes, but I frequently use the masking tape with super glue trick. Put masking tape on both sides and run a bit of super glue on one side and press both together. The tape gets glued together, giving a strong bond.
 Posting Permissions

 Reply With Quote