There are some areas where there are tiny gaps. I think I didn't use enough glue because I didn't get squeeze out all over. Oh well, another thing learned!Originally Posted by wokkaboy


There are some areas where there are tiny gaps. I think I didn't use enough glue because I didn't get squeeze out all over. Oh well, another thing learned!

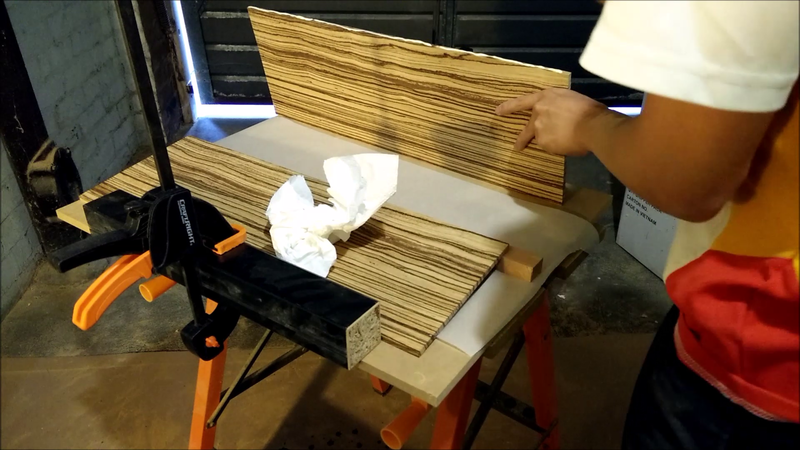
That Zebrano is off the hook, can you imagine that polished up with a high gloss? it's going to look wicked.
Yes it is! I'm still deciding if I should do a mirror gloss or oil finish.
Very very nice, makes me want to try a hard body veneer myself

Bad-ass top!!
Sent from my SM-N920T using Tapatalk
'As long as there's, you know, sex and drugs, I can do without the rock and roll.'

Pabs! Please!
I'm just about to have dinner!
first build PRS-1TS in progress...
http://www.buildyourownguitar.com.au...ead.php?t=4937
second build PRS-1Q in progress...
http://www.buildyourownguitar.com.au...ead.php?t=4956
Lol thanks for the comments and let's see more pics of wood... (actual wood)
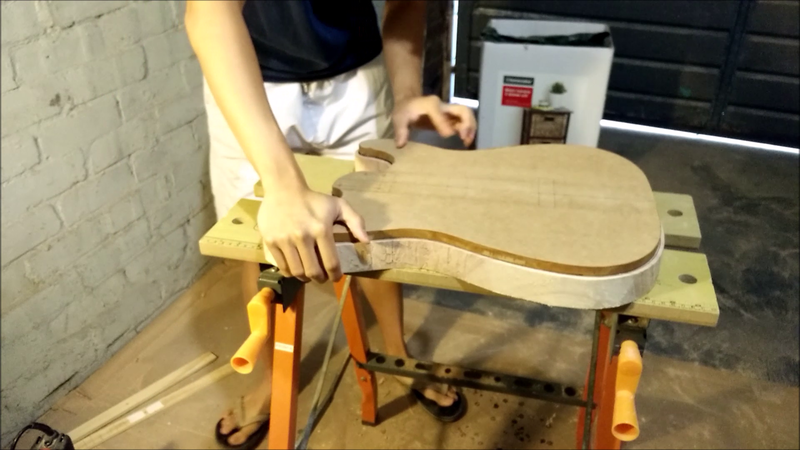
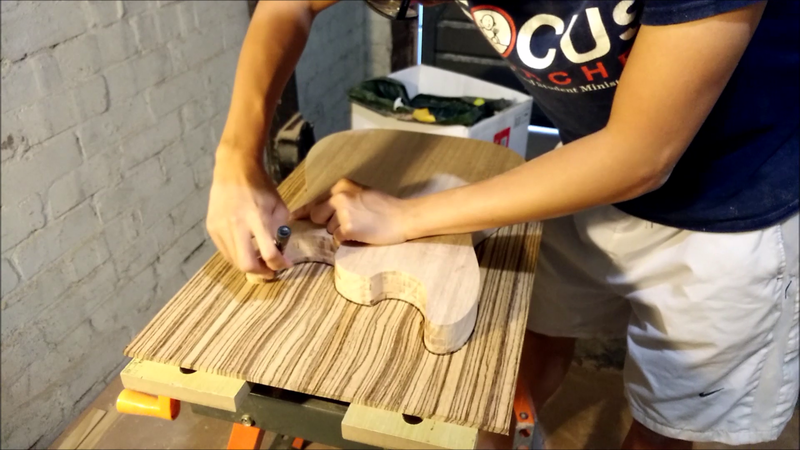
After the neck was done, I gave all my attention to the body. I had previously cut out the body with a jigsaw (painful work) and tried to remove as much wood as I could before routing.
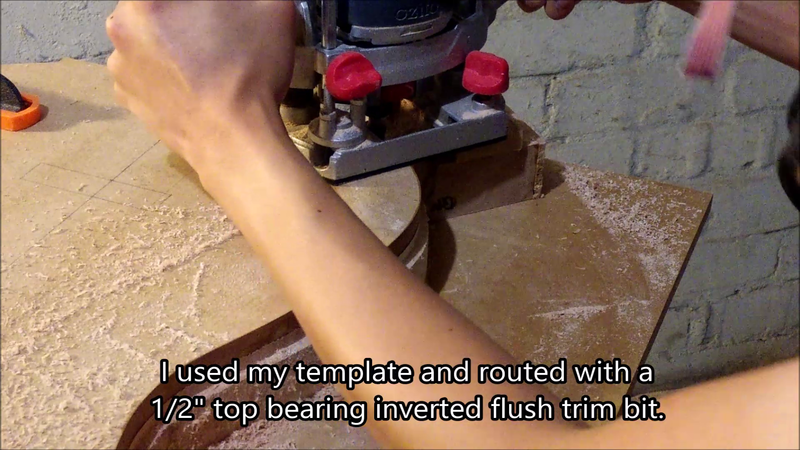
I first attached the template to the rawly cut body.
Then routed it out in many passes, starting with a short inverted flush trim bit.
As you can see I stuck some scrap wood to the base of the router to prevent any rocking, which will be absolutely devastating if that happens.
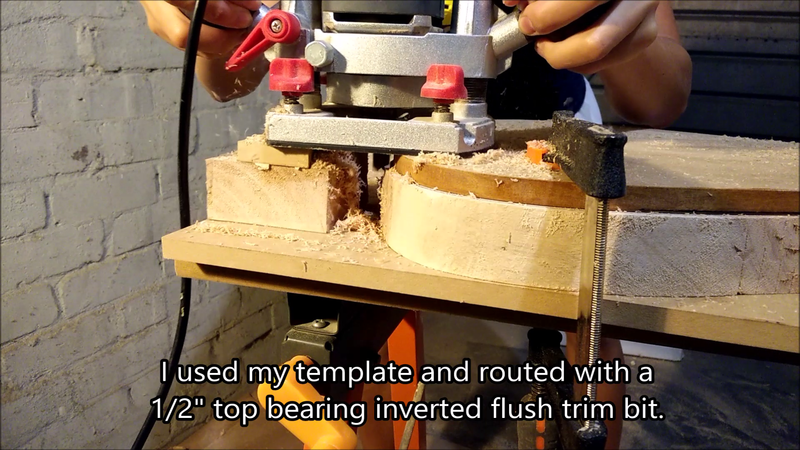
Then I switched to the longer bit.
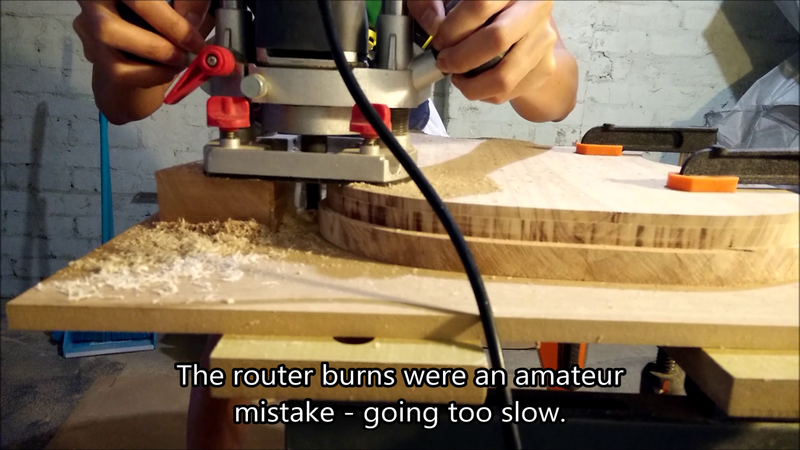
If you try to take off too much wood, you may experience tear out, so do it in multiple passes and remove as much wood as the bit will allow you to.
Don't make the mistake I made - going too slow can burn the wood and this can be hard to get rid of. Trust me! Also make sure your bits are sharp. Lousy bits mean lousy results!
When my long bit could go no further, I flipped the body and used a flush trim bit with the bearing on the bottom.
Now I'll show you how I glued the top together without any fancy jigs.
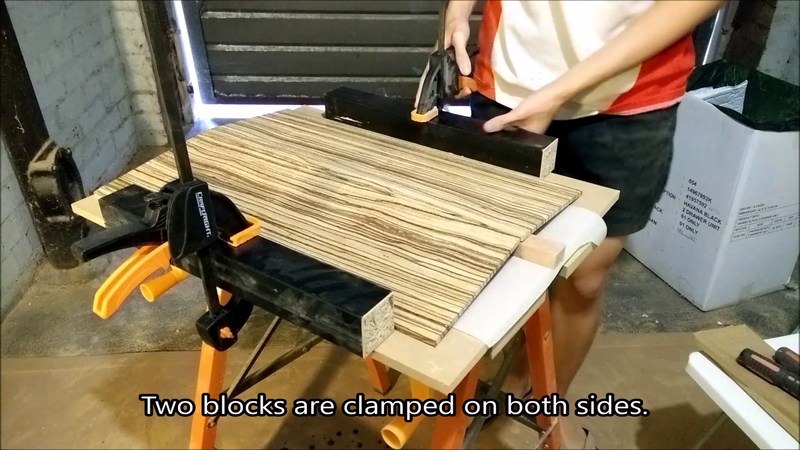
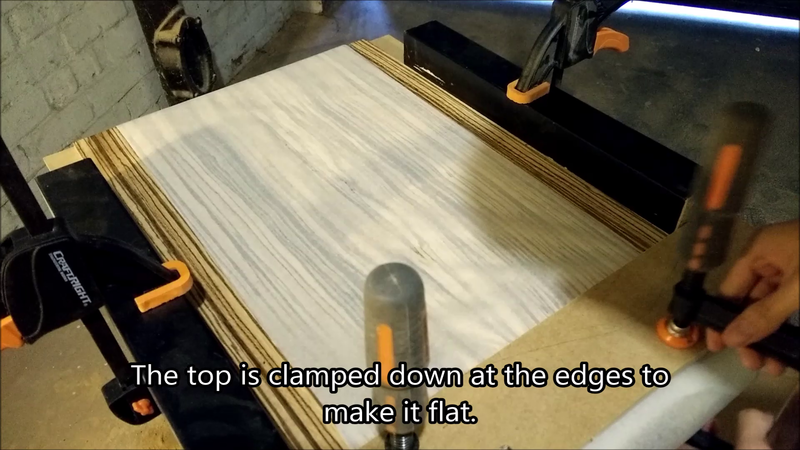
First, you want to have a flat surface. This is very important. Also make sure the top isn't warped and is perfectly jointed.
Then you will need two blocks on either sides. Clamp one side first and leave the other free for now.
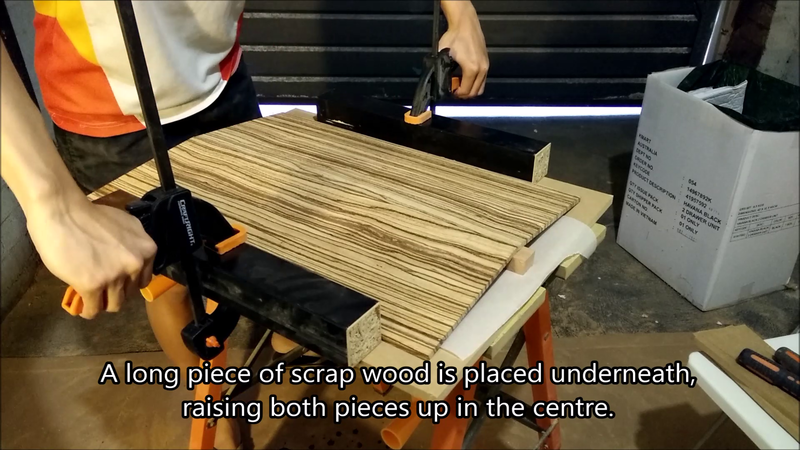
Put a long piece of wood underneath in the middle so that both pieces are raised in the middle. Then clamp the free block tight against the pieces.
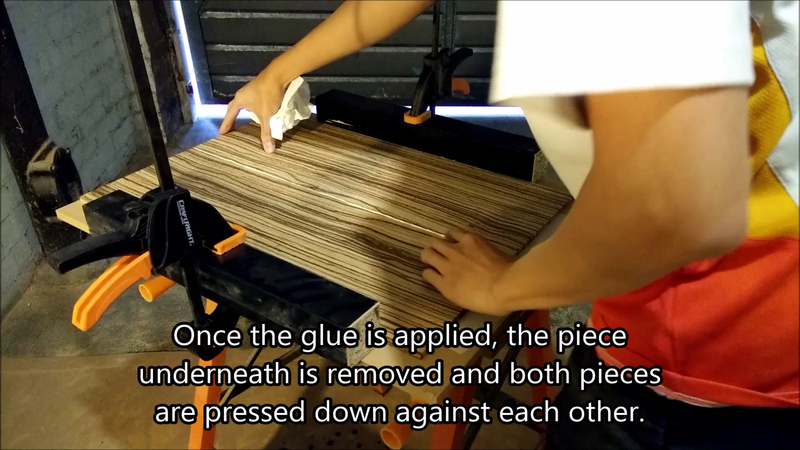
Put a nice amount of glue on one side.
Then remove the block of wood underneath and press the pieces down. The blocks on both sides will cause the top pieces to press against each other, providing a nice glue joint. Wipe off any excess glue that squeezes out.
Then you will need to clamp the wood flat against the flat surface at both ends, and you can add some weights in the centre just to distribute the pressure evenly.
Leave everything clamped for a good amount of time (I always clamp for 24 hours).
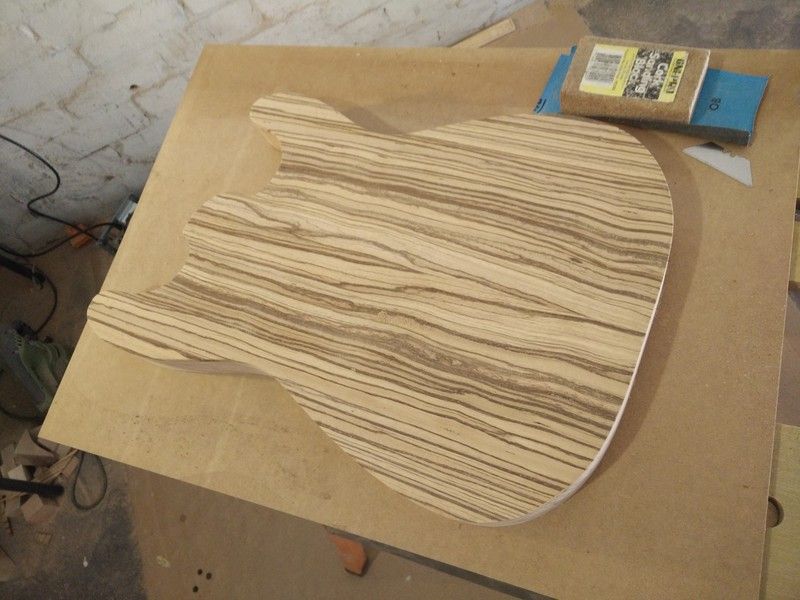
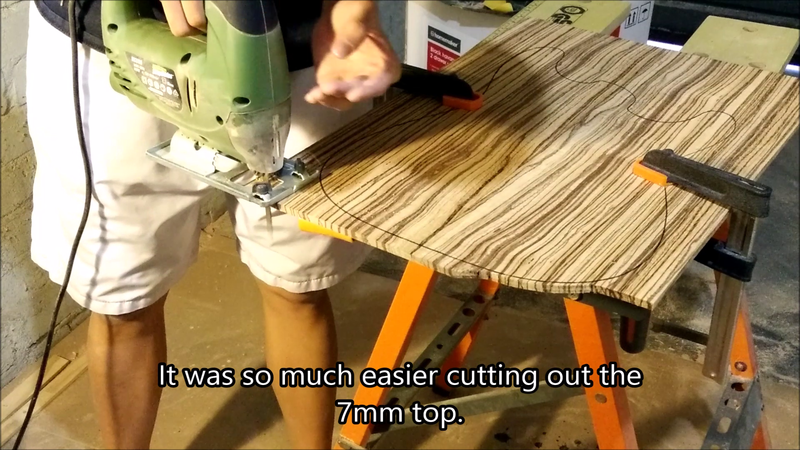
Once the top was glued, I traced the outline and proceeded to cut it out with my jigsaw.
The top cut like butter because it was only 7mm.
 Posting Permissions

 Reply With Quote