Page 1 of 2 1 2 LastLast
Results 1 to 10 of 15

Thread: OGD... Old Guitar Day!

  1. #1
    GAStronomist Simon Barden's Avatar
    Join Date
    Oct 2016
    Location
    Reading, UK
    Posts
    10,547

    OGD... Old Guitar Day!

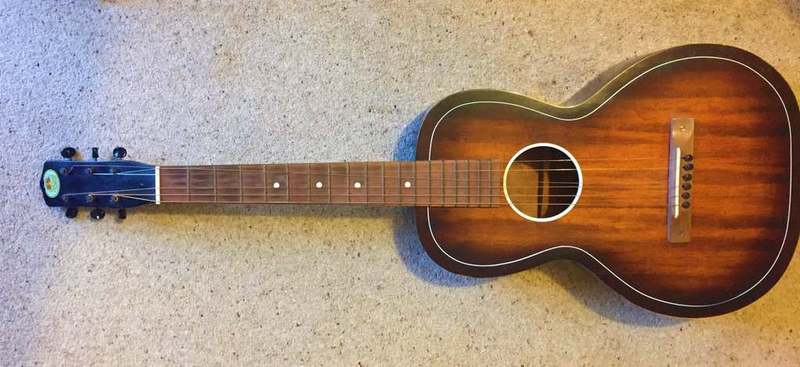
    I picked up this old Regal parlour guitar yesterday for £100 (approx. AUD$190/US$129) through Facebook Marketplace. I don't know quite how old it is but there are pictures of similar ones on the web giving dates in the 1930s and 1940s. There is no serial number or internal maker's sticker at all.


    As Regal proper shut up shop in 1954, it's certainly won't be any younger than that. Regal were best known for making resonators (up until 1941 when like many other woodworking companies they switched to war work for the duration). In the 1930s Dobro licensed their designs to Regal, so there are Regal Dobros out there. Regal also made quite a range of small-bodied guitars, tenor guitars and ukuleles, often for other companies to sell under their own brand name. After 1954, the Regal brand was first bought by Harmony and later Fender. The brand name had gone quiet by 1965 but was resurrected in 1987 for a line of Asian-made resonators that continues to this day.

    There's no adjustable truss rod, but the neck is pretty thick to make up for it and the neck looks to be pretty straight. Nut width is 55mm, so slightly wider than current norms. It's got a 24 1/4" scale length, so is only a bit shorter than standard. The top E string was buzzing slightly along its length, but it had one very loose string and it wasn't in tune. It certainly needs new strings and once these are fitted and brought up to correct tension, then I'll know if it needs a new higher saddle or not. The neck is flat (rather than radiused). The frets are slightly indented and don't look particularly flat when looking along the neck, so it may well get a level.

    The nut (bone) fell off when I removed the strings. The front (fretboard) edge of it is chipped by the B and high E slots, and whilst I could sand it down to remove the chipped area, it might then be a bit on the thin side to be stable, so I think I'll fit a new nut.

    I've now polished the frets and the fretboard is currently soaking up a good application of lemon oil. It was rather dry.

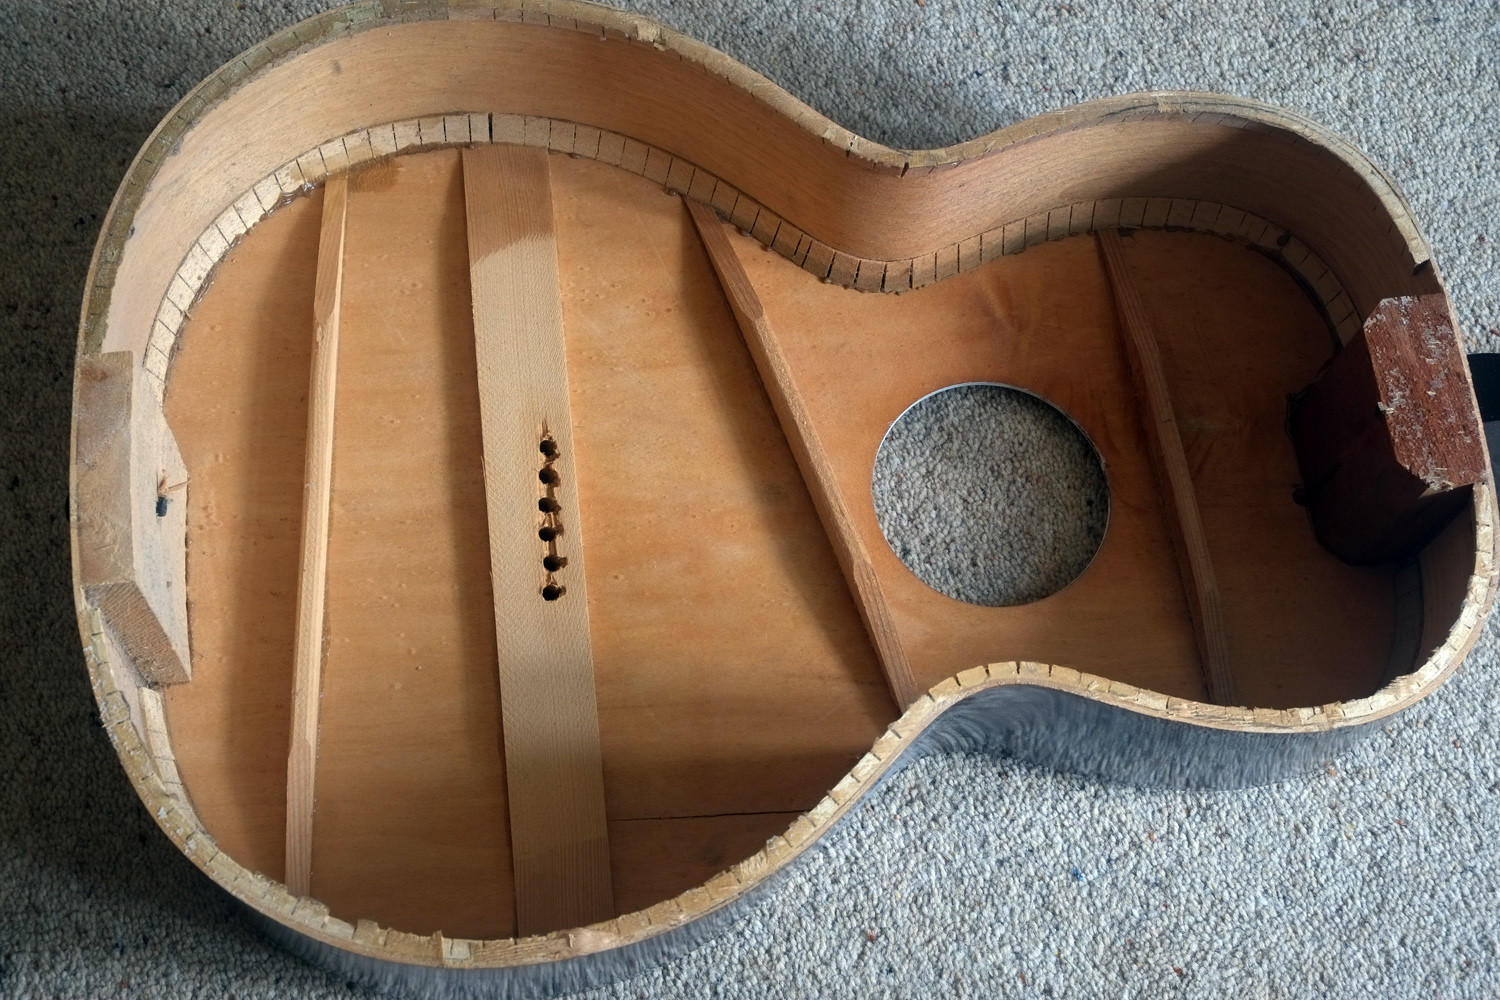
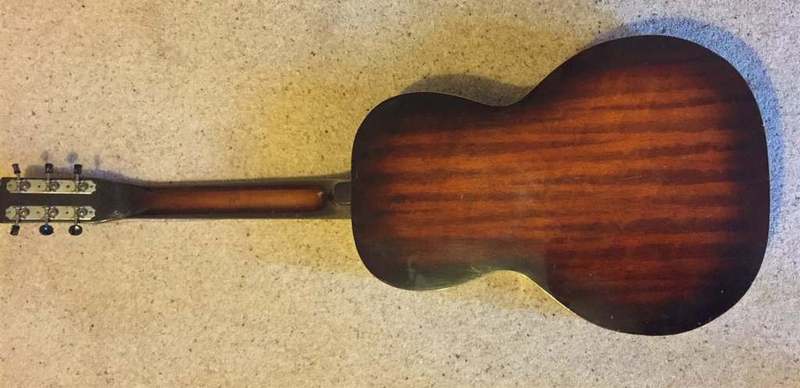
    Looking at the grain pattern, it's certainly a solid top and back. Because the sides are a solid black, I can't determine whether they are solid or laminate. There is a thin crack running halfway across the upper rear bout. The crack is a lot shorter on the inside than the outside, so it's 's not too badly damaged. But the cross-braces on both sides of the soundhole have come away from the top on the upper sides, presumably as a result of whatever knock put the crack in the top, so they'll need gluing back.

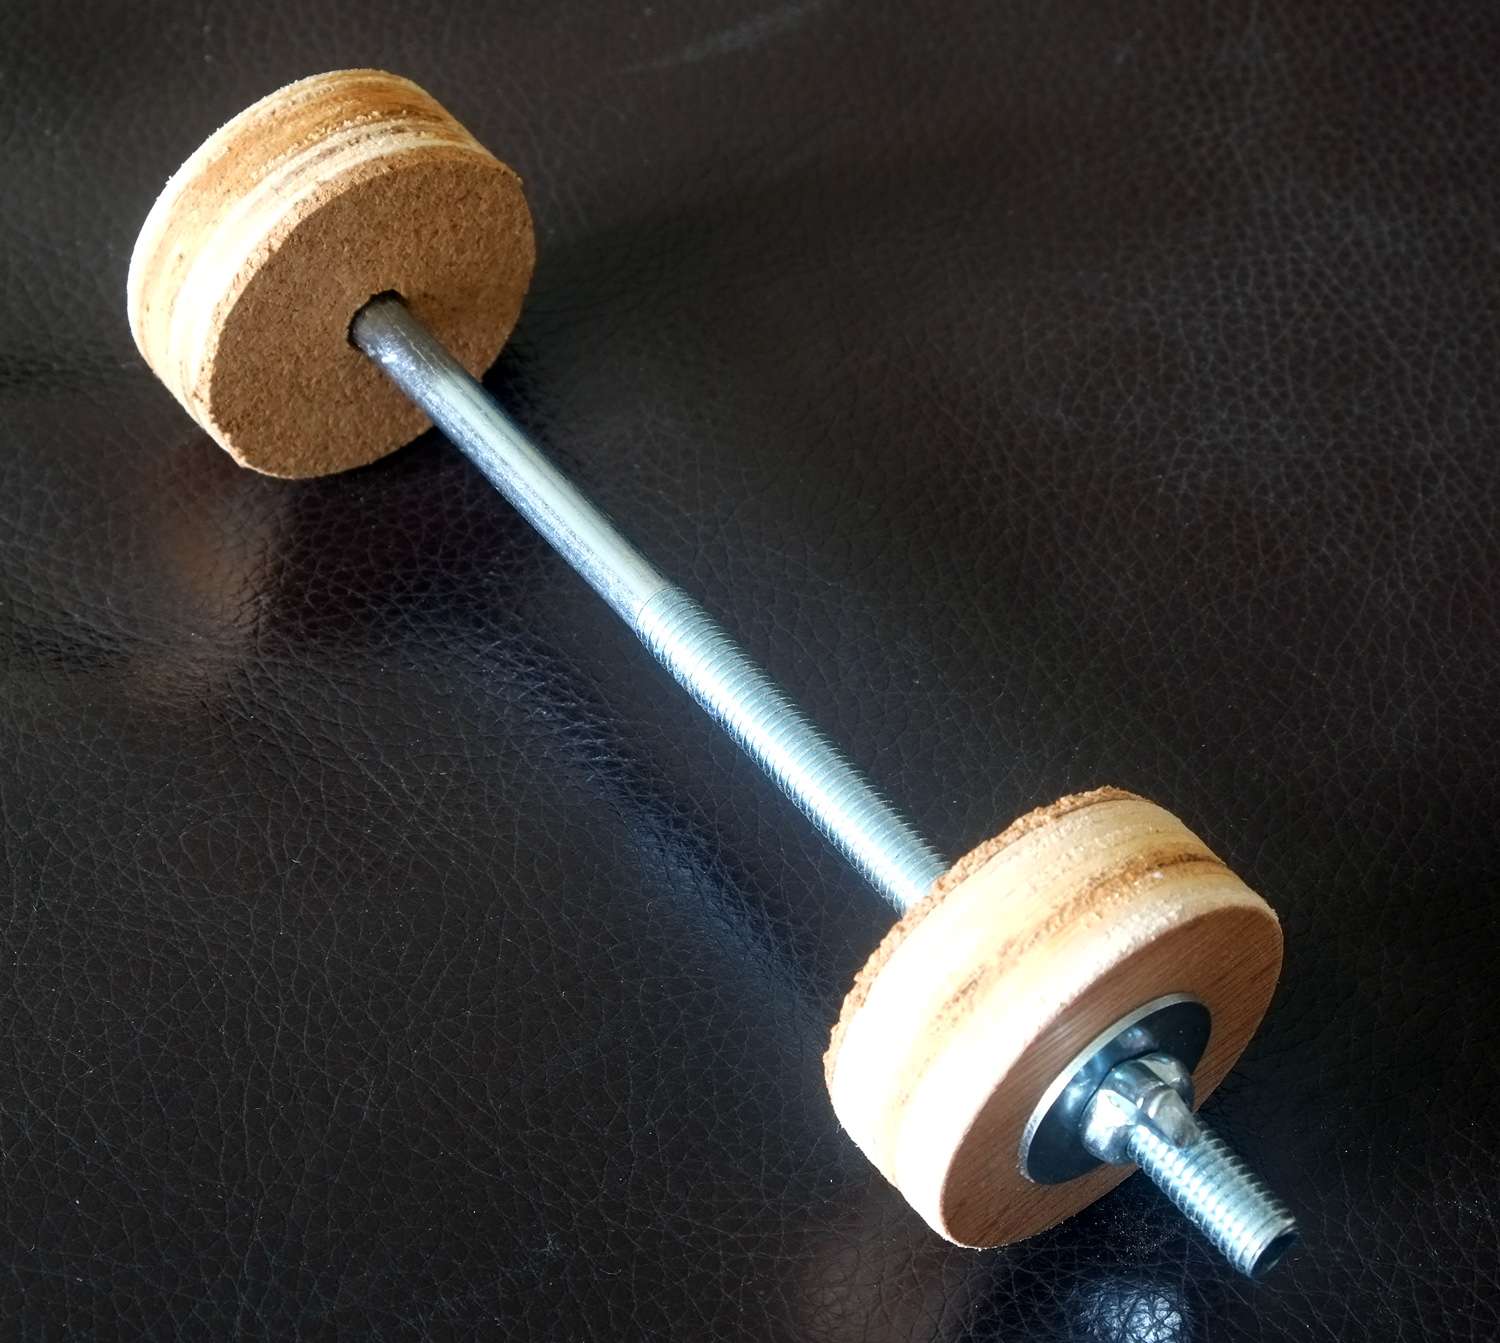
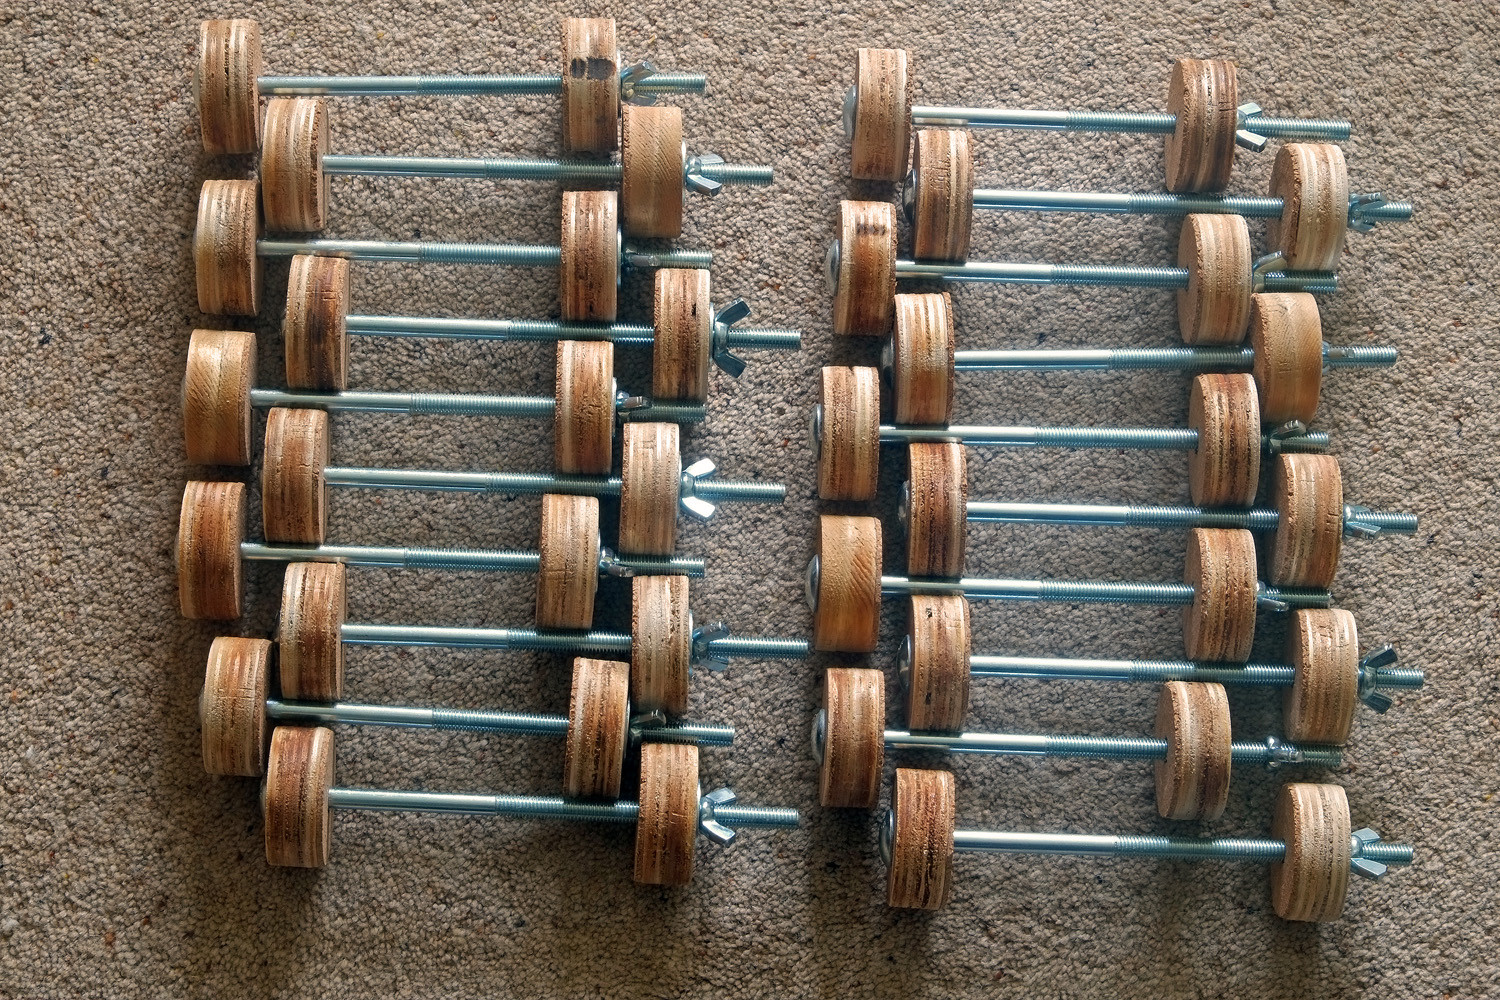
    Another check showed three of the rear braces are not fully attached - one is only hanging on at the end. So it looks like I'll need to knock-up some internal 'go bars' to apply pressure when gluing them back. So certainly no restringing it until the bracing is secure again.

    I've also noted that also need to get some tuner bushings for it as it should have them, and the tuning pegs are rattling around a fair bit as a result. The push-in ones do fall our rather easily. Had to get some for the 1965 Harmony Rocket I did up a few years back. I may get a new set of tuners for it as I think some of the current ones are probably too loose with too much backlash in the gearing to hold tuning well. Luckily the 3-on-a-strip tuner post dimensions has stayed constant throughout the ages (1/4" post diameters and 35mm between post centres) so I can drop a more modern strip in without any issues. I'll obviously keep the originals safe.

    It's not my oldest instrument; that's a 1903 Italian-made bowl-back mandolin that I got given and restored in the late 1970s. But that's got such a thin neck that I can't really play it, and the bowl-back makes it even harder to play. But it's certainly now my oldest guitar.

  2. #2
    Overlord of Music Sonic Mountain's Avatar
    Join Date
    Jul 2017
    Location
    Toowoomba, Qld.
    Posts
    3,261
    Nice pickup Simon. I'd love to see your solutions for glueing in the internal bracing.
    Build 1 - Shoegazer MK1 JMA-1
    Build 2 - The Relliecaster TL-1
    Build 3 - The Black Cherry SG AG-1
    Build 4 - The Sonicaster TL-1ish
    Build 5 - The Steampunker Bass YB-4
    Build 6 - The Howling Gowing ST-1

    "What I lack in talent I make up for with enthusiasm"

  3. #3
    Member Hardcoretroubadour's Avatar
    Join Date
    Nov 2017
    Location
    Brisbane
    Posts
    268
    Nice find Simon, can't wait to see this one come back to life.

  4. #4
    GAStronomist Simon Barden's Avatar
    Join Date
    Oct 2016
    Location
    Reading, UK
    Posts
    10,547
    Well I've ordered a couple of syringes with bendy thin nozzles for glue application. The two top braces are very close to the soundholes, so I will probably be able to glue and then clamp them from the soundhole.

    As I said, my first thought is that I need to get some flexible wood or plastic rods to act like 'go bars', which I'll bend into position so they push outwards between the underneath of the top and the bottom brace.

    Standard 'go bars':

    Click image for larger version. 

Name:	4a9662e1528edc12472064ce467fdad3.jpg 
Views:	153 
Size:	103.3 KB 
ID:	32907

    I'll need to find something that's reasonably flexible because there's not a lot of distance between the two surfaces. I can then put some heavy books on the top of the guitar to counter the upward thrust of the 'bars'.

  5. #5
    Mentor vh2580's Avatar
    Join Date
    Aug 2013
    Location
    Cleveland Qld
    Posts
    1,179
    For internal bracing you could maybe use a threaded tube and bolt or something like a small turnbuckle to expand in the hole similar to a brace repair jack
    https://www.stewmac.com/Luthier_Tool...pair_Jack.html
    Tony

  6. #6
    GAStronomist Simon Barden's Avatar
    Join Date
    Oct 2016
    Location
    Reading, UK
    Posts
    10,547
    I was thinking along those lines as a 2nd option. Well, a more DIY version, as buying those would get rather expensive. I'd need at least three for the brace that's almost completely loose. Unlike most other tools, it's not like I'd really get more use from them afterwards.

    Maybe I can find some screw-height adjustable kitchen cabinet legs or similar...

  7. #7
    GAStronomist Simon Barden's Avatar
    Join Date
    Oct 2016
    Location
    Reading, UK
    Posts
    10,547
    I've found some simple plastic cabinet legs; 4 for about AUS $8. A bit more affordable, even if I need to file some notches in the feet myself for the braces to fit into. Not bottle screws, but something I think I can still adjust. I now need to do some measuring to get ones with the right range of height adjustment.

  8. #8
    Mentor JimC's Avatar
    Join Date
    Sep 2019
    Location
    SE England
    Posts
    517
    You could probably make mini "go bars" from glass fibre sheet. I think I'd mould them with a built in curve, rather than flat, they'd be a lot easier to get in place. Use a plastic bottle or bucket or something to mould them round - something about double the diameter of the height inside the guitar at a guess. And yes, a bit of mdf with some weight on to keep the body flat.

  9. #9
    GAStronomist Simon Barden's Avatar
    Join Date
    Oct 2016
    Location
    Reading, UK
    Posts
    10,547
    Well I've ordered a cheap set of adjustable legs. That's good, as mine no longer reach the ground.

  10. #10
    GAStronomist Simon Barden's Avatar
    Join Date
    Oct 2016
    Location
    Reading, UK
    Posts
    10,547
    All the old plans went out the window as after watching various guitar restoration videos on YouTube I decided to do it properly, remove the back and re-glue each bracee fully from scratch.

    So in the the past week I've made a whole load of spindle clamps so I can glue the back of the guitar on again:


    Then with a mixture of knife and chisel, I prised the back off. The old hide glue was pretty brittle, so most of the back came off easily. It was only the heel and rear block area which gave me any real difficulty, even after heating up the wood with an iron. But brute force prevailed.


    All four of the rear braces were only held on by the smallest amount of remaining glue, whilst the two front top braces were only half-attached.

    And there's that small crack in the top that needs repairing as well. So that's something for me to do over the next few days.

Page 1 of 2 1 2 LastLast

Posting Permissions

  • You may not post new threads
  • You may not post replies
  • You may not post attachments
  • You may not edit your posts
  •