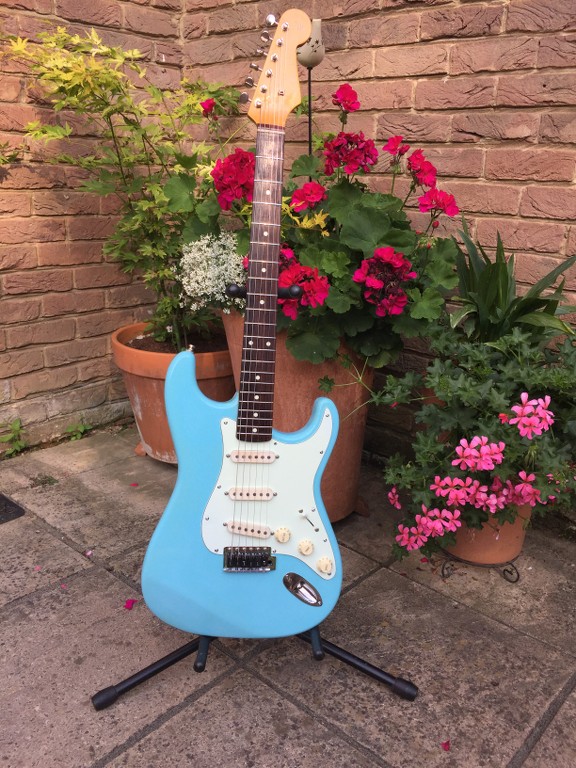
I thought you might like to see my slow progress over two summers of transforming my
Fender Japanese Strat from a cracked Fotoflame poly sunburst finish to a nitro Daphne Blue one.
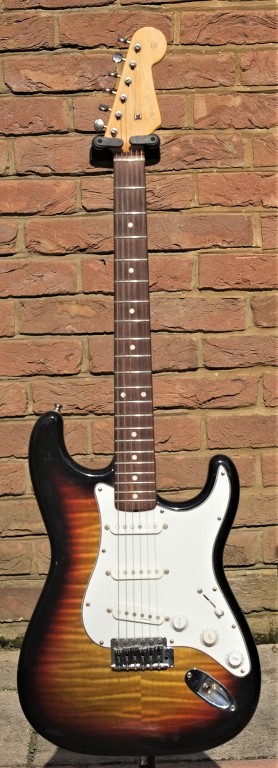
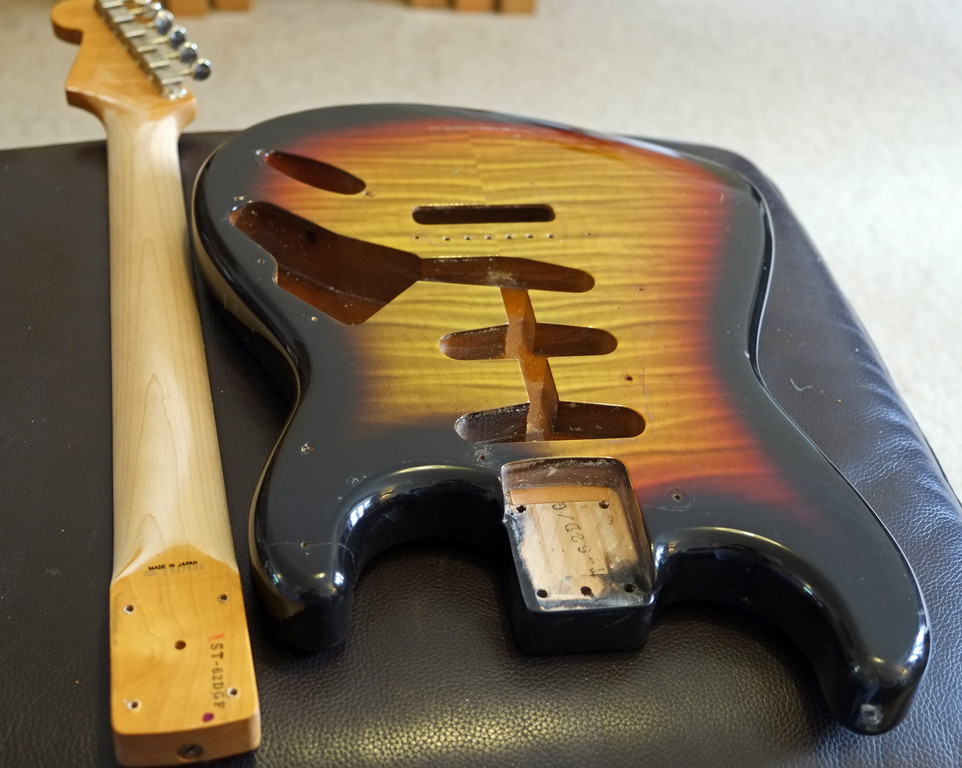
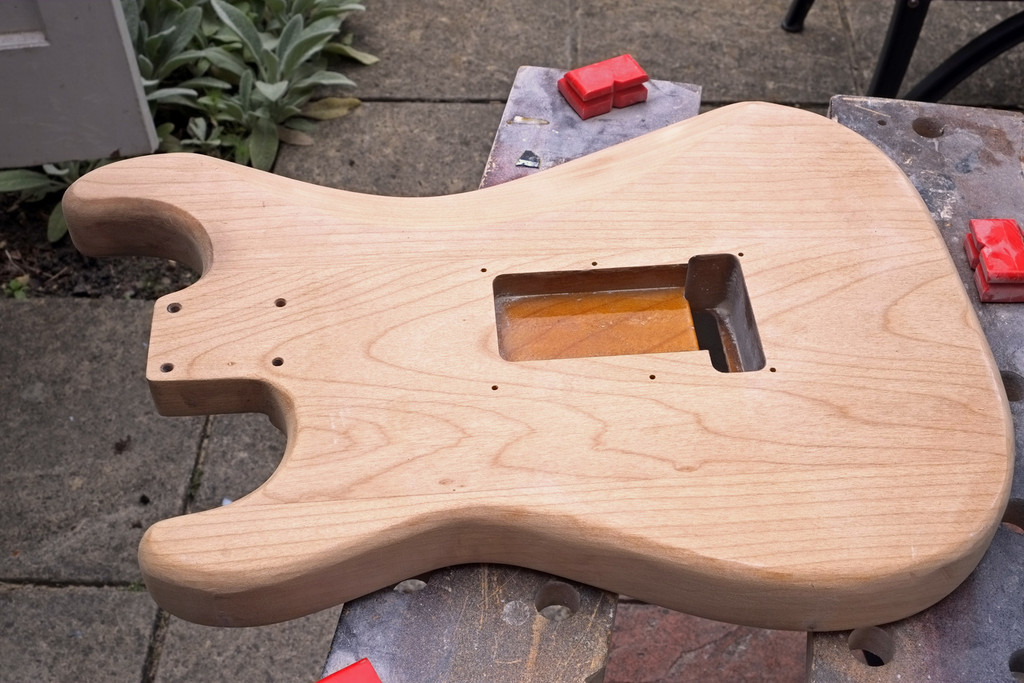
The guitar is a 1995 'Made in Japan' (as opposed to 'Crafted in Japan' ) '62 style Strat. I bought it used, back in 2001. The body wasn't in the best condition, but it had the nicest neck and overall feel of all the used Strats in the shop.
The Japanese '62 style Strats of that era had 'Fotoflame' finish on the front and back. This is basically a photo of some flamed maple that is stuck on to the body, then in this case the a red and black sunburst was sprayed on and the whole thing then clear coated (all poly finishes). The neck had a lightly tinted satin poly finish.
Apparently the photo material wouldn't stick to alder or ash, so as a result the body wood is basswood. The neck is maple with a rosewood board.
The previous owner had replaced the original saddles with Graphtec ones. I liked them, so they've remained with the guitar ever since (and have survived the refinish).
Zen kindly fitted a new bone nut for me a few years ago, after the original plastic one split in two.
The original pickups were cheap units with ceramic bar magnets stuck on the back. I ran with them for about a year, then bought a set of Kinmans (noise cancelling single coils), consisting of an AVn-62 in the bridge position and an AVn-56 in the middle and neck position.
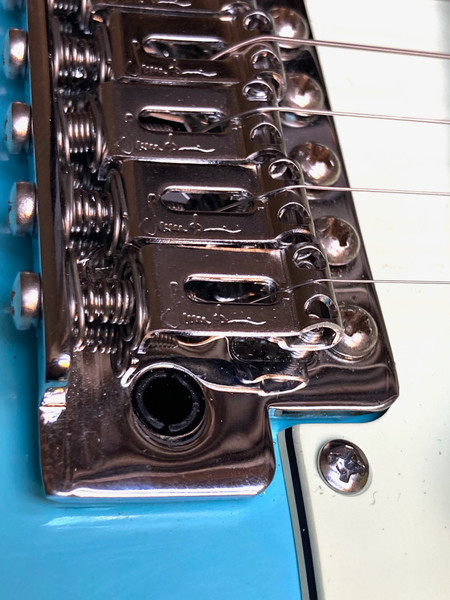
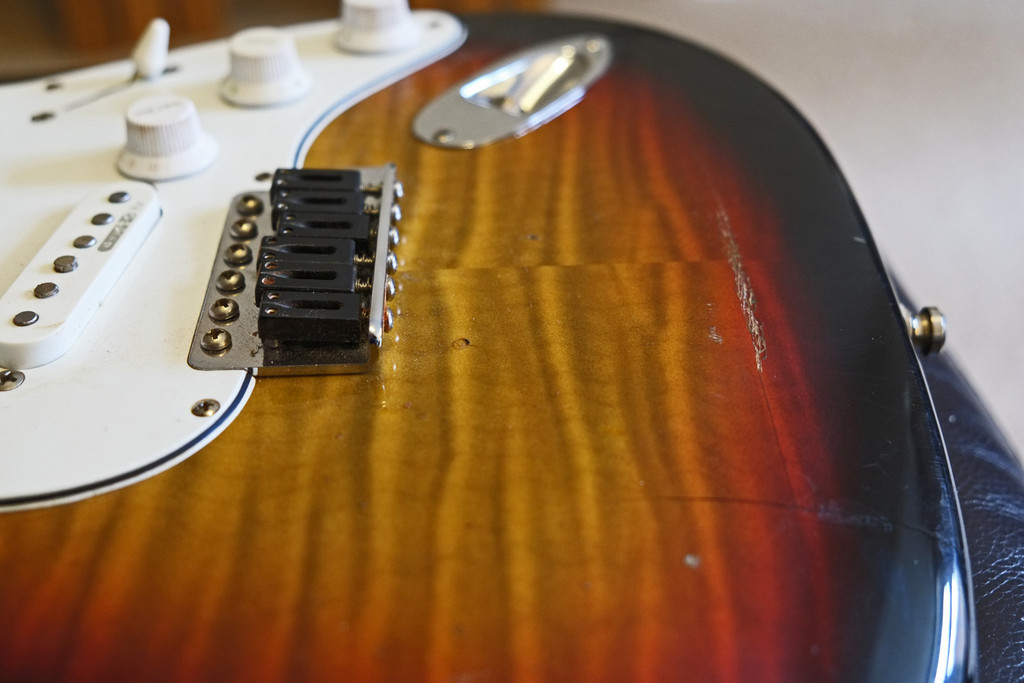
Whilst there was quite a lot of damage to the finish, it wasn't that obvious unless you were very close. Damage and finish cracking behind the bridge:
And finish cracking on the bottom horn spreading out both sides from a scratchplate screw hole.
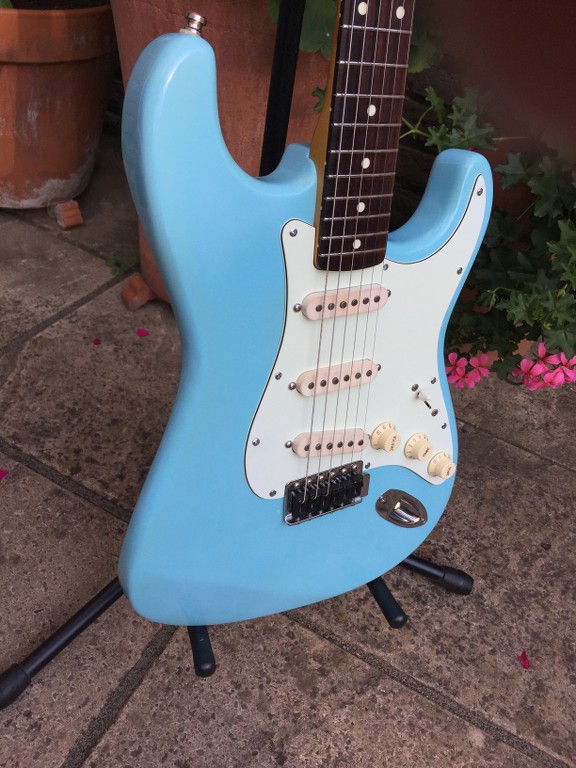
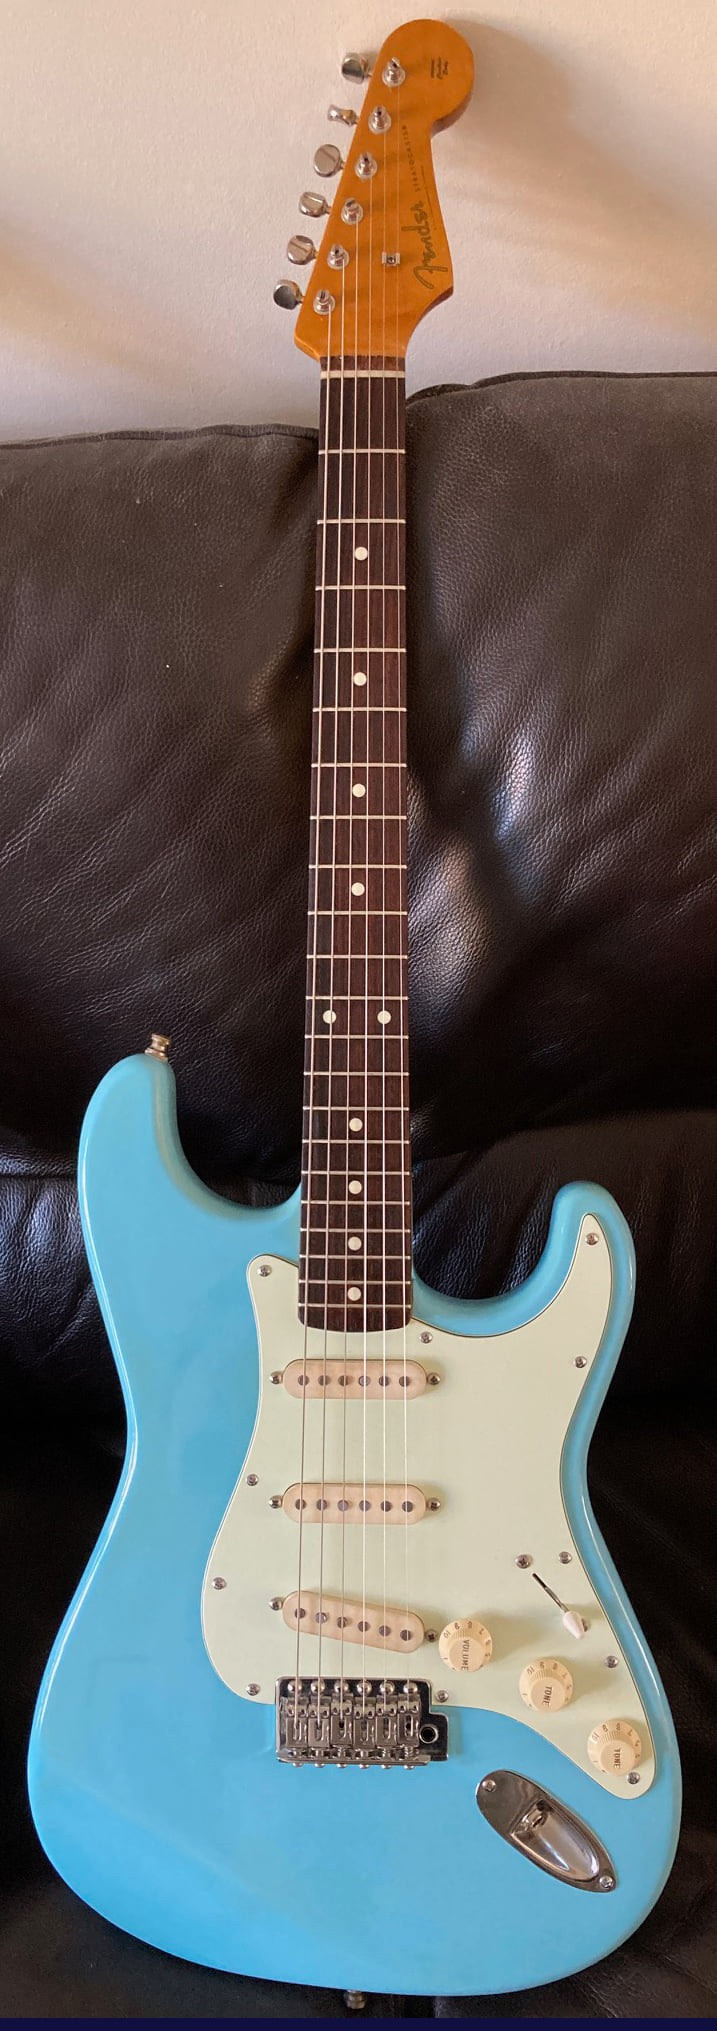
So I lived with it like that until last year, when I decided to refinish it in Daphne Blue, one of the old standard Fender custom colours from DuPont. I also wanted to re-profile the plump C-shaped neck, so it felt more like the shallow V neck on my Dave Gilmour Strat. New mint green scratchplate and trem covers were purchased (my preferred match for Daphne Blue).
After helping a friend to buy his Clapton Strat, I also decided to fit the Clapton boost circuit + TBX tone control. This would require some routing to make space for a 9v battery. Whilst I could have added a complete new battery compartment, I found it was possible to minimise any changes by modifying the the trem cavity.
As the original bridge had a rather poor thin alloy trem block, I bought a Wilkinson trem with a steel block to replace it.
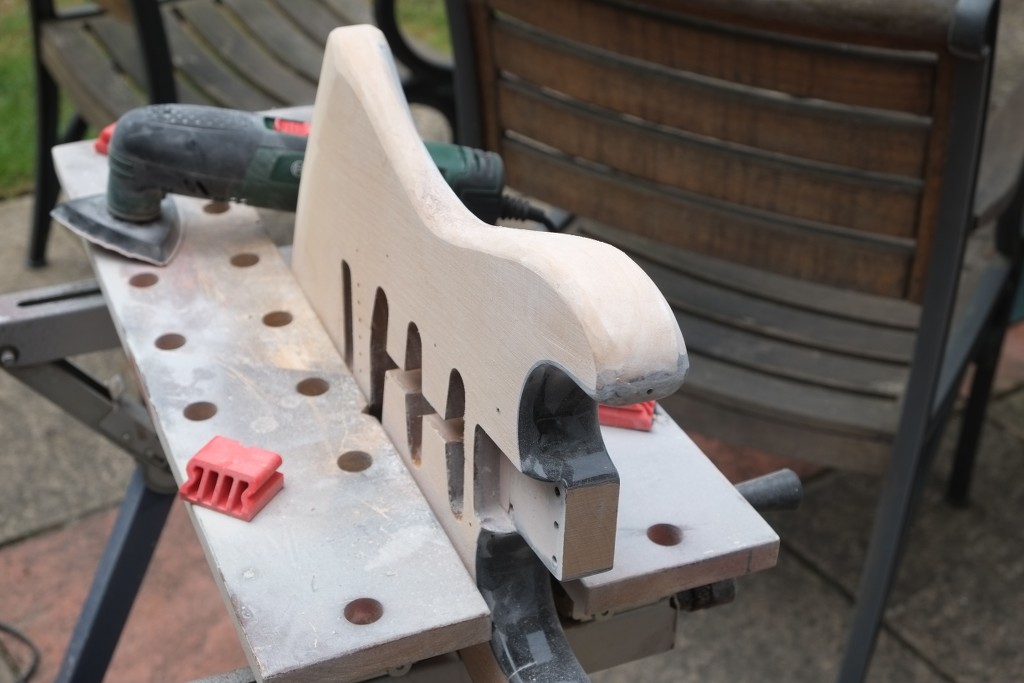
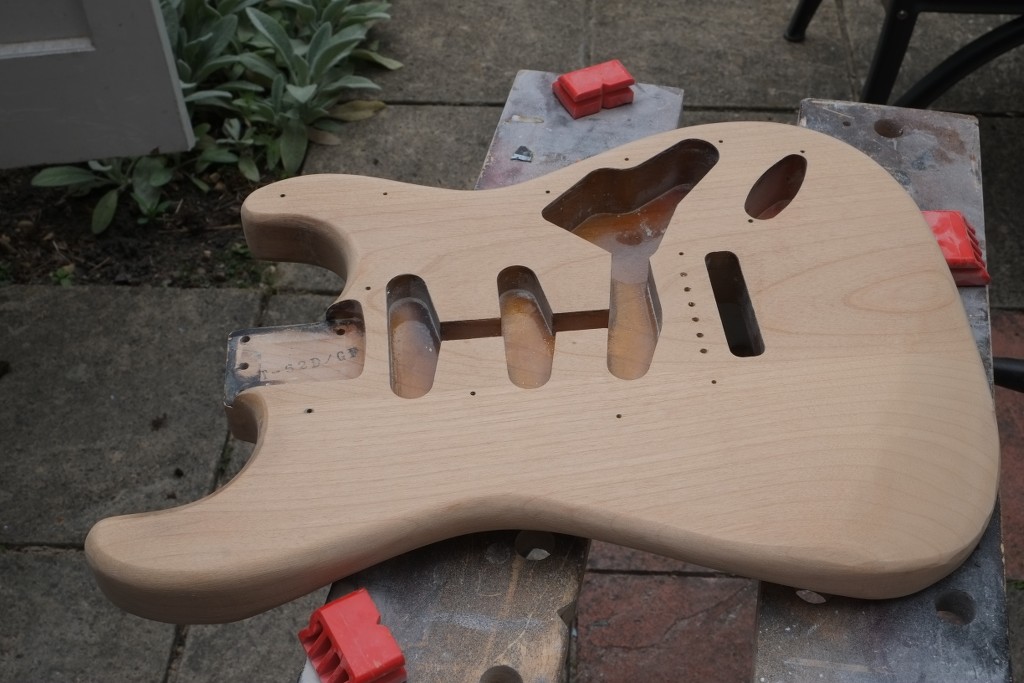
So, last summer the guitar first got stripped. I did try a hot air gun and paint stripper, but they didn't even start to touch the finish (which I then presumed was polyester rather than polyurethane), so it was all removal by sanding:
I re-profiled the neck using nothing more sophisticated than a a random orbital sander and hand sanding until it felt similar to the DG neck. This mainly involved taking the 'meat' out of the shoulders of the 'C' profile so that they began to slope inwards, away almost straight away, rather than run parallel down from the fretboard for a few mm first, then slightly flattening the 'C' both sides of the centreline to create a shallow 'V' profile at the end of the neck, that tapers to a more rounded shape at the top.
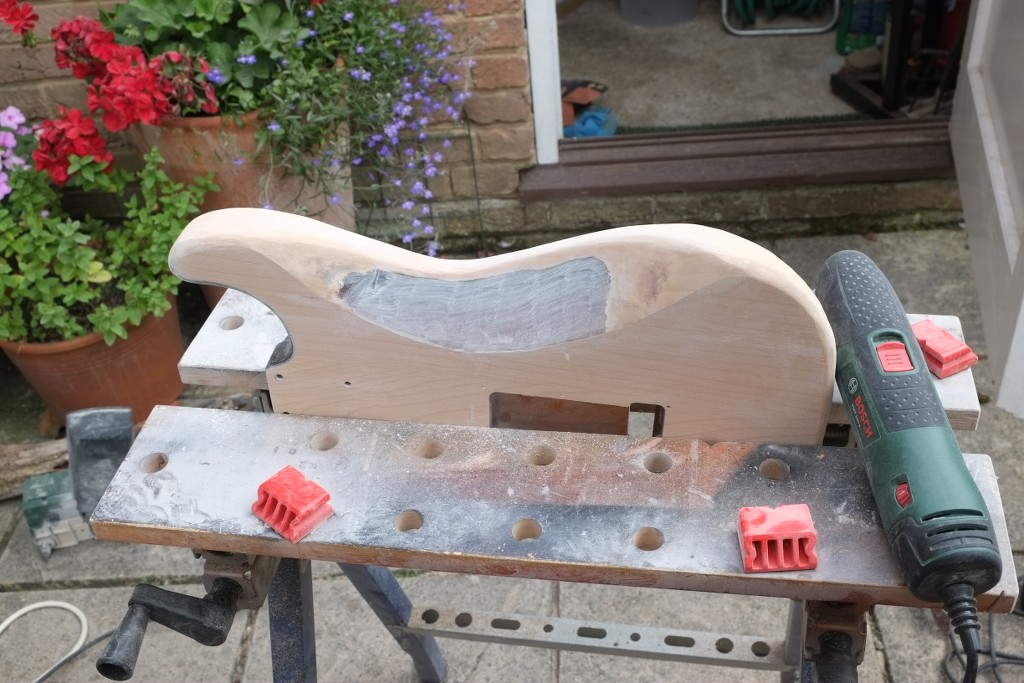
A battery pocket was routed (an extension to the trem cavity) and a couple of coats of white primer sprayed on the body. Here you can see the battery compartment routing as an extension of the trem cavity. The battery area is also slightly stepped into the cavity, in order for the battery to sit beneath the cover and also to help keep it in place.
Then the weather changed, first very wet, then it got too cold for spraying, and nothing further happened until this summer.
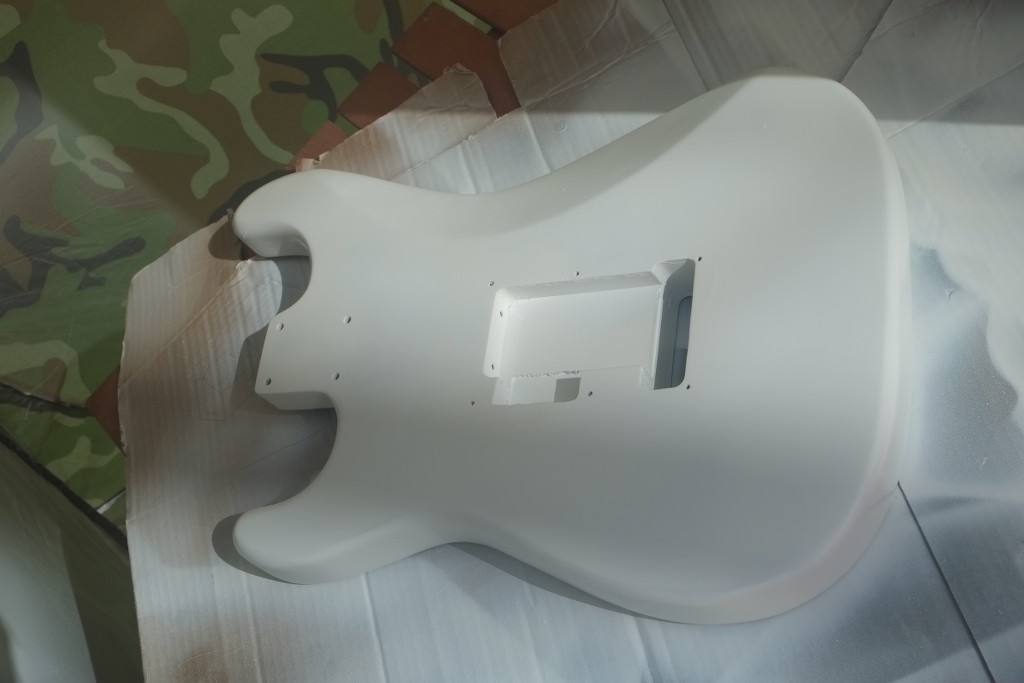
So this year, several coats of white nitro primer/filler were applied, rubbed down and then a few more applied and rubbed down again until the finish was smooth.
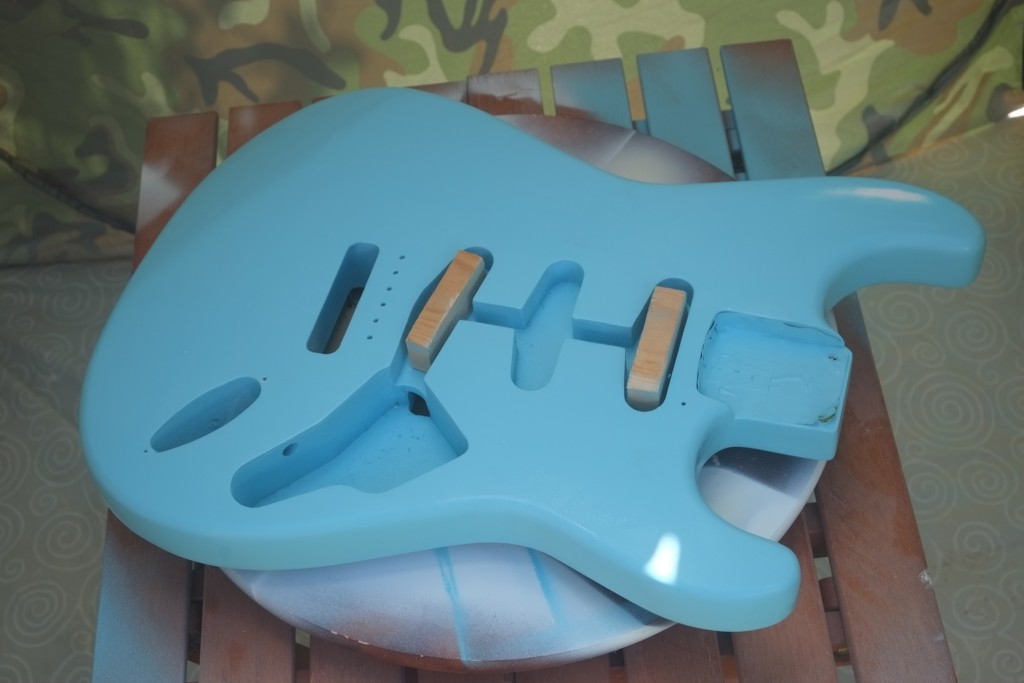
Then many spray coats of nitro Daphne Blue were applied. I have an air compressor and a used mini spray gun. I re-purposed a Lazy Susan to make a turntable to make it easier to spray all the edges. The wooden blocks you can see superglued into the two pickup cavities, are to keep the top of the body away from the supporting surface when the body is reversed (only took a light sideways tap to remove them after spraying). The bottom is being held up by long nails in the control cavity screw holes (a traditional Fender method). I'd already filled in all the scratchplate holes as the holes in the new scratchplate didn't line up with those for the old scratchplate.
It was then left several weeks for the finish to fully cure, after which is was wet-sanded back to a flat finish with P240 wet and dry paper and left for a further few days.
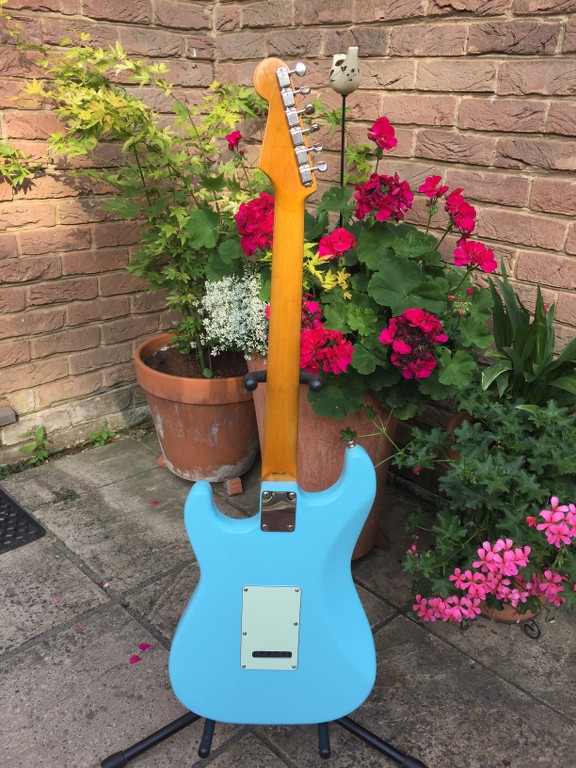
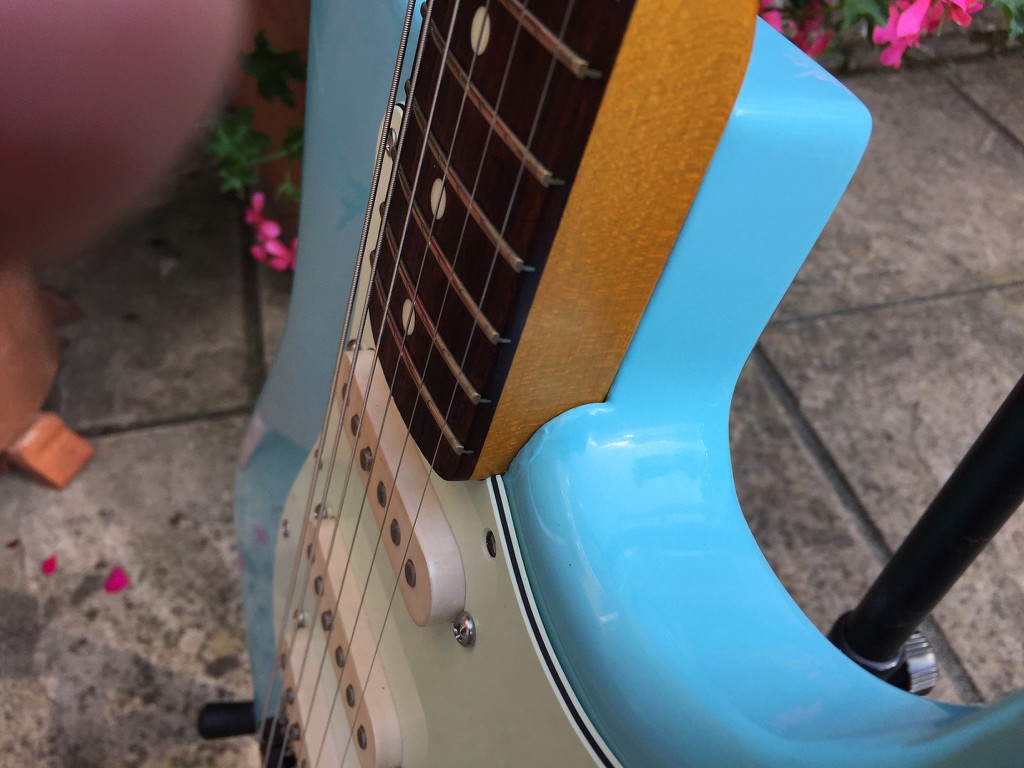
In the meantime, any bare wood on the neck was sprayed with amber tinted clear lacquer until it matched the existing finish on the headstock and neck heel (I didn't sand the serial number off and didn't touch the headstock finish). then some clear lacquer coats went on the top of everything, so there was no more satin finish
I had initially decided to clear-coat the body for a bit of extra protection. but the new tin of 'clear' lacquer I used wasn't clear as it said on the tin, but had a distinct yellow/amber tint to it, which when applied over blue, made the finish go rather green. I know this is often what happened to vintage Fenders as the 'clear' lacquer of that time aged and went yellow, but I did want a blue, not green guitar. So a lot of swearing and then a sand back to remove it.
This was typical of the hassle I had with this guitar all through the work. Things just kept going wrong all the time; strange marks appearing that couldn't have got there, dents in the finish when I hadn't knocked it etc. So I decided to just have a polished paint finish instead.
Most of the re-assembly happened over the past two days (12th and 13th August '19). The body was wet sanded with finer wet and dry, then went up through the grades of Micromesh until it was almost a good gloss finish. It then got buffed to a shine using T-Cut, followed by three specialised Rothco and Frost polishing compounds for a really nice shine.
The neck finish got polished, and the frets given a level, re-profile and polish to remove the shallow dents in them (If I hadn't already done several fret levels over the past two weeks I would have been tempted to have left it for the time being as they weren't that bad).
I had bought an 'aged' set of Bare Knuckle pickup covers to replace the glossy white Kinman ones, but found that the Kinman neck pickup has a smaller pole spacing than the mid and neck - and the BK covers didn't. So I sanded the Kinman covers down a bit, the polished then back up a bit, then soaked them in cold tea until they took on some colour and they looked fairly convincing.
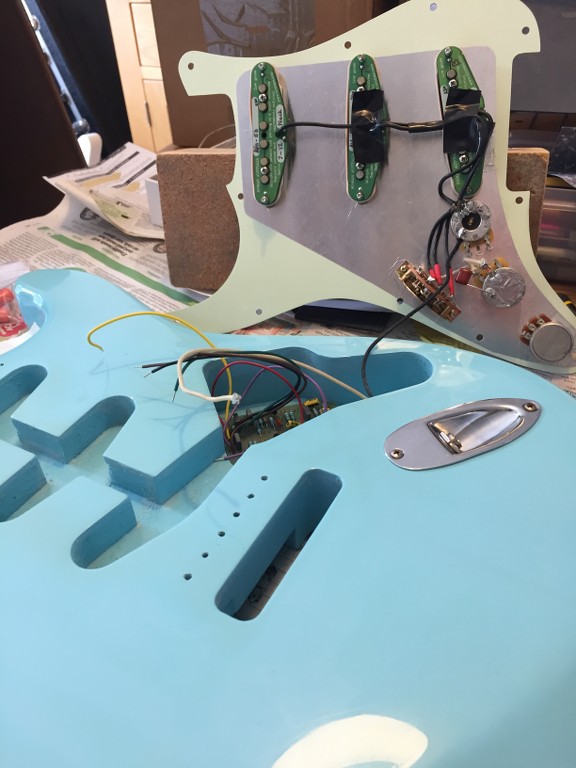
The electrics then got wired up. Not that easy, as the circuit board was fixed in the bottom of the control cavity (it all only just fitted but saved routing-out a dedicated cavity for the board) and everything else on the underside of the scratchplate.
Here the circuit board has been fitted into the bottom of the control cavity and the numerous leads from it await connection to the pots on the top:
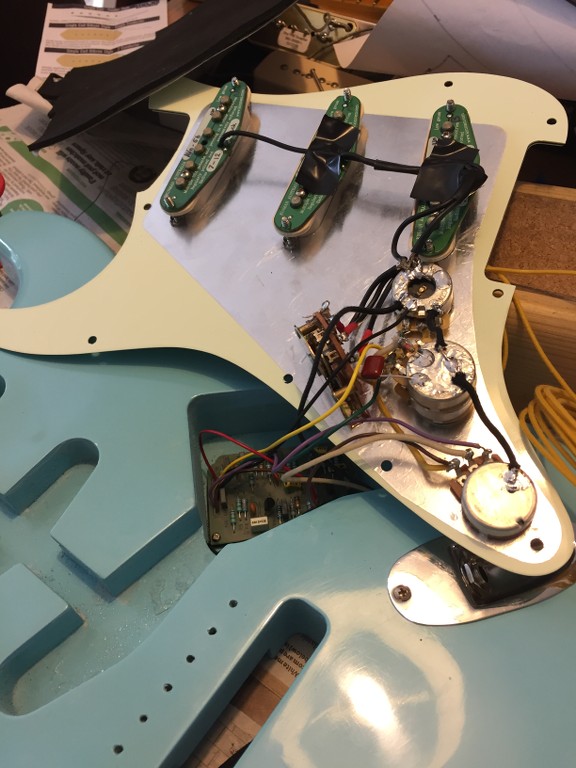
As if by magic - it's all connected.
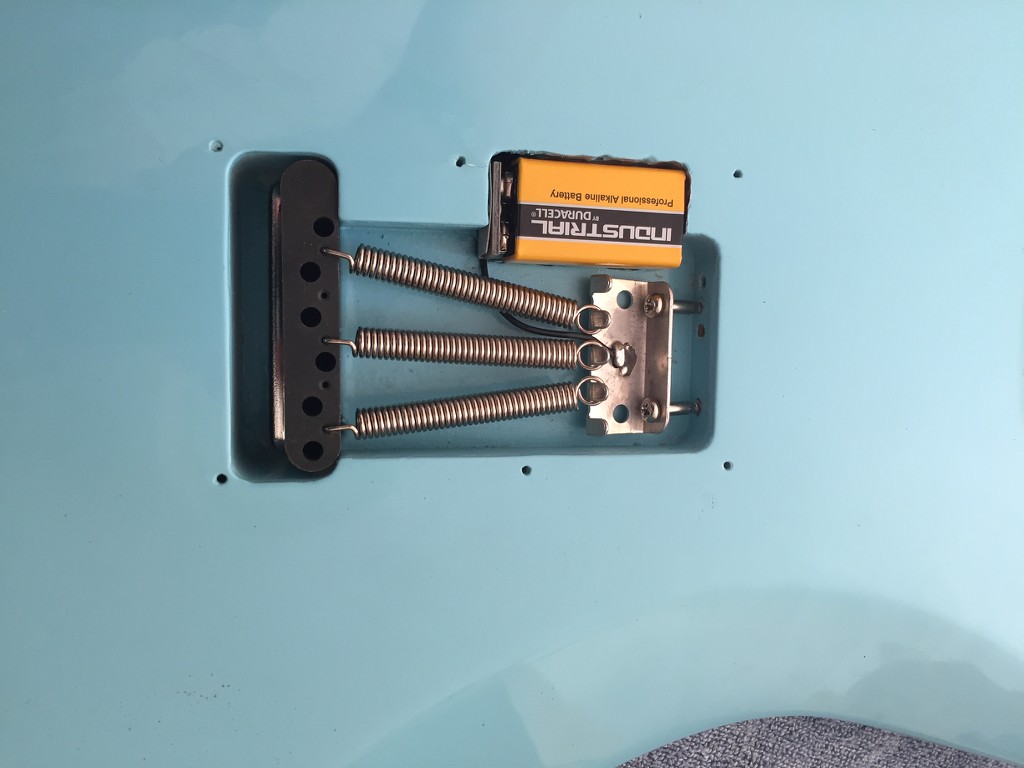
The battery rout needed slight enlarging after the painting, and then I found that the existing trem claw got in the way of the battery. Luckily, the trem claw that came with the Wilkinson trem was smaller, so by offsetting it slightly, and drilling one new screw hole, that problem was overcome. I must have used the new trem claw when routing out the battery location, then forgot about that in the meantime:
The scratchplate was positioned and the holes drilled for the fixing screws. It was then that I realised that the scratchplate both interfered with the neck pocket and also the trem top plate. Grrr! An attempt to see how well the neck fitted in its pocket (not at all with the scratchplate on) resulted in a chip of paint being knocked off the side of the pocket. Double Grrr! (plus a lot of four-letter swearing) .
But the scratchplate wasn't going to go back on as first fitted, so it was time to fill all those holes and drill new ones. This time it worked, and the scratchplate was screwed in place, with all those wires just fitting in the control cavity, (with the emphasis on 'just').
So it was time to fit a battery and see if the electrics work by tapping on the pickups with a screwdriver.
Silence.
But a bit of adjustment of the jack socket angle and sound was achieved. Fender Strat jack cavities are really just too small for purpose and the socket must be at just the right angle of rotation for it to work properly - otherwise you get no output or a very dodgy contact. With this being a TRS jack socket for battery switching, it compounded the issue and finding the right angle of rotation took several goes...


 Reply With Quote