


Way back in 1988, in the murky mists and miasmas of Basingstoke, UK, a young man called Tim walks into a music shop with a sheet of A3 paper and copies the body outline of a Telecaster. After much mysterious banging, sawing and chiselling, a one-piece mahogany body appears, to which Tim screws a bought 22-fret neck. After a trip to a car body-shop to have it clear-coated, and the appliance of electrics and hardware, on a dark and stormy night, a brilliant bolt of lightning strikes Tim's laboratory and the Emicaster comes alive!
Fast forward to 2010. Tim is a member of the Sound on Sound forum with a user name of Emitime (hence my name of 'Emicaster' for the guitar). He worked nearby so we meet up for the occasional curry, I give him an unused 15" powered sub, and in response, Tim gives me the Emicaster.
It had been up in his loft for the past 20 years or so and hadn't fared well, The pickups had corroded to bits, the neck was rather warped and the frets were very uneven. It was also, just varnished mahogany body, and for some reason that really does nothing for me. But the rest of the hardware was good - proper Fender bridge and control plate, with Grover vintage-style slotted tuners.
I couldn't get it to play at all well with the original neck (an all-maple affair), so I found a cheap used one on eBay with a rosewood board and fitted that. I sprayed the body red, using some car acrylic spray paints, but omitted to sand back to the wood first, so the paint went on over the varnish (of unknown type). Here's the body after being sprayed red over some white primer.
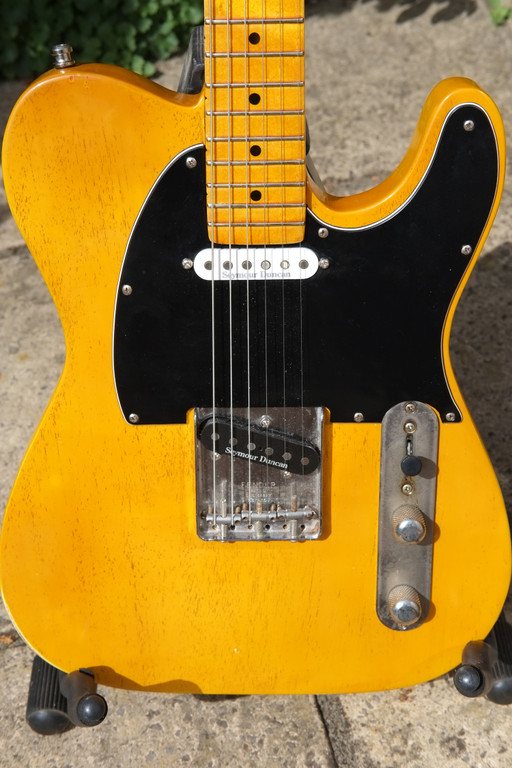
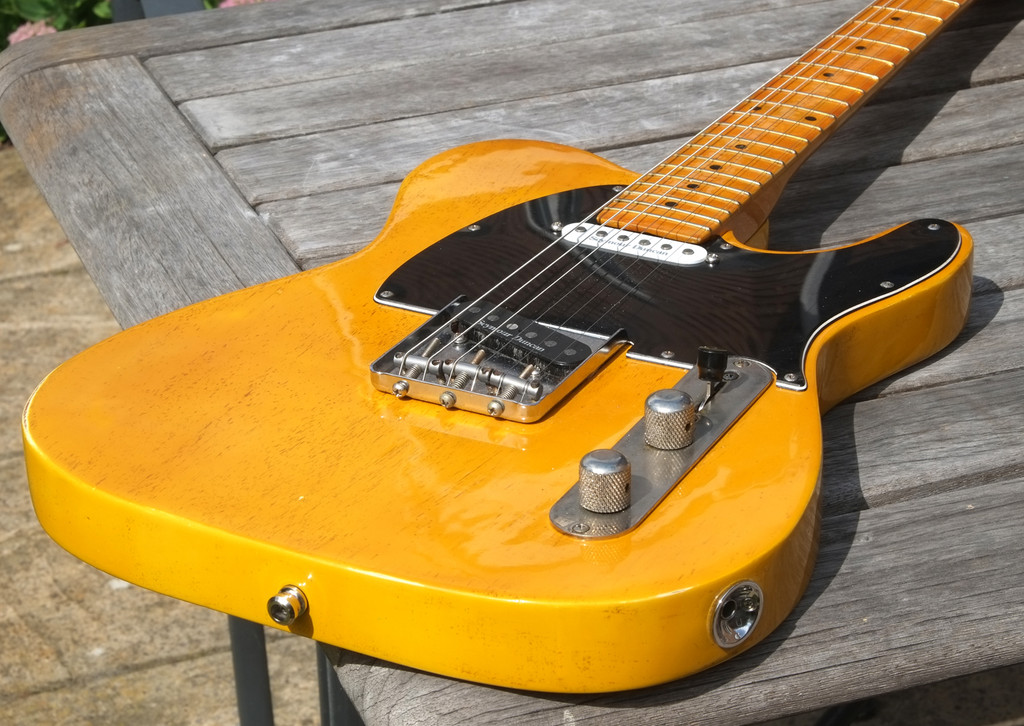
I fitted a Seymour Duncan Hot Tele Bridge (to the bridge position) and a Seymour Duncan Hot Strat pickup in the neck. the original Fender jack cup fixing was rather loose, so I fitted an Electrosocket in its place.
As I was playing a few Rolling Stones numbers in the band at the time, this became my 5-string open-G tuning guitar. If you look carefully you can see the gap between the scratchplate and the end of the neck. This shouldn't be there but was mainly covered up when the original 22-fret neck was fitted. The replacement 21-fret neck left this exposed, so I used a black Sharpie to make the gap less obvious from a distance.:
Over time, I noticed that the finish hadn't hardened properly and was quite elastic feeling. Where the control and scratchplate was bearing down on the paintwork, the paint was squeezing out from underneath and bulging out the sides. Plus, I couldn't get a decent shine on the paintwork:
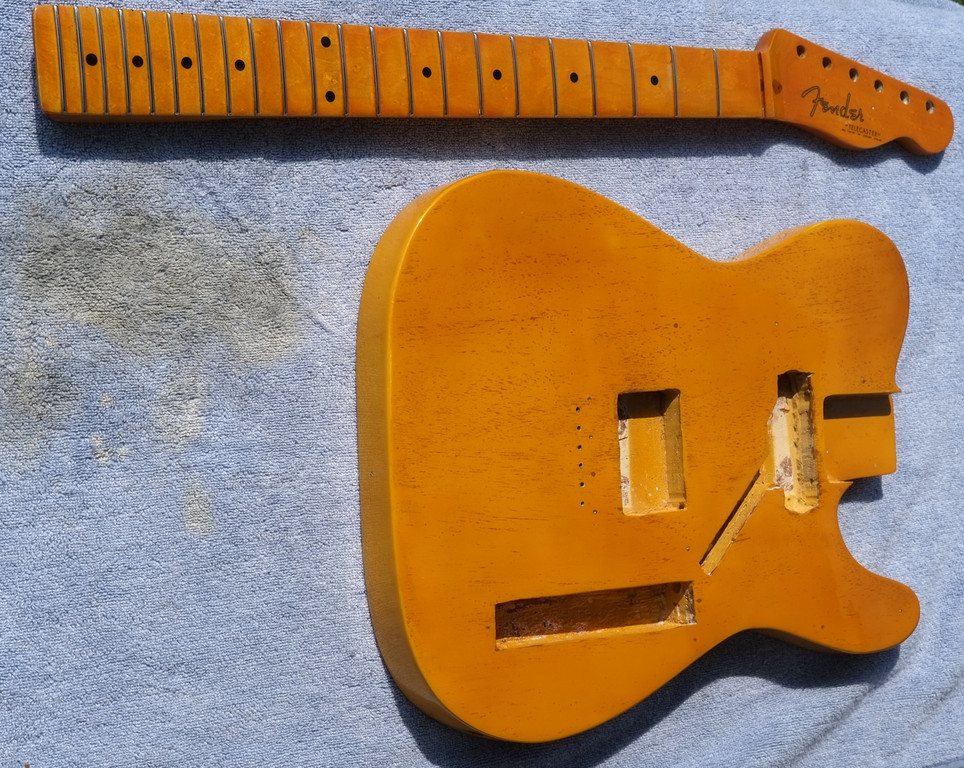
So it was time to do something about it and thought a re-finish would be a good idea. But first I thought I'd look at the original neck and see if that could be reclaimed. Having done a fair bit of neck work on my kit guitar builds, I felt more confident about this and had a lot more of the required tooling.
I took the frets out (most fell out with the merest touch), then re-profiled the board using a 12" radius sanding block. Yes, it's now a Gibson radius for easier playing and string bending. I then fitted new frets (ones designed for repair work with extra-wide tangs). Some coats of amber-tinted lacquer then some clear, and it was time to put it to one side and concentrate of the body. Unfortunately I didn't take any photos at the time of the neck in pieces.
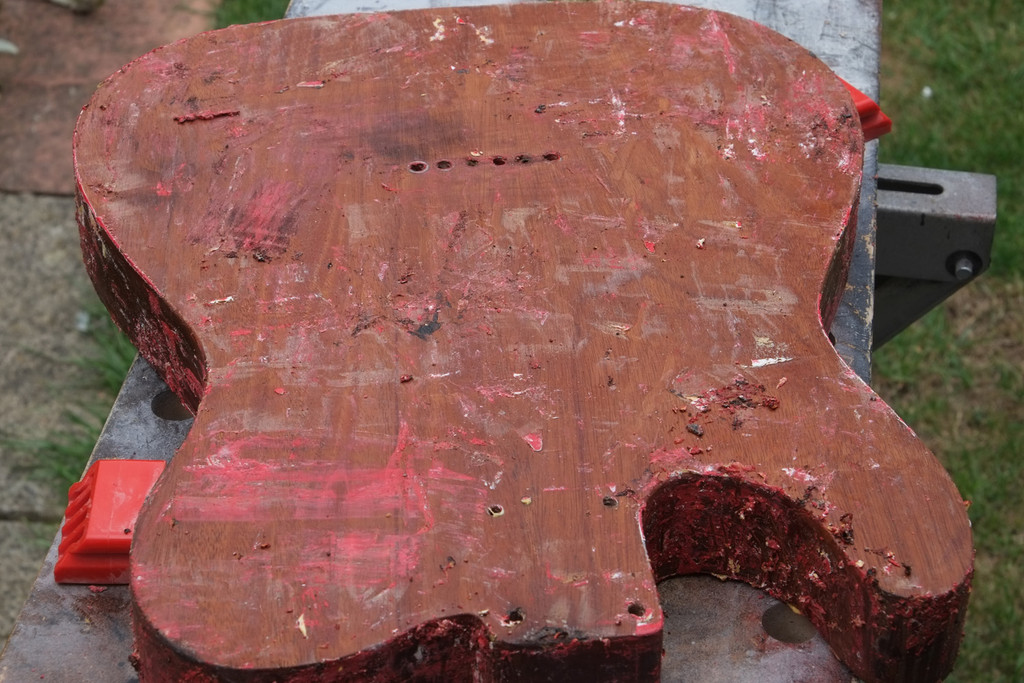
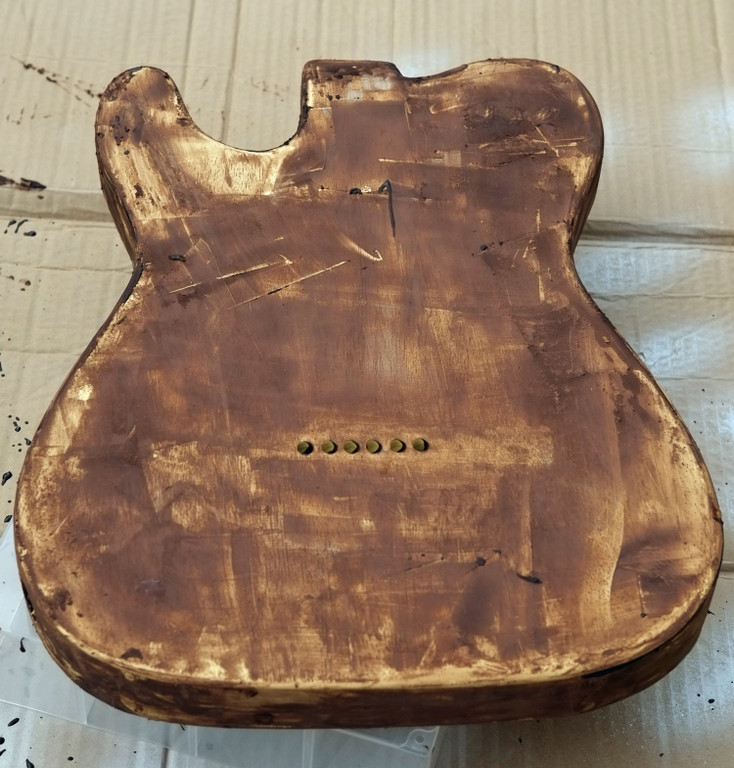
The body was stripped with a mixture of paint remover, a hot air gun and sanding. If I was a famous artist, this could be worth millions. I could be the new Jackson Pollock...
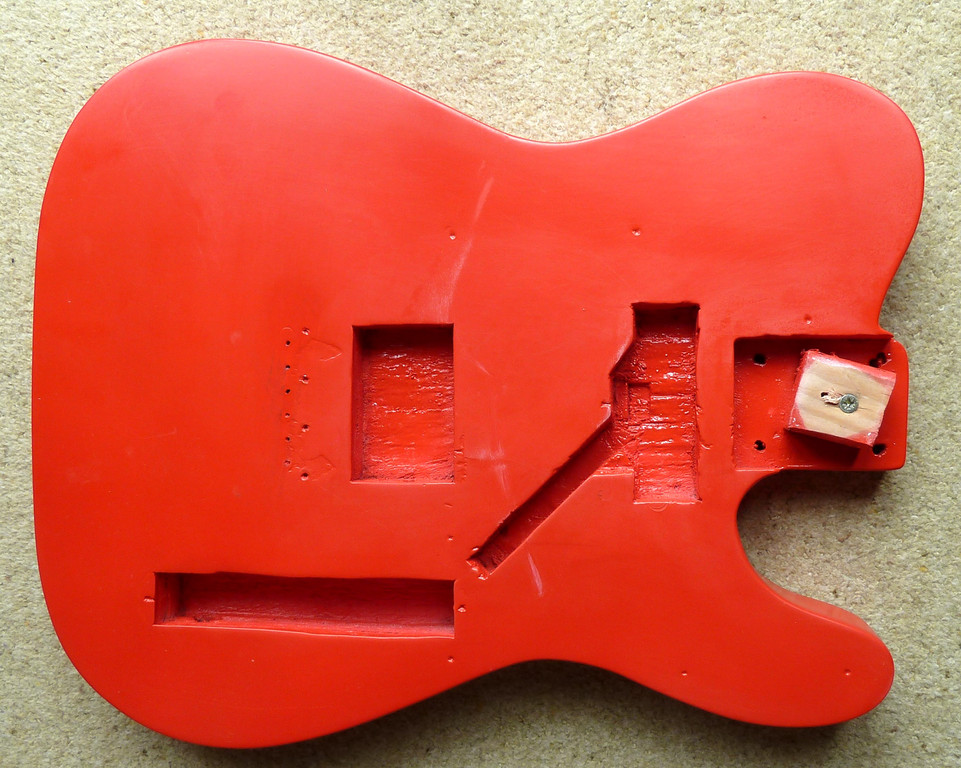
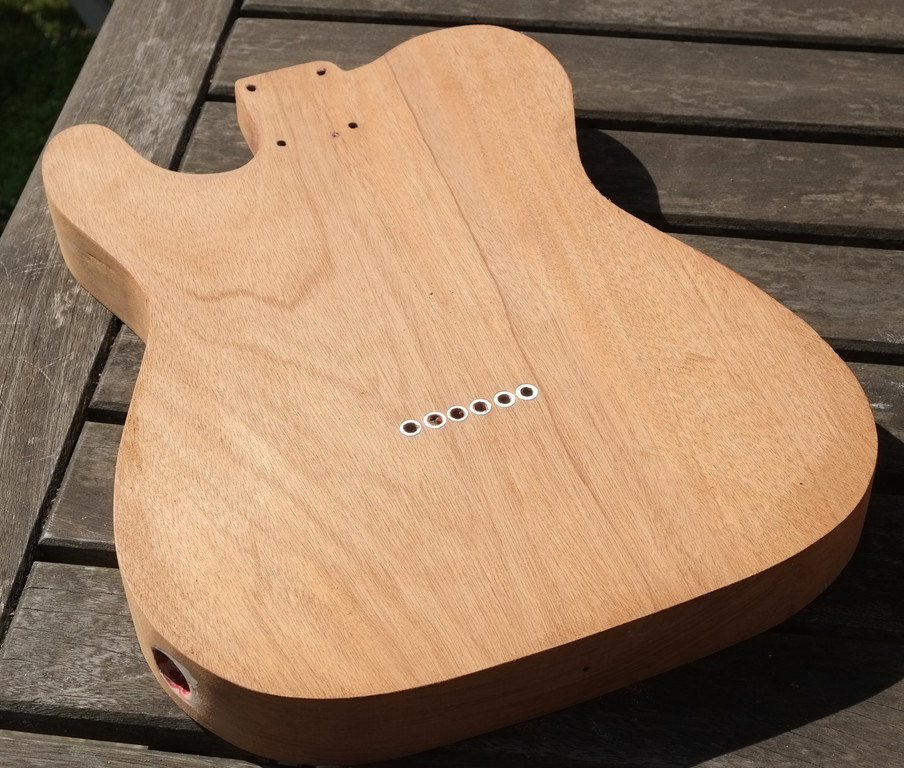
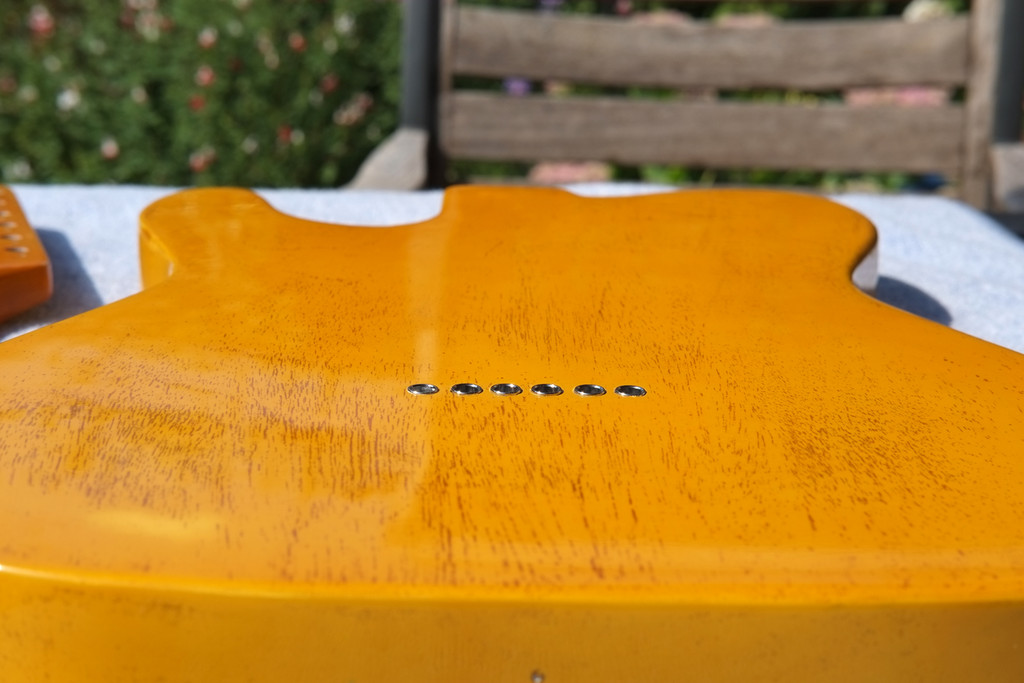
But I'm not famous, so the work of art disappears. I thinned down the body with a belt sander as it was over-thick for a Tele and also weighed a ton. It's now a lot lighter, but still has a substantial feel. The old string ferrules you can see here are now too short, so they got drilled out after I took this photo:
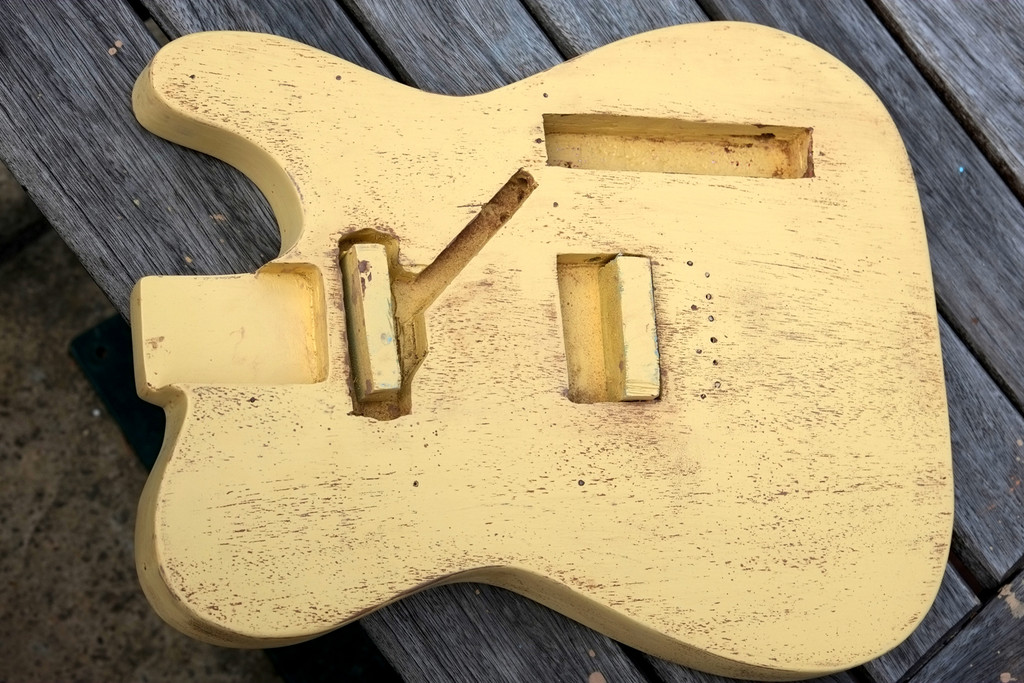
However I got a bit too enthusiastic in the weight-reduction, so it's now thinner than it really should be. I enlarged the neck pocket so that the neck correctly sat nearer the bridge, and also added some veneer to the side of the pocket to fill in a gap:
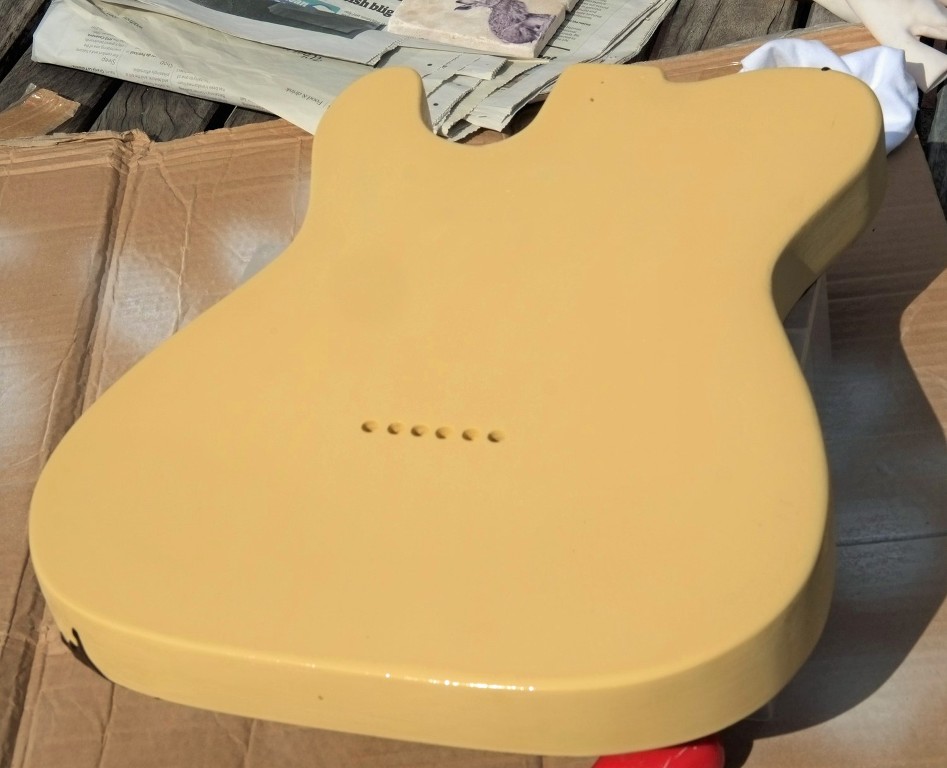
I decided to do a 'TV yellow' finish on it, so that it looked quite like a Gibson version of a Fender butterscotch blonde finish. The mahogany body wouldn't make an interesting standard blonde finish as it doesn't have the same interesting large grain patters that ash does (the standard wood for a Fender blonde finish), so I did the Gibson method of not filling the grain first but first sprayed on three coats of 'TV yellow':
Then it was time for an application of dark brown grain filler:
Which then gets sanded back until the paint reappears but the dark grain filler still shows in those pores:
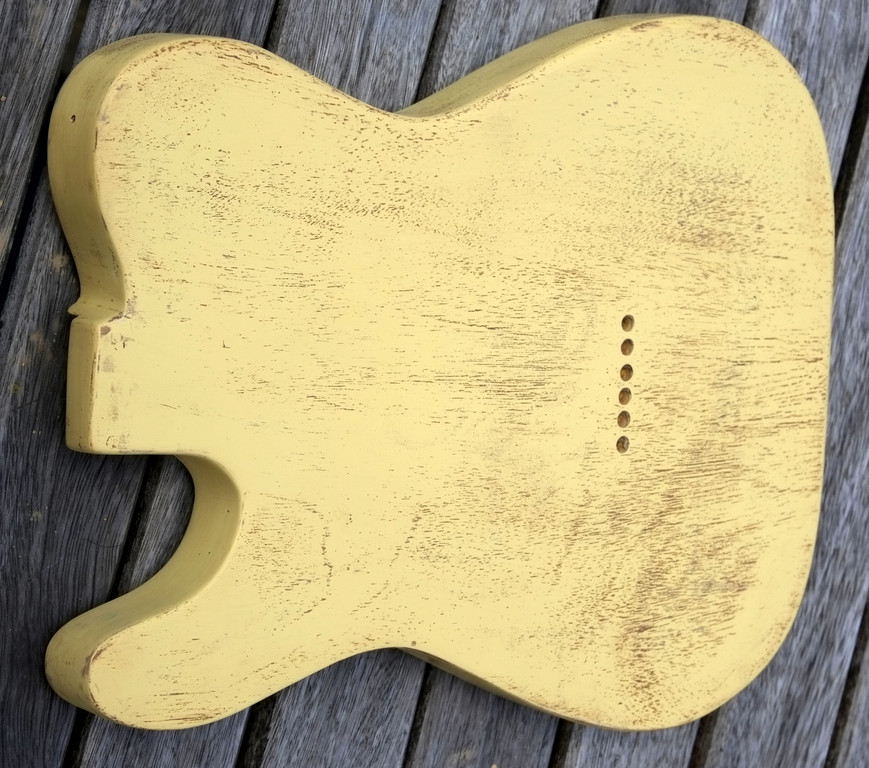
This gives a result that is far more interesting than just one all-over colour. The grain is a bit patchy, but that's what you get when using natural products:
Whatever was in that 1988 spray coat still hung around in the wood, despite the huge amount of surface and finish stripping , and the paint kept bubbling up in places. It took many attempts (and lots of bad language) to get those areas patched up. So the finish is about about 70% nitro and 30% solidified swearing.
Once that was sorted out as best as possible (I'd decided that this was going to be a warts-and-all build) I sprayed on a few coats of amber-tinted lacquer and then several coats of plain clear lacquer.
That was then left to dry for a couple of weeks, before wet sanding the finish flat with P240 wet and dry, then P400, P600 and then up through the micromesh grits from 1500 to 12000. The photo shows the body and neck after it's first polish using T-cut:
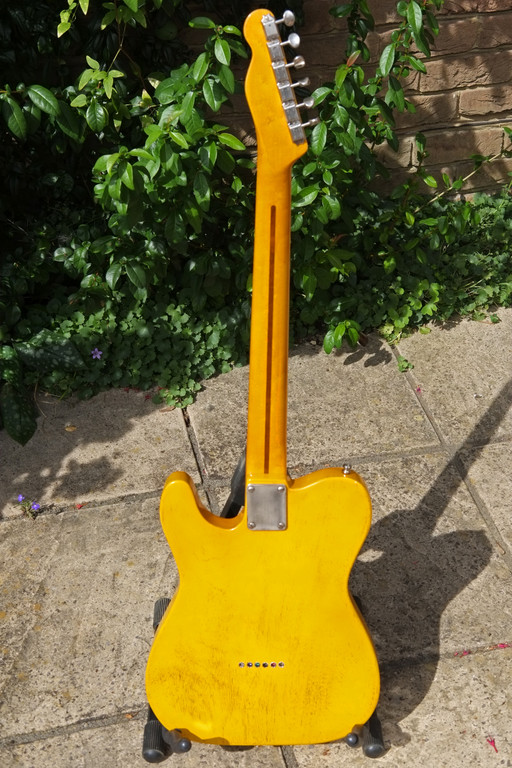
After that, it was then polished more using three progressively finer polishing compounds from Rothko and Frost. It didn't turn out as flat as I'd hoped after my initial sanding of the finish with P240 grit - when it looked really flat, but good enough for rock 'n' roll and certainly no orange peel. Here's the back of the body showing the new string ferrules:
The neck's original brass nut had poorly cut slots (Tim didn't have access to proper nut files - which are very expensive for what they are), so I planned to fit a bone nut. But the nut slot was wider than almost all standard Fender-style replacement nuts, so I was planning to cut one down from a thicker Gibson style nut. But then I picked up a Fender-style nut from my parts box and found that this one was a real Goldilocks one and fitted perfectly! So that saved me an hour.
The cavities and underside of the scratchplate were then all foil screened, and the electrics re-wired.
Because the body was now a lot thinner (and I also took the heel of the neck down to stop it sticking out too far from the thinner body), I initially tried using cut-down neck screws, but two of them wouldn't hold. So I used the original long screws, but have used two neck plates to stop the tips of the screw poking through the top of the board. It doesn't look too odd.
Putting it together, I somehow gave the body and headstock a mysterious couple of dents, so it's already slightly reliced, and I added a couple of tiny edge wear patches.
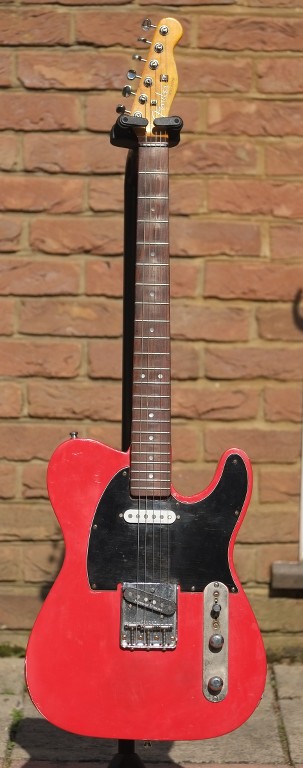
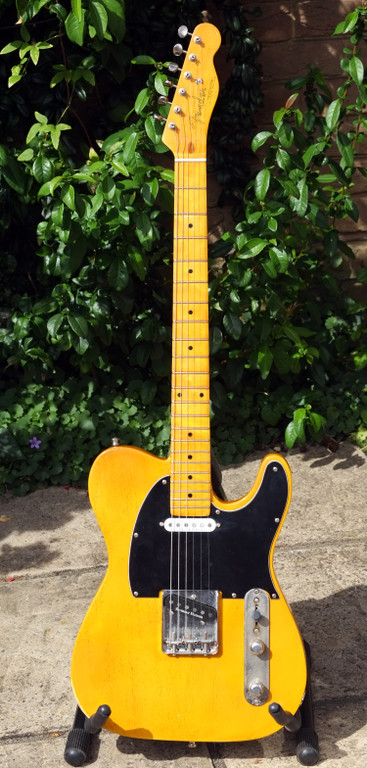
Then it was strings on, set-up and play it time. Took a bit of time because the truss rod is at the heel end of the neck, which means taking the neck off each time you want to adjust the rod (the 22-fret neck is also a PITA as you also have to take the neck off to remove the pickguard). But finally is was all done and it was tie to just plug it in and enjoy it. And here it was:
Finish niggles aside, I was really happy with it. I really like the overall 'TV yellow' look. Fender, but yet not Fender.
And then I started to feel unhappy with the sound....


 Reply With Quote

