Page 1 of 2 1 2 LastLast
Results 1 to 10 of 12

Thread: Set Neck on Custom V - possible factory mistake??

  1. #1

    Set Neck on Custom V - possible factory mistake??

    Just received my Custom FV-1 kit with a set neck, however the neck doesn’t have the piece that extends into the pickup cavity like the other set neck kits...it looks more like a bolt on neck minus the bolt holes. Will this still work as a glue joint neck??

  2. #2
    GAStronomist Simon Barden's Avatar
    Join Date
    Oct 2016
    Location
    Reading, UK
    Posts
    10,547
    Impossible to tell without photos. It doesn't sound right, but some photos would really help.

  3. #3
    Hi Griffo, I can answer this. When you custom order a set neck kit without a neck pickup rout, which I assume you must have ordered, the set neck pocket looks different. It is definitely a set neck, just a different version. You can see the same neck pocket on the old JRM-1, which only had a bridge pickup.

    I don't why this is, something to do with how they rout the pocket when there is a neck pickup rout.
    Cheers,

    Adam


    adamboyle(at)pitbullguitars.com

  4. #4
    GAStronomist Simon Barden's Avatar
    Join Date
    Oct 2016
    Location
    Reading, UK
    Posts
    10,547
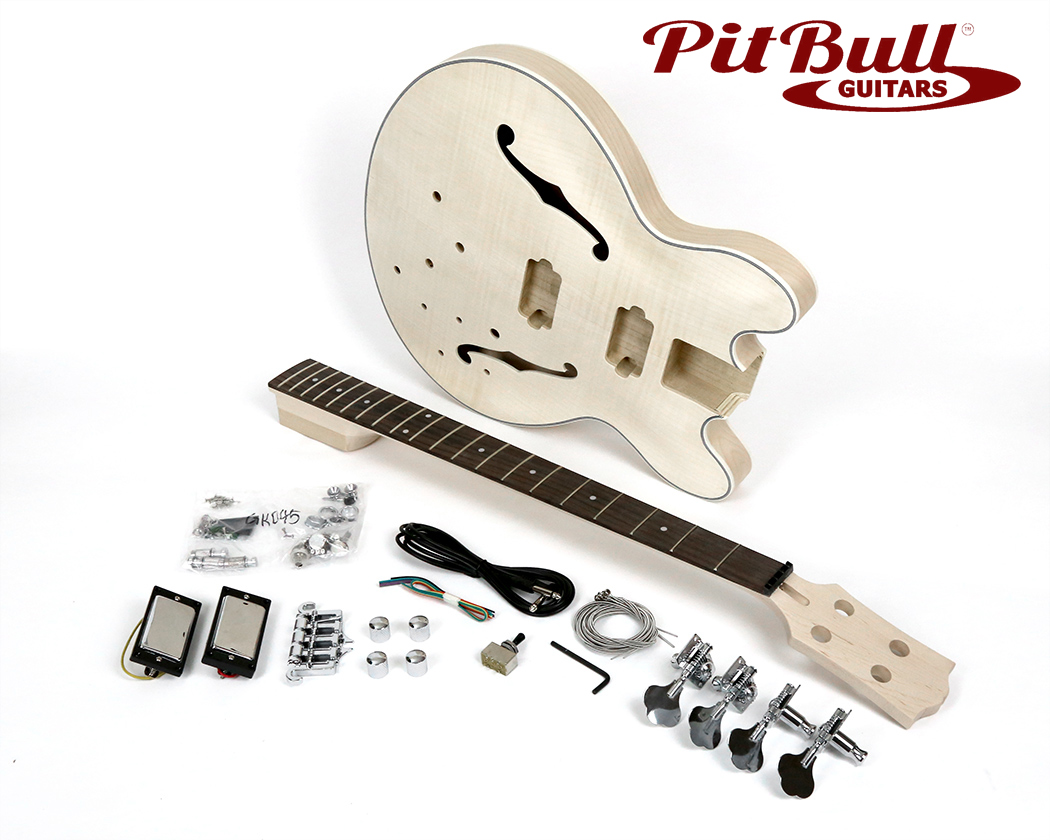
    I'd imagine the pocket should look something like this on this bass kit where the neck pickup rout and the neck rout don't meet up.


    I'd expect to see a much deeper neck heel for a set neck guitar than for a bolt-on neck.

    If you are still unsure after what Adam said, then photos are the only way for us to comment.

  5. #5

  6. #6
    GAStronomist Simon Barden's Avatar
    Join Date
    Oct 2016
    Location
    Reading, UK
    Posts
    10,547
    Well it's certainly a set neck build. The neck could have been built with an extension tenon, but you've got more that enough surface area for the neck to be glued in firmly. A lot of necks have far less length to the pocket, making the tenon necessary. I've just checked on my ES-1, and the neck pocket itself on that starts at the 20th fret (out of 22) and ends at the end of the fingerboard. It's then got a tenon of about the same length.

    By contrast, Your V has a very similar amount of contact length along the bottom of the pocket as my ES-1 neck has (including the base of the tenon), but more contact area at the sides than mine. So your neck should be more than secure enough, certainly more secure than mine will be. I'm not saying that having a tenon as well wouldn't be that bit nicer, but it's certainly not necessary.

  7. #7
    Awesome, thank you! This is my first build, so there will be a gazillion other questions to come...

  8. #8

  9. #9
    OK then, while we're on a roll...

    The factory did forget to drill the holes for the bridge and tailpiece mounts...but i'm not too worried about it because I think I'll put a maestro vibrola on there instead! And I think I can handle drilling the holes for the tune-o-matic. What I do have questions about is how to know where to drill the holes for the tune-o-matic. Do I glue the neck first with the heel all the way in the pocket flush with the neck pickup cavity (like in the second photo I linked to), and then measure out my scale distance?

  10. #10
    GAStronomist Simon Barden's Avatar
    Join Date
    Oct 2016
    Location
    Reading, UK
    Posts
    10,547
    This is more difficult! I have the same issues with my latest build, a GPR-1B, which in addition to having no pre-drilled bridge and tailpiece holes, has an arched top, unlike the flat topped V, which makes drilling vertical post holes difficult without a pillar drill with a big throat (I don't have one).

    The Maestro is easy to fix once the bridge is on. I'd leave it until you've got all your finish applied as its just a few screw holes and you're there. I've got one on my Flying V. But I'd suggest a roller bridge to help with tuning stability. Mine's got locking tuners, a roller bridge, the bridge posts have PTFE tape round them to stop them wobbling and I've glued the sliding parts of the Maestro (an Allparts copy) together and the tuning is very stable.

    Click image for larger version. 

Name:	Flying V small.jpg 
Views:	163 
Size:	251.9 KB 
ID:	25320

    It's certainly easier to get the bridge position correct with the neck glued in place, but there's drawbacks as the guitar becomes more awkward to handle. Clamping the bridge in the desired position, marking that well and measuring distances for the post holes is probably best - but you really need to be sure of your centre lines.

    the best method is to mark the bridge post locations in situ. Buy the cheapest trapeze tailpiece you can get from eBay. On a V you'll need to make-up a V-shaped triangular wedge, and I'd suggest sticking it on some board, so that it can sit at the back of the guitar and you can attach the trapeze tailpiece to it (and the board will fit under the guitar and stop the wedge being pulled up). With the neck glued or clapped into position, add the two E tuners, and string up the two E strings. Put some small pieces of wood under the saddle (not using posts) and run the two E strings over the outer saddles. You can now move the bridge around so that the strings run parallel to the sides of the neck and you can properly check the intonation of both E strings. Make sure the wooden packing pieces leave the post holes in the bridge clear, so that you can then use the holes and a suitable drill bit to drop down the hole and mark the post hole centres.

    If you've got access to a pillar drill, then I'd use it to drill nice vertical holes, just a bit smaller than the post insert stud diameter. If not, then you can normally adapt a drill stand so that the drill drills down through the centre of the stand (it's not meant to, but the stand will keep the drill vertical relative to the body of the V). You don't want the posts poking out at different angles. Don't drill deeper than you need to.

    Don't forget that you'll need to run a ground wire for the bridge. So you'll need to get an extra long, thin drill bit so that you can drill a hole from the treble side post hole to either the control cavity, or the bridge pickup rout - whatever you think is easiest. Then before you finally put the post inserts in (freeze them first so that they contract and are easier to knock in) don't forget to run some wire into the hole via your small drilled hole, splay the bare wire ends out facing downwards and then tap the posts in.

    The picture of mine reminds me that if you are going to use a similar pickguard, rather than just pickup rings, then there's that section between the neck pickup and the end of the neck that moves the neck further away from the neck pickup rout. I'd also get the pickguard now, so that it will help you with the layout and other decisions. Note that a lot of the pickguards don't come with holes pre-drilled for the bridge posts. The current guard on mine is covered in superglue dribbles from the maestro glueing session, and my replacement pickguard didn't come with bridge post holes.

    You can simply measure well and mark and drill the holes without bothering to set up a tailpiece and strings. The StewMac fret calculator will tell you where the holes should go relative to the nut. http://www.stewmac.com/FretCalculator . But you need to be really sure about this, and check that notches in the saddles, or the notches in the rollers are equally spaced from the bridge post holes, as you don't want the strings running skewed across the fretboard, or even falling off the board.

    The bottom E side post hole centre is normally 3mm further back than the top E post hole centre. The bridge will need to be angled to get the bottom strings intonated correctly.

    If it all goes wrong, (I sincerely hope it doesn't), then you can always fill and re-drill the holes. A pickguard might then come in very handy as it will hide the plugged holes well without you having to do a lot of work to the finish.

    It really is better to ask these more general questions in your build diary, as you get more people reading those, so can often get answer to your questions more quickly.

    All the best!

Page 1 of 2 1 2 LastLast

Posting Permissions

  • You may not post new threads
  • You may not post replies
  • You may not post attachments
  • You may not edit your posts
  •