Page 15 of 19 FirstFirst ... 5 13 14 15 16 17 ... LastLast
Results 141 to 150 of 181

Thread: Simon B's Custom ES-1/ES330 style build

  1. #141
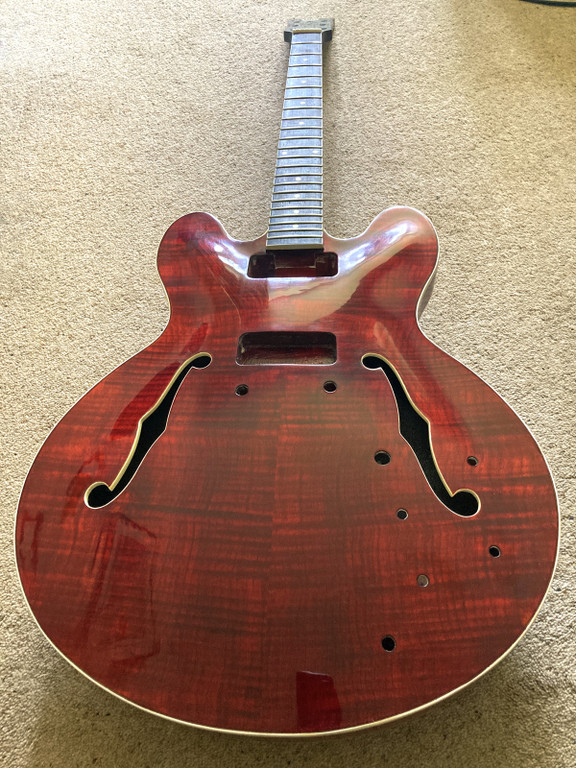
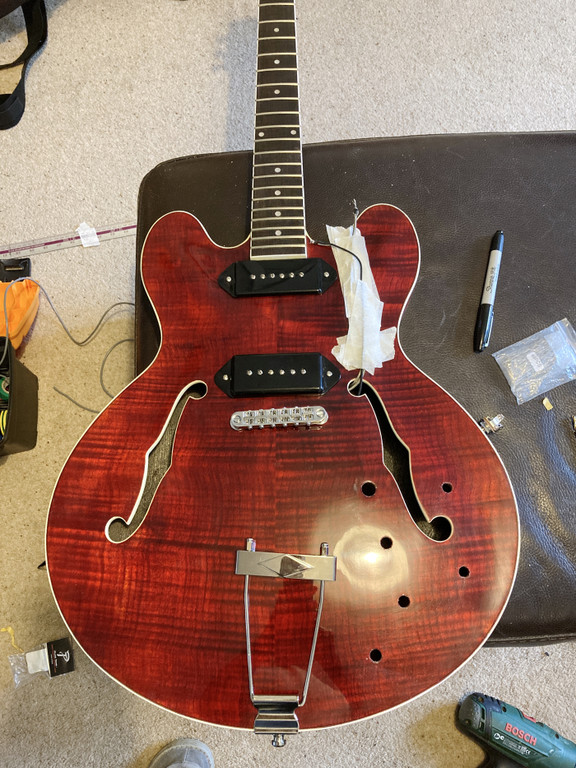
    I've had that happen simon its crap binding its sort of porous I mixed up a bit of White paint mixed in a bit of brown stain till I got the color close to what the binding is and masked up and air brushed the binding turned out really good you can't tell the difference pretty easy to do

  2. #142
    Overlord of Music fender3x's Avatar
    Join Date
    Jan 2016
    Location
    Miami, FL, USA
    Posts
    2,201
    This is a pretty epic save. I just went through the last three pages of diary. When you consider what you've been through with that finish the first amazing thing was that you saved the veneer rather than just putting down a solid color. Then you painted all that binding, and it really looks good. I had a small stain in the binding, and thought I was clever for covering it with a bit of my daughter's nail polish. This is pretty amazing. You appear to have fixed the sand through on the horn too.

    I had a friend from Yorkshire who's father was a marble forger. If that line of work is still open you may want to check it out ;-)

  3. #143
    I see you are quite the artisan yourself kind sir! That is such a nice build. Lovely finish - it pops.
    ~~ love through art ~~
    Build 1: DHB-5 Semi-Hollow Electric Bass https://www.buildyourownguitar.com.a...ad.php?t=10621
    Build 2: GSM-1 Electric Guitar https://www.buildyourownguitar.com.a...ad.php?t=10714

  4. #144
    GAStronomist Simon Barden's Avatar
    Join Date
    Oct 2016
    Location
    Reading, UK
    Posts
    10,547
    This build is nearing completion.

    I've missed out a lot of what has gone on in the past 4 months, as everything was small steps, not really enough to mention in a post, yet when I look back at my last post here, I've done a fair amount.

    I wasn't happy with the way the painted binding looked very yellow, and the join line in the veneer looked quite noticeable in some lights. Work on the SG kits with the heritage red spray showed how well that covered up small imperfections. So a few coats of heritage red lacquer got sprayed on, then I masked up the binding and sprayed that a very light cream, then after numerous touches-up of binding and body colour to get the best edge to the binding I could get, it was more clear lacquer time.

    This kit was a custom order (for the P-90 routs and dot inlays) and I had also asked for thin edge binding, but it came with the standard thick multi-ply. So, as the heritage cherry spray had done a pretty good jib of covering up the binding on the top so that you couldn't see it until you got really close, I masked it up so that only just the outer part of the multi-ply was painted, giving a more authentic three-thirty look. I thought about leaving the f-hole binding unsprayed and red and so again, more authentic, but I liked the extra highlighting the binding gave, so that got re-done as well.

    It was also headstock makeover time with the same fibreboard facing and silver vinyl + black decal treatment for the logo as on the GSJ-1 and GSM-1.

    So the guitar has been hanging in the garage, and then more recently indoors (since the weather turned colder and I feared what a possible overnight frost might to to the finish) for the best part of a month. So all nice and ready to be sanded back and polished.

    Which is what I did yesterday. It's ended up a bit darker compared to the last pictures but not too dark and a bit lighter than the GSJ-1. You can still see the flame highlighting, though it's a bit less obvious than it was:


    I also fitted a new bone nut after sanding it down to size, which was left glued and clamped overnight.

    So today I'll start fitting the hardware.

    I'll need to cut down the end of a reamer, as the holes need widening for the output jack and the CTS pots. There isn't enough body depth to ream out the lower holes before the end of the reamer hits the rear of the guitar. And I much prefer a reamer to using a drill for this, even when running one backwards.

  5. Liked by: JimC

  6. #145
    Mentor blinddrew's Avatar
    Join Date
    Apr 2018
    Location
    York, Uk
    Posts
    1,122
    That's so shiny I can almost make out the model of your phone in the reflection!

  7. #146
    Member
    Join Date
    Jun 2020
    Location
    Berlin, Germany
    Posts
    113
    Looks very nice! Like the surface! And the lighter binding works great with the red shades!
    Build #1 Explorer EXM-1
    Build #2 IB-4 P-Bass
    Build #3 Single-Cut
    Epiphone Gothic Modifying and upgrading
    Build #4 HB-4 Custom

  8. #147
    Member
    Join Date
    Apr 2020
    Location
    Northumberland UK
    Posts
    124
    Wow! What a recovery job!
    The colour is perfect - almost a cross between cherry and mahogany. Stunning finish as well.
    I agree that the binding now looks much better and in keeping with the original.

    Looking forward to the finished result!
    Well done, Sir.

    Cheers
    Ricky

  9. #148
    Overlord of Music Sonic Mountain's Avatar
    Join Date
    Jul 2017
    Location
    Toowoomba, Qld.
    Posts
    3,261
    Agree, that's come up really well.
    Build 1 - Shoegazer MK1 JMA-1
    Build 2 - The Relliecaster TL-1
    Build 3 - The Black Cherry SG AG-1
    Build 4 - The Sonicaster TL-1ish
    Build 5 - The Steampunker Bass YB-4
    Build 6 - The Howling Gowing ST-1

    "What I lack in talent I make up for with enthusiasm"

  10. #149
    GAStronomist FrankenWashie's Avatar
    Join Date
    Jan 2016
    Location
    Glebe, NSW
    Posts
    5,666
    First class work as always Mr. B.👏🏾👏🏾
    FrankenLab
    Hand crafting guitars, because Death Rays are expensive.


  11. #150
    GAStronomist Simon Barden's Avatar
    Join Date
    Oct 2016
    Location
    Reading, UK
    Posts
    10,547
    I forgot to mention that I also levelled and re-profiled the frets two days ago as well (before fitting the nut).

    I only got round to fitting the tuner bushings yesterday before my post-viral feeling became so bad that I had to stop and just do nothing.

    Feeling better today so I've done a fair bit, though am now waiting on a new reamer to arrive and try and open the last few holes up. I tried cutting the end off a reamer, but my hacksaw wouldn't touch it and I don't have a grinder. I've done some final widening of the selector switch and jack socket holes with a rounded needle-file, but it's a lot of work doing that for widening 6mm holes up to 8mm, and a lot harder to keep them round whilst doing so. I could drill them, but there's a lot of risk of chipping the finish. Something I should ahve done right at the star.

    No point in doing the wiring harness yet until I've got those holes done just to make sure that I get the hole positions spot-on (my excuse for not feeling like doing it ATM anyway).


    I've just ordered some bare nickel pickup covers that I'll spray black, as I over-tightened a mounting screw on the neck pickup and caused some grey stress markings in the black plastic (hidden with black Sharpie ATM). The neck pickup has narrower pole spacings at 47.5mm to the standard 50mm spacing, and low-profile dog-ear covers in that spacing are just about impossible to find. So I've gone for the nickel ones because a) they're available and b) they'll give some extra noise screening for the P90s, which aren't the most hum-free pickups in the world.

    The veneer join line is a couple of mm off the neck centre-line, but isn't out far enough to worry about.

    I made a little sponge-on-a-stick to get rid of the white wet-sanding residue that had fallen inside the body. That worked well.

    The bridge (a TonePros Nashville-style bridge) is sitting right on the body. I hope it's going to be low enough, otherwise I'll have to cut deeper notches in the saddles. Running a straight edge along the neck indicates it could be touch and go in order to get my normal low action. If necessary I've found some post inserts with no rim at the top, so fitting those would give me an extra 1mm of movement (the rim is 1.3mm but I don't want the bridge right against the lacquer). I can also move to an ABR-1 style bridge, which in theory is about 2mm lower than the Nashville type. I'll get there somehow.

    I stuck some thin self-adhesive velvet on the underside of the trapeze tailpiece so that it doesn't mark the top of the guitar whilst remaining hidden from view.

    And yes, I did remember to fit the bridge grounding wire.

Page 15 of 19 FirstFirst ... 5 13 14 15 16 17 ... LastLast

Posting Permissions

  • You may not post new threads
  • You may not post replies
  • You may not post attachments
  • You may not edit your posts
  •