Page 1 of 4 1 2 3 ... LastLast
Results 1 to 10 of 32

Thread: Arzi's barncaster TLA-1

  1. #1
    Member Arzi's Avatar
    Join Date
    May 2015
    Location
    Vantaa, Finland
    Posts
    400

    Arzi's barncaster TLA-1

    Hi guys

    After about 6 months building other stuff one of our guitarists said he needs a Tele so just put an order in for a TLA-1 kit an hour ago.

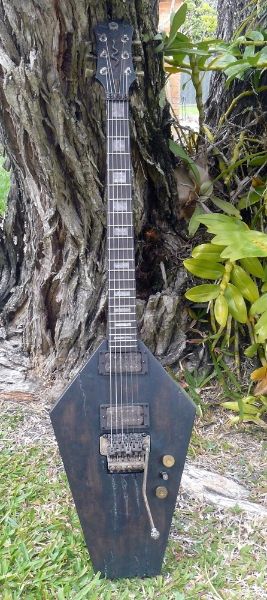
    What I'm visioning it to be is a "barncaster" type - a worn / weathered / worm eaten body in shades of black and gray with the neck showing similar colors faded from lighter fretboard to darker back and headstock. Was gonna achieve this with thought out abusing of the wood and different shades of gray and black stains sanded to worn look. Tried the steel wool and vinegar some time ago but it does not keep the gray look when using Tru Oil so have to dump that idea.

    I'm gonna upgrade the pickups using Tele set vintage wound by Q-Pickups - a Kroatian small manufacturer. Those are Alnico5:s with vintage specs on resistance and build materials. Also gonna put a 4-way Grigsby with vintage push-back wiring and larger pots. Maybe upgrading the tuners too, bone nut and roller string trees if necessary. Black or black pearl pickguard depending on how the finish looks. String through body.

    Maybe try to weather the hardware too. Before I start in a couple of weeks, I'd like some advise on something:

    What type of methods and with what results have some of you had weathering / seasoning wood? What did you coat it with - clear, TO etc?

    Has anyone tried ageing the chinese chromed hardware - does it behave similar way as steel or does it just end up s**t in some way? Like dipping and soaking it in some blend of chemicals? Is there a way to treat the stock hardware to achieve the look I'm after?


    Anyway - thanks for anyone who might be able to help on these matters. Can't wait to get started...

    Arzi

  2. #2
    Overlord of Music Dedman's Avatar
    Join Date
    Mar 2016
    Location
    The "Fabulous" Gold Coast
    Posts
    3,566
    check out my GD-1 build and my speaker cab for ageing wood.
    With chrome hardware you need to get the chrome off, bad news is it's a bugger to get off. Course grades of emery cloth work best (sanding drums on a dremel ), then once you have bare steel, salt water rusts things quick, both vinegar and lemon juice will stain bare steel. Boiling salty water and vinegar is a good combo ! If you get black hardware ( my GD had a black floyd copy) it's only paint or powder coating, painst stripper gets to work on that quick.


    Last edited by Dedman; 05-09-2016 at 10:24 PM.
    Build 19 PSH-1 Kustom
    Build 18 HB-4S Kustom
    Build 17 WL-1 Kustom
    Build 16 TL-1TB Kustom
    Build 15 PBG-2-
    Build 14 FTD-1
    Build 13 RD-1 Kustom
    Build 12 DM-1S
    Build 11 MKA-2 -
    Build 10 Basic strat
    Build 9 JM Kustom
    Build 8 FV-1G
    Build 7 ES-2V
    Build 6- Community prototype
    Build 5 LP-1LQ
    Build 4 ES-5V
    Build 3 JR-1
    Build 2 GD-1
    Build 1 TLA-1

  3. #3
    Member Arzi's Avatar
    Join Date
    May 2015
    Location
    Vantaa, Finland
    Posts
    400
    Wow!

    Those look so cool!!

    I might just leave the chromes on then - leave a bit of contrast on the wood. Might look good that way too. I figured the chrome would turn out to be a lot of work to change the way I wanted.

    You've done a great job on the wood

    I thought about charring the body at some point - like the way they preserved wood in Jaoan long time ago. Can't remember the name of the technique right now, but that would also make cracks in the glue seams on the body by burning some of it due to heat. And since the body has like three pieces at least - too many straight cracks as a result. Would have looked awesome though...

    Thanks for the advise!

  4. #4
    nice job some how when i look at the amp and guitar i think of ned kelly lol maybe the pain killers

  5. #5
    Member Arzi's Avatar
    Join Date
    May 2015
    Location
    Vantaa, Finland
    Posts
    400
    Ok....

    Got to mock up build stage at last. The neck would seem to be a good fit to the neck pocket - when treated wit TO should be a nice tight fit. Nice straight neck too with a fun grain on the fretboard.

    As Iīm switching to a six saddle bridge, I have to route the pickup cavity larger to be able to fit the neck pup as you can see in the picture. The bridge is placed where it should be 2 x 323mm (saddle to 12:th fret distance) and it needs some extra space.

    The pickguard is a perfect fit and so is the control plate.

    Havenīt tried to fit the 4-way switch yet to replace the stock one if it fits but I'll work it out if it doesnīt.

    A 4 piece body is showing some nice grain and even though it has some different shades itīs ok for the color scheme Iīm after. Actually should work great with the "banged up" look.

    Decided to switch to Wilkinson ez lok tuners as itīs a cheap and easy mod. Bone saddle is on it's way too.

    Next week It'll be sanding and placing the bridge with routing the pup cavity. then drilling the holes for string through placements.

    Can't wait to get started on this...

    [ATTACH=CONFIG]14153[/ATTACH

    Click image for larger version. 

Name:	DSC_1773.JPG 
Views:	184 
Size:	541.0 KB 
ID:	14154

    Click image for larger version. 

Name:	DSC_1774.JPG 
Views:	202 
Size:	572.2 KB 
ID:	14155

    Click image for larger version. 

Name:	DSC_1775.JPG 
Views:	221 
Size:	390.5 KB 
ID:	14156
    Attached Thumbnails Attached Thumbnails Click image for larger version. 

Name:	DSC_1772.JPG 
Views:	143 
Size:	675.8 KB 
ID:	14153  

  6. #6
    GAStronomist wokkaboy's Avatar
    Join Date
    Dec 2012
    Location
    Perth WA
    Posts
    13,555
    mock build looks good Arzi, what colour stain you doing ?
    Current Builds and status
    scratch end grain pine tele - first clear coat on !
    JBA-4 - assembled - final tweaks
    Telemonster double scale tele - finish tobacco burst on body and sand neck

    Completed builds
    scratch oak.rose gum Jazzmaster - assembled needs setup
    MK-2 Mosrite - assembled - play in
    Ash tele with Baritone neck - neck pup wiring tweaks and play in

  7. #7
    Member Arzi's Avatar
    Join Date
    May 2015
    Location
    Vantaa, Finland
    Posts
    400
    Hi Woks

    I'm planning on staining it black after I "wear down" the wood, then sanding it back and then adding a shade of gray next. Trying to achieve an old gray wood look. Also gonna use a light gray on the fretboard and darker shade on the back of the neck plus headstock - sanding it so that it also looks faded and old. TO coats on top. We'll see how it turns out.

  8. #8
    Overlord of Music Andy40's Avatar
    Join Date
    Oct 2015
    Posts
    3,913
    I am seriously impressed with the grain on that maple fretboard Arzi....nice score.
    Build #1 - ST-1 - Completed
    Build #2 - LP-1SS - Completed
    Build #3 - TLA-1R - Completed
    Build #4 - SGD-612 - Completed
    Build #5 - ES-1G - Completed
    Build #6 - STA-1HT | Completed
    Build #7 - ST1JR - Completed
    Current Build #8 - JBA-4
    Build #9 - Semi-scratch build Tele x 2 - Completed
    Current Build #10 - PRS-1H
    Current Build #11 - AGJR-1 - Completed
    Current Build #12 - ATL-1SB
    Current Build #13 - GST-1
    Current Build #14 - FBM-1

  9. #9
    Member Arzi's Avatar
    Join Date
    May 2015
    Location
    Vantaa, Finland
    Posts
    400
    Update...

    After being sick with a persistent (man)flu and popping antibiotics for over a week now I finally got to do some work on the guitar. Today I attached the neck, placed the bridge, routed the bridge pup cavity larger to accomodate the six saddle bridge (pup placement is a few millimeters different to the stock one) and drilled the string through holes on the body. Also positioned the scratchplate and control plate.

    Another "Murphy" for me - the drill press at my workplace was broke and to proceed in my build I had to try with just a power drill. The result was not perfect but not a disaster either. Since it's gonna be a "barncaster" I'm not too broken because of it. Should not affect playability.

    Didn't have a chance to post any pics but I will after I get them downsized on my pc.

  10. #10
    Overlord of Music gavinturner's Avatar
    Join Date
    May 2013
    Location
    HOLGATE NSW
    Posts
    3,057
    The kit looks great Arzi, and I like the sound of your plans. Looking forward to seeing this one come together.

    cheers,
    Gav.
    --
    Build #01: BC-1
    Build #02: ST-1
    Build #03: JR-1DC
    Build #04: ES-2V
    Build #05: ESB-4 (GOTM July 2014)
    Build #06: RC-1
    Build #07: MK-2
    Build #08: TLA-1
    Build #09: JR-1DC
    Build #0A: LPA-1
    Build #0B: STA-1 (GOTM April 2015)
    Build #0C: MKA-2
    Build #0D: LP-1M
    Build #0E: JB-1
    Build #0F: FS-1

    Find me:
    https://www.facebook.com/firescreek.guitars/
    http://www.guitarkitbuilder.blogspot.com.au/

Page 1 of 4 1 2 3 ... LastLast

Posting Permissions

  • You may not post new threads
  • You may not post replies
  • You may not post attachments
  • You may not edit your posts
  •