Page 1 of 4 1 2 3 ... LastLast
Results 1 to 10 of 36

Thread: Coil cut your Pit Bull pickups.

  1. #1
    Moderator dingobass's Avatar
    Join Date
    Sep 2012
    Location
    Perth
    Posts
    4,491
    It is very easy to cut a coil on your Pit Bull Humbucker Pickups.

    First step is to open the case to expose the two coils.
    This is a simple process on the metal cased Humbuckers, but nigh on impossible on the plastic cased Humbuckers as the coils are glued to the case.... Found that out the hard way, one broken case sitting on my work bench. :x

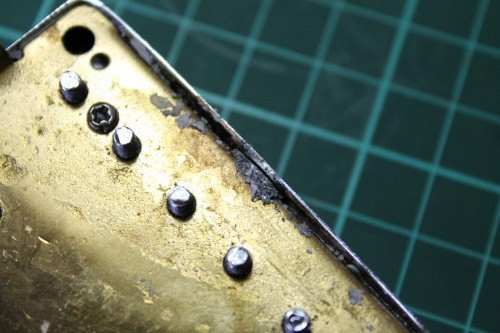
    To open the case you will need a fine saw to cut the solder join. The reason for cutting rather than melting the solder is it is very difficult to melt and pull the case away at the same time. Also by cutting the solder it is much easier to re flow the join back together.


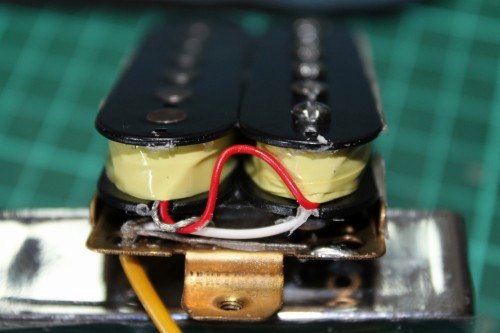
    When you have the case off you will see the two coils and the connecting wires as well as the tape that is wrapped around each coil.

    Looking at the 'Bucker with the wires facing you, undo the two screws holding the RIGHT hand coil, taking care to have a good grip on it as you gently move it away from the base.

    Next, unwrap the tape CAREFULLY until you have exposed the RED wire. (This is where you need to be even more careful as the coil wire is soldered to this red wire. The coil wire is very fine and will break off easily.
    If you do break it off it is easy to re solder the join). Save the tape for re use.


    ]
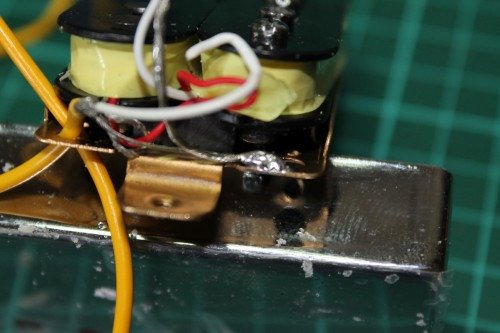
    Next you will need to solder a wire to the red wire, and another wire to the shield/ earth wire.
    (Pass these wires through the hole in the base plate where the existing wire passes through)

    Carefully re wrap the tape around the coil, take care to wrap the soldered joins of the red and white wire separately.


    screw the coil back onto the base plate and put the cover back on. Clamp the cover so the cut in the solder is closed and re solder the join.

    You have successfully coil cut your pick up!

    500 XP. 8-)

    When you install this cut "bucker, you will need to connect the added wires to a DTDP ON/ON micro switch.
    Solder the RED wire to the CENTRE lug and the earth wire to the bottom lug. You will then need to solder the earth wire to the back of your tone pot.

    Now you can cut the coil at the flick of a switch!


    There is always a workaround for glitches, mistakes and other Guitar building gremlins.....

  2. #2
    Newb question/observation: does this process, then, enable you to deactivate one of the coils at the flick of a switch, essentially switching between a humbucker and a single-coil pickup?

  3. #3
    Moderator dingobass's Avatar
    Join Date
    Sep 2012
    Location
    Perth
    Posts
    4,491
    Quote from GlennGP on January 9, 2013, 18:09
    Newb question/observation: does this process, then, enable you to deactivate one of the coils at the flick of a switch, essentially switching between a humbucker and a single-coil pickup?

    You got it in one!

    There is always a workaround for glitches, mistakes and other Guitar building gremlins.....

  4. #4
    Moderator Gavin1393's Avatar
    Join Date
    Sep 2012
    Location
    Mindarie, Western Australia
    Posts
    3,151
    Really nice work! Great explanation! Thanks for sharing DB!
    http://www.buildyourownguitar.com.au/forum/image.php?type=sigpic&userid=1258&dateline=1443806  448Gavmeister

  5. #5
    Overlord of Music keloooe's Avatar
    Join Date
    Jan 2013
    Location
    Melbourne
    Posts
    3,162
    Quote from GlennGP on January 9, 2013, 18:09
    Newb question/observation: does this process, then, enable you to deactivate one of the coils at the flick of a switch, essentially switching between a humbucker and a single-coil pickup?
    Hey Glenn, the cut pickup can be wired to any switch or push pull pot and can switch to a single coil!!! If you want a nice Aussie guitar that has this, the Maton MS 500/50th Anniversary ($2000, so pricey!!!) has one of these!

  6. #6
    Overlord of Music keloooe's Avatar
    Join Date
    Jan 2013
    Location
    Melbourne
    Posts
    3,162
    Nice article DB!! When you said that plastic is harder to remove, I felt like I had no hope... Then I saw the pickup with the cover off and then lookers at my Epi 700T and remembered it was actually an open coil, so now I feel like fixing a push pull pot to it and cutting the coils...


  7. #7
    Nice work DB, you're really hitting your straps now.
    Cheers,

    Adam


    adamboyle(at)pitbullguitars.com

  8. #8
    Overlord of Music keloooe's Avatar
    Join Date
    Jan 2013
    Location
    Melbourne
    Posts
    3,162
    Also, since I am fairly new to soldering, and literally just had no idea what you were saying, any wiring diagrams with the steps????? Or maybe a video???

  9. #9
    Moderator dingobass's Avatar
    Join Date
    Sep 2012
    Location
    Perth
    Posts
    4,491
    Quote from keloooe on January 10, 2013, 07:53
    Also, since I am fairly new to soldering, and literally just had no idea what you were saying, any wiring diagrams with the steps????? Or maybe a video???

    Good observation Kelooe! 8-)

    I will get onto drawing up some diagrams this weekend.

    As a side note, you will most likely find that the coil and connector wires are soldered to a lug or eyelet on your Epi Pups.

    This will make installing the coil cut wire on a lot easier as you will only need to solder it to the lug or eyelet.

    There is always a workaround for glitches, mistakes and other Guitar building gremlins.....

  10. #10
    Overlord of Music keloooe's Avatar
    Join Date
    Jan 2013
    Location
    Melbourne
    Posts
    3,162
    Quote from dingobass on January 10, 2013, 08:27
    Quote from keloooe on January 10, 2013, 07:53
    Also, since I am fairly new to soldering, and literally just had no idea what you were saying, any wiring diagrams with the steps????? Or maybe a video???

    Good observation Kelooe! 8-)

    I will get onto drawing up some diagrams this weekend.

    As a side note, you will most likely find that the coil and connector wires are soldered to a lug or eyelet on your Epi Pups.

    This will make installing the coil cut wire on a lot easier as you will only need to solder it to the lug or eyelet.
    another great reason why i chose Epi for my lp jr!!!

Page 1 of 4 1 2 3 ... LastLast

Posting Permissions

  • You may not post new threads
  • You may not post replies
  • You may not post attachments
  • You may not edit your posts
  •