Page 1 of 2 1 2 LastLast
Results 1 to 10 of 20

Thread: Making templates and pickguards

  1. #1
    Overlord of Music WeirdBits's Avatar
    Join Date
    Jan 2013
    Posts
    2,731
    As per Gav's request…

    The WeirdBits method of making templates and cutting pickguards/plastics

    These are the methods that I've been using. I'm not an expert in any of these areas, just a hobbyist (at best), so please keep that in mind. But first…

    Warning: Routers are extremely dangerous! Plunge routers inverted and stuck under a table with the high speed bit pointing up through a hole towards you are even more dangerous! Be very careful when working with routers - ensure the bits are sharp, in good order, and are tightly secured, and wear/use all appropriate safety equipment. If you are not willing to use the tool safely, then do not use it.

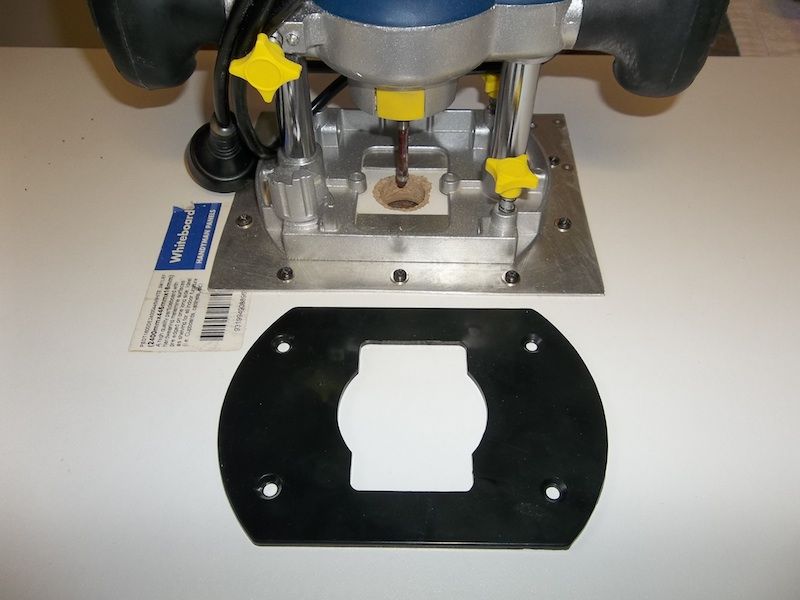
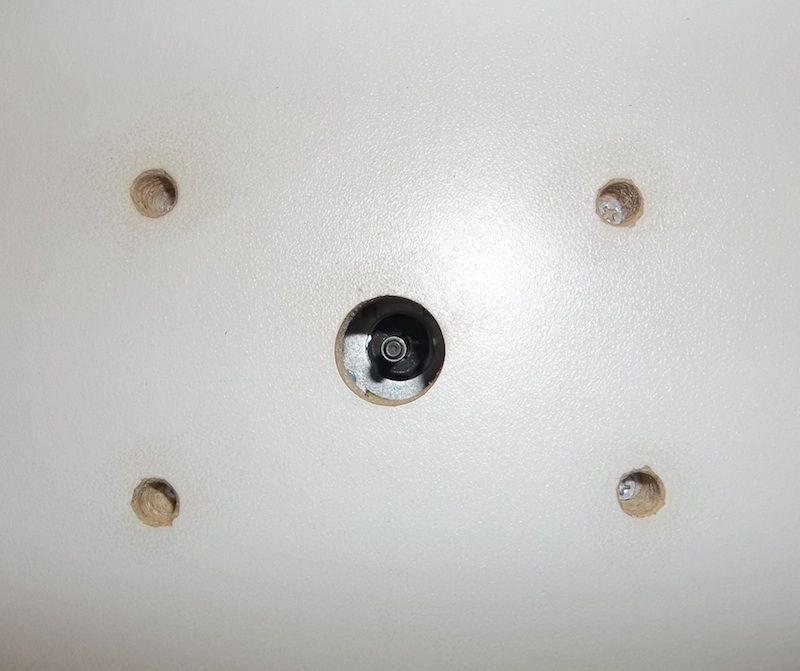
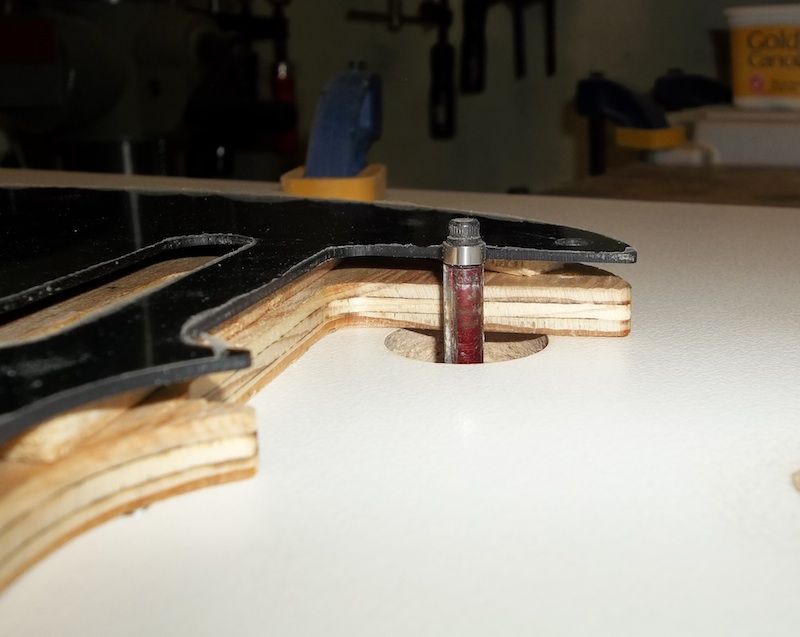
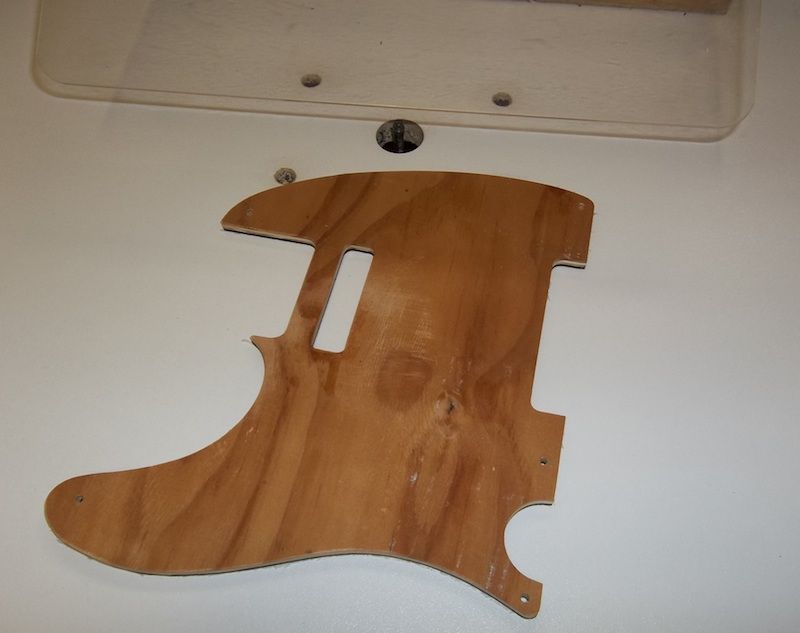
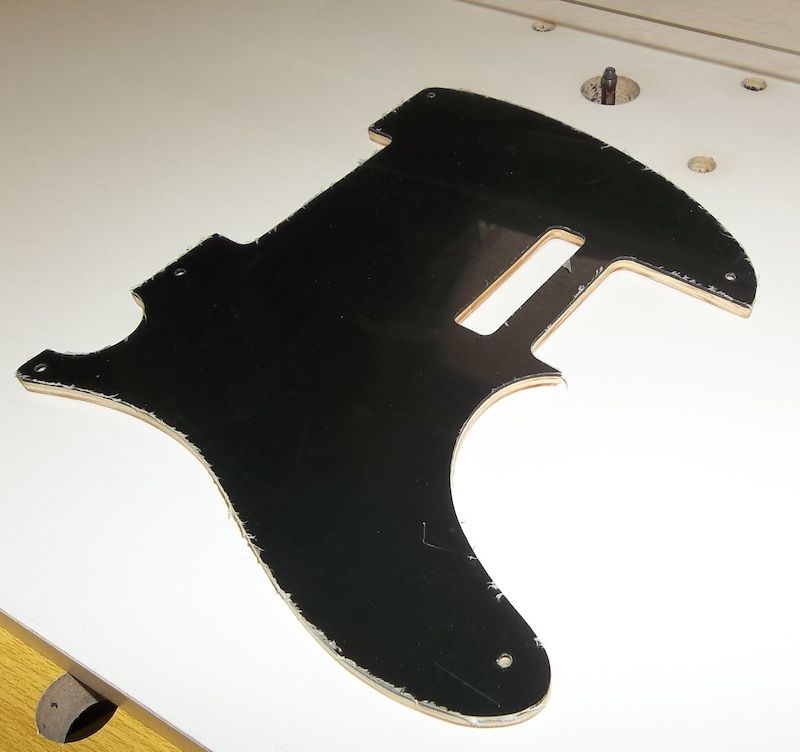
    My router table set up is fairly basic. I have a cheap plunge router (1/4" shank) that has a plastic glide plate attached to the router base by four screws (black plate in image below). I simply removed that plastic plate and made a larger aluminium plate with the same four screw holes and central hole, and this became my attachment plate to fix the router to the table. The plate is screwed to the underside of the table, and then the router is attached to the plate via the original four screws which are accessed via holes through the table. That way I can quickly remove the router whenever needed and put the glide plate back on. The table itself is just a large sheet of melamine that I clamp to a pair of sawhorses/work benches when needed.


    I also have an angled piece of perspex that I clamp above the table, as an added precaution in case something goes flying.


    At the very least you must wear safety goggles whenever you are using a router table, or preferably a full face shield like this:


    Now, the tricky/dangerous bit… starting and stopping the router. Because the router is attached under the table I use a spring clamp to lock the trigger, and then have a switched plug at the edge of the table that I use to turn it on and off. IMPORTANT: you must have a method of turning the router on and, more importantly, OFF without having to reach, move, or otherwise take your eyes away from what you are doing. Ideally, you also want an emergency stop foot switch directly under your table that can turn it off, but not on.


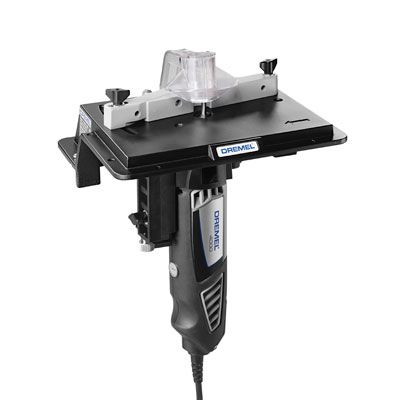
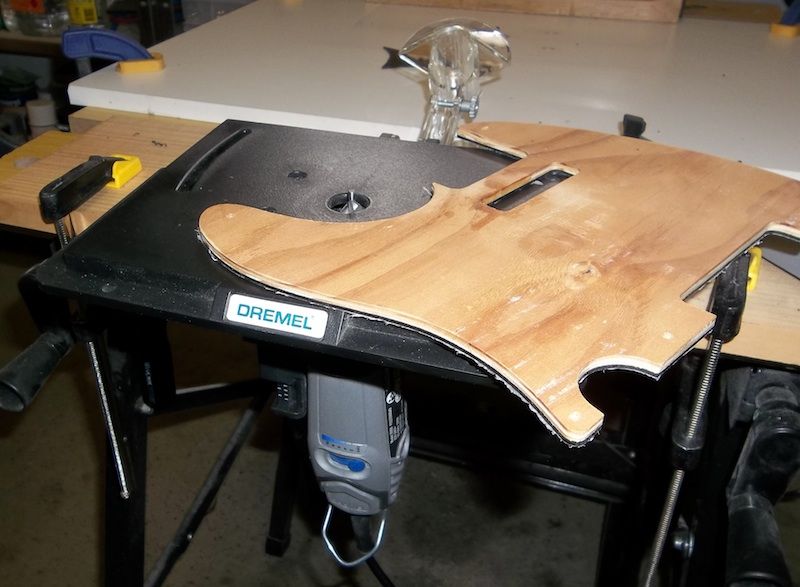
    I also have a Dremel router table attachment which I find really useful for working on small items and certain other tasks:


    Continued…

    Scott.

  2. #2
    Overlord of Music WeirdBits's Avatar
    Join Date
    Jan 2013
    Posts
    2,731
    I mainly use a 1/4" diameter flush-cut pattern following bit (centre top row below) for making my templates and cutting the pickguards. It can handle the tight corners and cuts easily through both the plywood and plastic. Before and after every routing session check the bearing of your bit to ensure it is moving freely, not binding, and is in good condition. All the Dremel bits below get a fair work out at various times, but I mainly use the small straight cut bit.


    That is the basic setup that I've been using for routing my templates and cutting pickguards etc.


    Scott.

  3. #3
    Overlord of Music WeirdBits's Avatar
    Join Date
    Jan 2013
    Posts
    2,731
    Making a template from an existing item

    If you are going to make a pickguard (or any plastics, in general), take the time to make a template. It is relatively easy to fix/adjust a wooden template, but you can't fix a mis-cut piece of pickguard plastic, and the time it takes to make the template is time (and frustration) saved cutting or re-cutting the pickguard. I've been using 7mm plywood for most of my templates (occasionally 4mm ply), as it is rigid and thick enough to run a guide bearing along, but easy to cut and work with. Some of the ply layers can chip slightly from time to time on very sharp corners, usually if the bit running too slow or is getting blunt, but the core layer remains intact and it's easy to fix with a bit of glue and sawdust. In fact, any time you are not happy with a section of your template just mix some Titebond and sawdust into a thick paste, plaster it onto the area of concern and let it dry overnight, then re-rout, shape or sand until you are satisfied. Good as new.

    I've found the best way to copy a template from an existing piece of plastic is to use thin strips of 4mm ply and double-sided tape to elevate it above the 7mm ply for the template (double-sided tape on both sides of the spacer strips). That way the pattern following bearing can run cleanly along the edge of the plastic and the blades can safely cut the full thickness of the ply. This gives a nice accurate copy without damaging your original item.


    When you are doing the routing do multiple passes taking away a small amount of material each time, and ease your way up to the edge of the guide item. If you try to rout too much at once the bit could 'grab' and either fling the work and damage it (and/or fingers), or possibly flex the edge of the guide pattern enough so that you get a dip/divot the in the edge of your template. Take it slowly and you will get much better, more accurate, and safer results.

    Scott.

  4. #4
    Overlord of Music WeirdBits's Avatar
    Join Date
    Jan 2013
    Posts
    2,731
    Making a template from a drawn/printed pattern

    Making a template from a pattern is more involved, but with care you can still get good results and it is worth doing. Again, it is much easier to adjust your wooden template than fix a mis-cut piece of plastic. You can either download a pattern and print it out or draw up your own, but get it onto paper then cut it out and test fit/adjust until you're satisfied. Once you have your adjusted pattern, scan/photocopy it so that you have a saved copy. Then I just glue the pattern onto my plywood with a very thin smear of Aquadhere (I've found a use for those old bottles), then leave it overnight to dry. It has to be a very light smear of Aquadhere or your paper will start to swell, soften, stretch and tear as you smooth it out. Once it's dry I usually paint the outline with some brush-on superglue to harden the paper and make sure it cuts cleanly without tearing or fluffing.


    Depending on the pattern, I use either a coping saw, jigsaw, or router to rough cut the template to just outside its outline and then finish the shaping with sanding drums. I've found trying to freehand the router to make a template with just a paper pattern is simply too inaccurate and prone to mistakes, and I get much better results by sanding away the last couple of mm's instead. Typically, I'll use a coping saw to do most of the work, then rasps if needed, and then either the Dremel or the larger sanding drums to sand it in to the outline. If you take too much wood off or want to change it, it's easy to glue some wood back on or use some sawdust and glue filler.


    If you make them in batches, either from existing items or new patterns, you can quickly build up a collection of templates for most of the items you use regularly. Then, as long as you have plastic available, you can cut the item you need in the colour and material you want whenever you need it.


    Scott.

  5. #5
    Overlord of Music WeirdBits's Avatar
    Join Date
    Jan 2013
    Posts
    2,731
    There are limits to what you can do for some templates. For example, the lever switch slot on a Strat pickguard is very narrow, so even if you cut the slot you wouldn't be able to fit a router bit through it anyway. So, instead, I just drilled small holes of the appropriate diameter along the slot line. That way, when cutting a pickguard I can just drill through the outer two slot holes in the template and then use my Dremel or tool of choice to cut the slot between the holes in the plastic.


    For something like a Strat trem cover, on all the existing ones I had the slots were 6mm in diameter which is too small for my favoured 1/4" router bit. So, I drilled my own 1/4" holes (with a 54mm string spacing) and then squared up the slots. As such, I can now use my 1/4" router bit to cut the trem covers (once I've started the slots with 1/4" holes).


    One other tip for making templates: whenever you see an interesting curve or shape, make a template/guide from it. Take your favourite curve from a Strat pickguard or a Tele, or a dinner plate or whatever etc., and make guide from it. For example, get a square piece of ply and put a different curve on each of the outside edges and then another set of curves on a cut-out in the centre. Then, whenever you are making a template from a paper pattern you may be able to use one of your guide curves to rout a section of the template (or use a section of an existing template to cut the new template). Just stick the guide curve on with some double sided tape, rout that section, and then repeat for the other sections of the pattern. I often use a thick steel ruler or metal square as guides for straight edges and right angle corners when cutting templates from just a pattern (stuck on with double-sided tape, as always, but make sure the bit's blades won't hit the metal). Being able to rout along a guided edge is much easier and faster than trying to accurately trim, saw, file or sand down to an outline.
    Scott.

  6. #6
    Overlord of Music WeirdBits's Avatar
    Join Date
    Jan 2013
    Posts
    2,731
    Cutting a pickguard from a template

    In this example I'm making a custom pickguard with a modified neck pickup slot for my TL-1A build.

    Once you have your template, the pickguard material (in this case very thin 2mm plastic) is rough cut to the basic shape (using a coping saw), and face of the template stuck to the back of the plastic using double sided tape. The template has to be on the back of the plastic for what happens later. My router table is set up with a 1/4" flush cut pattern following bit, and the height of the bit is set so that the bearing runs nicely along the template with the blade getting a clean cut on the plastic. I pre-drilled a couple of 10mm holes in the pickup slot so that I could do all the routing in one go.


    Because the bearing is on the top of the bit the routing is done with the plastic facing down, and in this case it's so thin it cuts like soft butter. A couple of minutes later and the plastic is cut to shape (I cleared away the mound of plastic shavings to get a clean pic, as they tend to be static charged and stick to everything!).


    A quick check to make sure there were no lumps, bumps, gouges or missed spots, and then a drill and countersink of the mounting holes.


    The reason I mounted the template on the back of the plastic is that I needed the 'good' side of the plastic to face down so that I could put a chamfer on the edge, which again requires the router bit to run along the edge of the template. But, in this case it's done with my Dremel on a router table with a chamfer bit (bit shown in an earlier image). You can use a normal router table with a chamfer bit too, but I find the Dremel more manageable and better for tight corners/curves. I set the height of the bit so that the chamfer starts at around 2/3's thickness of the plastic, that is, the 1/3 in from the back is un-chamfered which makes the edge less severe. And, check to make sure the solid pilot end of the bit will make good contact with the edge of the template and not mangle your plastic. I recommend doing a test on a scrap bit of plastic set up with the same thickness ply stuck to it to ensure you're happy with the angle/depth of chamfer etc.


    Finish off by working through 600, 800+ grit sandpaper along the chamfered edge and then some fine steel wool to give it a nice smooth polished feel.


    And the end result…


    And, a final test fitting to make sure I didn't stuff it up somewhere along the line. The neck isn't bolted in yet, hence the fishing line centreline for alignment purposes.


    For cutting small plastic items I found the large router table to not be ideal, in that the small surface area of the template meant that the limited amount of double-sided tape would tend to flex slightly and prevent an accurate/exact copy to be cut. I actually found my Dremel set up on the router table to be the best option for cutting the small items, like truss rod covers. But, as there is no straight piloted flush-cut bit that I'm aware of, I needed to use the small straight bit (shown in an earlier image) and run the template along the shaft of the bit. This meant that the template must be on the bottom with the plastic facing upwards, the opposite of how I would normally cut a pickguard. It's not ideal, but it works as long as you have a light touch so that the template barely brushes the shaft of the bit (for the sake of the bit and the template). The Dremel piloted round-over bit can sometimes be used as a flush-cut, or close to it, if your material is thin enough to avoid the curved section. I would advise against using Dremel piloted bits to follow plastic edges, like if you were using one pickguard to cut another, as without a bearing the friction can easily melt or damage the plastic guide edge.

    Once you have your various templates and are familiar with the process, it becomes relatively easy to knock out a set out plastics whenever you need them.


    Scott.

  7. #7
    Moderator Gavin1393's Avatar
    Join Date
    Sep 2012
    Location
    Mindarie, Western Australia
    Posts
    3,151
    Outstanding Scott! You deserve all the credit and appreciation you are certainly going to receive for the detailed work and carefully considered tips and info that you have put into preparing this valuable instruction guide for the community. I am going to link this thread to the HOW TO article so that in years to come this thread will never be lost in the pile of forum threads. Just awesome!
    http://www.buildyourownguitar.com.au/forum/image.php?type=sigpic&userid=1258&dateline=1443806  448Gavmeister

  8. #8
    Mentor AJ's Avatar
    Join Date
    Mar 2013
    Location
    Hoppers Crossing, Melbourne
    Posts
    562
    great info matey
    Projects:
    LP-1A
    TL1-A
    LP-1Completed
    TL-1Completed
    Yamaha rebuild: Completed
    Mako -Scratch designed: Completed
    PUP winder: Completed

    Facebook : www.facebook.com/andrew.johns.1272010
    Skype: andyjohns1

  9. #9
    What a great in depth tutorial. Well worded and easy to understand.
    I'm sure many will find this very usefull. I know I did.

  10. #10
    GAStronomist wokkaboy's Avatar
    Join Date
    Dec 2012
    Location
    Perth WA
    Posts
    13,555
    fantastic tutorial Scott, I'll read this in great detail when I get time. Thanks for taking the time to document it, you have done a great job and the tips are priceless.
    Current Builds and status
    scratch end grain pine tele - first clear coat on !
    JBA-4 - assembled - final tweaks
    Telemonster double scale tele - finish tobacco burst on body and sand neck

    Completed builds
    scratch oak.rose gum Jazzmaster - assembled needs setup
    MK-2 Mosrite - assembled - play in
    Ash tele with Baritone neck - neck pup wiring tweaks and play in

Page 1 of 2 1 2 LastLast

Posting Permissions

  • You may not post new threads
  • You may not post replies
  • You may not post attachments
  • You may not edit your posts
  •