Page 1 of 3 1 2 3 LastLast
Results 1 to 10 of 23

Thread: JM-1 Help

  1. #1
    I'm a newbie building my first jm-1.
    I'm struggling with an incorrect wiring diagram, however, don't believe it should be that difficult.
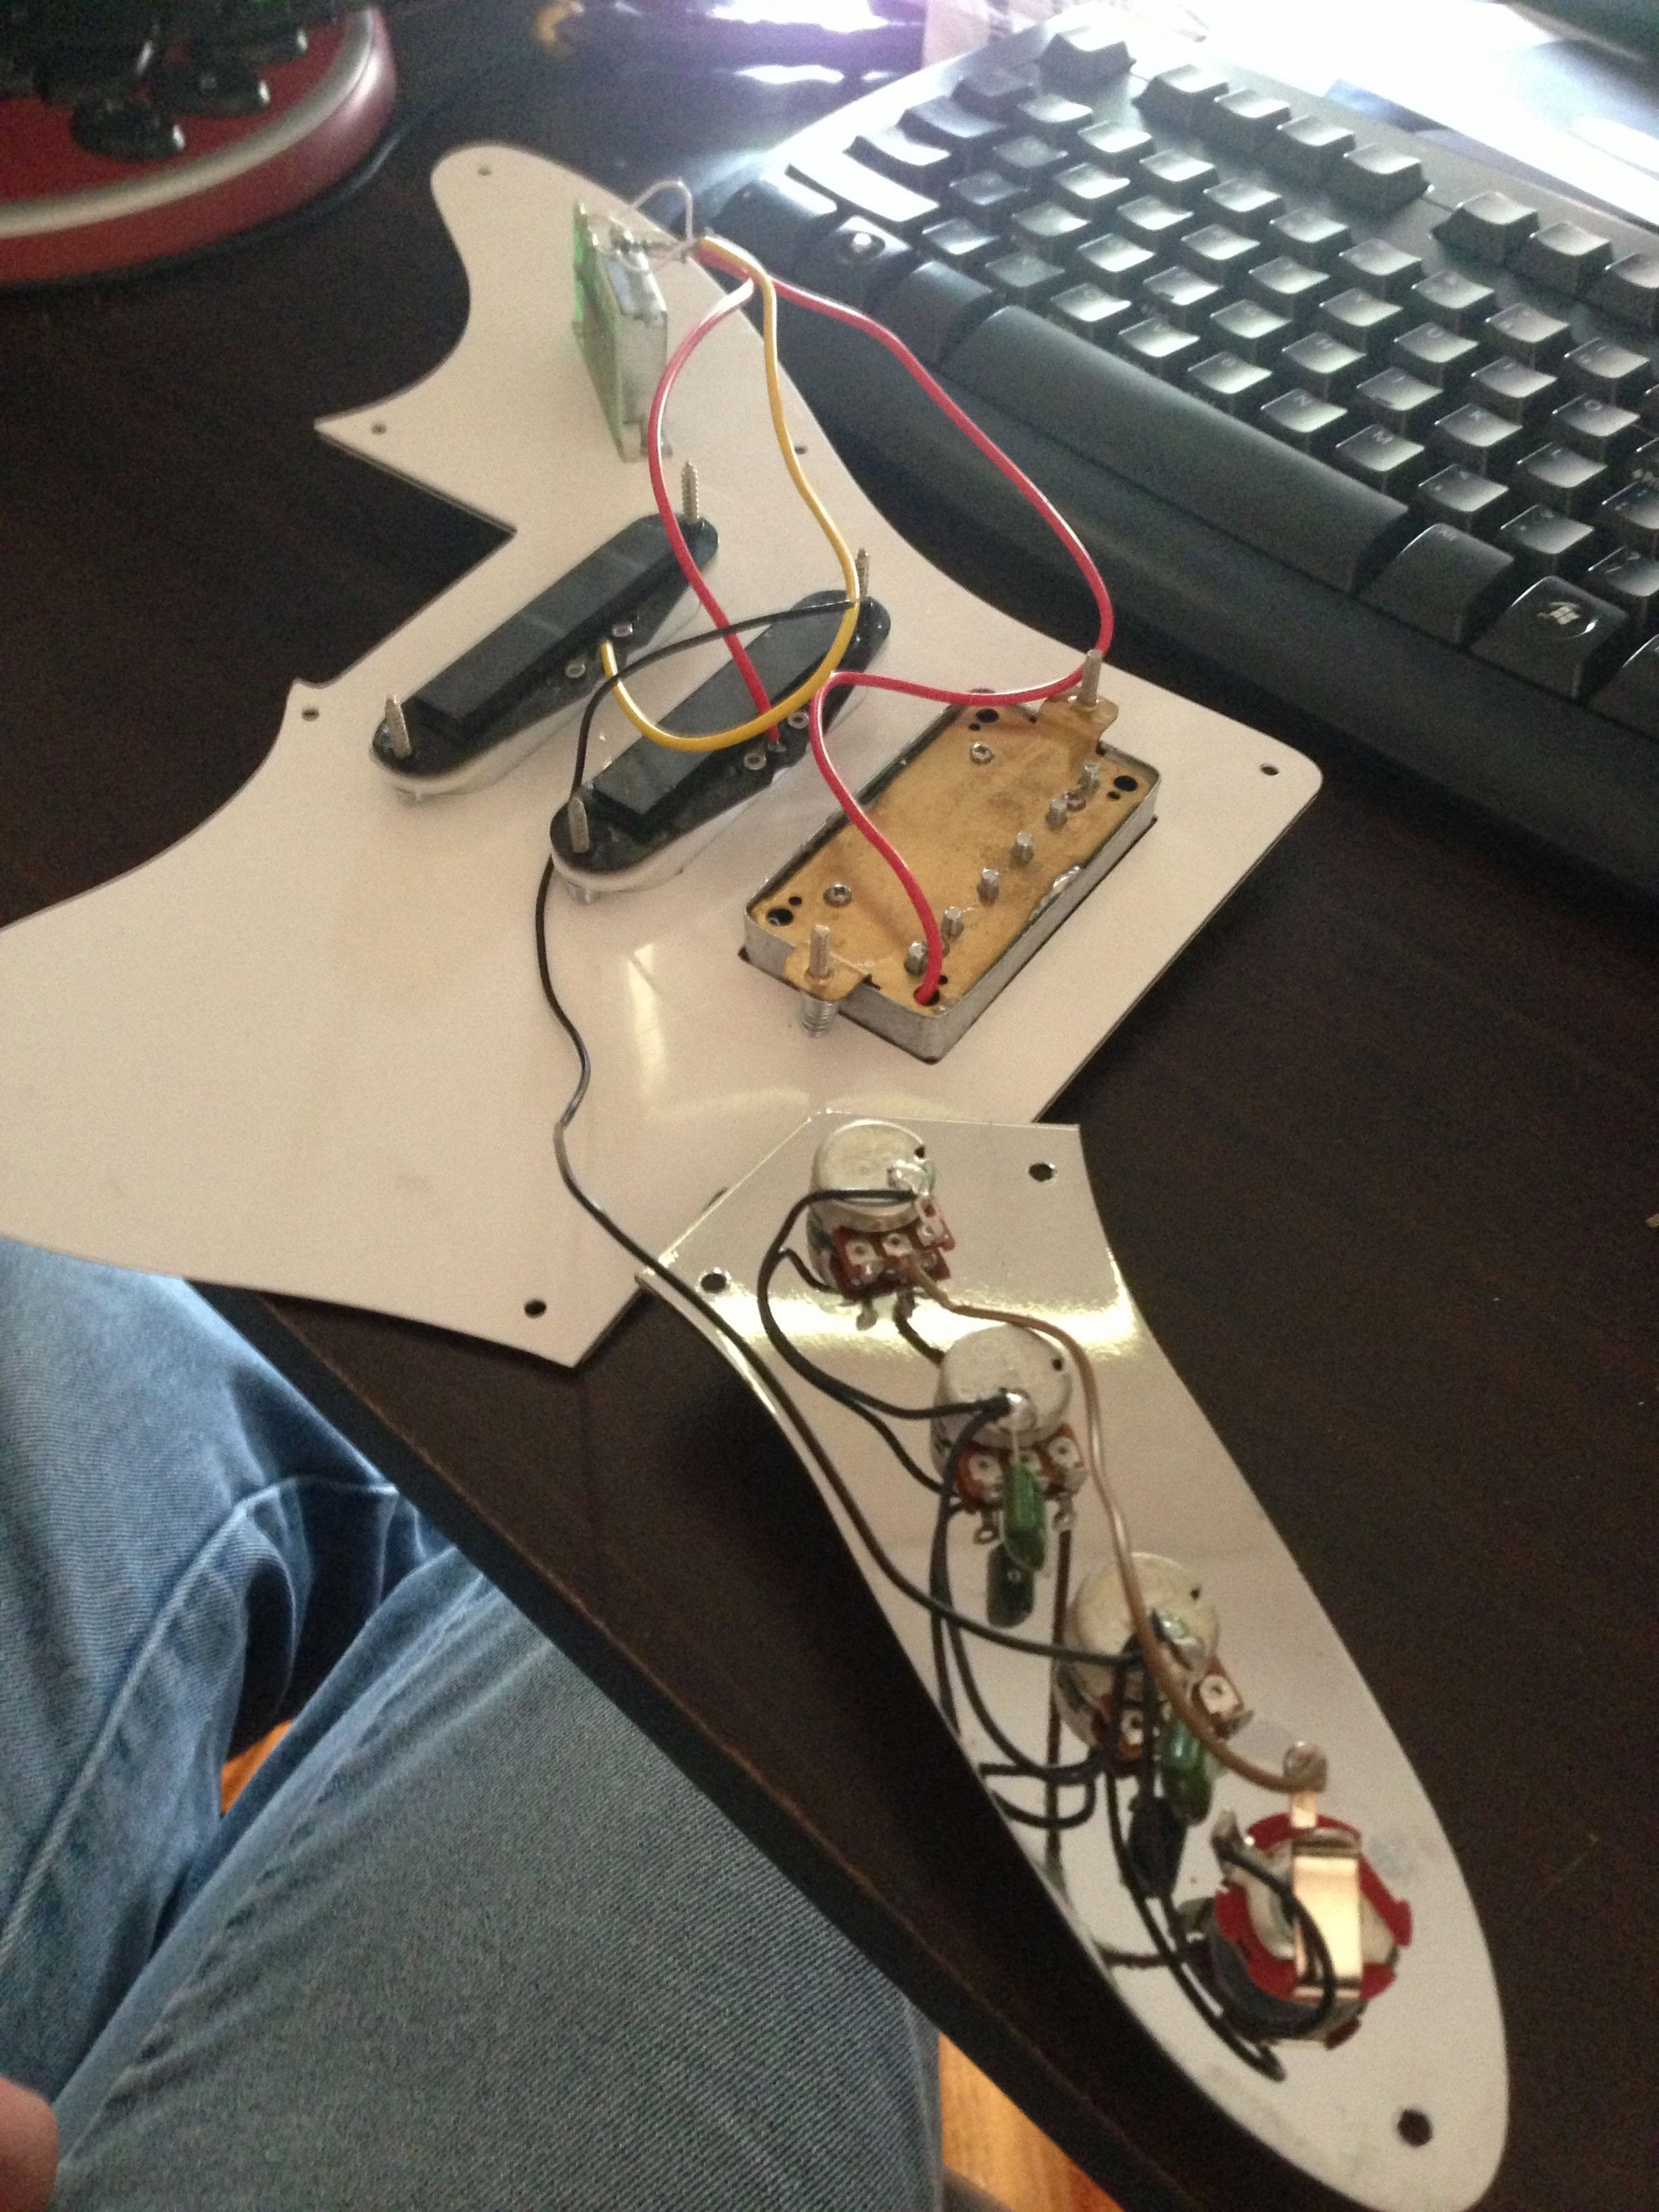
    I have four wires ( Green, red, Orange and yellow ).I have the black but know what thats for.
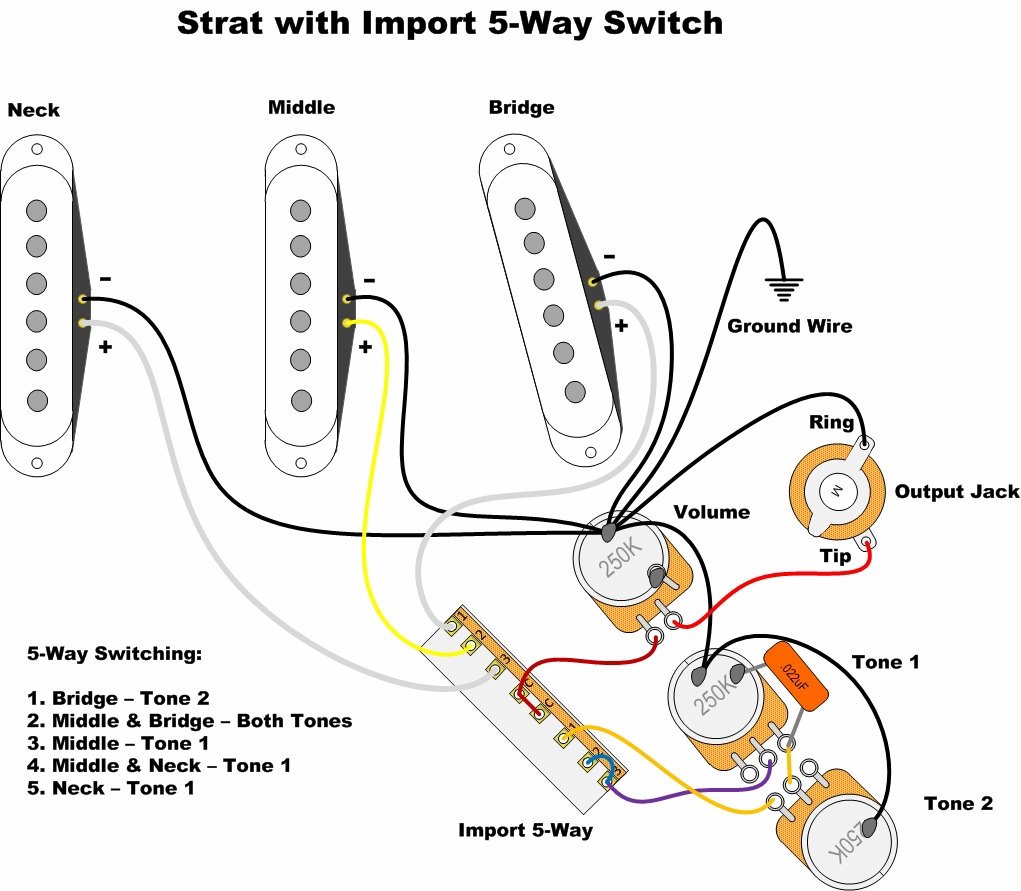
    The four wires I believe, tell me if I'm wrong, need to be soldered to the 5 way switch and I'm not sure what goes where.

    Hoping someone can help me a trip to the music shop!

    Cheers

  2. #2
    Overlord of Music WeirdBits's Avatar
    Join Date
    Jan 2013
    Posts
    2,731
    This thread about JM-1 wiring may help. Hopefully, your layout looks something like this:


    It looks like you should have a black ground wire that connects to the tremolo/bridge to the back of a tone pot. Then, you should need to connect an output wire from the switch to the volume pot, and then separate wires from the switch to each tone pot. You should also connect a ground wire from the pickup grounds (negatives) at the switch (ground lug) to the common ground point on the back of the vol/tone pot. Although this diagram has a single coil bridge pickup and your switch position is different, the basic wiring layout should match what you need:


    Does that help?

    Scott.

  3. #3
    Massive Help... Thanks

  4. #4
    Mentor
    Join Date
    Aug 2013
    Location
    Mackay
    Posts
    1,276
    Timing is everything. I am almost at the stage of wiring up my JM and now I don't need to go hunting. Thanks man!

  5. #5
    Yeah really big help.

    I, like Coriem am also a newbie building my first JM-1. That wiring diagram was a big help. I was wondering if anyone could assist with an issue I have been having with attaching the bridge. The two bolt holes that came already drilled into the body seem too close to the hole where the bridge is supposed to be input. I have inserted the bolts that the bridge sits up against, however, when it comes to putting in bridge piece, it won't fit…

    So I guess my questions are as follows:
    - How likely is it that the bolt holes and the bridge hole have been incorrectly drilled by the factory that makes these guitar parts?
    - Should the bridge fit in easily against the bolts, and in fact have some slack?
    - Also, do the bolts need to be hammered in flush against the body of the guitar?

    Any help would be great.

    Cheers

  6. #6
    Mentor
    Join Date
    Aug 2013
    Location
    Mackay
    Posts
    1,276
    Hi Charles.
    I had a few little 'imperfections' with the bridge arrangement on my JM build too. The biggest one being that the post holes were not deep enough to allow the post to be flush when hammered in. So check that. As for your issues, I can't quite visualise what you're saying. Any chance of posting a picture?
    Cheers

  7. #7
    Moderator dingobass's Avatar
    Join Date
    Sep 2012
    Location
    Perth
    Posts
    4,491
    OK,
    Firstly, dont hammer the bushings in! You are better to press them in with a large g clamp or a drill press..
    If you dont have access to either then very gently tap them in using a block of timber to protect the bushings.

    Next up, screw the bolts in about a quarter of the way, so they still has a little bit of wobble. the bridge should then slip on.

    Then with a large screw driver you should be able to lower the bridge to the correct height when you do your set up

    There is always a workaround for glitches, mistakes and other Guitar building gremlins.....

  8. #8
    Hey thanks for the quick reply guys,

    Unfortunately I am at work right now so I can't upload any pictures, though I will do that tonight Lawry.

    Hey Dingobass - ok so I won't hammer them in, but they currently won't sit flush with the guitar body so perhaps I need to drill a little bit more so they can easily get deep enough...? Also, I have tried what you suggested about only screwing the bolts in about a quarter of the way, however, the bridge will not slip in. I have also tried putting the bridge in one bolt at a time, however in this situation I encounter two problems:
    1.) When screwing in the second bolt, as the bridge is so tight against the bolts, instead of pulling the bridge down onto the guitar, the bushing lifts out of the guitar.
    2.) When I did manage to get the bridge as far down as possible, it is so tight up against the bolts that if I were to attach the tremolo bar, there is no way that the bridge would lift up and down...

    What I was thinking of doing is filing down the hole (where the bridge goes) toward the bottom of the guitar body so the bridge can move about more freely once in the hole.

    Will upload some photos tonight, though would really appreciate some more help.

  9. #9
    GAStronomist wokkaboy's Avatar
    Join Date
    Dec 2012
    Location
    Perth WA
    Posts
    13,555
    should be able to work out a solution Charles once we see some photos.
    Take some above and below photos so its clear
    Current Builds and status
    scratch end grain pine tele - first clear coat on !
    JBA-4 - assembled - final tweaks
    Telemonster double scale tele - finish tobacco burst on body and sand neck

    Completed builds
    scratch oak.rose gum Jazzmaster - assembled needs setup
    MK-2 Mosrite - assembled - play in
    Ash tele with Baritone neck - neck pup wiring tweaks and play in

  10. #10
    \\\\uds\\5\\cslessar\\Desktop\\guitar 1.jpg

    Alright so I've measured it and it is 7mm from the bridge hole to the edge of the bolt holes

Page 1 of 3 1 2 3 LastLast

Posting Permissions

  • You may not post new threads
  • You may not post replies
  • You may not post attachments
  • You may not edit your posts
  •