Page 1 of 10 1 2 3 ... LastLast
Results 1 to 10 of 96

Thread: 335 - installing Pots, switches and Output jacks

  1. #1
    Moderator Gavin1393's Avatar
    Join Date
    Sep 2012
    Location
    Mindarie, Western Australia
    Posts
    3,151
    Installing the potentiometers, switches and output jack into the 335 has been the source of some frustration even amongst the most experienced of us builders on the forum.
    Perhaps the most differentiating aspect of the '335' is that installing the electronic components principally takes place through the decorative 'f' hole. There is no plate to remove or install to achieve the result you'd find on most other guitars.

    Searching the web to find out how to do this lead me to believe that the ONLY way to accomplish this task was to tie the pots to strings and to concoct a plug with leads to insert into the output jack. I spent a bit of time building this jack and searching the house for string. This time ended up being a minuscule amount of the actual time it eventually took to install the components into the body of the guitar.

    The problems I experienced were easily solved once i'd figured out what the key issues were.
    Wires seem to get tangled inside the body and when you try to pull the components into place wires detach, particularly the earth wires.
    The strings pull free from the Pots before getting them into place.
    Pots slip out of place and back into the body when trying to tighten the nuts to lock the pots in place.
    When trying to figure out which earth wire has broken free the only was to resolve this is to remove all six components and draw them out of the 'f' hole and then start the installation process all over again.

    In the end, if you are looking to get a working result, with no hum such as this, then the following guide may save you some time and frustration.


    http://www.buildyourownguitar.com.au/forum/image.php?type=sigpic&userid=1258&dateline=1443806  448Gavmeister

  2. #2
    Moderator Gavin1393's Avatar
    Join Date
    Sep 2012
    Location
    Mindarie, Western Australia
    Posts
    3,151
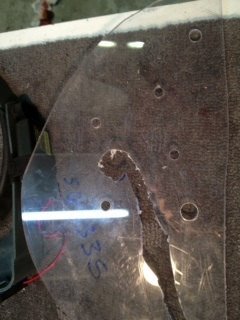
    The typical process that you will be encouraged to follow when putting together the component is to use cardboard or a perspex template as shown here. With a '335' i am not convinced that the standard template is the most effective way to do it. This does not mean that you dont use the template. You should, it saves you dropping hot solder onto your finish and besides it is pretty much the only way you will connect everything up on the 335. However, the change to the template that I would suggest is to make the connecting wires longer between the output jack, the switch, and both sets of the 'volume and tone' controls.

    This lengthening of the wires makes it easier to trouble shoot detached wires when the components are in place. You will be able to remove components individually back through the 'f' hole whilst leaving the other components in place. Note that the 'tone and volume pot' for each pickup will have the standard short wiring and will be treated as a single component when installing and removing from the body. All connecting wires are longer to enable them to be removed individually.

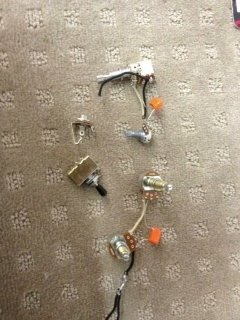
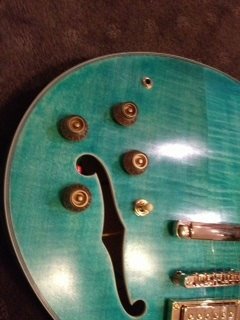
    This picture is how I started with the wiring far too bunched up with short wiring causing it to get tangled and to detach.
    http://www.buildyourownguitar.com.au/forum/image.php?type=sigpic&userid=1258&dateline=1443806  448Gavmeister

  3. #3
    Moderator Gavin1393's Avatar
    Join Date
    Sep 2012
    Location
    Mindarie, Western Australia
    Posts
    3,151
    Here are the six electronic components made up into four 'components'.

    Once you have completed these, then connect them up with the longer wires.
    http://www.buildyourownguitar.com.au/forum/image.php?type=sigpic&userid=1258&dateline=1443806  448Gavmeister

  4. #4
    Moderator Gavin1393's Avatar
    Join Date
    Sep 2012
    Location
    Mindarie, Western Australia
    Posts
    3,151
    Here is the perspex template I used which is drawn by placing it directly on top of the body and tracing it.
    http://www.buildyourownguitar.com.au/forum/image.php?type=sigpic&userid=1258&dateline=1443806  448Gavmeister

  5. #5
    Moderator Gavin1393's Avatar
    Join Date
    Sep 2012
    Location
    Mindarie, Western Australia
    Posts
    3,151
    This is probably the best secret of making the job easier, 5mm tubing!

    http://www.buildyourownguitar.com.au/forum/image.php?type=sigpic&userid=1258&dateline=1443806  448Gavmeister

  6. #6
    Moderator Gavin1393's Avatar
    Join Date
    Sep 2012
    Location
    Mindarie, Western Australia
    Posts
    3,151
    The 5mm tubing fits tightly inside of the input jack and will not fall out like the recommended jack creation it was suggested I build!
    http://www.buildyourownguitar.com.au/forum/image.php?type=sigpic&userid=1258&dateline=1443806  448Gavmeister

  7. #7
    Moderator Gavin1393's Avatar
    Join Date
    Sep 2012
    Location
    Mindarie, Western Australia
    Posts
    3,151
    ...and the tubing fits snuggly over the pot controls too, large or small!

    http://www.buildyourownguitar.com.au/forum/image.php?type=sigpic&userid=1258&dateline=1443806  448Gavmeister

  8. #8
    Moderator Gavin1393's Avatar
    Join Date
    Sep 2012
    Location
    Mindarie, Western Australia
    Posts
    3,151
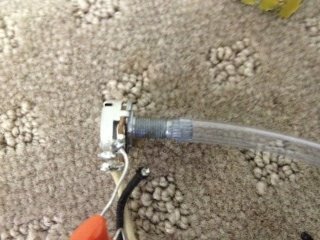
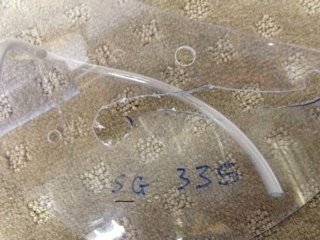
    To use the tubing effectively it needs to be drawn through the holes where the component will be placed and then through the 'f' hole before that end is coupled to the pot.

    http://www.buildyourownguitar.com.au/forum/image.php?type=sigpic&userid=1258&dateline=1443806  448Gavmeister

  9. #9
    Moderator Gavin1393's Avatar
    Join Date
    Sep 2012
    Location
    Mindarie, Western Australia
    Posts
    3,151
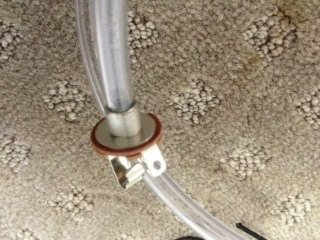
    The first component that you want to connect is the input jack. Of course it is fully wired at this stage but I wasnt about to disconnect everything on my finished 335!
    http://www.buildyourownguitar.com.au/forum/image.php?type=sigpic&userid=1258&dateline=1443806  448Gavmeister

  10. #10
    Moderator Gavin1393's Avatar
    Join Date
    Sep 2012
    Location
    Mindarie, Western Australia
    Posts
    3,151
    Connected up! Bit of an optical illusion, the tubing doesn't actually go all the way through...that's another piece of tubing in the background!
    http://www.buildyourownguitar.com.au/forum/image.php?type=sigpic&userid=1258&dateline=1443806  448Gavmeister

Page 1 of 10 1 2 3 ... LastLast

Posting Permissions

  • You may not post new threads
  • You may not post replies
  • You may not post attachments
  • You may not edit your posts
  •