Page 2 of 7 FirstFirst 1 2 3 4 ... LastLast
Results 11 to 20 of 67

Thread: Levelling Frets

  1. #11
    Moderator dingobass's Avatar
    Join Date
    Sep 2012
    Location
    Perth
    Posts
    4,491
    Wow Gavin, that is a very thorough job indeed!

    Now taking into consideration that most of our builders won't have the same extensive toy collection... Whoops, I mean tool collection that you and I posses there are a few modifications I would suggest.

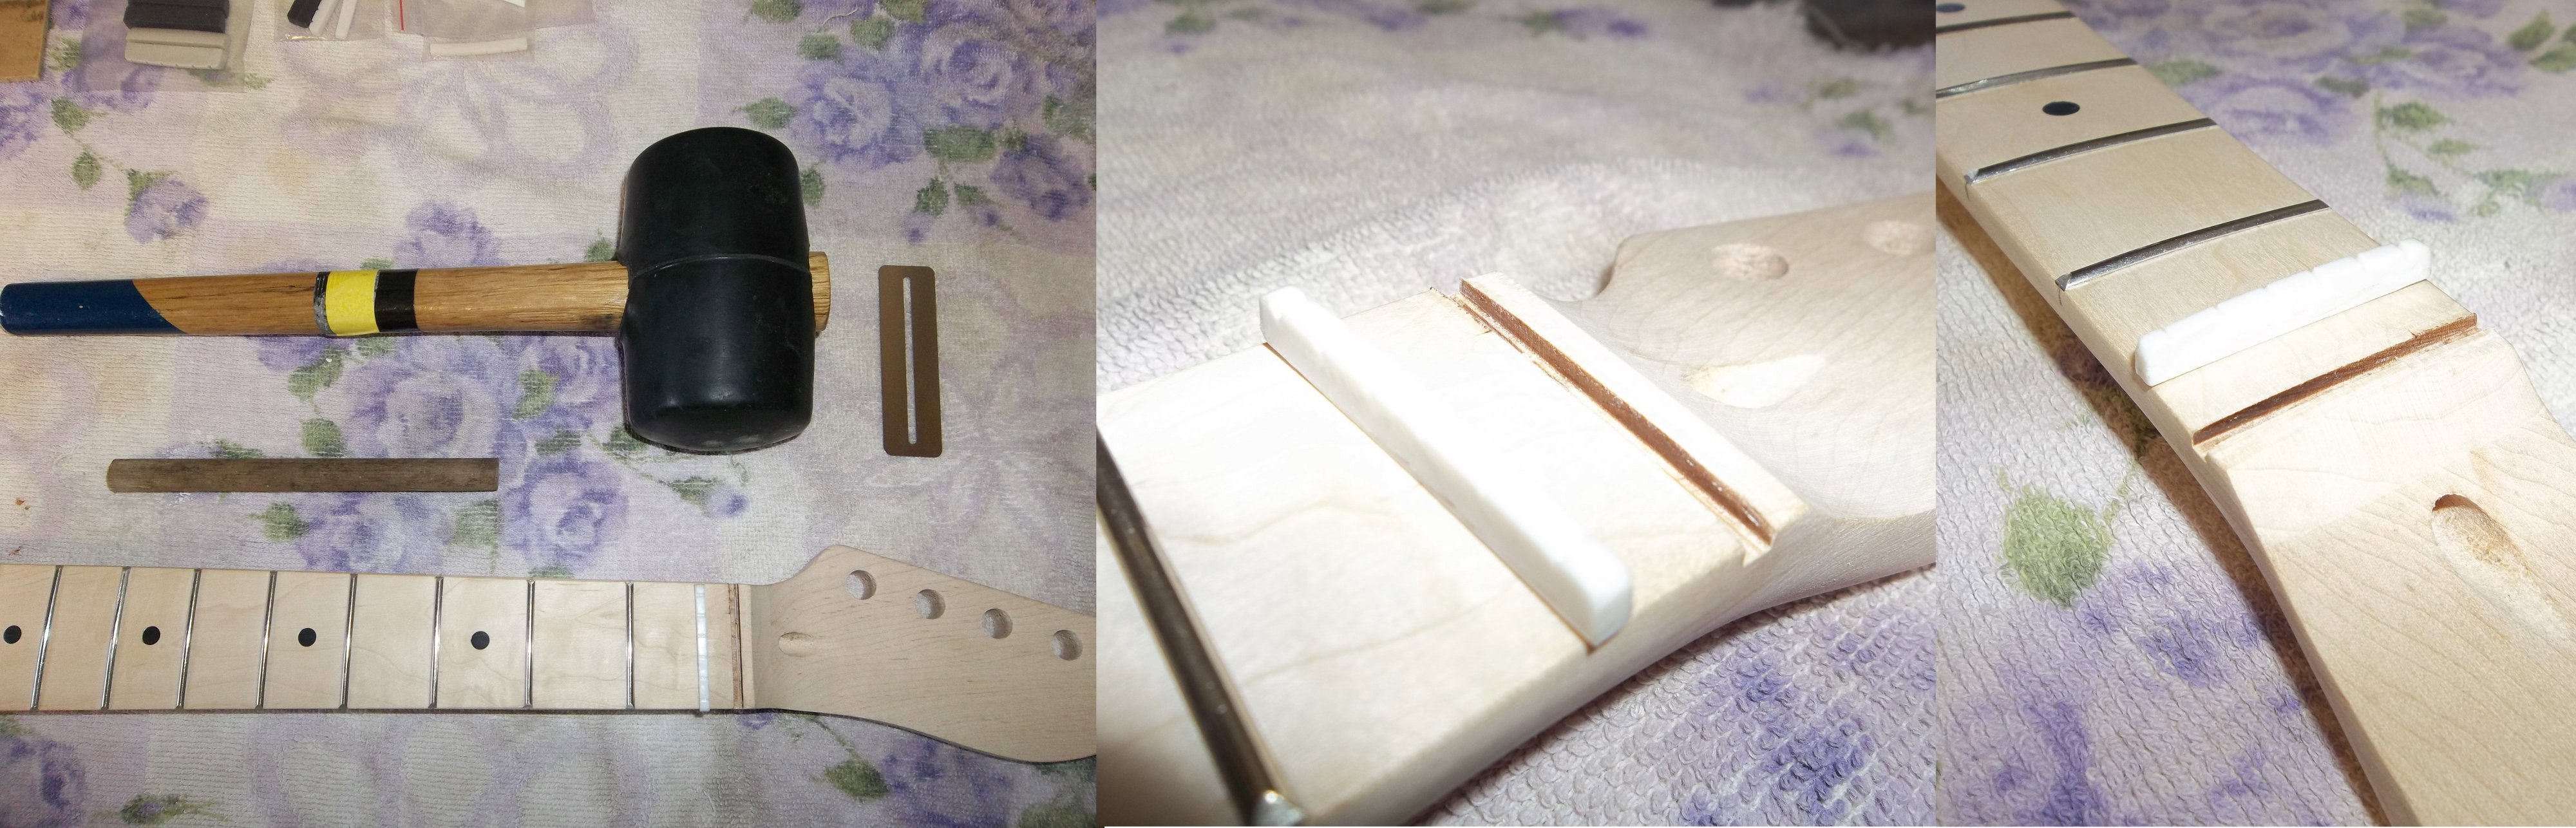
    Once the neck has been adjusted so it is as flat as possible, support the neck on a cut off jeans leg filled with sand.
    Eyeball the frets and see which ones are not quite seated properly and give these a whack with a nylon faced hammer to get them seated properly.

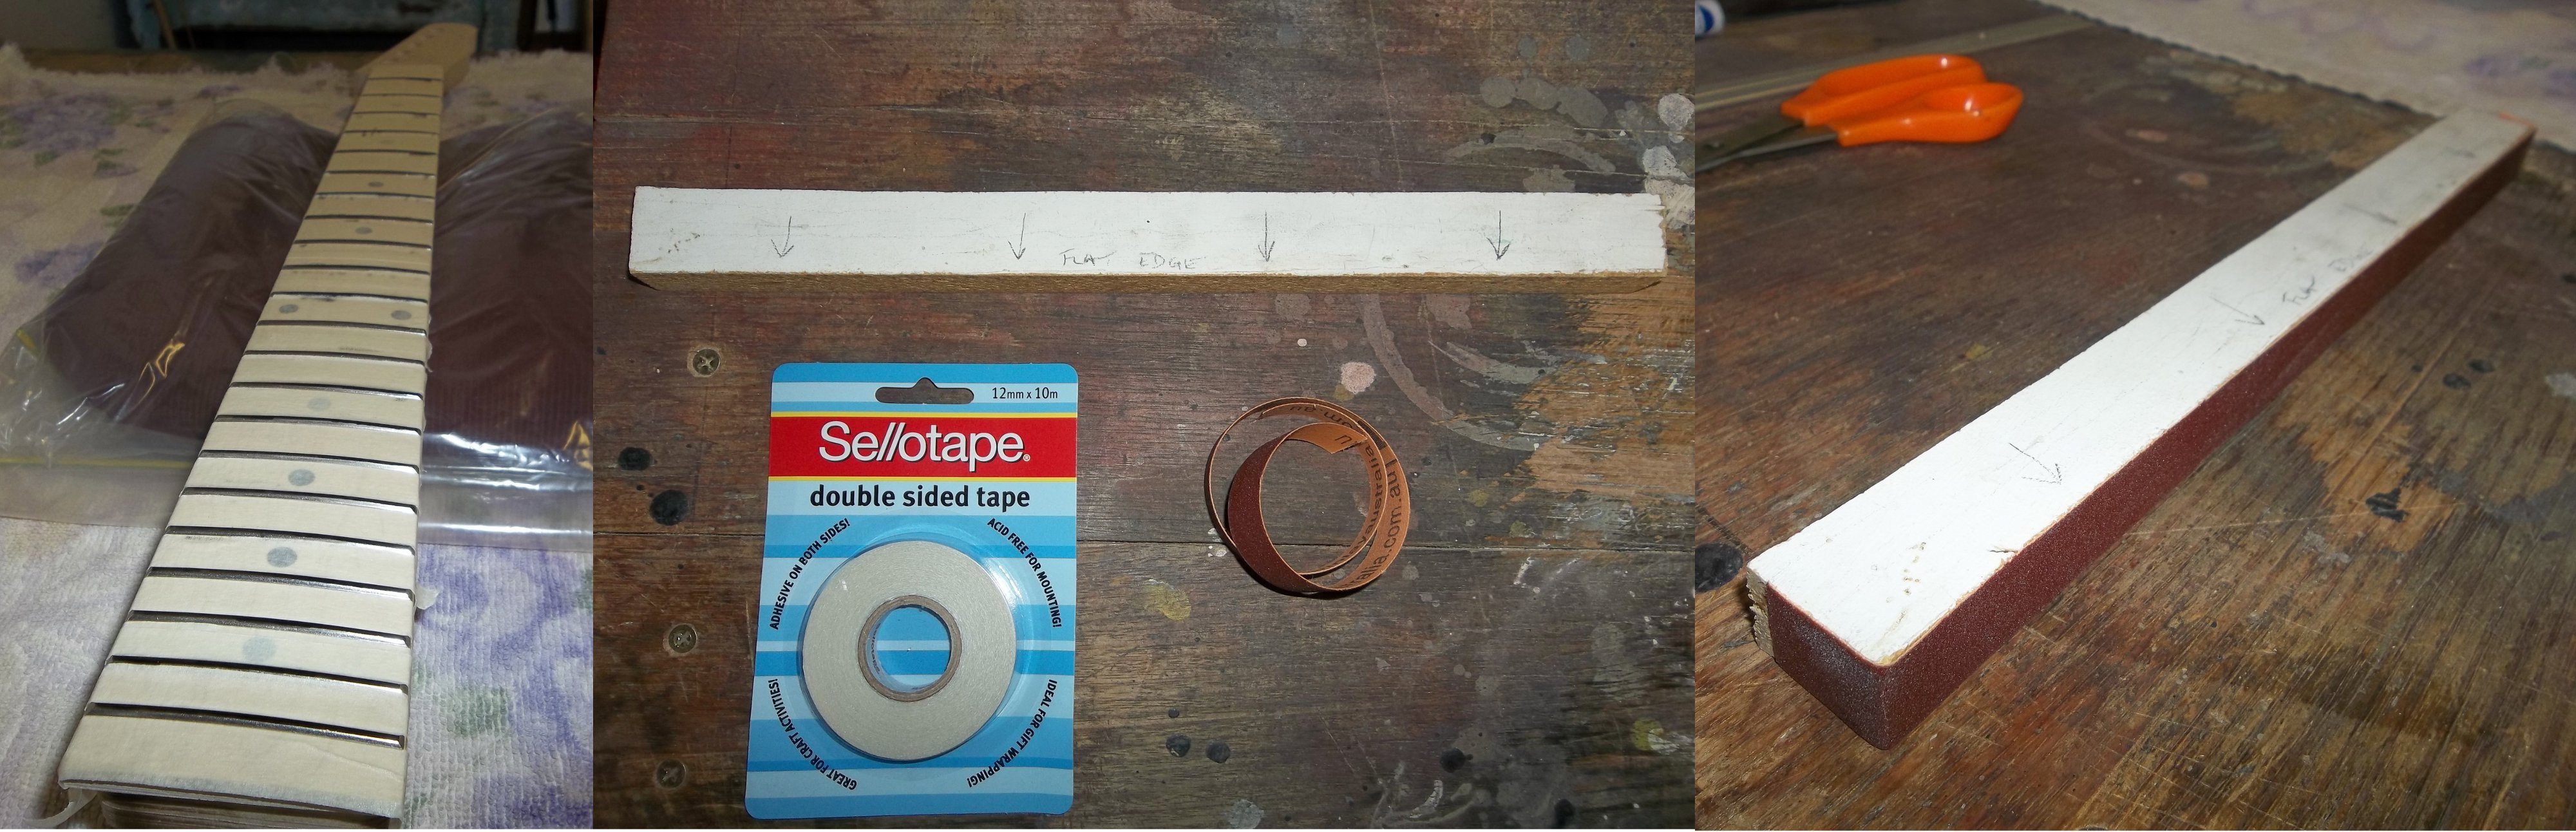
    Radius block: you can substitute this with a short spit level, some spray adhesive and Norton sand paper.

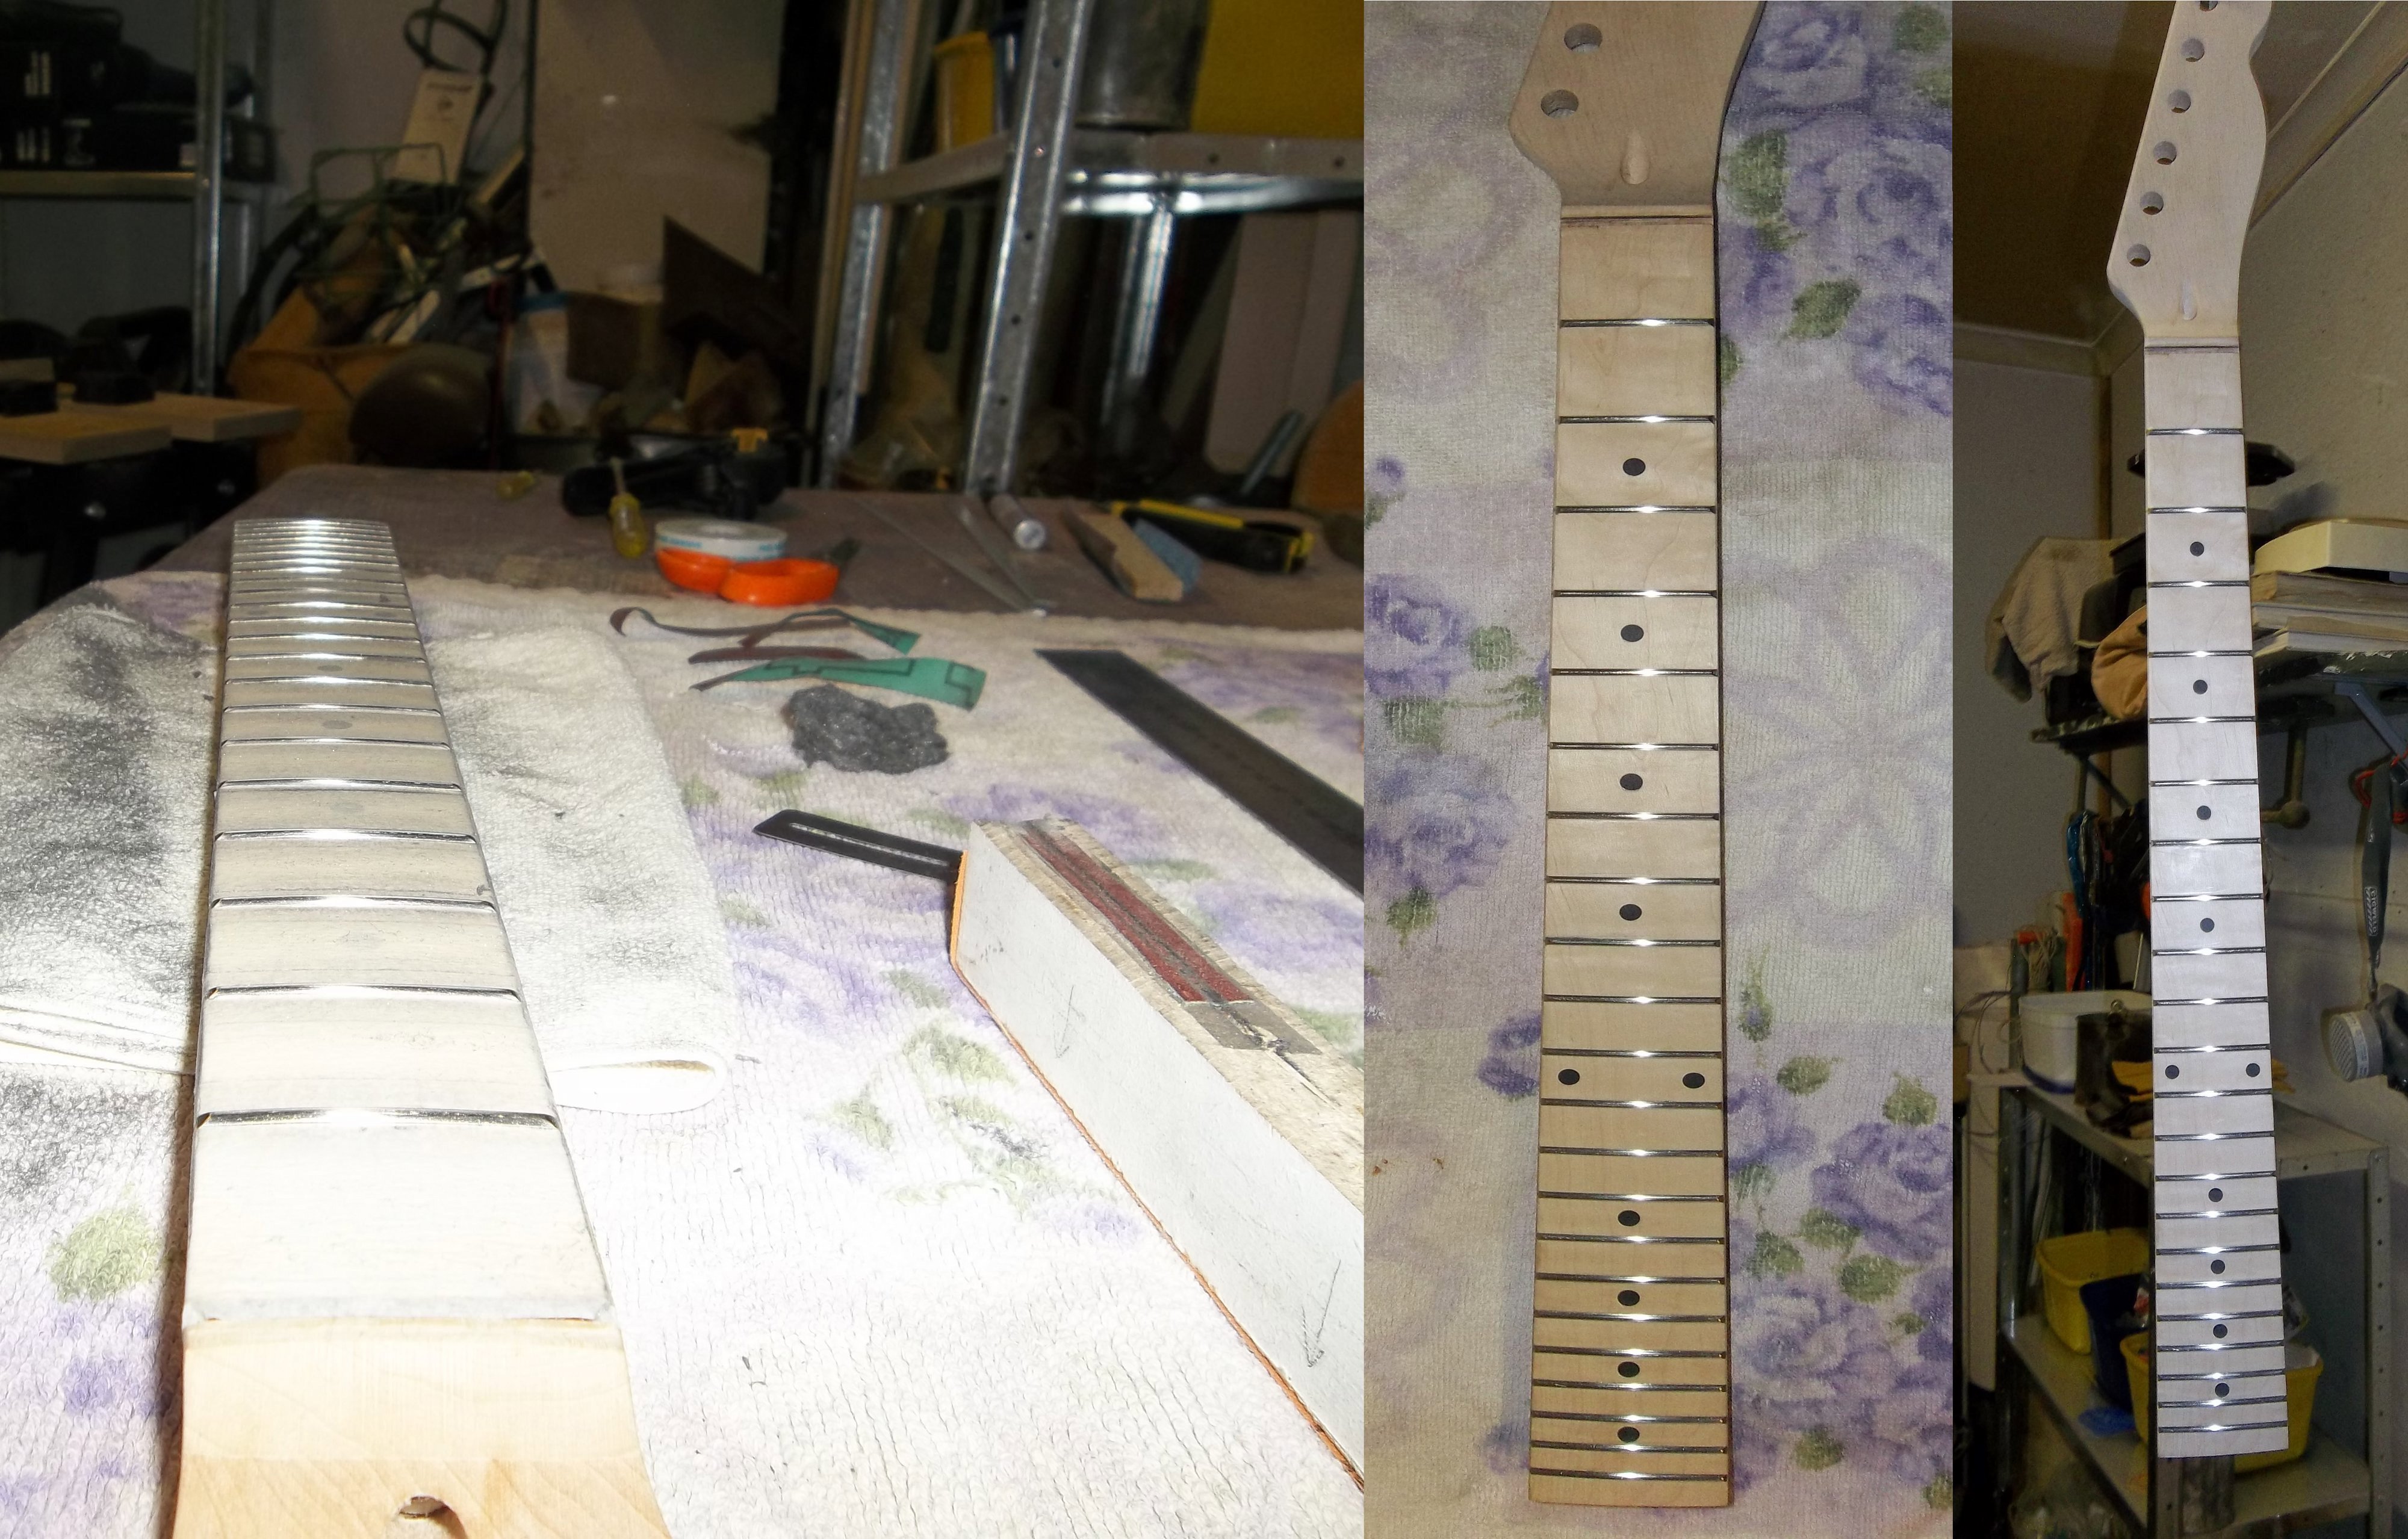
    Of course you will need to be very careful to sand the frets evenly. To do this start in the centre and work out to the edges.
    Once you have gotten rid of the blue marker it is time to break out the masking tape and triangle file.
    Mask either side of the frets to protect the finger board and carefully re shape the fret crowns.

    Then sand as per Gavin's method and steel wool.

    If you take your time, you will still end up with an even set of frets.

    There is always a workaround for glitches, mistakes and other Guitar building gremlins.....

  2. #12
    Mentor robin's Avatar
    Join Date
    Feb 2013
    Location
    Brisbane
    Posts
    1,513
    Thanks Gavin, I think I might regret having asked the question............ ignorance is indeed bliss.

    Such a detailed tutorial, much appreciated. Just what I needed.

    And thanks to DB for making it a little less scarey. At first glance it looked quite daunting, but having now digested all the info supplied by Gavin and realizing that there may be work-arounds, it is "do-able".

    Thanks Gavin and DB. It is so good having professionals on the forums who are willing to share their time and experience with the rest of us.

    Cheers
    rob

  3. #13
    Overlord of Music keloooe's Avatar
    Join Date
    Jan 2013
    Location
    Melbourne
    Posts
    3,162
    Nice article Gavin!!!

  4. #14
    Moderator Gavin1393's Avatar
    Join Date
    Sep 2012
    Location
    Mindarie, Western Australia
    Posts
    3,151
    The key take-out from my article is this. If you spend the time (and a little money) with the right tools you can achieve an excellent fret job. This in turn will add to the asthetics of the guitar but most importantly to the playability. I was hopeless at workwork as a kid. I don't think too much has changed and hence I use good quality tools to minimise stuff-ups! For me I love a low action on a guitar and the better the Fret job the lower your action can go without picking up any fret buzz. If you use the frets as they are there is a good possibility that your action will need to be higher as a result of accomodating the highest crowned frets. Secondly, a gigging guitarist is very likely to complain that they are 'feeling' the sharp edges of the fret-ends. A bit of work will eliminate these issues. I think it is worth it!
    http://www.buildyourownguitar.com.au/forum/image.php?type=sigpic&userid=1258&dateline=1443806  448Gavmeister

  5. #15
    Moderator dingobass's Avatar
    Join Date
    Sep 2012
    Location
    Perth
    Posts
    4,491
    Wot Gavin said!

    It is true that it is good money well spent on buying the right tools for the job.
    I could not operate without my special toys!

    Big problem is once you start collecting tools you just can't stop! 8O

    There is always a workaround for glitches, mistakes and other Guitar building gremlins.....

  6. #16
    Overlord of Music WeirdBits's Avatar
    Join Date
    Jan 2013
    Posts
    2,731
    As my TL-1A Tele kit has become a real experimental project, I thought I may as well be the guinea pig for Gavin and DB's fret levelling masterclass. A big thank you to Gavin for his detailed instructions and for DB's additional guidance. I should point out that I'm a complete novice in guitar building, still in the process of working on my first kit, and I have none of the fancy-smancy lutherie tools the more privileged among us posses

    So, with very little confidence, less ability, shaky hands and some basic tools I embarked upon my perhaps ill-advised attempt to level the frets on my TL-1A neck (I should point out, an unfinished and not even sanded neck).

    First removing the nut: I wanted to keep it intact as I will need it to either match it with a pre-made (bone) nut or to make my own, so cutting it was out. Instead I took the big hammer, VERY soft tap approach. Using a short length of soft dowel I tapped EXTREMELY gently on the side of the nut at each end of the fretboard side then centre, then repeated on the headstock side, switch back and repeat. I'm talking VERY gentle taps (the large hammer allowed me to move it only fractionally to get the force I wanted, rather than needing large swings). Imagine tapping you own teeth with a hammer… that's how gentle and careful you need to be. Hopefully you'll hear the slight crack/creak of the glue breaking (rather than the wood of the nut seat splintering), and slowly the nut will start to come free. I wouldn't recommend everyone attempt this (for F-style nut slots) as things could go HORRIBLY WRONG… but this is how I did it, and the nut came out intact without any damage to the neck (crime scene photos below).


    Scott.

  7. #17
    Overlord of Music WeirdBits's Avatar
    Join Date
    Jan 2013
    Posts
    2,731
    Fret Levelling: Due to my lack of tools, ability and experience, I decided to tape the neck at the very start just in case… and at the very least that saved me from getting permanent marker on the neck during the first steps.

    The previous night I had loosened the truss rod and the neck had gone from a slight back-bow to completely straight, which was a good start. I have a nice 600mm steel rule that used at various points on neck that seemed to indicate a few frets needed to be levelled, particularly around frets 10 and 11, and a couple up at 15+. A couple of quick taps had already helped to seat a high spot on 14. Anyway, my neck was straight so I taped it up and marked the frets as per Gav's instructions.

    Unfortunately, my spirit level doesn't have a usable edge (as per DB's suggestions) and I don't have a radiused block, so I had to find an alternative for the sanding. What I did have was a ~15mm x 400mm off-cut that I know has a straight and square edge… so with some 320 grit paper and some thin double-sided tape, that became my fret leveller (see first set of pics below). I chose to use 320 grit instead of anything lower as I was worried about taking off too much too quickly. The 'tool' actually seemed to work quite well, and produced pretty much the same sequence as Gav's images, with the high points wearing down and eventually taking the marker off the crowns of all the frets. I even re-did the marker at one point just to double check.

    Re-crowning the frets without a professional tool was more challenging and, for me, was the most difficult part. In the end I made a sort of 'crowning tool' by cutting a narrow groove into the opposite side of my levelling tool with a micro triangular file (producing a narrow V), embedding double-sided tape in it and then pressing in some 400 grit paper. The flats of the sandpaper either side of the groove I ground down by rubbing the tool on a concrete floor, thus only leaving the grit in the groove itself. This then was just rubbed back and forth along each fret to re-crown then, and it seemed to have worked OK-ish (see the second series of pics below). Not perfect, but not too bad for a first attempt. I think doing each side of the fret separately may produce a better result next time… with an angled block and some double-sided tape

    I used my levelling tool again for the fret ends bevel and then some 400 grit stuck to my finger with double-sided tape for the scratch removal/clean-up. And, then, finally used some 0000 steel wool for the polishing (using my stainless steel fret board guard for the finger sanding and steel wool procedures). The end result looks ok, I think. The frets still have their radius, so I didn't ruin that. My straight edge no longer shows any hight spots and doesn't rock, so the frets now appear to be level. And, visually the frets now look more even. I have noticed that there is still one little sharp'ish point on the high E side of the 2nd fret, but that's an easy fix. As the neck is unfinished the frets will gets some scratches when I finally sanded it, so they will need to be cleaned up and steel wooled again anyway. See the final set of pics below for the end result. And, as I said before, I found the re-crowning to be the most challenging aspect of the process.

    But, overall, I think with some thought, patience and care (and advice from our generous experienced forum members) amateurs like myself can level their frets (if needed) with only a few basic tools… if you are willing to accept the fact that you *could* make a complete mess of it. I guess, ultimately, I won't truly know if I have made a mess of it until I finish the damn guitar and try to play it


    Scott.

  8. Liked by: VoxMechanica

  9. #18
    Moderator Gavin1393's Avatar
    Join Date
    Sep 2012
    Location
    Mindarie, Western Australia
    Posts
    3,151
    Well done Scott. I see the humble beginnings of a Luthier coming through. Sure sign is the ability to put together your own tools!!!
    http://www.buildyourownguitar.com.au/forum/image.php?type=sigpic&userid=1258&dateline=1443806  448Gavmeister

  10. #19
    Overlord of Music keloooe's Avatar
    Join Date
    Jan 2013
    Location
    Melbourne
    Posts
    3,162
    Quote from Gavin1393 on March 24, 2013, 09:15
    Well done Scott. I see the humble beginnings of a Luthier coming through. Sure sign is the ability to put together your own tools!!!
    I can see DB's smile through the screen right now...

  11. #20
    Moderator dingobass's Avatar
    Join Date
    Sep 2012
    Location
    Perth
    Posts
    4,491
    Nice work around!

    As Gavin said, the makings of a Luthier.

    There is always a workaround for glitches, mistakes and other Guitar building gremlins.....

Page 2 of 7 FirstFirst 1 2 3 4 ... LastLast

Posting Permissions

  • You may not post new threads
  • You may not post replies
  • You may not post attachments
  • You may not edit your posts
  •