I identify with this so very much .👍🏾😜Originally Posted by Stuart D


I identify with this so very much .👍🏾😜
FrankenLab
Hand crafting guitars, because Death Rays are expensive.

I guess he uses ghs Boomers......
After using the neck shaping jig with 12in radius cams at either end I tried to radius the fret board of the Buzzard. It didn't go well and after sanding for a while I realised that it was going to be too thin and thinner at one end than the other, I scrapped the board and cut and slotted another. I also used this thing:
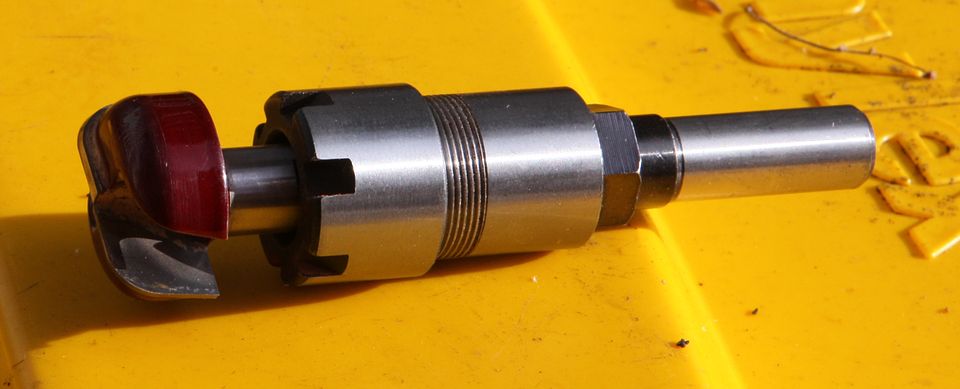
What's this? *Another* jig? Yeh, 'fraid so. Ever get the feeling I spend more time making jigs and faffing around with them than any actual instrument making? I decided to use a single action stainless truss rod, and this jig was for routing the curved truss rod channel. Progress is slow, but progress none the less!
I like that! Does it work well?
Yeh, it worked great. I set it up so the deepest part of the arc is under the 7th fret, the 3/16 rod sits just below the fret board close to the end and a little lower under the nut so a truss rod cover will cover the adjustment nut...just. When I carve the neck there should be about 5mm of meat under the rod at the 7th fret.
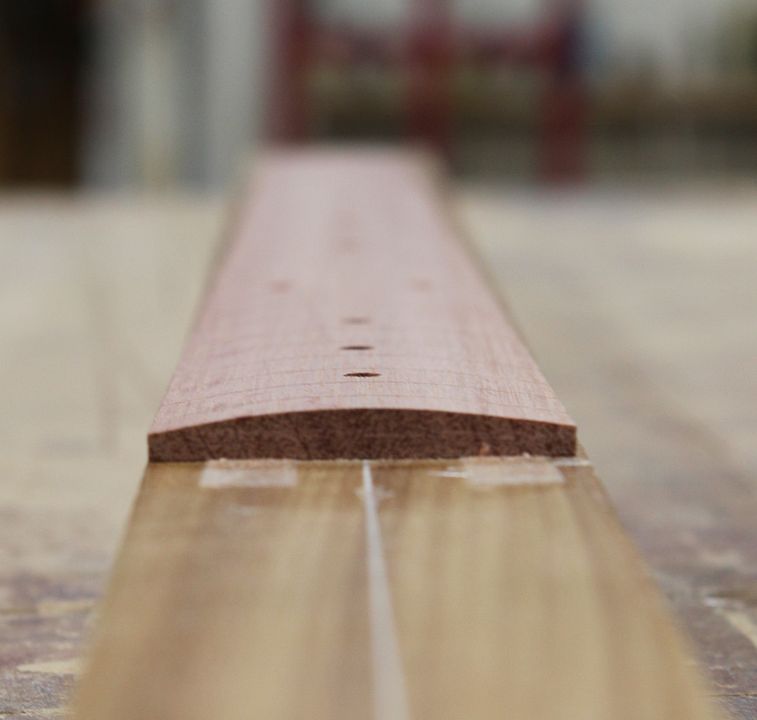
Well folks round 2 with the fret board. I had addressed the alligment issues with the radius cams for the neck caving jig, and I had used some aluminium rectangular tube with some timber epoxied to it and run under the thicknesser to ensure a router bit friendly surface that was parralell with both side to side and front to back axis.I also Made a new router cradle so that I could use the Mens Shed's 1/2 inch plunge router, and a different bit I had. Despite that, there was still a bias whereby when supposedly centred, it was taking more off one side than the other. Since I have a habit of taking light cuts I was able to spot this very early on, and adjust the offset to get it carving symetrically either side of the fretboard centre. The different bit, a wider bit meant for bowls:
It didn't occur to me to take the photos before I had drilled the blind holes for the marker dots.Profiles raw from the jig before sanding.
End view:
Side view:
Since the plan is to use japan black stained maple binding with unstained scrapped tops, I used maple as the marker dots:
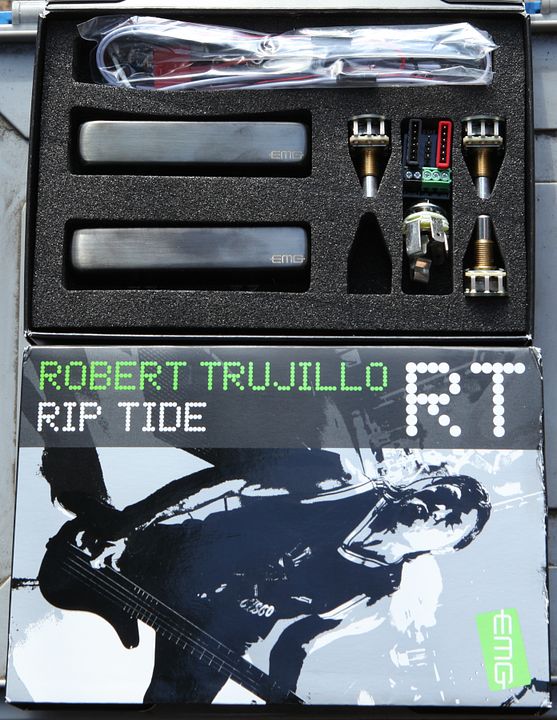
Before I finish the fretboard I will bite the bullet and carve the neck. I have order the pickups, and against my better judgement this will be my only instrument with active pups. In keeping with the Metallica theme, this will be the compliment to Papa Het's Vulture, and will have Trujillo signature Riptide JB pups, although I prefer Les Claypool's gold to Trujillo's precious metal ( you have to have seen the vid of the add to get that one)


Looks great.
PitBull Builds: FVB-4, LP-1SS, FBM-1, AG-2, TB-4, SSCM-1, TLA-1, TL-1TB, STA-1HT, DSCM-1 Truckster, ST-1, STA-1, MBM-1.
Scratch Builds: Pine Explorer, Axe Bass, Mr Scary, Scratchy Tele's.
The little voices in my head keep telling me "build more guitars"
So...a few things .. and the budget is balooning
I still need to deepen some of the fret slots, but I have the fretwire.. 2.7mm stainless jumboes.. I applied some epoxy thinned with a timber treatment to the board, gave it 30 mins to wet out the timber then wiped off the excess:
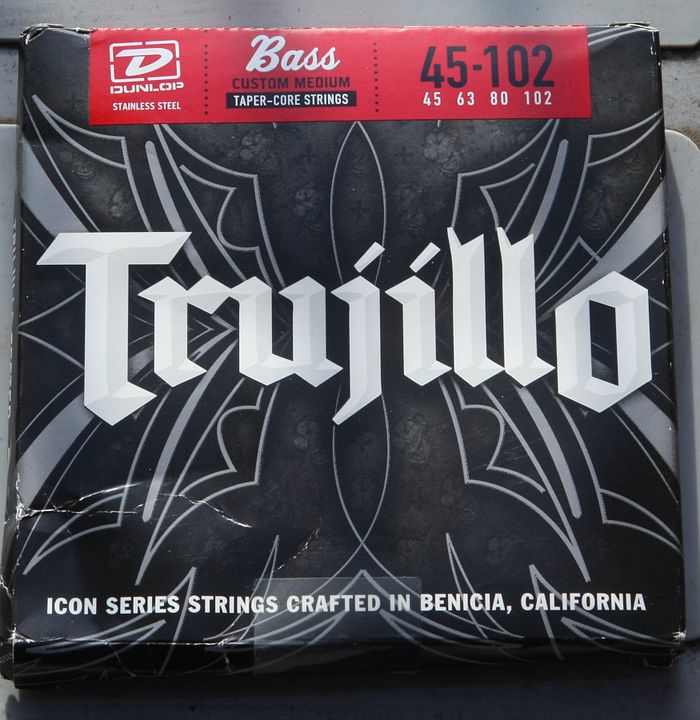
Since I decided to go with the Metallica theme, I looked up "what strings does Robert Trujillo use?" Turns out , he has his own :
I have read numerous posts around the traps claiming that if you have stainless frets, you will never need a re-fret. I wonder how that statement holds up when stainless strings enter the mix ne?
The pups turned up and the "recommended" wiring added another component to the mix. I swear "recommended" is just a trigger word EMG uses to get more green from gullible schlubs like me. In this case the addition is a pot for active balance control, similar to the passive balance control on my Toby to adjust the neck/bridge bias. The thing ain't cheap. So I ordered the ABC, and then discover *another* component that was part of "recommended". the tone control is an "active tone control" , also listed as VLPF. I looked online for the sucker, and found it at a music store in Victoria I think. Because of the price i was going to wait till next pay day. The next time I went looking for it, I could not find the store, and reverb had secondhand ones for $40somethingand shipping even higher.Yeh, f*** that! The ABC turns up today in a box massively too big for said component. Now, the pups:
See the pups? pretty much the rest of the contents of the box goes ......"in the bin" (viewers of Mighty Car Mods will get the gag). The reason is because:
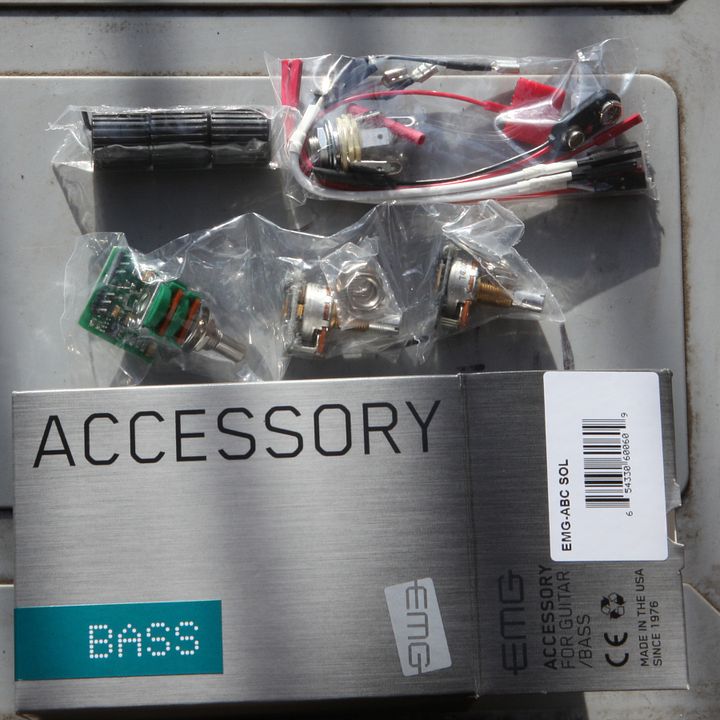
None of the vendors I looked at mentioned any of the stuff that comes with the ABC. In the package that has the ABC we have the ABC, volume control, and the mythical active tone control. I don't have to buy it! Win!!!!! The wiring diagram with the ABC is identical to the "recommended" wiring diagram that came with the pups. Not sure I will use the knobs that came with it.. think I need to try match what is on the Vulture.
Next step I think is to make the jigs for carving the truss rod channels in the Cliffenbacker, the 8 string and the Unicorn . I'm also looking into using the CNC router at the Men's shed to accurately mark the frets in the other fretboards. I'd like to radius the other 12in radius fretboards while the neck shaping jig has the 12in cams on it.

I've re-levelled stainless steel frets for a mate of mine on a 6-string with standard strings. He put big dints into them after 3 years or so after they were fitted (by Bill Puplett, a fairly well known UK luthier). He did play the guitar a lot and used 11s at the time and a lot of finger pressure. They are a complete PITA to work on. It took me about an hour a fret to crown and polish using my diamond crowning files (which I later learnt aren't the best ones for stainless), so that was at least 10x longer than normal. I've since got better files for stainless frets, but even so, it's at least 2x to 3x the time for standard frets. As a result it will cost a lot if you take it to a luthier for a fret level, so far better for those with pitted stainless frets to learn how to do it themselves.
And I too get lost in the EMG world. You are not alone.
 Posting Permissions

 Reply With Quote
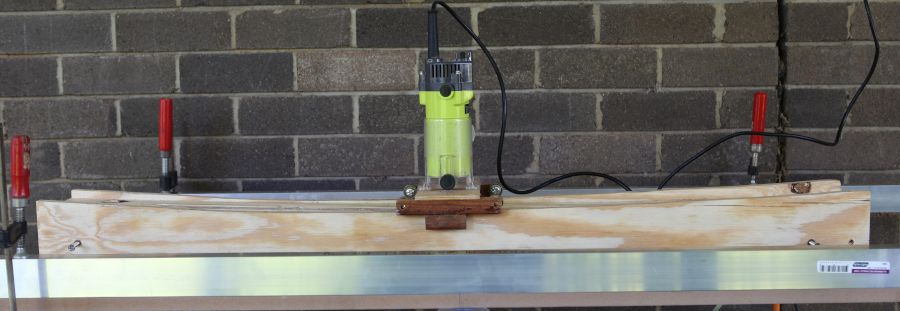


")