Page 1 of 3 1 2 3 LastLast
Results 1 to 10 of 23

Thread: ES-1 build for a friend.

  1. #1
    GAStronomist Simon Barden's Avatar
    Join Date
    Oct 2016
    Location
    Reading, UK
    Posts
    10,547

    ES-1 build for a friend.

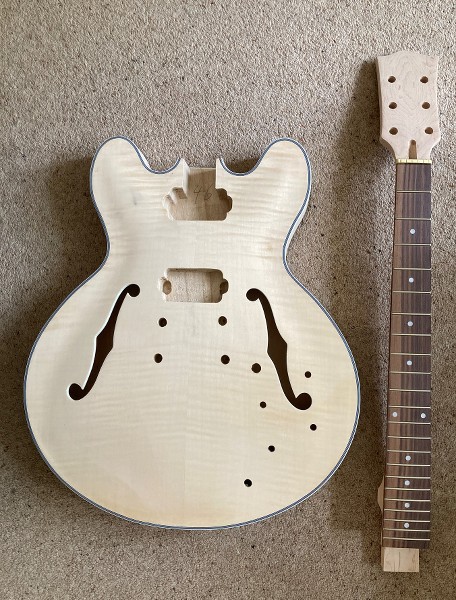
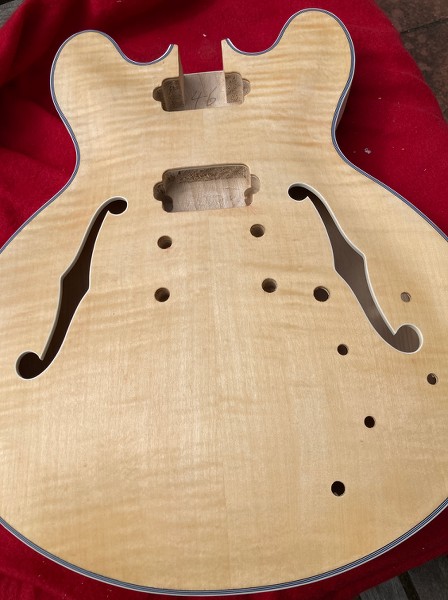
    Inspired by my ES-1/ES 330 style build, my mate Mark picked up an ES-1 kit from Pit Bull when he was visiting Perth a couple of years ago. However he'd only recently moved house which has been a bit of a project and taken up all his spare time, so the kit was languishing in its box. So I've offered to put it together for him.


    There were some dirty fingerprint marks on the top, which I found a bit worrying, and a 2cm x 1cm raised smear of glue on the rear.


    But a wipe-down with white spirit didn't show any glue marks on the top and removed the fingermarks.

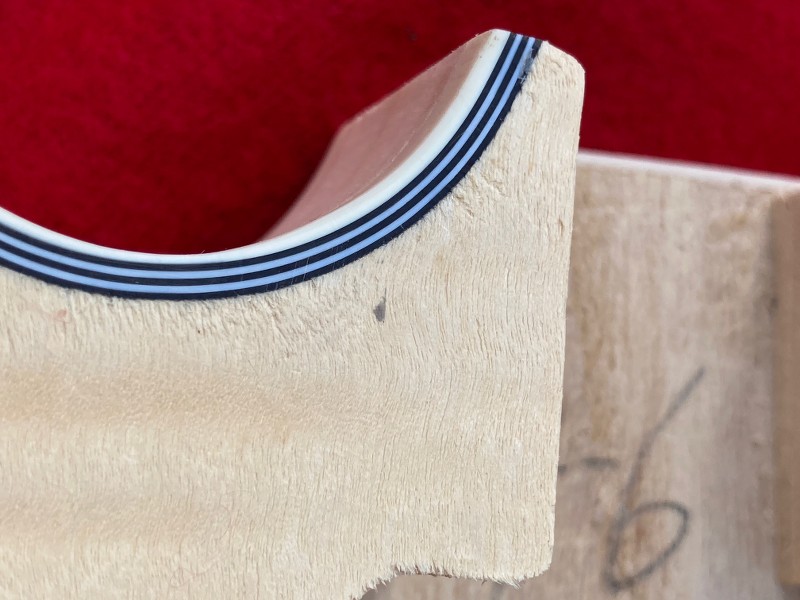
    Splintering on the veneer around the upper horn and a strange grey mark that seems to be ingrained in the wood and not on the surface:


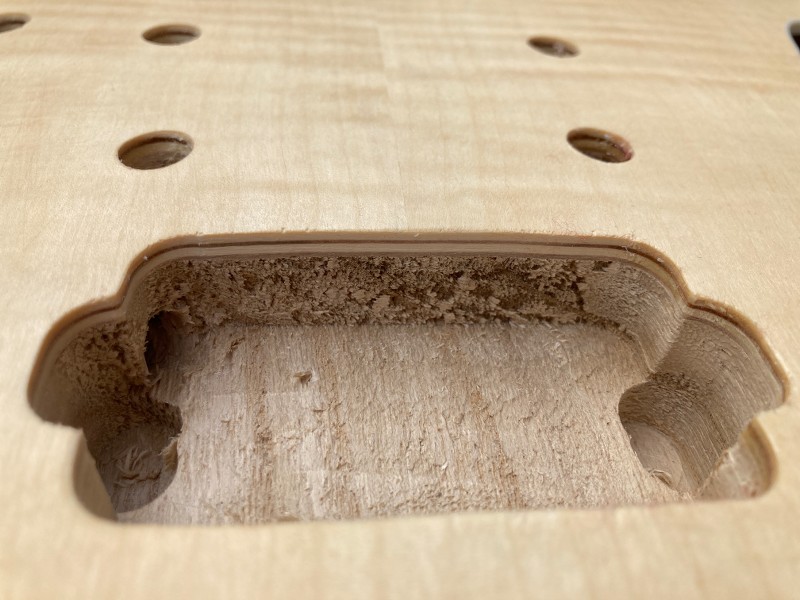
    The usual soft core wood cut with a blunt routing bit:


    But a bit of sanding has got that looking reasonably presentable.

    Mark wanted a blue guitar, along the lines of Daphne blue, so I said I'd have a look at the top to determine if it was good enough to try staining that colour or whether we went with a solid finish.

    Wetting it with white spirit (I'd run out of turps and methylated spirit) showed what I'd expected from the look when dry:


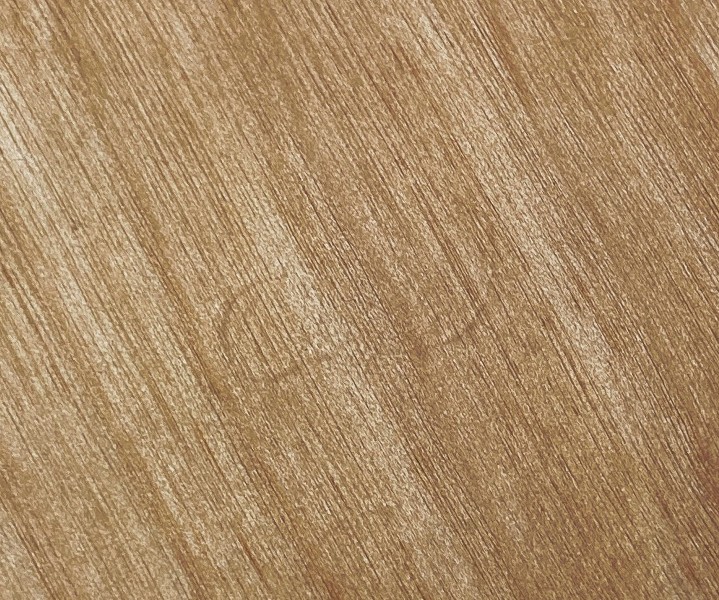
    The flame pattern was only strong in a couple of areas like the lower horn. The photo improves the actual contrast which was far less. So it was decided to go with a solid colour.

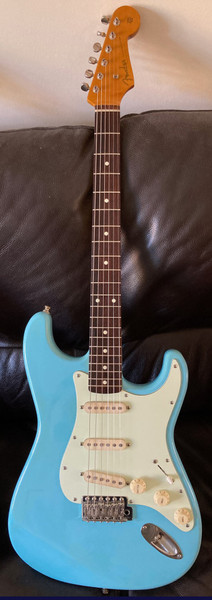
    So it will be this blue:


    I then had a look at the neck and the neck angle once fitted, as too shallow a neck angle has been a persistent problem on a lot of ES-1 kits.

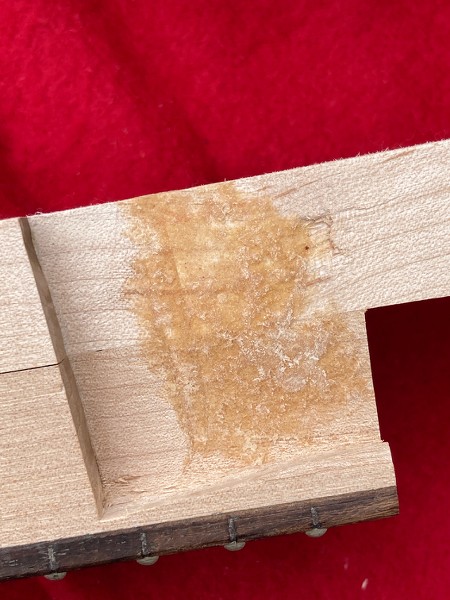
    The neck wouldn't fit in the slot, primarily due to this thick mass of glue on the side of the block (and a smaller amount on the other side):


    A few minutes work with some sandpaper removed the glue and got the neck fitting about as well as any of the PB kit set necks fit.

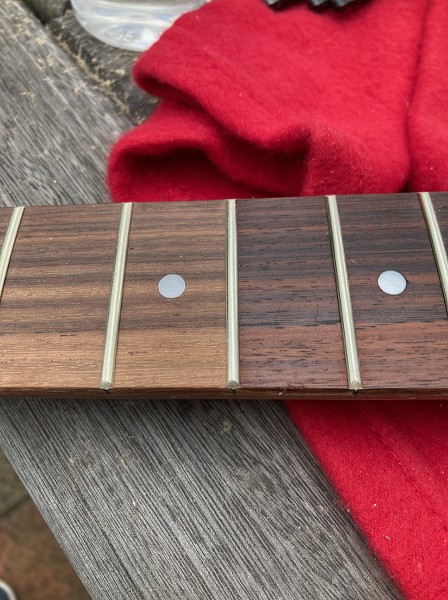
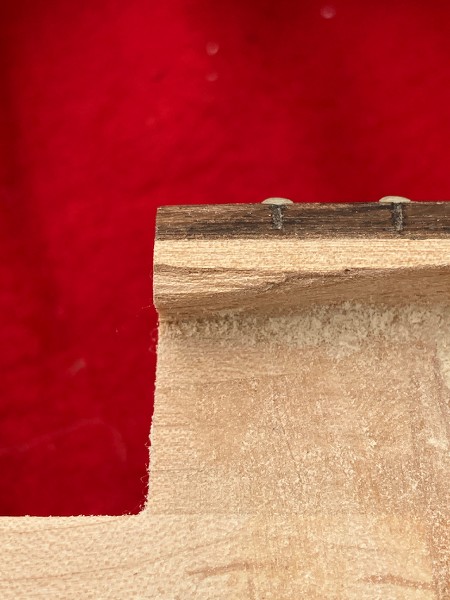
    An annoying chip out of the end of the underside of the fingerboard:


    But at least the choice to go with a solid colour means that I don't need to worry about glue marks, and I can fill in the small chips and cracks without having to try and match things up so they aren't noticeable.

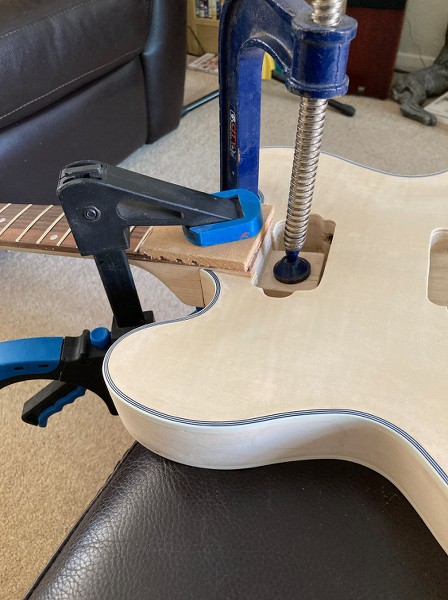
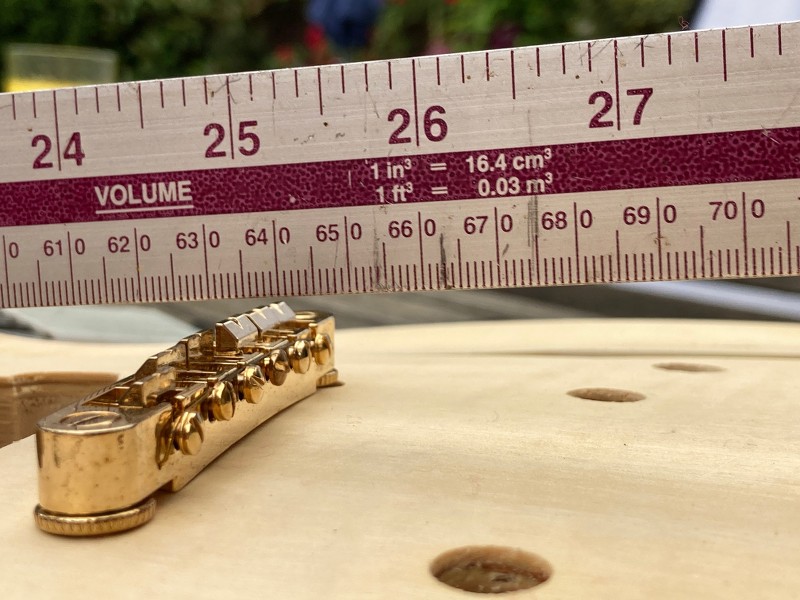
    The next thing was to check the neck angle. The neck itself had quite a severe back-bow, which took about 1.5 turns of the truss-rod to correct. Once the neck was flat, I set it in place and ran a straight edge along it so I could see what sort of height I had at the bridge position.


    Luckily there's plenty of height. Possibly too much, so I may well try reducing the neck angle very slightly as I don't like bridges sitting too high on posts for stability reasons.

    So that's it to start with.

  2. #2
    GAStronomist Simon Barden's Avatar
    Join Date
    Oct 2016
    Location
    Reading, UK
    Posts
    10,547
    Forgot to mention the fretboard. Unlike my own ES-1's synthetic 'Blackwood' board (due to the CITES hiccough on Rosewood input/exports), this has a figured ebony board.

    They often come pretty dry from the factory, and this one has been sitting around for a couple of years. I gave it a preliminary oiling, and you can see the huge difference in colour:


    It just absorbed it in no time at all, so it will be getting a few more applications as time goes by.

    At least it doesn't appeared to have shrunk significantly, as there are no sharp fret ends.

  3. #3
    GAStronomist Simon Barden's Avatar
    Join Date
    Oct 2016
    Location
    Reading, UK
    Posts
    10,547
    Weather cleared up for a bit, so I decided I might as well glue the neck on.


    It can remain clamped for a day.

    I had found that the neck developed a bit of a square shoulder to it by around the 12th fret, so I sanded that away. It's now got a consistent feel as you go up the neck.

  4. #4
    Member jonwhitear's Avatar
    Join Date
    May 2020
    Location
    Sydney, Australia
    Posts
    260
    I’m going to enjoy this! Will you be building with the stock components, or do you have other plans?

  5. #5
    Overlord of Music McCreed's Avatar
    Join Date
    Oct 2018
    Location
    AUS
    Posts
    3,552
    If I wanted an ES kit built, I couldn't think of a better person to do it! Good on ya!

    When you said the kit was a couple of years old, I was hoping it may have been a bit better quality than the ones of more recent times. Alas, that does not seem to be the case (though maybe not as bad).
    At least your mate isn't married to idea of a stained finish. That all but guarantees a nice finish job by you.

    Will watch this with interest.
    Making the world a better place; one guitar at a time...

  6. #6
    GAStronomist Simon Barden's Avatar
    Join Date
    Oct 2016
    Location
    Reading, UK
    Posts
    10,547
    It will be mainly stock apart from pickups, the bridge and the electrics. And probably the knobs. I've ordered some Tonerider Alnico IV Classics (was going to be Iron Gear Blues Engines but they are out of stock). The kit bridge gold plating is rather lumpy, and I had a gold Sung Il T-O-M bridge that I bought for the ES-3 thinking it was lower than the one I originally tried to fit on it (it wasn't), which is a much better quality item. Oh, and straplocks.

    I'll stick with the kit tuners as they are decent tuners and the stop bar is fine (one of the posts is a very snug fit in the bar slot, so it won't fall off when there are no strings attached). I've got a stock of better quality gold screws to replace the soft kit ones.

  7. #7
    GAStronomist Simon Barden's Avatar
    Join Date
    Oct 2016
    Location
    Reading, UK
    Posts
    10,547
    Clamps off today, and filler in the gaps. Cold, wet and windy outside today, so a good day to let the filler dry hard. I think I'll run some CA over it once sanded to help stop it absorbing the paint.

  8. #8
    Member
    Join Date
    Aug 2021
    Location
    Blue Mountains NSW
    Posts
    128
    I have a question Simon about "Once the neck was flat, I set it in place and ran a straight edge along it so I could see what sort of height I had at the bridge position."

    This is interesting, but what are you checking? What is a good string height at the bridge with the straight edge? Is this check something specific to this type of guitar?
    (Rookie question probably)

  9. #9
    Mentor DarkMark's Avatar
    Join Date
    Sep 2017
    Location
    Perth, WA
    Posts
    1,531
    You’re a good friend building a kit for your mate. I would of like to of seen a stain attempt first, but alas, it’s not my guitar. Good catch on the neck profile. I hope they sort out the ES kit neck angle one day.

  10. #10
    GAStronomist Simon Barden's Avatar
    Join Date
    Oct 2016
    Location
    Reading, UK
    Posts
    10,547
    It's applicable to any guitar, though it's far less likely to be an issue on a bolt-on neck guitar.

    I've done the same thing again now the neck's glued on. You really need to clamp the neck in place when testing, as it's amazing what a bit of extra force can do to the final neck angle.


    The straight edge is now touching the top of the bridge, with the straight edge being raised off the end of the neck slightly (less than 1mm). If the straight edge was touching the top of the saddles when flat on the neck, then that's really about as low as you'd want the straight edge to be pointing. The bridge will have to be raised up by 2mm-2.5mm from that point in order for the strings not to hit the frets. There's normally 1mm or so of rim on the post insert, which will account for some of that height adjustment, so you've then got maybe 1mm of height adjustment to do on the post screw.

    If there's a gap between the straight edge and the top of the saddle (as in the first photo I took if it), then the bridge will have to be raised up on the posts by the gap height+ approx 2mm extra for a low action guitar.

    You don't want the bridge to sit too high, as you then have very few post screw threads in the insert, and the play in the screw threads allows the bridge to rock back and forth more. So maybe 5-6mm maximum. Too high, and the neck angle needs to be reduced.

    Conversely, if the end of the straight edge would hit below the slot in the saddles, then you'll find that the strings will sit too high off the fretboard and you've got no way of lowering them as the bridge is as low as it will go.

    I had this on my first ES-1, tried filing the bridge so it sat lower (to no avail) and then finally managed to find a really low profile bridge (a Goldo Lowrider) which allowed me to get a really nice action on the guitar. But they are rare beasts, seem to exist in shops in France and Germany only and may now even be discontinued, as everywhere I looked at that sold them were out of stock (and they only do them in nickel, no gold option).

    So view the straight edge as the string, hold it off the end of the fretboard by say 2mm, and where it passes over the bridge position, that's pretty much the height the bridge will need to be set to. If it can be set to that height without being too high off the body, then all is well. But too high, or an inability to set the bridge low enough, and you need to do something about the neck angle before the neck is glued in and the angle is fixed.

    On a bolt-on, you can use shims at one end of the neck pocket to increase or decrease the neck angle if necessary. But generally on a bolt-on, the neck is parallel with the body (which is generally flat) so the string height at the bridge is determined by the neck height/depth of pocket and so by how much the neck sits above the body. It's a lot easier to get the bolt-on pocket bottom parallel to the top than it is to make a correctly angled pocket for a set neck guitar.

Page 1 of 3 1 2 3 LastLast

Posting Permissions

  • You may not post new threads
  • You may not post replies
  • You may not post attachments
  • You may not edit your posts
  •